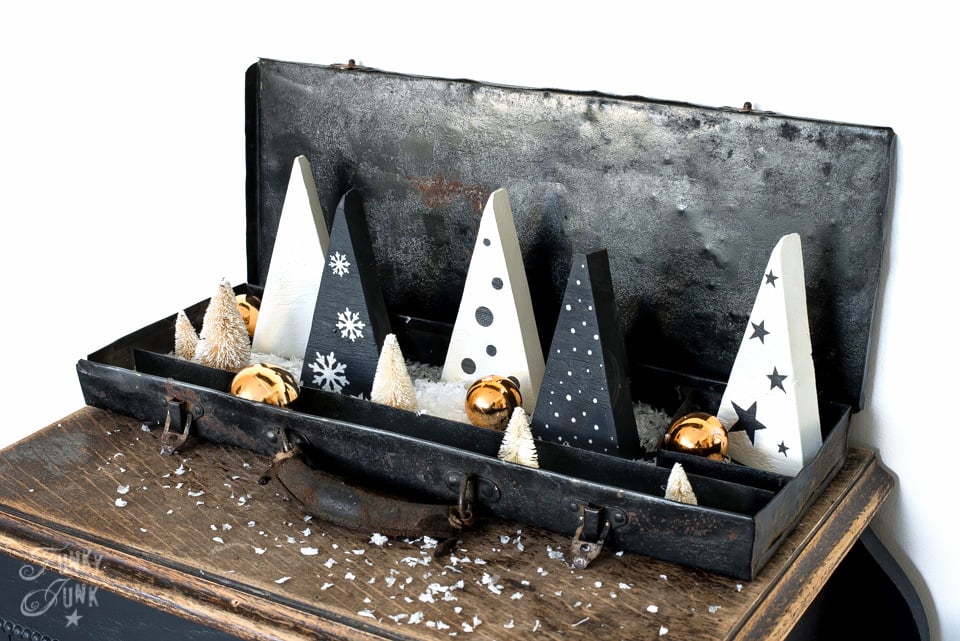
DIY wooden pencil Christmas trees with stencil decorations
Love the look of wooden Christmas trees for holiday decor? Here's an easy way to create wood pencil Christmas trees and easily decorate with the perfect sized stencils!
Tools:
Supplies:
Instructions:
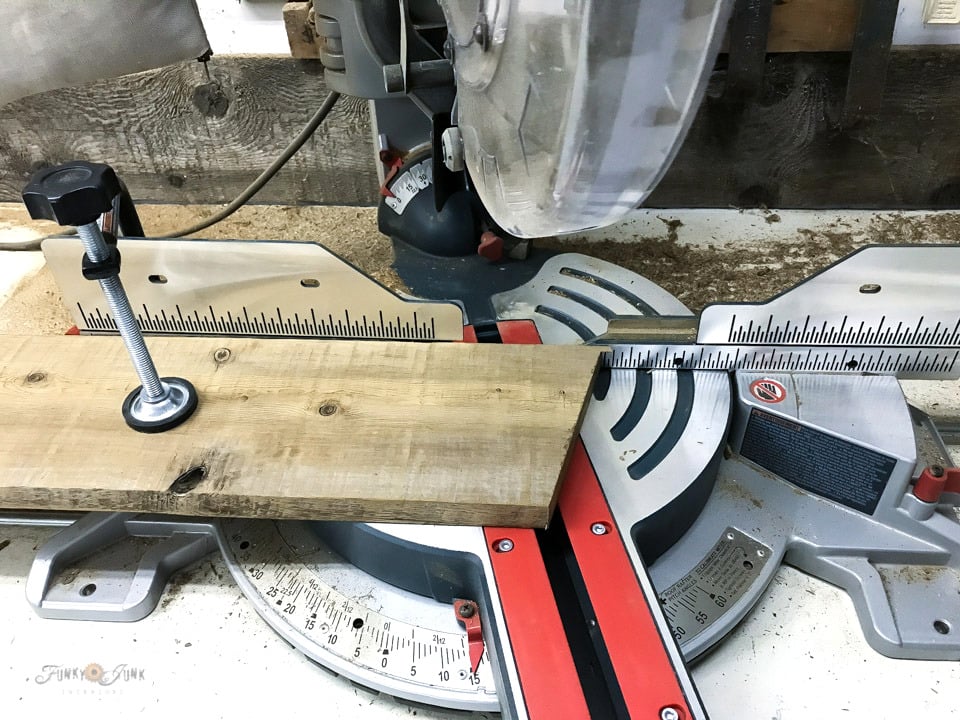
- Position wood plank into miter saw, and cut a 15 degree angle.

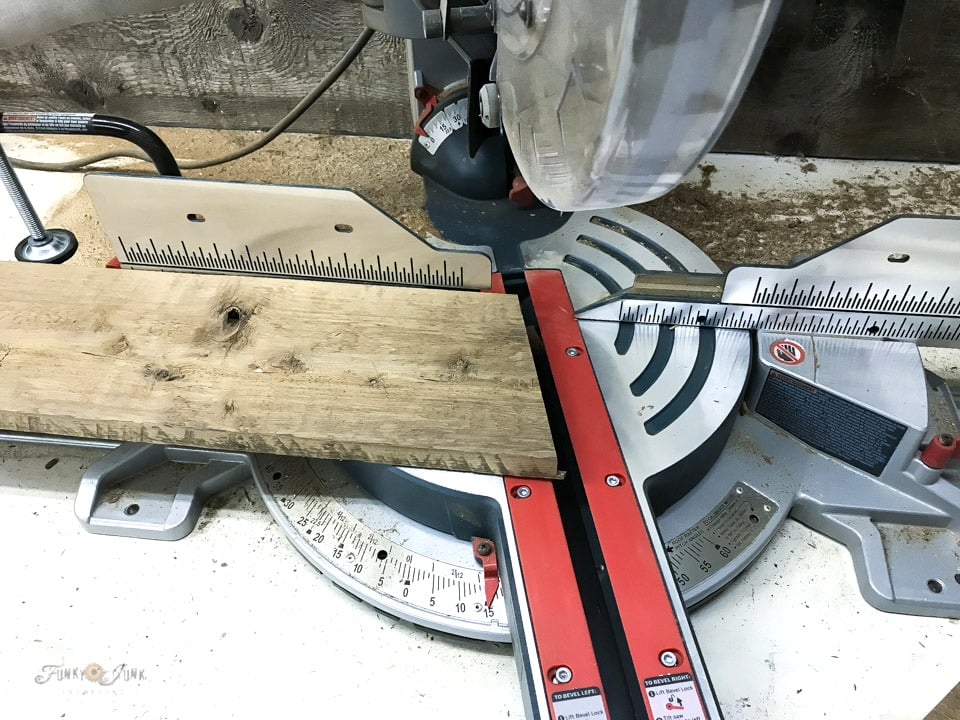
- Flip board over, and cut again, creating a triangle.

- Keep cutting board until you have all the trees you desire. Lightly sand edges.
- Paint or stain the trees as desired.

- Stencil decorations from Pencil Christmas Trees to decorate the trees with.Pencil Christmas Trees stencil

- Stage as desired.

- Make a Christmas Village to match!Christmas Village stencil (if desired)



Did you try this tutorial?Share it on Instagram and tag @funkyjunkinteriors and include #funkyjunkinteriors so we can check it out!