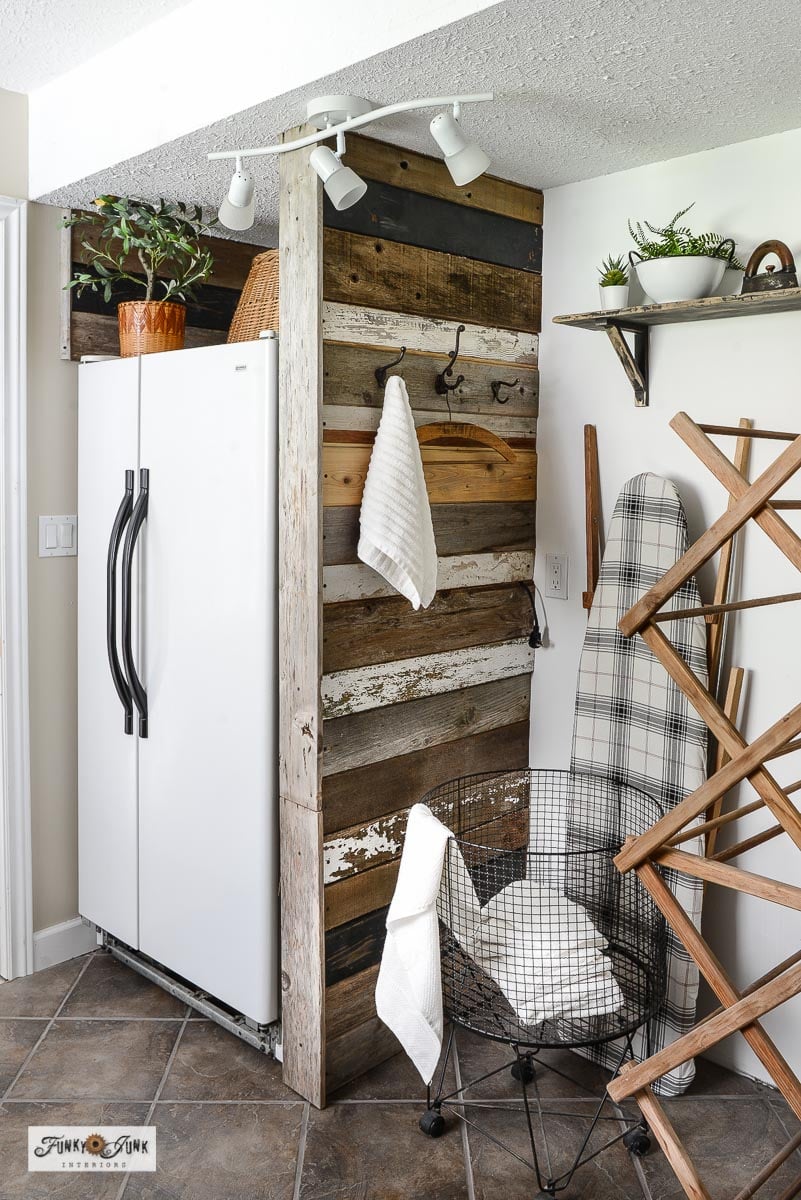
Easy-to-build DIY reclaimed wood built-in fridge look wall
Transform a free-standing fridge into a custom built-in fridge look using reclaimed wood!
Supplies:
- Random reclaimed wood boards
- 2x4s for frame
- Small carpenter level
- Sanding sponge
- Measuring tape
- Grill black spray paint
- Rustic coat hooks
Instructions:
- Setup the fridge with the correct lean, plus calculate how much air space it requires on the sides and back.
- Measure the space beside the fridge to the full floor to ceiling height, plus front to back.
- Cut 2 2x4s to the full floor to ceiling height. Cut horizontal 2x4s to your desired depth (front to back)
- Lay the frame boards onto the floor, then join the 4 corners with screws.
- Add a bracing board in the middle, and attach with screws.
- Slip the frame into position beside the fridge, or build it in-spot of space is too tight.
- Attach the frame to the back wall and ceiling with screws using a level to ensure it is straight.
- Cut random reclaimed wood boards to the depth of the fridge. Lightly sand any rough areas.
- Predrill holes, then attach boards to the frame with screws, starting from the top, then working down.
- When close to the bottom is reached, start from the bottom working up, then find a board that fits to meet both sides.
- Cut and mount another board to cover along the front of the frame to give the wall a finished look.
- To add more interest, add some boards along the top of the other side of the fridge if working against a wall.
- Mount hooks and decorate as desired!
Notes
To see more photo and instructions on this built-in fridge project, visit Funky Junk Interiors at:
https://www.funkyjunkinteriors.net/reclaimed-wood-built-in-fridge/
Did you try this tutorial?Share it on Instagram and tag @funkyjunkinteriors and include #funkyjunkinteriors so we can check it out!