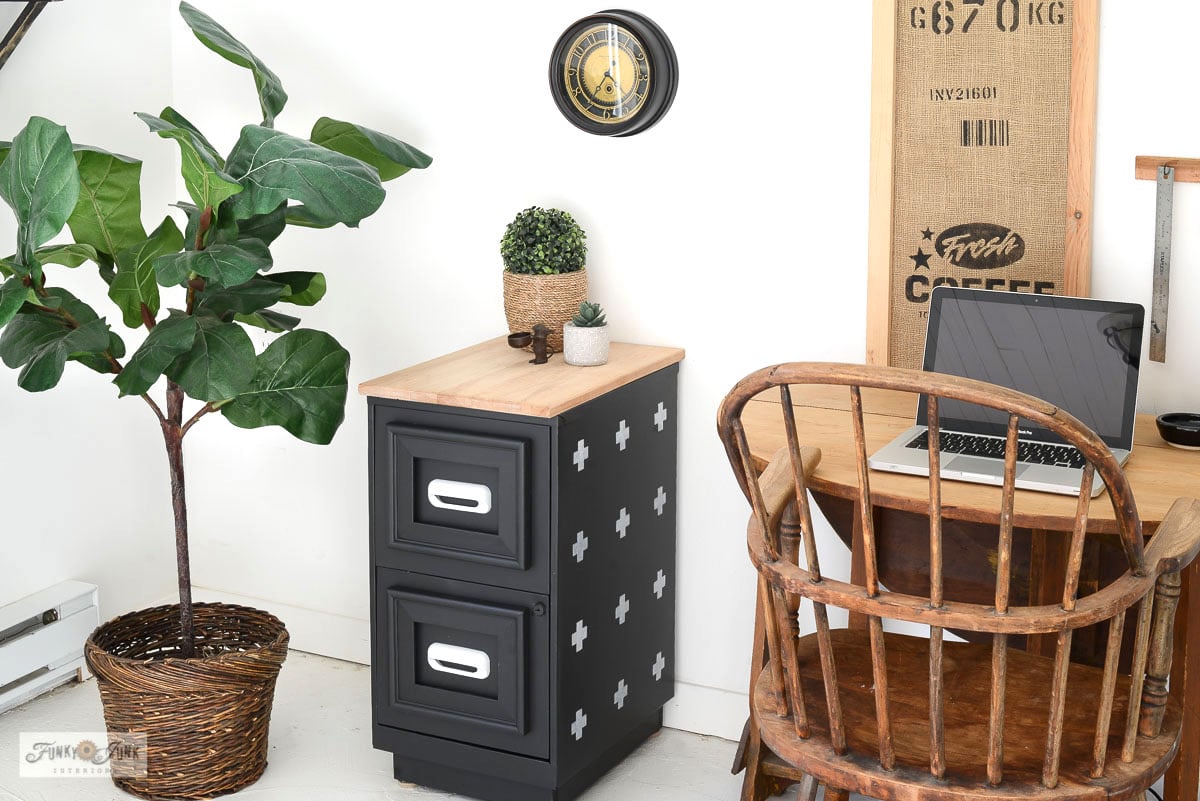
DIY-Friendly Stenciled File Cabinet Makeover Using Picture Frames
Transform a plain file cabinet into a stylish storage piece with this easy DIY file cabinet makeover using picture frames, stencils and a cutting board for a truly personalized touch!
Supplies:
Instructions:
- Remove the drawer handles, and fix any imperfections (removing stickers and oil drawers) to get the cabinet in good shape again.
- Clean the cabinet with TSP Alternative. Lightly sand with a sanding sponge, then remove the dust. Tape off any nearby areas you don't wish to paint over.
- Roll on Cast Iron paint using long, even end-to-end rolls to all flat surfaces. Use a brush for smaller areas.
- Paint 2 picture frames that fit on the front of the drawers in your base colour. (Cast Iron in this case)
- Place cabinet on floor with drawers facing up, then hot glue picture frames onto the drawer fronts.
- Position handles inside the middle of the picture frames, then mark and drill new screw holes to re-attach the handles.
- Stencil the sides and back of the file cabinet in a coordinating colour to your chosen base tone. (I used a Cross Pattern in Large in Casement)
- Position a cutting board on top of the cabinet, or cut some reclaimed wood to fit.
- Fill up the drawers with either files, or anything you wish!
Notes
Tip: if you can find picture frames large enough, you may be able to leave the handles in their original places.
For more pictures or additional tips, visit this full tutorial on Funky Junk Interiors at:
https://www.funkyjunkinteriors.net/stenciled-file-cabinet-makeover/
Did you try this tutorial?Share it on Instagram and tag @funkyjunkinteriors and include #funkyjunkinteriors so we can check it out!