Transform a plain file cabinet into a stylish storage piece with this easy DIY file cabinet makeover using picture frames, stencils and a cutting board for a truly personalized touch!

As a Fusion and Amazon Influencer, this post contains affiliate links in which I earn a small percentage from qualifying purchases at no extra cost to you. If you shop Fusion Mineral Paint products through this post, you will get 10% off. Thank-you for helping to support my blog!
Why are metal file cabinets so unattractive? Is there a rule that they must look boxy, boring and… can I say it… even kinda ugly?
I use to have a filing cabinet that I hid in my laundry room under storage shelves! In those days, I never thought to do anything with it to make it more attractive. I eventually got rid of it because it was in my way.
So when I was recently challenged to create a metal filing cabinet makeover enhanced with picture frames, I hesitated because I couldn’t think of a place to even put one! I had been attempting to find one at thrift stores, marketplace or places like goodwill, but no luck yet.
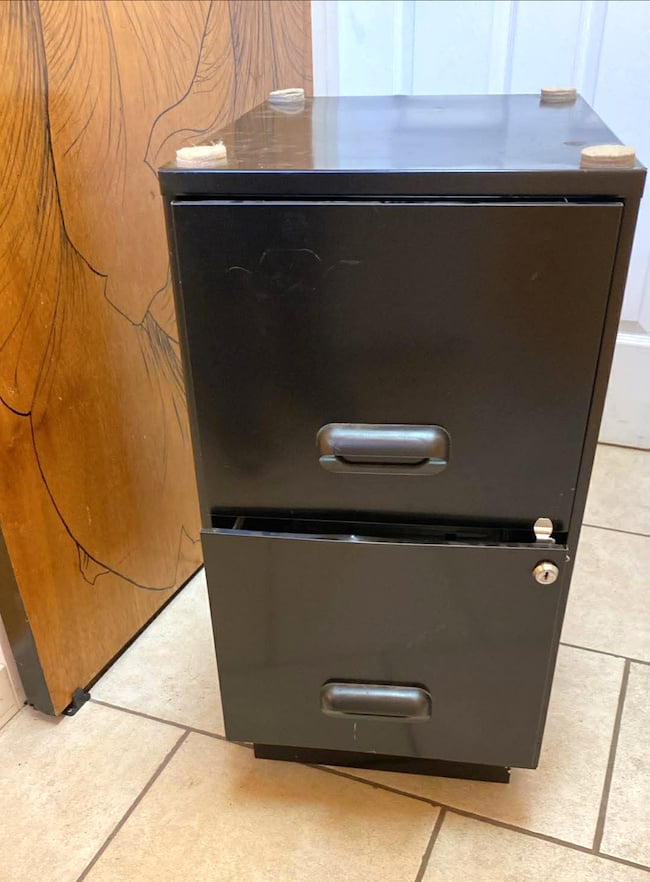
File cabinet – before
Then when a neighbour offered this letter sized filing cabinet up for grabs… I first said no. What would I do with a letter sized cab? All my paperwork is in legal sized folders. But then I decided, wait… why not? I don’t have to use it to store files! Plus, a letter sized cabinet is lighter and SO much easier to manage… so why not? I could even lift it on my own. Bonus!
Even though the metal drawers were bent, and the filing drawer sliders were very stiff and sticky, at least I had a new challenge on my hands. Time to fix it up and learn something new!
Then after working on it, I have had a total change of heart. I LOVE this file cabinet now, and I don’t WANT to stop looking at it!
I had a little help though. Incorporating a couple of picture frames to fancy it up, plus paint and stencils, ending with a cutting board on top, I fell HARD for this now beautiful piece!
Plus, the drawers work so slick now, and hold a ton of other things other than files! Now I have a handy and beautiful storage piece that’s pretty enough to even become a side table in my living room if I so desire!
I’m officially smitten with this file cabinet makeover, and when you see how easy it is to do, you just may be enticed to give yours a makeover too!
Here’s what I did:
DIY-Friendly Stenciled File Cabinet Makeover Using Picture Frames
Supplies I used:
2nd hand file cabinet (I used a 2 drawer letter size)
Fusion Mineral Paint in Casement and Cast Iron (get 10% off)
Cross Pattern Stencil in Large
Large rectangle wood cutting board
(more supplies are included in the printable at the bottom of this post)
Fixing the file cabinet
1. Fix the file cabinet drawers. (not shown)
The first thing I did was gently pound out any dents using a hammer.
To make the drawers slide effortless again, I sprayed the sliders with Innox which is a high quality all purpose spray that works much like WD 40 silicone spray. After a few spritzes with back and forth sliding, they now close effortlessly with a push using only 1 finger!
Now that the file cabinet is sound, let’s make it pretty!
Prepping the file cabinet for paint
2. Remove the front drawer handles, then clean and scuff sand the cabinet to prepare it for paint.
To prep the cabinet, I first cleaned the entire cabinet with Fusion’s TSP alternative to remove any dust and dirt. Then scuff sanded the entire surface with a sandpaper sponge to remove a bit of rust while giving the slick surface some tooth so the paint would adhere well, followed by one final cleaning.
With drawers open, I taped on a little painter’s tape in areas I didn’t want paint on.
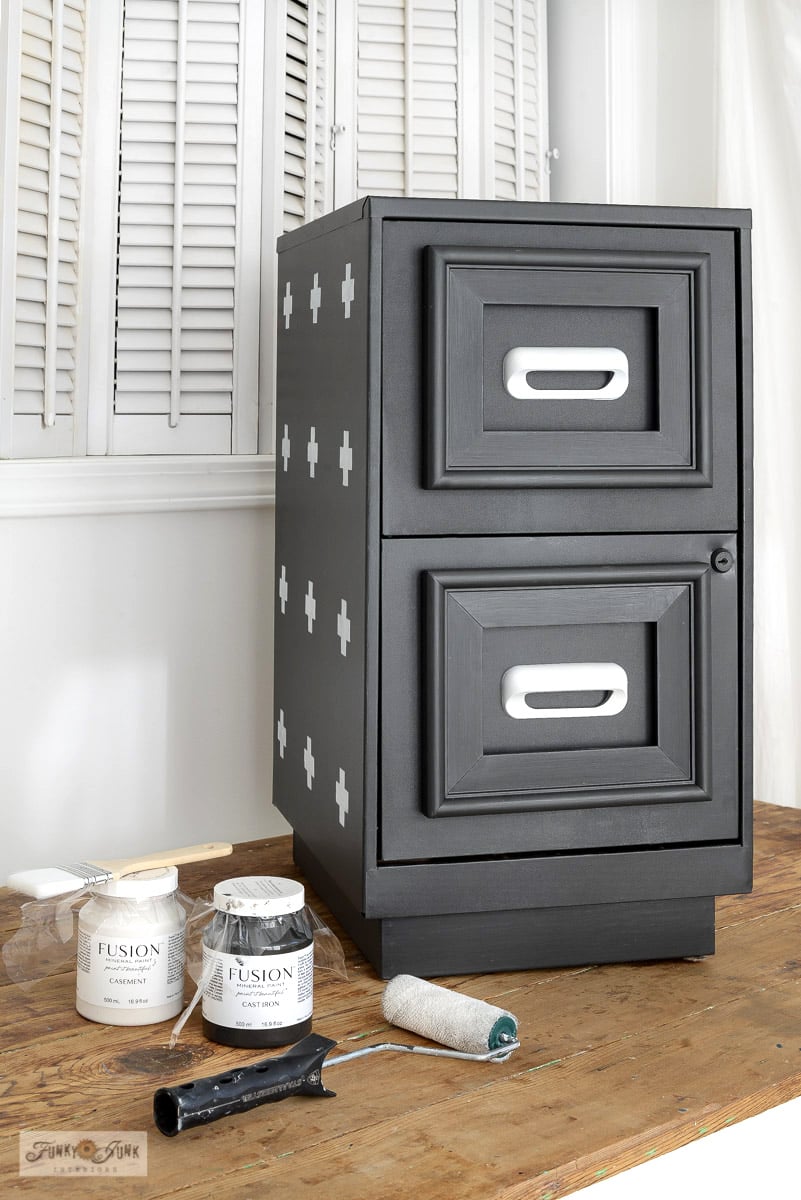
Fusion’s Cast Iron (get 10% off)
Painting the file cabinet with a velour roller for a sprayed-look finish
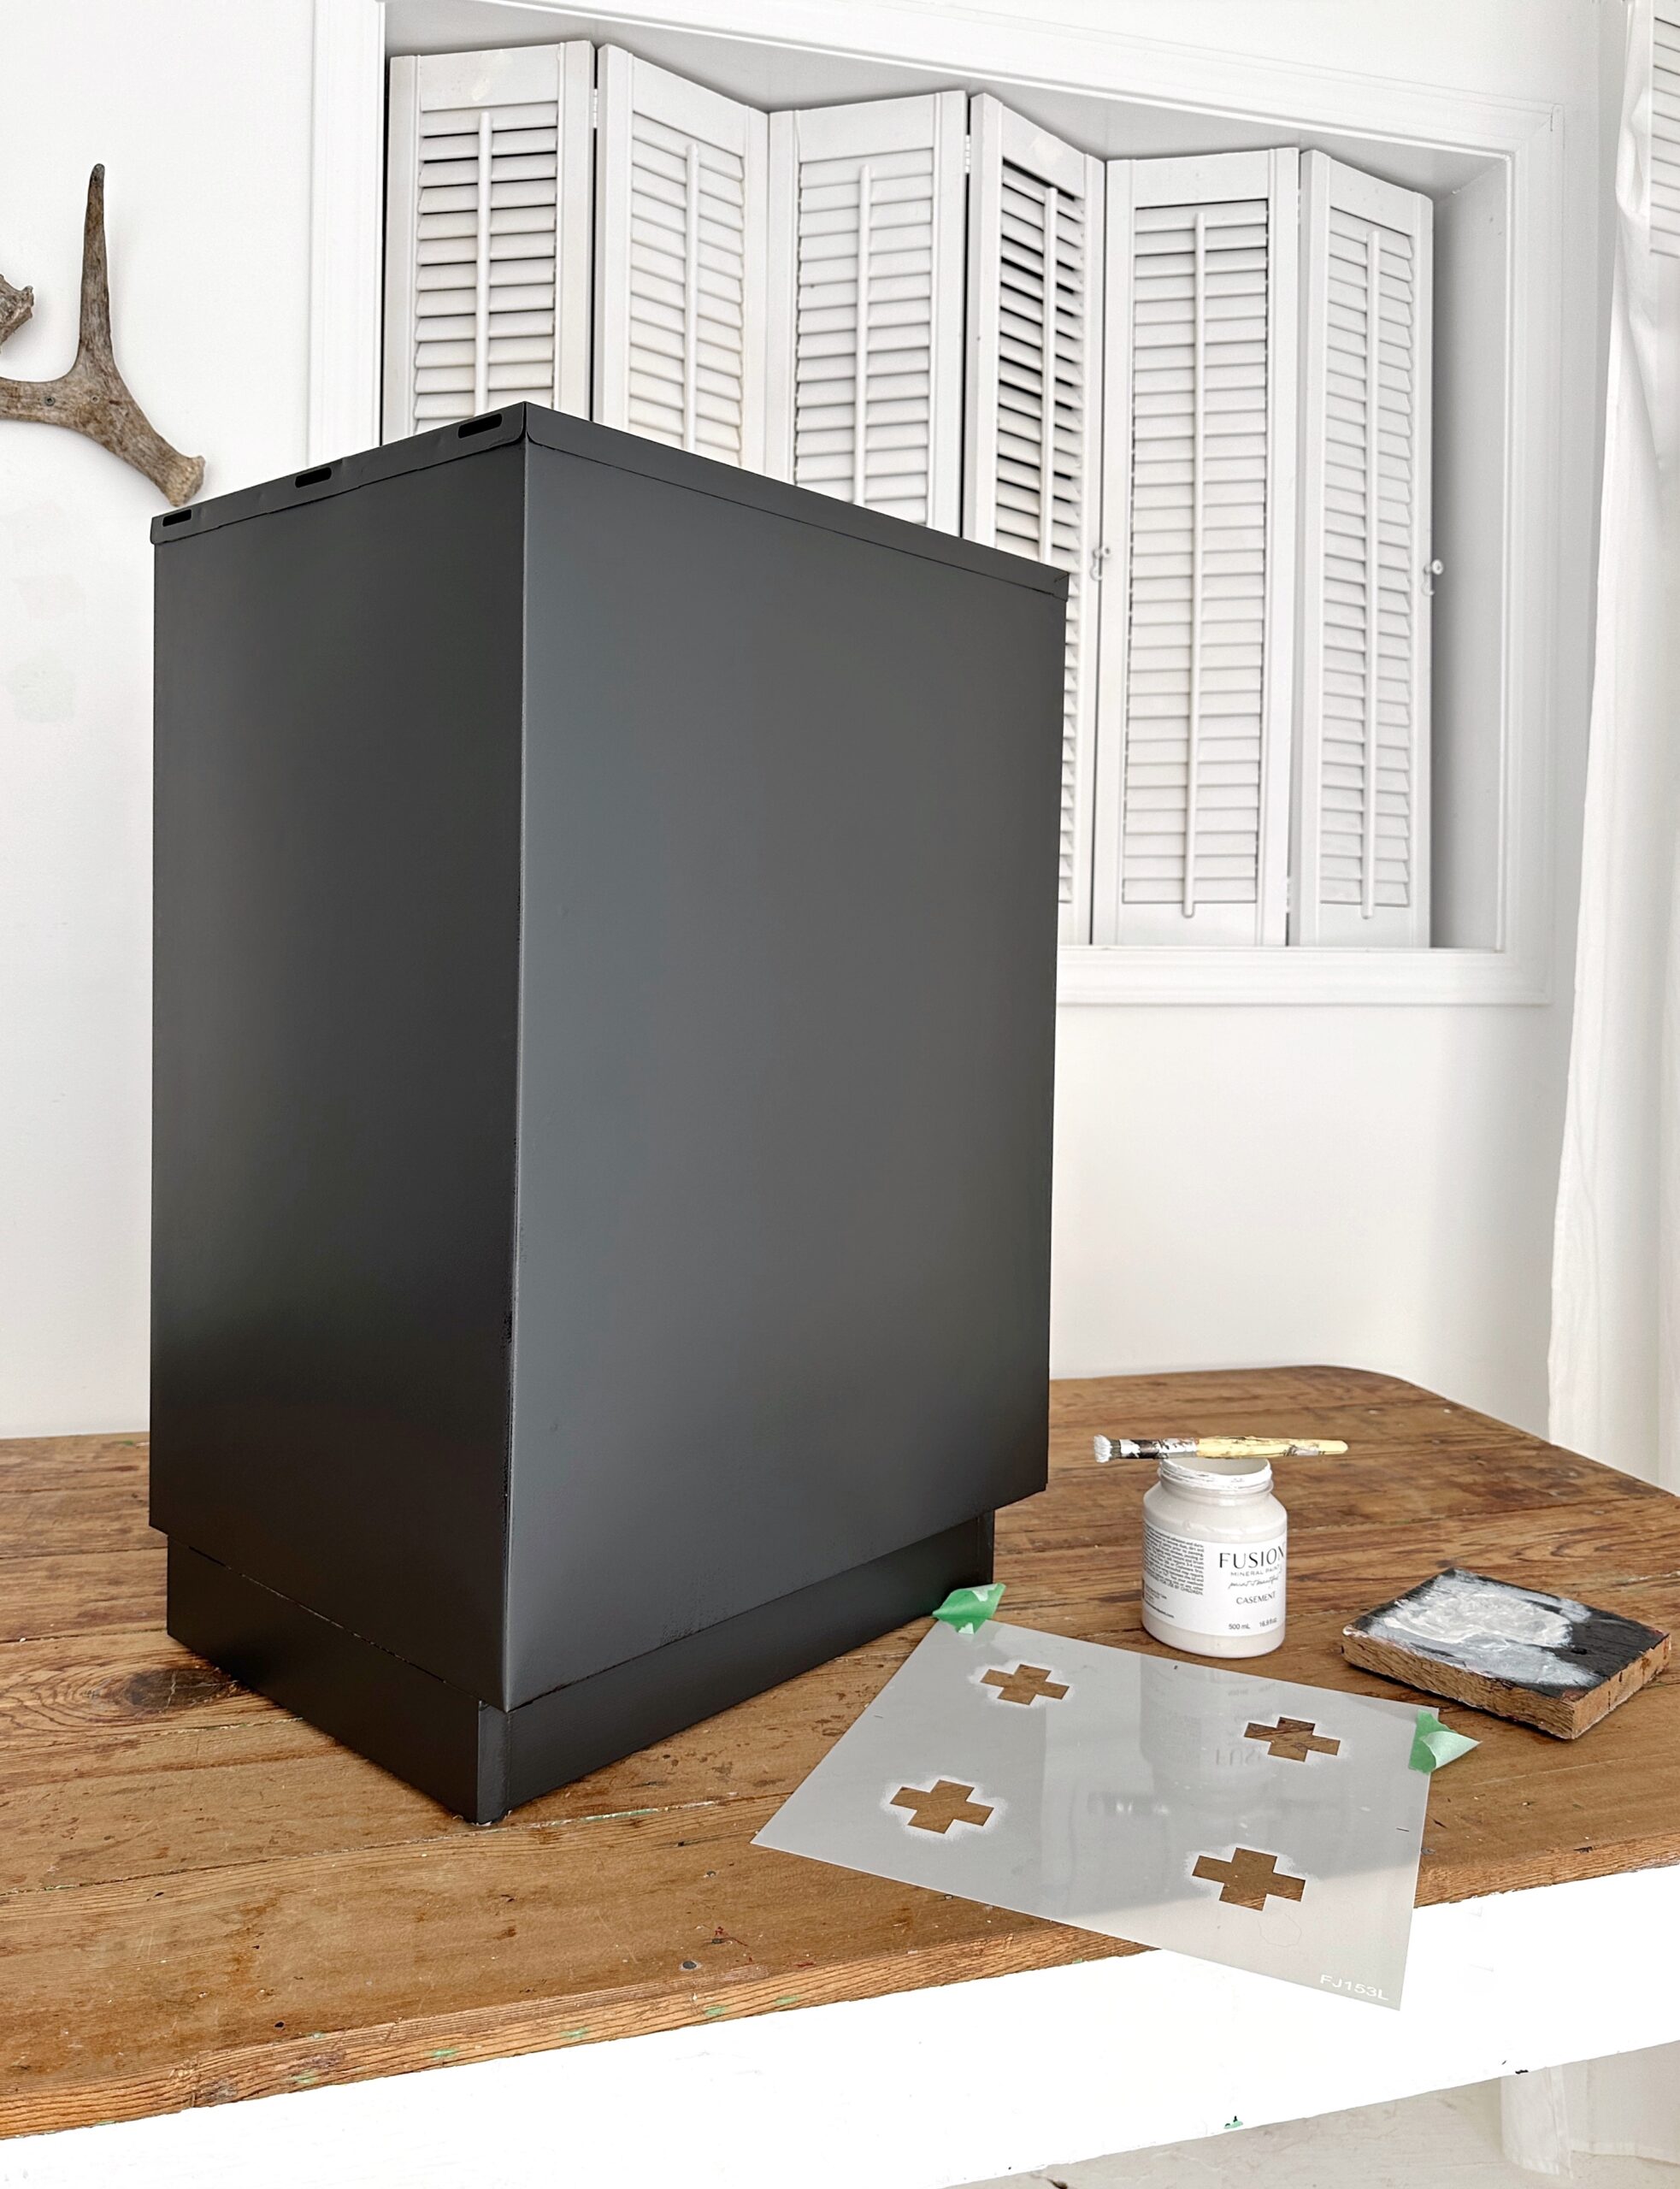
3. Paint the file cabinet in Fusion’s Cast Iron.
Since all of my walls in my home are white, I desired a dark neutral tone so it would pop in any room I placed it in. Choosing Cast Iron was a great choice and looks SO much nicer than the original black metal look! It’s a lighter black, or deep charcoal in a beautiful matte finish making it more receptive to stenciling.
No primer was required. Fusion is actually amazing directly on metal! And I found one coat was required.
Painting technique used:
(Hometalk video coming soon!)
- Pour the paint into a small roller tray.
- Dip a velour roller into the paint, then choose one full side to work on at a time, ensuring coverage is always rolled against a wet edge.
I apply the paint quickly, then go over it again using long end-to-end rolls with no stops in between to achieve a flawless finish. It looks like it’s sprayed on!
A paint brush was used to paint along the bottom where a roller couldn’t fit.
Painting the picture frames
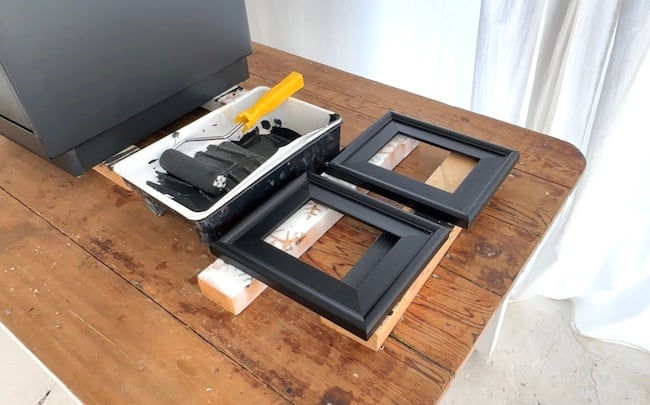
4. Paint two picture frames (that fit on the front of the drawers and work with the handles) the same tone as the filing cabinet.
I landed these two picture frames at the thrift store which happen to fit the front cabinet drawers perfectly! The glass was removed, and the backing paper was scraped off.
The picture frames were also painted in Cast Iron using a paint brush.
5. Spray paint the handles white. (not shown)
I placed both handles on top of a shallow box, then brought them outside to spray paint them in white. A box makes turning the handles around while you spray all sides very easy!

Cross Pattern Stencil in Large
Fusion’s Casement (get 10% off)
Stenciling the file cabinet
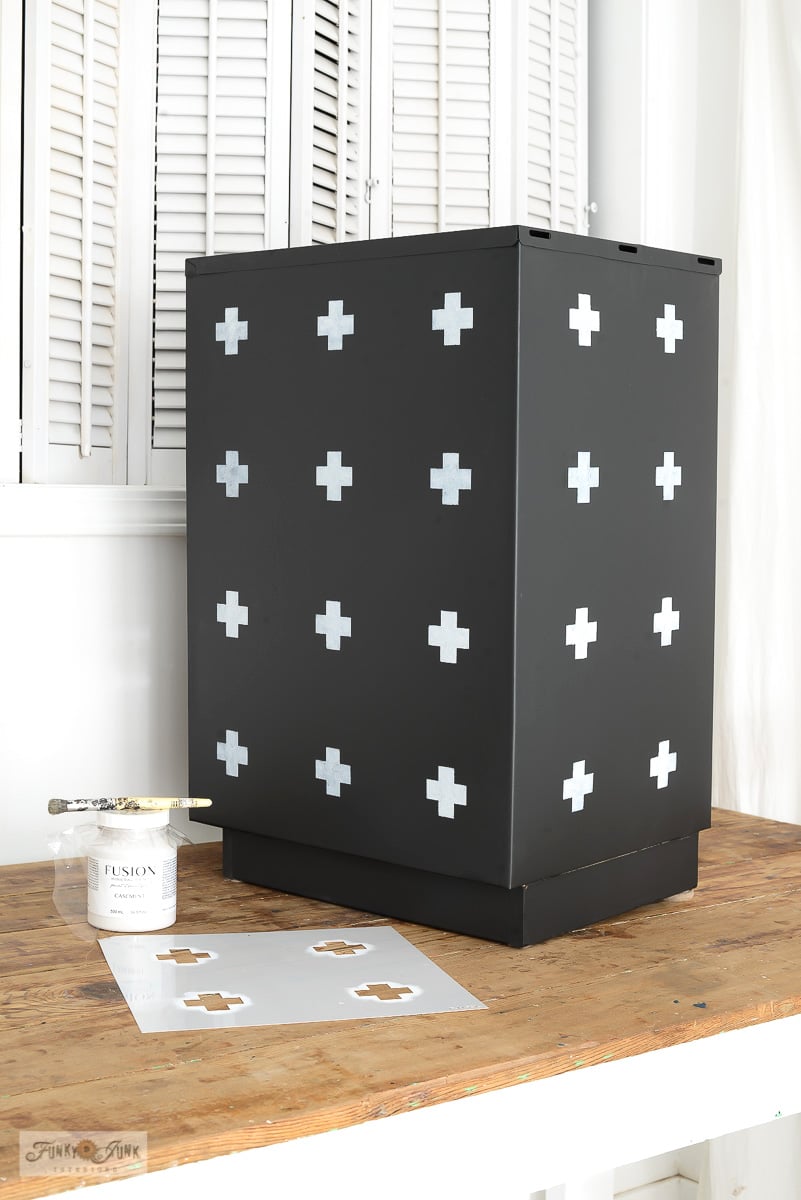
6. To add a decorative element to the cabinet exterior, choose a stencil pattern to suit.
I love this large Cross stencil design in large in Fusion’s Casement, which offers a clean, contemporary look!
How I stenciled the pattern:
- Measure the center of one side of the cabinet and mark it with masking tape.
- Figure out the start and finish of the pattern to calculate the best starting point.
- Stencil by tapping a dome tip stencil brush into paint, removing most paint, then tap the paint through the stencil. To avoid paint bleed, multiple thin coats are better than one thick coat.
- Continue the pattern by lifting the stencil, overlapping like-minded images along edges, then continue until the side is complete.
I stenciled the sides and back, and left the top and front plain to achieve my finished look.
Attaching the picture frames and handles
7. Glue the picture frames to the front of the file cabinet, centering on each drawer front.
I placed the cabinet on the floor, drawer-sides-up, positioned the frames, marked position with masking tape, then hot glued them into place. (these may need to be further secured with screws, I’ll see how they do)
I also ensured the picture frames hid the original cabinet handle holes by moving them slightly higher than center.
8. Reposition the handles in the middle of the frames, drill new holes, then install.
Since the handles were originally positioned too low to work with my chosen picture frames, I moved them to be centered in each frame.
- I laid a piece of masking tape across the original holes, punched holes through with a pencil to create a template.
- The template was then positioned where desired, then I drilled new holes through it using a metal bit so I could reinstall the handles.
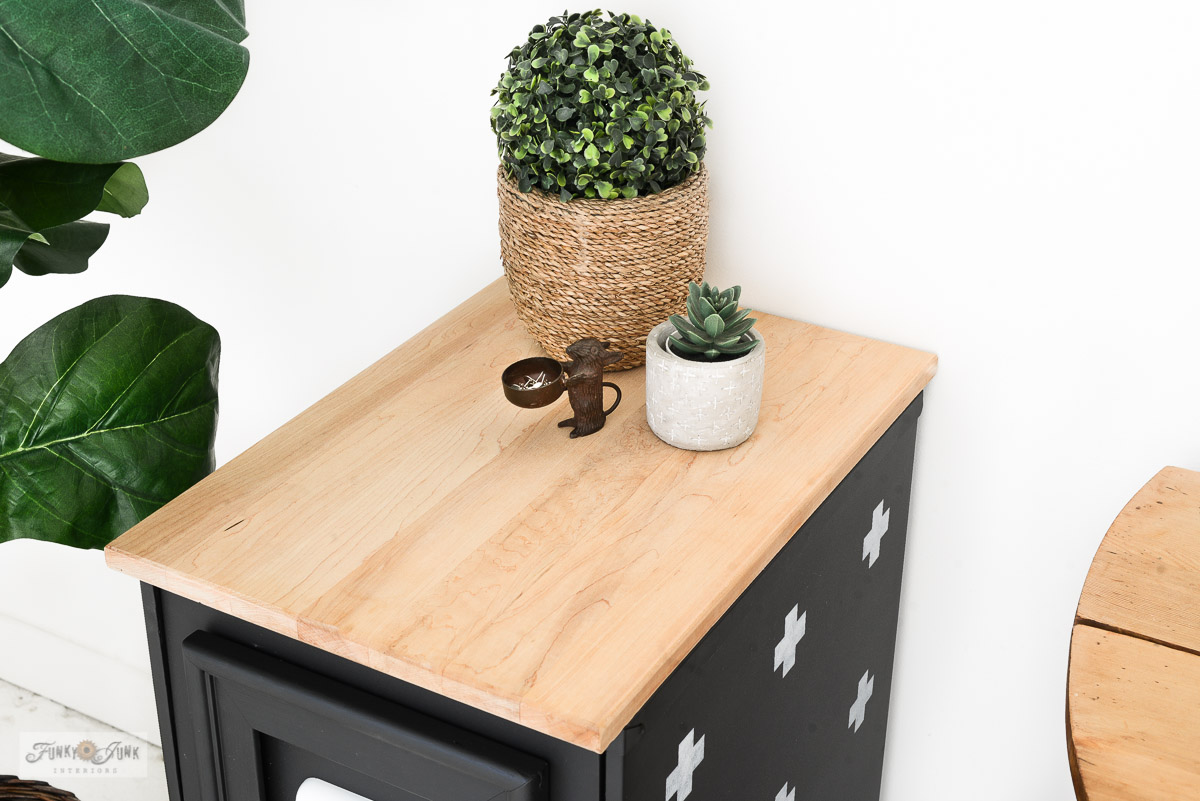
8. Cover the top with a cutting board.
I happened to have an old cutting board in my stash that fit the file cabinet top perfectly! I used a Bosch variable speed orbital sander to freshen the finish to look brand new again. Then simply placed it on top, leaving it loose. The fit is SO perfect, which also creates a beautiful, useable work surface!
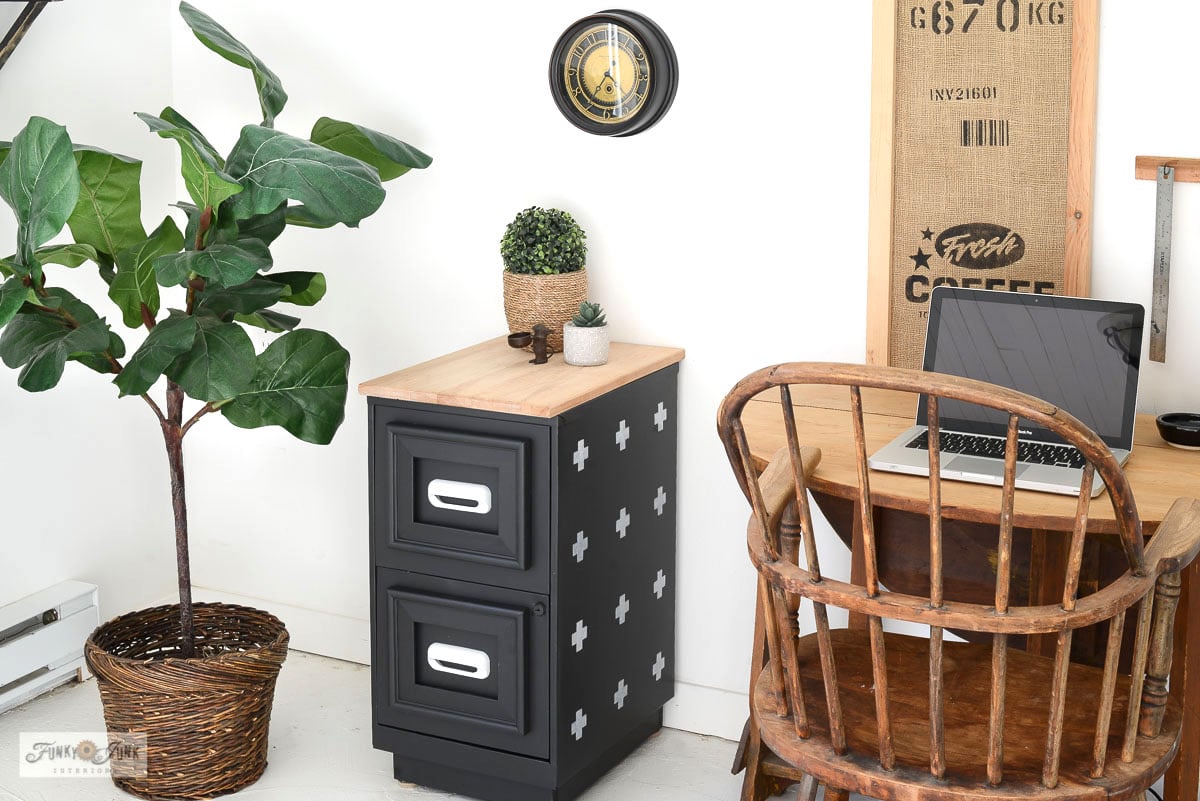
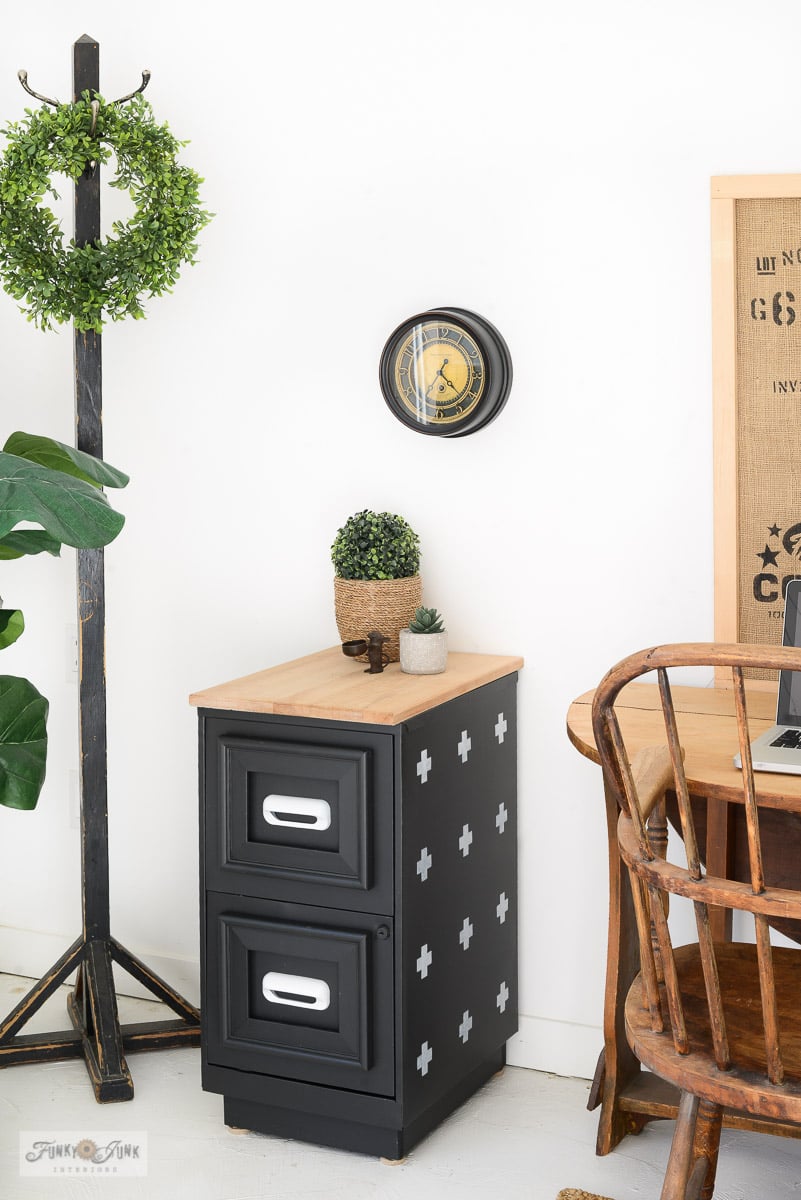
Finished file cabinet makeover
And that is how I ended up with this now gorgeous file cabinet makeover I don’t want to ever hide! The stencil graphics give it a great punch of style! While the picture frames look as if I built custom drawers to suit without really building anything at all!
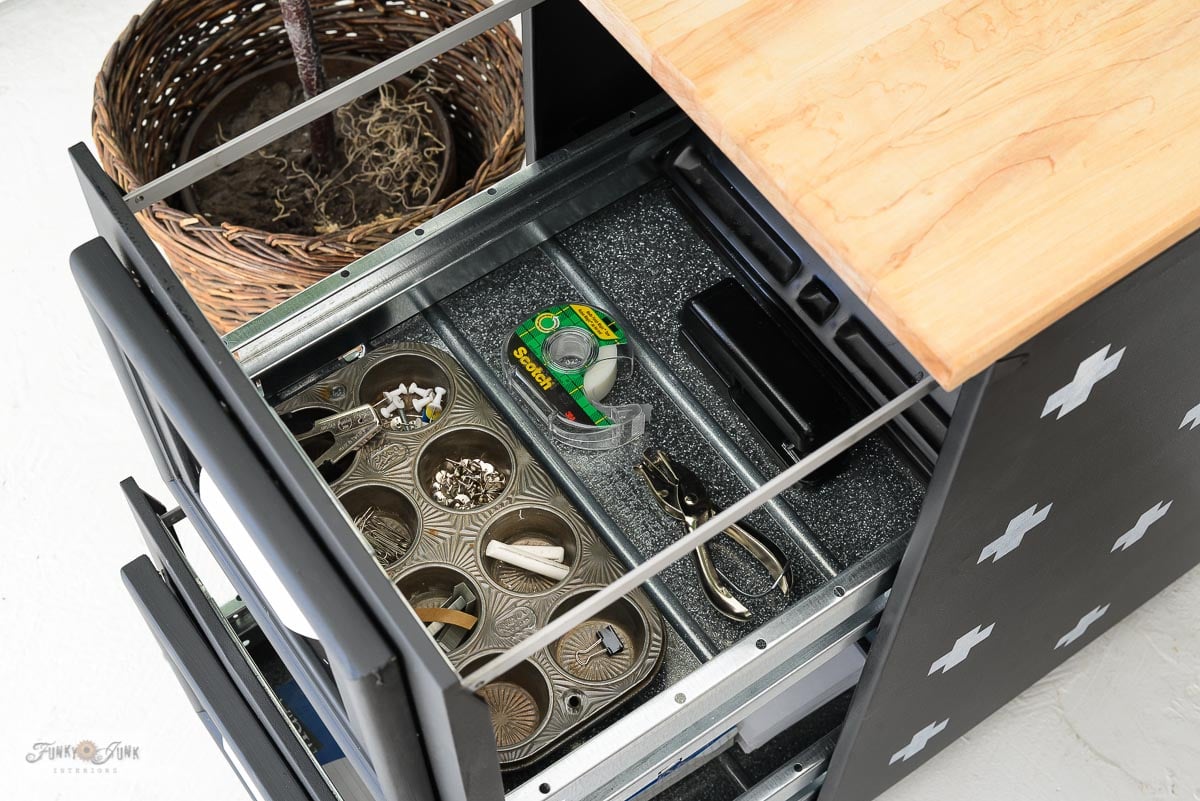
Since I didn’t need the cabinet for files, I loaded up the now slick sliding drawers with random office supplies! The drawers are so nice and deep, and well lit thanks to the open sides!
Imagine if this file cabinet makeover was used as a side table, you could hide throw blankets, books or puzzles inside! Once my Christmas tree is down (yes, I’m leaving it up for winter with just white lights!) I’m going to try the cabinet in that corner, because I think it would look so cool as a side table!
But then again, it just may stay in my downstairs office space because I just adore it wherever I vision using it! Although the various drying times take a little more time, I’m deeming this file cabinet makeover under easy DIY projects any beginner can do!
It doesn’t even look like the same file cabinet, does it?! Does this give you inspiration to perhaps do your own file cabinet makeover? What colour would suit your home?
Other unique office projects to make:
How to build a reclaimed wood desk from scratch
Blogging office with pallet and ladder desk
Upcycle a coffee table into an office flip desk
Visit MANY more creative office projects HERE
See all unique furniture makeover projects HERE
DIY-Friendly Stenciled File Cabinet Makeover Using Picture Frames
Supplies:
Instructions:
- Remove the drawer handles, and fix any imperfections (removing stickers and oil drawers) to get the cabinet in good shape again.
- Clean the cabinet with TSP Alternative. Lightly sand with a sanding sponge, then remove the dust. Tape off any nearby areas you don't wish to paint over.
- Roll on Cast Iron paint using long, even end-to-end rolls to all flat surfaces. Use a brush for smaller areas.
- Paint 2 picture frames that fit on the front of the drawers in your base colour. (Cast Iron in this case)
- Place cabinet on floor with drawers facing up, then hot glue picture frames onto the drawer fronts.
- Position handles inside the middle of the picture frames, then mark and drill new screw holes to re-attach the handles.
- Stencil the sides and back of the file cabinet in a coordinating colour to your chosen base tone. (I used a Cross Pattern in Large in Casement)
- Position a cutting board on top of the cabinet, or cut some reclaimed wood to fit.
- Fill up the drawers with either files, or anything you wish!
Super cute! I love the idea of using it for blankets and stuff too!
I read your blog every Saturday, so this project was fresh in my mind. Today on my laptop scrolling down all the stories that pop up a video was on there about you redoing the cabinet. It was on a site Home Ideas. I watched it through and was surprised there was no mention of who you were or where the video came from. I always feel photos and videos should credit the person that made them.
Thanks for noticing Ramona! I actually did a video tutorial for Hometalk on this cabinet. They graciously allow me to put the same project on my blog if I wish minus the video. So they really do own the video. But thanks for looking out for me!
LOVE it!! Especially the squares on the front, the white handles, white stencils & and the wood top! I guess you can say I love ALL of it… ha-ha so much better than a regular file cabinet if you need one or not.
What a beautiful cabinet! I’m here by way of your feature at Inspiring Monday! Would love to have you link up each week at Tuesday Turn About via My Wee Abode! Hope to see you there!
Thank-you Julie! And thanks for the warm invite, I’ve bookmarked you for Tuesday, see you there!
I love this and want to jazz up my little two drawer cabinet so that its pretty enough for my office. Thanks for a great tutorial!