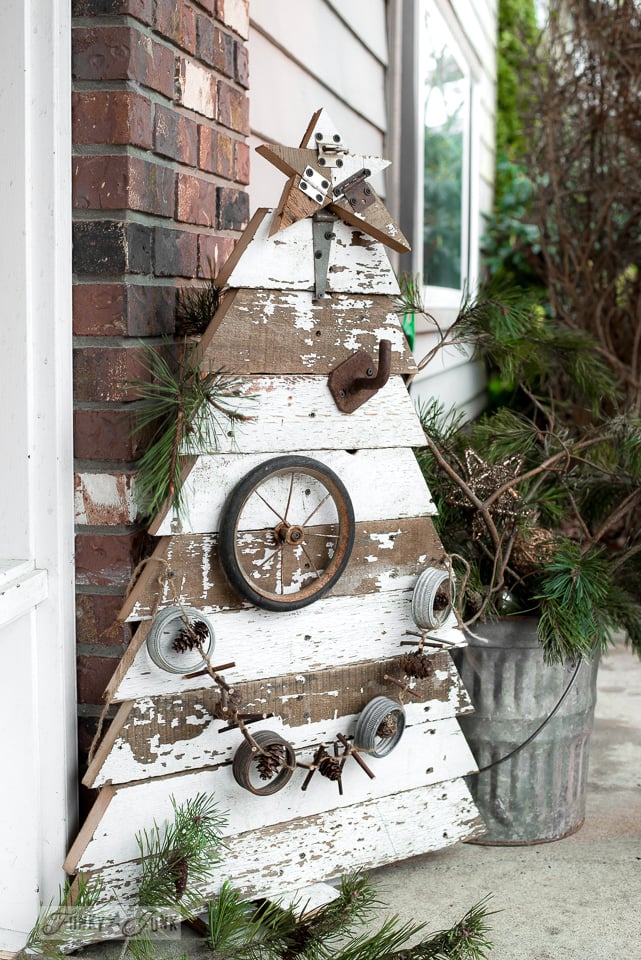
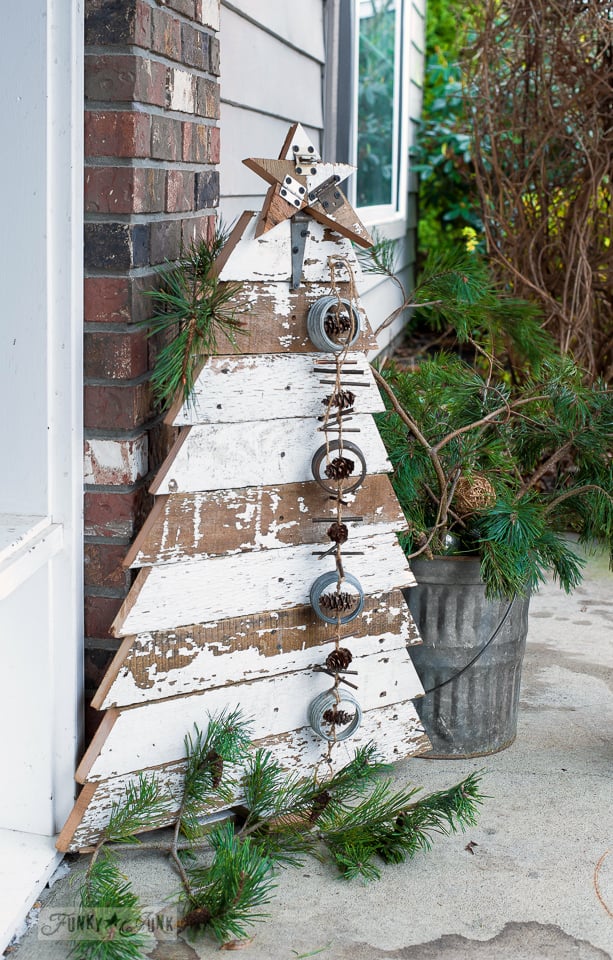
DIY Reclaimed wood Christmas tree and star
If you love the rustic look of reclaimed wood, this Christmas project is perfect for you! Learn how to build your own rustic DIY reclaimed wood Christmas tree and star using free scrap wood!Read more in original blog post: https://www.funkyjunkinteriors.net/2015/12/reclaimed-wood-christmas-tree-and-star-front-porch.html
Supplies:
- reclaimed wood planks
- a square post or 2x4 for main support post
Instructions:
- Gather plenty of like-minded wood planks. Anything will do!
How to build the tree stand
- Cross two planks of the same size, and attach with screws.

- Add some boards as feet underneath the top boards so the stand sits level.

How to build the wooden Christmas Tree
- Cut a tall post to the desired height of your Christmas tree. Attach it to the tree stand.

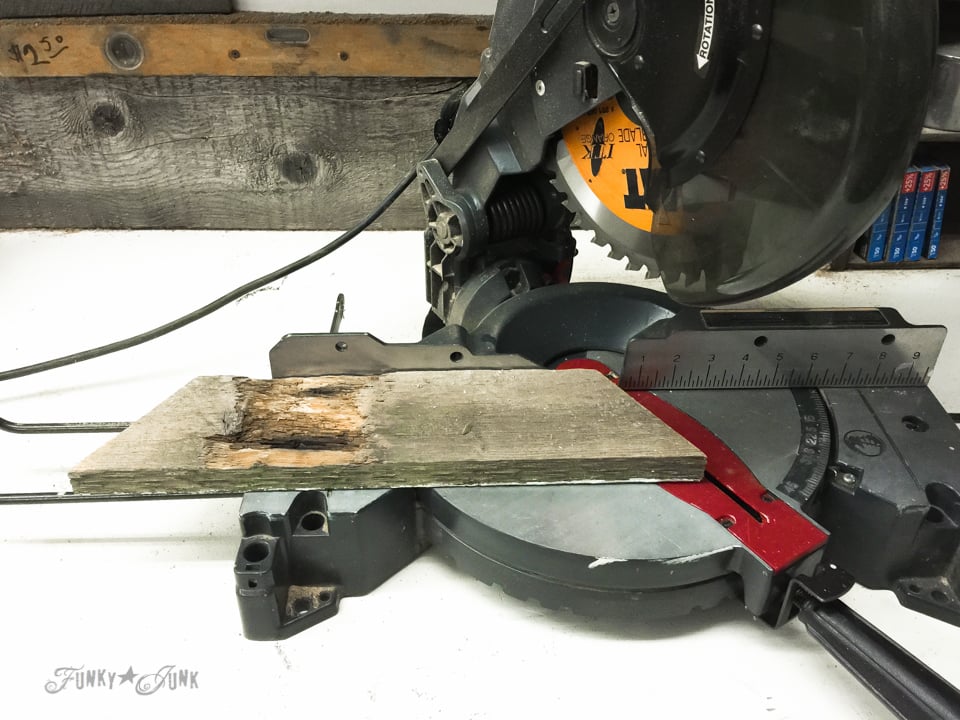
- Select one angle on the miter saw for your tree shape. Mine was 35 degrees.

- Starting with the bottom of the tree, cut the longest board first. Mine was 28" long x 4" deep. Angle one side of the plank, then flip it horizontally and cut the other side.

- To cut the next board: cut one edge first, lay your fully cut board on top of a new board and pencil in the same length. Position in the miter saw until your pencil marks at 2", then cut. This will cut your new board 2" shorter than your previous.

- Repeat until all the boards desired are cut.
- Assemble the tree by screwing in each plank, starting with the bottom of the tree closest to the stand.


Scrap wood star - I built mine from the wood cut scraps!
- Cut sharp angles from straight edged boards.

- Dry-fit until it resembles a star shape.
- Assemble with small hinges from the front so they are exposed.

- Attach the star with one long gate hinge.


Notes
Read more in original blog post HERE at Funky Junk Interiors
https://www.funkyjunkinteriors.net/2015/12/reclaimed-wood-christmas-tree-and-star-front-porch.html
Did you try this tutorial?Share it on Instagram and tag @funkyjunkinteriors and include #funkyjunkinteriors so we can check it out!