
Stenciled wooden Christmas tree with tree skirt
This stenciled wooden Christmas tree sign is such an easy way to create a porch sign! However it’s the 3D tree skirt that makes a festive project extra special! Read on for the full tutorial.
Tools:
Supplies:
- Tall Christmas Tree in Crate stencil
- Christmas Crates stencil
- 3 long reclaimed wood cedar planks 5.25" x 4' each
- Fusion Mineral Paint in Coal Black
- Fusion Mineral Paint in Algonquin
- stencil brush (I love dome-tipped)
- small L-brackets
- Fusion's synthetic bristle angled paint brush
- 2 smaller support boards top and bottom of sign 1 x 2 cut to width of your sign
- screws to suit your wood thickness (I like black drywall screws)
Instructions:
- Cut boards to fit behind the Christmas Tree In Crate stencil. My overall sign boards measured 16" wide x 4 feet long.

- Line up the main boards side-by-side, then attach two horizontal support boards along the top and bottom with screws. Mine measure 1 x 2 at 16" long.

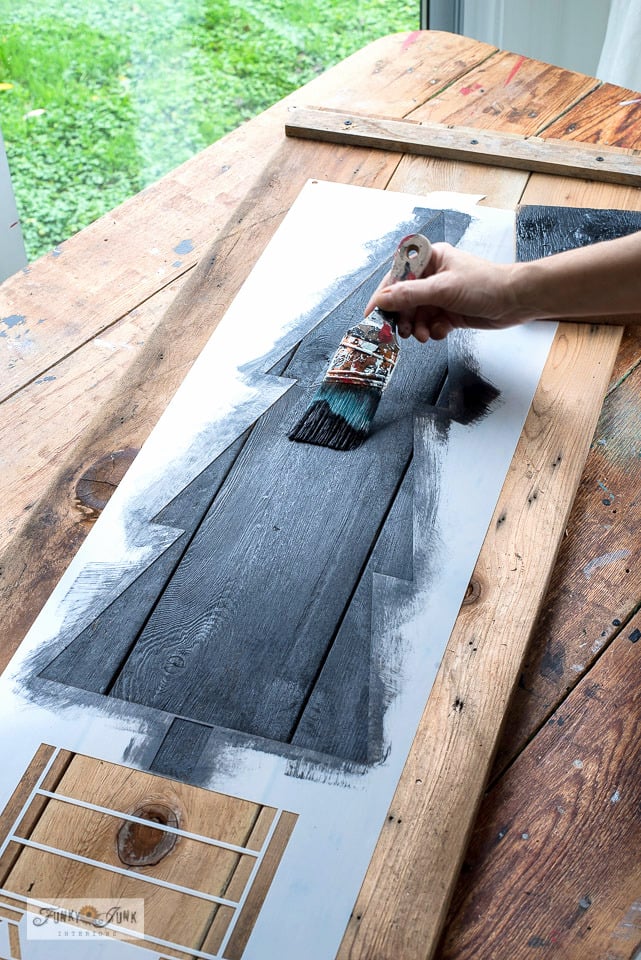
- Position the tree stencil with masking tape holding it in place.Tall Christmas Tree in Crate stencil
- If using a 3D crate, cut your crate pieces first, then dry-fit with stencil for final positioning. Note: if you wish for sled blades under your crate, may need to modify stencil positioning to accommodate.

- Paint the large tree image with a wider paint brush, taking care to swipe away or tap stencil edges to avoid paint bleed.Fusion Mineral Paint in Coal Black

- Stencil any parts of the crate or sleigh blades as desired.

- Leave the tree stencil in place, then position Christmas Crates on top. Position stencil the way it was designed, starting from the bottom of the tree, working up.Christmas Crates stencil

- Stencil the images in Fusion's Algonquin.Fusion Mineral Paint in Algonquin

- As you near the top of the tree, shift graphics to fit.
- Remove both stencils.
- Attach your 3D wood crate. (L brackets, nail gun, screws or glue)


Notes
Keep in mind: If creating a wood tree skirt, decide if you wish it to hold cards or decorations. If so, you'll need to style it to have a gap.
View entire blog post to view 2 ways to build the tree skirt crate.
https://www.funkyjunkinteriors.net/2020/11/christmas-tree-vertical-sign.html
Did you try this tutorial?Share it on Instagram and tag @funkyjunkinteriors and include #funkyjunkinteriors so we can check it out!