
Welcome to my kitchen!
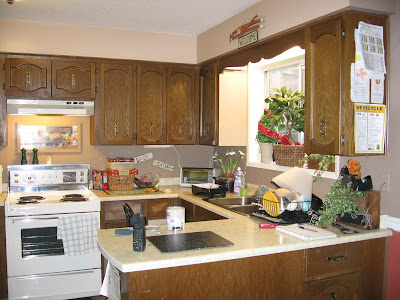
This is how this beauty looked when I moved into this house 5 years ago. Ugh. Cupboard doors hung crooked, complete with a totally disfuctional layout. Small window, counter in that goofy U shape.

I bought some time by painting everything in sight right away, including countertops! The cupboards were a deep mocha with black drybrushed highlights. Countertops I painted every season for a fresh new look.

And then there’s the goofy wall. I had the hole cut in it, but as soon as I found out it wasn’t a load bearing wall, I wanted it ALL gone. I wanted an open floor plan soooo badly!

Reno day was finally approaching 4 years later, so I allowed Cody and his friend to draw all over the old lino floors right before they were ripped out. FUN!

The goofy wall is gone! I LOVED it at this point already.

Three windows were installed and the door was removed. The beginnings of the hardwood floors started here too. Note the angle of the flooring in the kitchen area to flow with the angled island position.

Cupboards and new appliances arrive! Buh bye old stove!
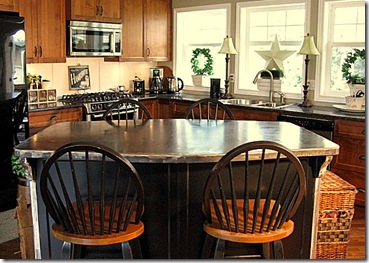
And this is what you see today. The entire upstairs is now open floor plan. It’s roomy, bright and very functional!
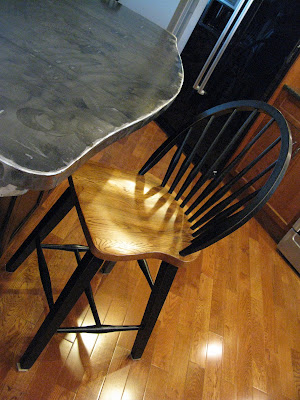
A funky metal tops a custom built island. I had it designed so we could sit at both sides of it. LOVE it!
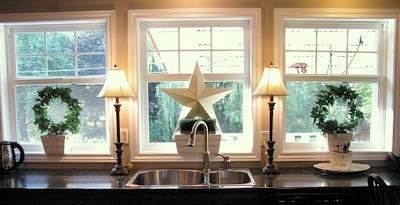

And my dream windows! You can see the entire backyard now. Countertops are laminate. LOVE the sink with the two different sized tubs. And that high end tap set is the only jewellery I’ll EVER desire!

All new Bosch appliances. I love them not only for their quality, but also because they’re a play of both stainless and black, not just one or the other. The cupboard hardware is very rustic, that wears a worn metal appearance. For the backsplash, I did a board and batten treatment to bring in more whites. The cupboards are a shaker style that now go right to the ceiling. I chose alder wood for it’s rustic hold of the stain.
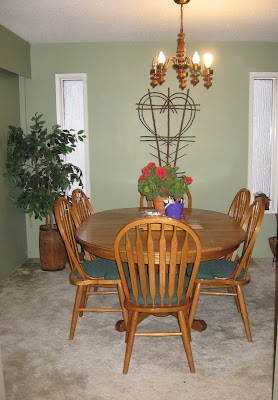
And because it’s all one room now.. the dining room when I moved in…
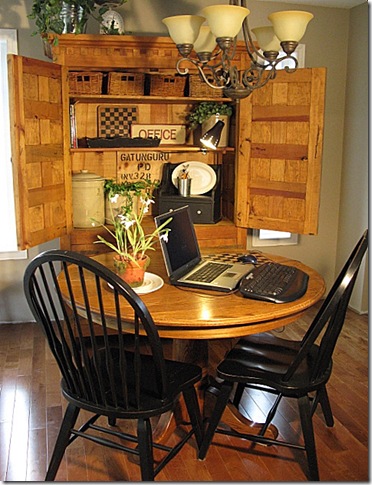
… went to this, and then…
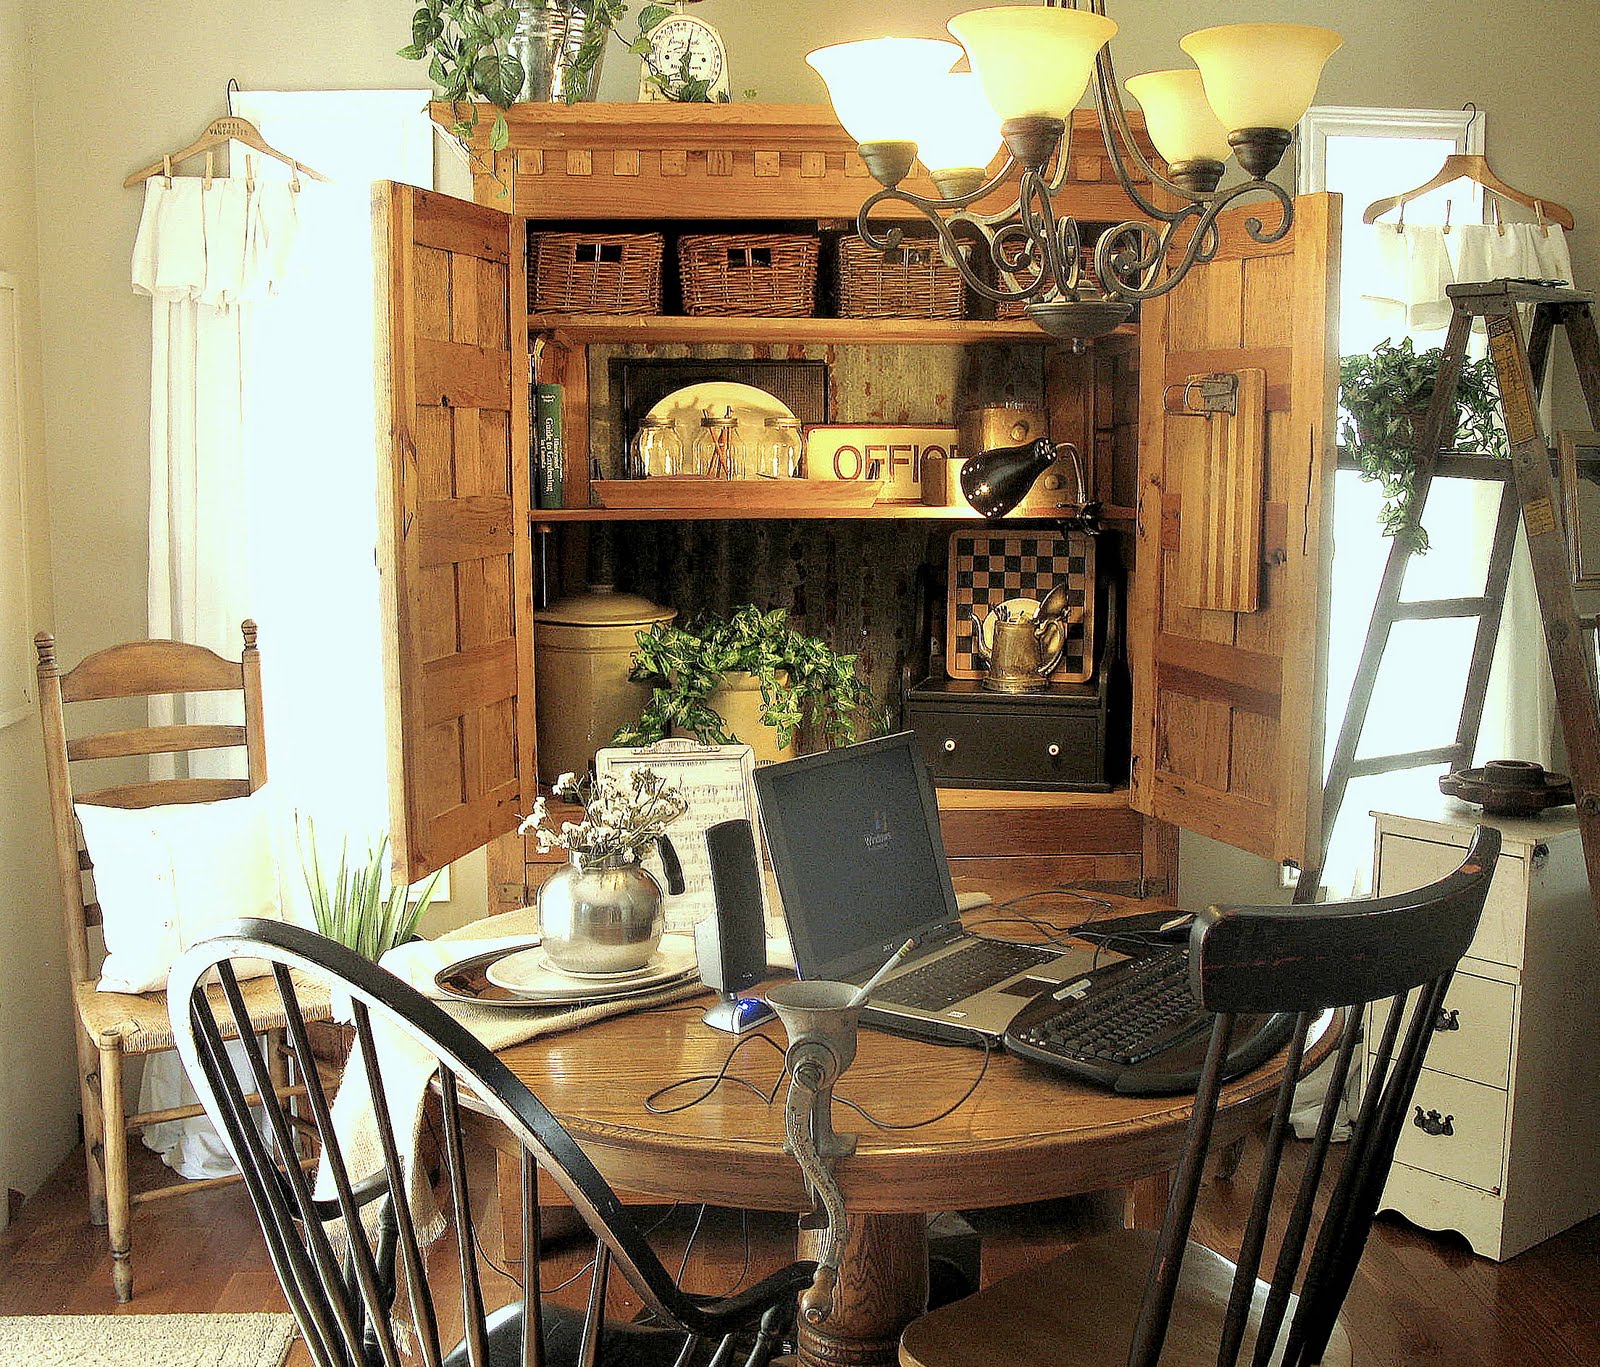
… finally to this. Which now serves as my blog office.
More reno pics of the building of this kitchen can also be seen at my other blog, Our Extreme Home Makeover Experience.
AMAZING! I hope my kitchen is this wonderful once I am all done!
GORGEOUS! Love that island countertop. How did you paint your countertops?
Wow! What a difference! I just love how open it is. Great job! ~Ashley~ shanty2chic
Wow, Donna ~ taking that wall down made an immense difference without you doing anything else yet! Love your new windows and how you accessorized the countertop over there.
Dang!! What a transformation!!! Lucky girl!!
WOW! Can you come to my kitchen when i get a house! That looks AMAZING! Be sure to LINK it up to my Trash To Treasures Party & adding my button! It will get you an additional entry in an UPCOMING GIVEAWAY i’ll be doing! Following my blog will get you another one TOO! Happy Blogging & hope you join the party!
Love it! The windows, the double seating at the island, floors, woodsy feel, everything! You did a fabulous job!
Your kitchen looks beautiful!
wow!! what an amazing difference, and I love that you put lamps in your kitchen, they look great there! Great job! It is beautiful!
WOW! Really fabulous job! I bet you enjoy it tremendously everyday. I love the photo of the kids drawing on the floor…we did that as well when some carpet was pulled up to be replaced with wood floors. Kids love this stuff don’t they, when they are allowed to do the stuff you would otherwise NEVER PERMIT!!
Janell
What a beautiful kitchen!! Those three windows are amazing. I think I might enjoy doing dishes at your sink!
Love the breakfast room and that open cabinet with all the pretties. Love the metal counter top on the island too!
Rhonda
Hold on…let me wipe the drool off my keyboard. P E R F E C T I O N.
Holy cow girl, that is a complete redo! It’s beautiful! I especially love those 3 windows and what you did with them, and the angled island. Your bloggy station is quite nice, too! 🙂
WOW! What a great job! We did kind of the same thing when we bought our home… no walls removed, but alot of hard work and money went into it. I love your colors, my husband is a Glass Contractor so I know all about the windows… they make an amazing difference to a home. Enjoy the rest of your weekend 🙂
Sheila
What a big difference! Love it!
everything you post is so so inspiring! i’m hoping to do a kitchen post soon! i LOVE yours!!!!
WOw, what a transformation. And who knew you could paint countertops? I’d never heard of it!
Thanks for stopping by my blog!
I am in LOVE with your new kitchen!! How beautiful. 🙂 visiting you from TDC. 😉
Wow. Can’t say much more that what’s already been said. It’s fabulous!
Very nicely done!! Love that bank of windows- gorgeous!
Shucks… thanks all!
Joanne, I painted my countertops with a ‘melamine’ paint.
Basically it’s a liquid countertop. This decision buys you some time but is not a forever solution. Hence me repainting it from time to time. 🙂
I lightly sanded the surface, and rolled it on with a high density foam roller (with rounded edges, important!) I also gave it a granite look with other colours sponged on top, turned out pretty cool.
Melamine paint doesn’t level that well as it’s very thick to work with so your painting skills have to be pretty up there for a good result.
As for the new kitchen, it totally TOTALLY rocks if you can gut and start over. You then get yourself an option for a more functional design. I did indeed design this myself. A few scratched their heads at my angled island, how big it was, this and that, but I KNEW when I moved it that’s what I wanted.
Incidently, my first choice was antique white cupboards. At the 11th hour, I did a total 180 and went woodsy! I was 1% unsure how long I’d adore ANTIQUE white and at the time, white white wasn’t my thang. And wouldn’t you know, now white white IS my thang. So now I can accessorize with all the whites I desire to work with my woodsy theme.
Trust your gut ladies. And my biggest suggestion is, tread carefully where trends are concerned. You will have your cupboards for a VERY long time. Repainting is ideal so you can simply change your mind. In my painted variation, they would have gone antique white next. Luckily, I found a way to do it right instead. 🙂
Donna
It looks fabulous!
absolutely gorgeous!!
this is GORGEOUS!!! enjoy it!
Wow, Wow, Wow!!!!
Your kitchen is fabulous! So glad you chose to add more windows, too. It really makes a huge difference. I have been dying to cover my kitchen table in sheet metal. Now that I see your countertop, it has got me thinking about it all over again! Beautiful!!!
~Misti
Thanks again all!
Misti, you will LOVE the metal, but just a cautionary note.. it is cold. I use to blog from my island and my arms would rest on the metal and the coldness would jolt right through you. Someone had suggested heating wires you can glue to the underside which I was about to do, when I moved my blog office to the kitchen table. LOL!!
But, you can’t wreck the metal! We exacto knife right on the surface for art projects. I really must do a special feature on the island alone. Soon!
Donna
So beautiful – You did a great job! I’m planning to follow your blog and would like to invite you (and anyone else who might be listening!) to mine. http://cheapfrillsblog.blogspot.com/
Just starting out, but hoping to get a good following going! I will be mostly talking about decorating, repurposing, and crafting.
Again, gorgeous kitchen – I’m off to read more!
Lovely redo! Everything looks so warm and homey 🙂
Love the windows!!! I actually love everything you did! Wonderful job!!!
What a difference that ONE wall made. Absolutely love it, especially that metal topped center island. Love your blog! Lori
It’s beautiful. I love the windows!
Okay I love that kitchen. I’m definitely coming to your blog for some inspiration. It has inspired me for sure!
Maybe this is dumb-but how do I put the SIT Sisters logo in my sidebar instead of a post in the middle of the page. Sorry for such a dumb question but maybe someone can help me out with this one?
I am just in love with the windows in your kitchen and the way you have them decorated is just stunning. I love the buffet lamps and topiaries. I can’t wait to get going on my kitchen!
What a great transformation! Love the look of the new kitchen and that funky island…..LOVE IT!
Beautiful! I love the lamps by the sink, and the stove, and the island, and…..everything. Great job.
LOVE it! Looks fantastic!
That’s SO fantastic! I have major kitchen envy!! It’s just a fabulous style.
This is the first I have seen of your kitchen…and it’s gorgeous!
Wow! Girl I am lovin that kitchen! It looks so much bigger….love all of it!
I’ve been spending some time playing on your blog this morning and am having a ball! So glad I found you! ~LA
What is the brand and color of your laminate countertops? Also, for the metal countertop, did you have someone do that for you, or did you do it?
curious about the metal counter top. TELL US MORE!!!!
This is so inspirational and is exactly what I was looking for. I too have a very run down kitchen (worse than your previous one, if you find that hard to believe) .. I cant wait to start working on my plan. I too have a wall that isnt load bearing and I am going to start with ripping that down (woodfire stove is in the way) but now I know what to do by moving it over to where you have put your stove (where my current sink is) and then relocate my sink in the same place as yours (where our current door is). I can then relocate the door (semi-french style) to where you have placed yours (woodfire heater in the way, but I wont need that as the woodfire stove will be enough to warm up the entire area and it will save me in the extra expense of running two fires. Love it! Thank you so much (now, just to convince my partner)
I like that it took you 5 years and some in betweens to go from before and after. Thanks.
The after is lovely. I like the windows.
So brilliant ! After seeing your plants in the kitchen window , I thought ..Hummm
I have new pots , some fake vines , a coat hanger & glue gun .
SO .. thanks to your inspiration.. in less then 10 min I now have two plants in my big kitchen window too..
THANKS !
Lisa