
This is a story of a morph. From greenhouse to rustic garden shed, this build was truly so very easy.
This is a little greenhouse I have tucked in my backyard. I use it to store my firewood. And it’s currently an eyesore. I knew I wanted to eventually do something to it, but wasn’t quite sure what. When my friend Vic gave me that old window, I knew exactly what I needed to do. Put the window to great use!
I then visited The Back Porch that houses many adorable character buildings for the perfect inspiration.

Today my little pile of free old fencing wood came out of hiding.

I took a scrub brush to it and removed all the moss and yuck while my son removed the nails. It was a beautifully warm overcast day, perfect for such a project.

Meet my best friend of today! I love this saw. If you don’t have a circular miter saw, you need one. Just do it.

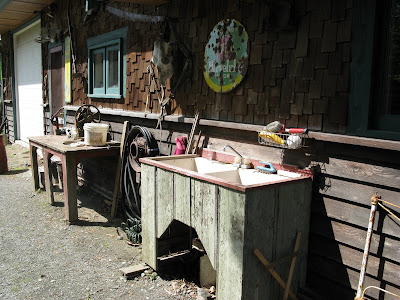
First thesmall window got a home… yup, looks good right about there. I predrilled holes first, then used screws to gitter done. Always use screws. It makes repositioning effortless. I positioned this window approx. 4 times if not more. Trust me, use the screws.

Anyone that knows anything about real wood construction would definately cringe. I don’t have alot of building skills, but I’m pretty comfy with a cordless drill and measuring tape and the saw became 2nd nature fairly quick. I simply premeasured each board, and cut them to size, tapped the tonque and groove wood together and screwed them in with wood screws. I think they were wood screws… they were black, is that enough info? I don’t care if they rust. All part of the added charm. I ensured I staggered the board joins where longer lengths were required.

Look! Cute!! I scooped up that funky gate from the dump too.
I had another old window with no glass in it which can be easily taken care of later glasswise. Remember, I screwed the window frame in so it’s easy to remove! Then I cut the wood to fit around the positioning of the window.
The proper way to add windows would be to cut into the framing and add the right supports. I didn’t desire to LIVE in this thing, so I didn’t care about that part. The eventual glass will hide the framework. And I plan for the glass to get really dirty and stay that way, like that little window. It’s all good!
I’m off to a great start! I plan for homemade shutters, window boxes with flowers, and a pretty little garden of sorts around this building. Perhaps even hang my garden tools on the outside during the summer months. And to find some old relics to decorate the outside with. I’m also on the lookout for some broken pathway stones. I have loads of dreams for this building!
Stay tuned for part 2, after I land abit of extra wood. A neighbour may replace their old shake roof shingles. How cute would the above effect be?!? Remember, I used screws. Anything is possible. Even partial redos…
Part 1 – from a greenhouse to a shed
Part 2 – the building of a barn door
Part 3 – a planter box and a gate
Part 5 – The little rustic garden shed that could / a 2013 enhanced reveal and a message
Like you … your project is down to earth and beautiful. Great job!
Bill
wow that wood went farther than I thought it would. It’s looking great! The view in your back yard in spectacular! I love driving through Kentucky and Tennessee and seeing the old barns, they just seem to go with rolling hills. So your little building goes with your landscape too
Oh my gosh, Donna, you have outdone yourself!!! I am absolutely amazed at what you’re doing. I cannot WAIT to see the finsihed project. I wish you were my next door neighbor, I so need a next door neighbor like you.
Melissa
covered in paint/stain from doing the deck!
LET’S WRITE A BOOK!!!!!
I’VE ALREADY PICkED THE TITLE!
ya done good honey!!
Thanks guys!
Debbie, I have something to admit. The wood only covers the sides you see. 🙂 The back sides are still covered with (gasp!) PLASTIC. LOL
What a cute little cabin feel it has! You’re so creative!
I love what you have done so far, amazing, you sure are handy with the tools, wish I was like that… You’ve done good, can’t wait to see the finished project. Where are you going to put the cows??
I LOVE it!
You completely amaze ME!! I wish I were your next door neighbor… I’d be over there helping, and learning. I’ve always prided myself as a do~it~myself kinda gal, but I’ve never attempted anything like this little beauty. Bravo!!
I would also come over. I love your backyard, I don’t think I would ever get anything done, I would sit on a swing and just stare. Your so lucky. In Texas, it’s as flat as a pancake!
My thoughts as I read this post:
Oh my goodness! No Way! You GO Girl! You ROCK!!
Seriously, Donna – you can do anything! It looks absolutely adorable! And I’m so jealous of your gorgeous backyard! Adding this new look to the landscape took it over the top! You’re creating your own little paradise back there!
LOVE it! 🙂
~Karla @ It’s The Little Things…
Your amazing! Your yard is gorgeous and I can not wait to see that shed all finished up.
I love how this is turning out. Can’t wait to see the finished project. You like to keep us in suspense, or is is procrastination? In my case it would be procrastination, but I’d say I like keeping everyone in suspense. lol.
That is amazing!!!! You are an inspiration. And i love…”They are black…is that enough information?” That about sums up my knowledge of woodworking. ha! Thanks for linking!
Can’t wait for the rest of the project! So many possibilities!
it’s beautiful! and I love your attitude……..
Oh my goodness… that is THE BEST idea! It already looks so cute! I can’t wait to see it done.
I just love a drill and saw for those magical makeover, screws are definitely the way to go if you like change 😉 You did a great job on your project.
Thanks for sharing!
Wow! Very beautiful. So much character, love it!
Now this is a FABULOUS project! Love the old barn wood and windows. Your door is just perfect all spaced apart. Very cool. I can’t get over the view! How incredible, and where in the world are you? Oh, the funky wreath…NICE!
~Misti
It looks like it’s been that way forever – LOVE IT.
Um, this is awesome! I love your building attitude-very Tim Gunn- “Make it work!”
Thanks for your kudos! I can’t wait to work more on this project this weekend!
Misti, I’m in BC Canada. That’s why you see so much green. We don’t suffer through our rain 10 months out of the year for nothin.’ 🙂
Funky Junk Donna
What an awesome project and what an awesomely cleaver person you are. I love it! And that green yard, Wow!
Wow! I am so impressed at your handy “man” skills! I was going to ask how you plan on retrieving the wood from the shed but I saw in a comment that the siding is only on two sides. Lovely shed! Wish we had one!
Great job on the building project! And I love the old windows and funky gate.
Blessings,
Marie
http://emmacallsmemama.com
What an awesome building! I would LOVE something like that!!
I saw this on the Frugal Friday linky party but I still love it seeing it from Kimba’s Garden party. I love everything I have seen you do.
I love it! But I loved the cows too. 😉
It’s really so beautiful with all that old wood. Can you come build one for me?
I’ll be waiting.
Kimba
Makes going out to the ol woodshed a treat……..Great job…Greg
So Donna I looked at this post again and I love it – I am smitten though over the cow art! I don’t usually like cows but something about their sweet faces made me swoon. Who or where did you get that? Do you still have it? Sell it and if so, who was the artist or where can I get some more information on them? Thanks and keep up the good inspirations for us junking gals.