
I’ve always been smitten over those wooden NOEL or JOY letters I’ve seen others make.

So while this idea is not really my own, here’s my own junk take. Junk for joy reclaimed wood letters. With a wreath. 🙂

How to make this reclaimed wood JOY
What you’ll need:
- pallet wood
- junk
- cordless drill
- screws and washers
- masking tape
How I did it:
- Create one letter by cutting down boards to desired sizes to determine overall size.
- Masking tape a line above and below the letter.
- Measure and cut the Y to fit.
- Go grab a wreath for the O, praying you didn’t make the J and Y too big for it.
- Maybe find a wreath of choice first…
- The letters were joined by predrilling pilot holes, then inserting screws. Easy! Done!

And then junky relics were added to the bare shapes just for fun. Because I like looking at that kinda stuff.
Note the washers WITH the screws? They beef up the junk jewelry just a tad.

So weird, yet kinda wonderful in its own right, don’t you think? 🙂

A vintage hanger was assigned the duty to hang a wreath in place of an o.
And a battery operated tea light offers a little flickering illumination.
I had to stage it in my photo studio because my entry door where it’s going was too dark. But that’s ok, this door is cuter anyway.

And if you were here yesterday, you will know the secret to the cheater faux to real tree in the strainer. It proved to be the perfect companion for this project!


And here it is as a junky JOY deer sign. Learn more HERE.
This junk for joy lettering indeed makes me joyful!
And here are the rest! With another giveaway…


Songbird – Fairy lights vignette and today’s giveaway!

Inspired by Charm – Decorating with ornaments
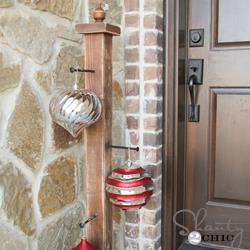
Shanty 2 Chic – Front porch ornament

Remodelaholic – Build an easy Lego tray

Thistlewood Farms – Front door decor

Love the different shapes and textures. Is the number 6 significant?
Thanks! And no significance on the 6. I just like looking at it. 🙂
This is the best Christmas design I’ve seen all season. Its so unique and charming; You keep toping even you. Its a lovely piece of art!
Love the door decorations. I have two old doors with glass door knobs. I want to attach them to the walls..one horizontally and add distressed shelving for supplies and the vertical door would be functional and yet decorative…both in a large craft room. What’s the best way to safely attach the doors to the walls? Love your creativity. Thanks for sharing.
MA in CT
Hi Mary Ann! I’m not exactly a wood working pro, however I always like to locate the studs on the wall, and attempt to screw into that. You can also create a cross brace on the wall, and as long as that brace connects to the stud some way, you’ll have more support, even if you screw the door just to the brace.
Sounds fabulous!
Love, love it! And especially for all the extra goodies on each piece of wood!
You are decorator and a artist. WhenI see you use gears and wheels, I picture that’s what your gears and wheels look like while you are creating!
Love this sign!
That is so you! I love everything about it!
Love this so much Donna!!!
GENIUS, girlie. I would love to have this greet me every time I walked up to my door.
Fantastic!!! Thanks for sharing how you made the “JOY” letters.
You blow me away Donna with your creativity. Lov’n this unique version of the JOY signs! The holiday vignette you created is AWESOME!
Love this. I have three doors so I am going to pick one and build “my JOY” on it for my front porch.
Indeed unique and out of the box design — bring in a little green was a perfect and a touch of light – you are so cleverly skilled..
Hugs
You come up with such amazing projects! I just love them all. Thanx for the inspiration. XX Jo
Donna I just LOVE all the projects on your blog. You are so inspiring! Keep blogging, keep sharing. I just put together a Christmas Card holder using an old frame and chicken wire. Your blog is a big motivator for ME-thanks.