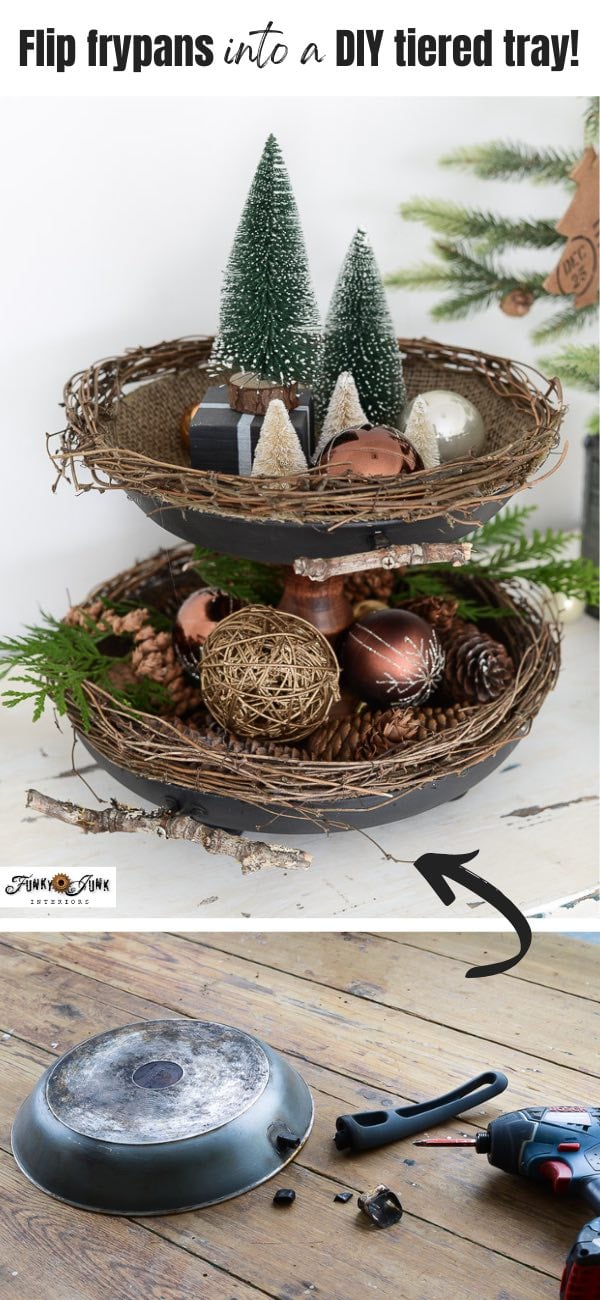
Learn how to transform old frying pans into a one-of-a-kind rustic tiered tray you can also separate to use as decorative bowls! Trimmed with grapevines and burlap for the perfect rustic touch! This beautiful piece can be used so many different ways, and will make a major decorating statement anywhere you display it! 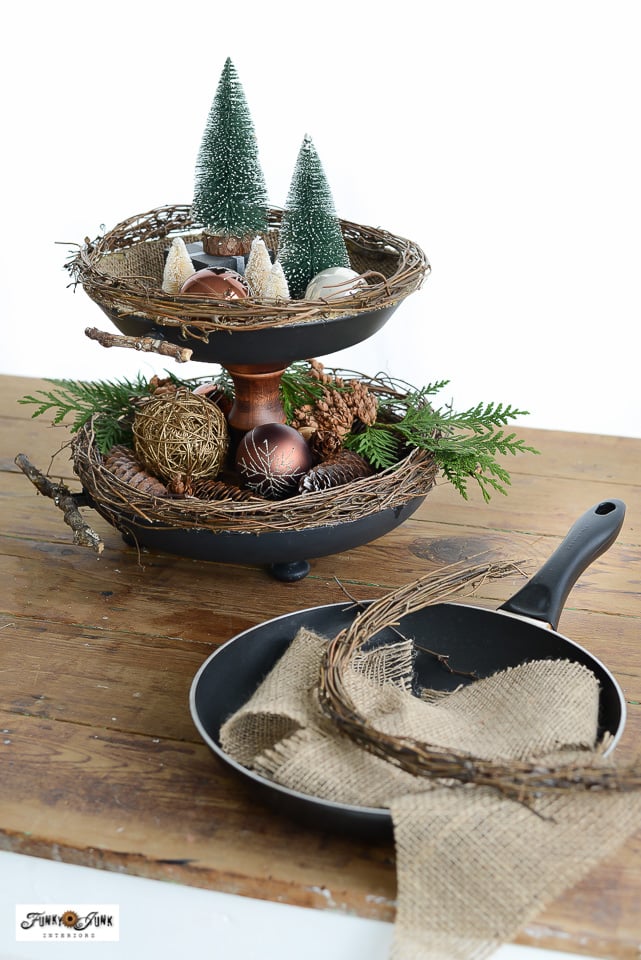
As a Fusion and Amazon Influencer, this post contains affiliate links in which I earn a small percentage from qualifying purchases at no extra cost to you. If you shop Fusion Mineral Paint products through this post, you will get 10% off. Thank-you for helping to support my blog!

Today, you’re in for a treat! I’m teaming up with the Thrift Store Decor Team, where we are all sharing what we made with a thrift store find! Thanks for your visit to see mine! The rest are located at the bottom of this post.
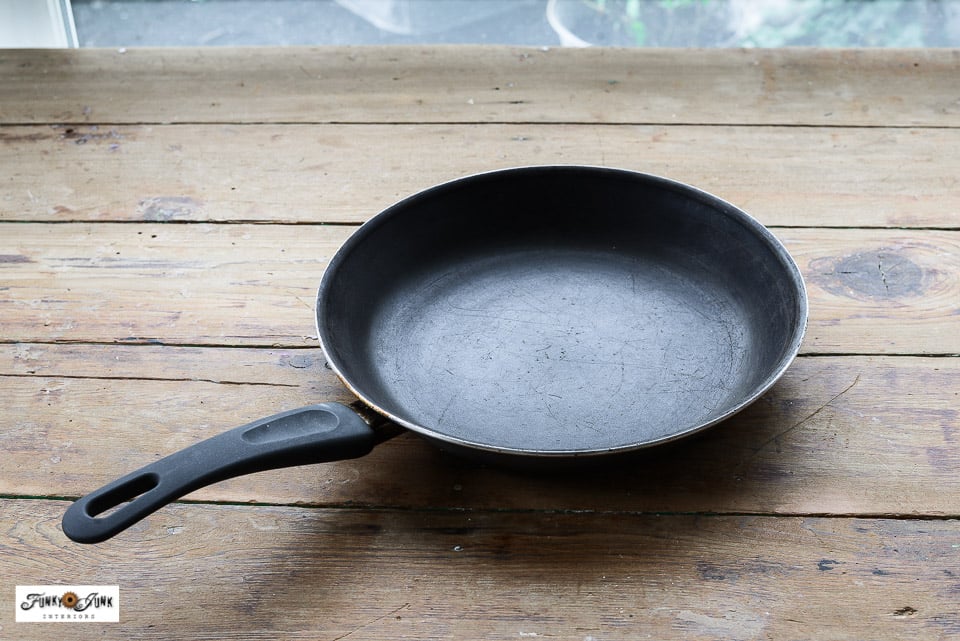
Before you is a typical teflon coated frying pan found at the thrift store.
Not long ago, I made a decorative bowl or tray out of a frypan which I fell in LOVE with!
I meant to get the tutorial up on the blog earlier, but now I have an even better idea… instead of just one, I’m going to make two so they can become a tiered tray!
Tiered trays are so cool! They help you layer items in one area so you get major impact and save space. Plus the added height adds visual uniqueness to an area, making them easy and fun to display with.
However, this tiered tray also comes apart so the two bowls or trays can be used separately as well. And since the pans have nice rounded edges, they hold a ton without anything falling out!
I just LOVE how they turned out. The design has loads of rustic charm and is neutral enough to work in any given space. I use them for everything!
Ready to see how my little brainstorm came to be? Here’s what I did:
Repurposed frying pans turn into a rustic tiered tray
Supplies I used:
1 larger and 1 smaller nonstick frying pans with removable handles via screws (this makes it easier)
Fusion Mineral Paint in Cast Iron (get 10% off)
Fusion’s TSP Alternative (get 10% off)
Burlap fabric Small thicker branches for handles
Fusion’s Flat Brush (10% off) for painting
Tools:
Cordless drill and drill bit that makes holes
Bosch variable speed orbital sander
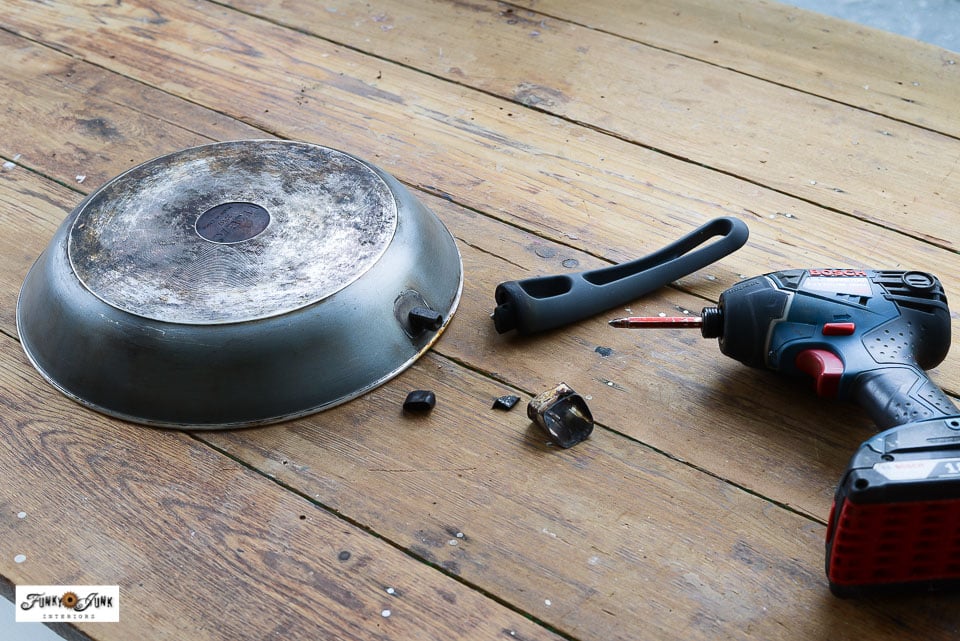
Removing the fry pan handle
1. Remove the handle from the fry pan, saving the original screw for later.
I chose two frying pans that have removable handles with screws, making removal a whole lot easier than having to grind them off!
Fusion’s TSP Alternative (get 10% off)
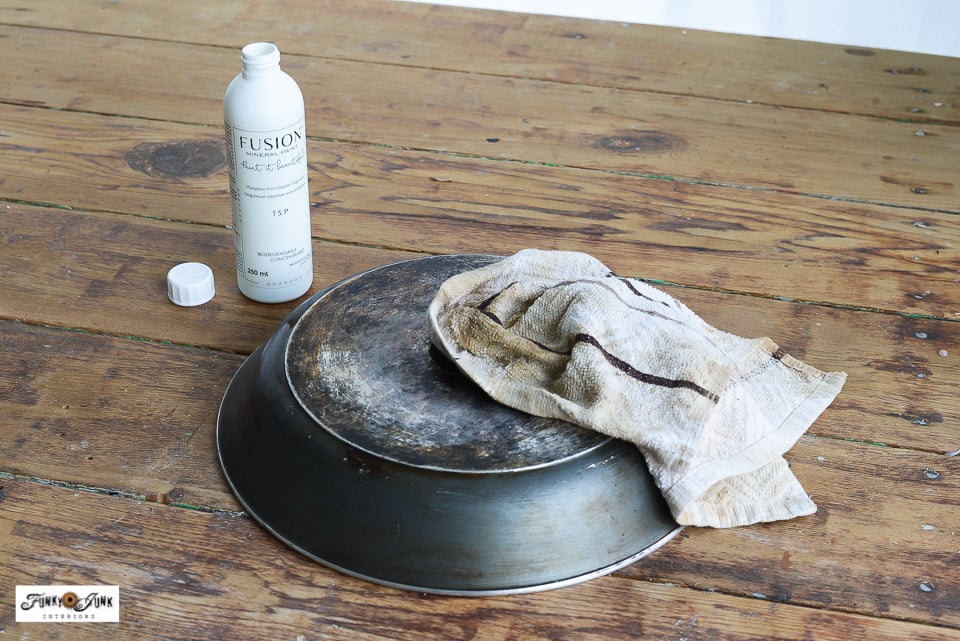
Removing the grease
2. Clean off all the grease, inside and out. I recommend to use an SOS pad all over the pan first, then follow up with Fusion’s TSP alternative.
It’s really important all the grease is removed, or the paint won’t adhere properly.
Fusion Mineral Paint in Cast Iron (get 10% off)
Painting the frying pan
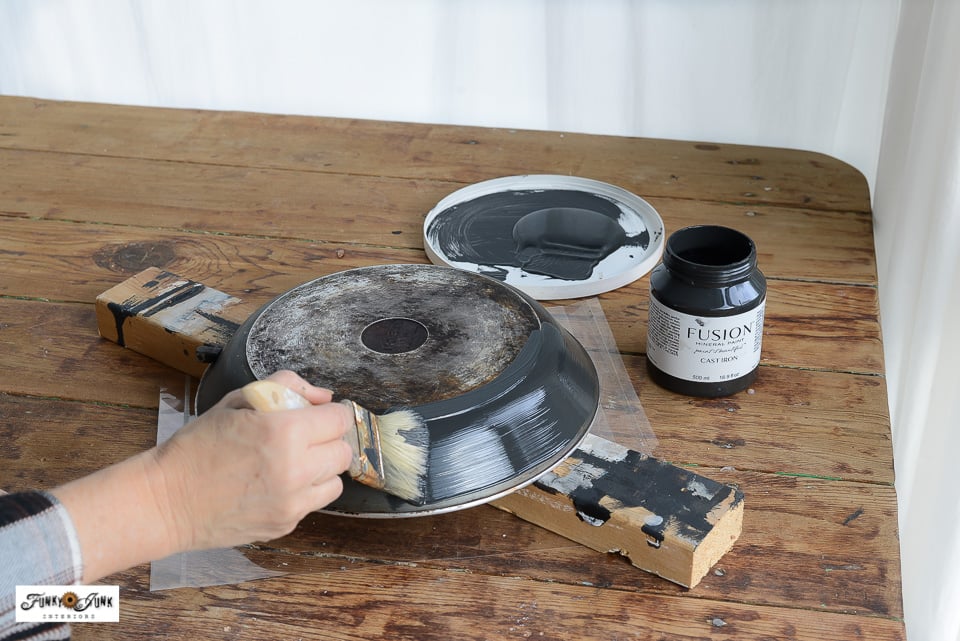
3. Sand the outside of the frypan with an orbital sander, then paint 2 coats on the sides and bottom using Cast Iron.
I chose Cast Iron for its deep neutral tone, which looks SO good with my other chosen supplies I used!
While 2 coats of paint on the metal did turn out ok without sanding, the paint went on better when I sanded the first frypan, thanks to the sanding removing every bit of remaining grease.
Adding burlap inside the fry pan
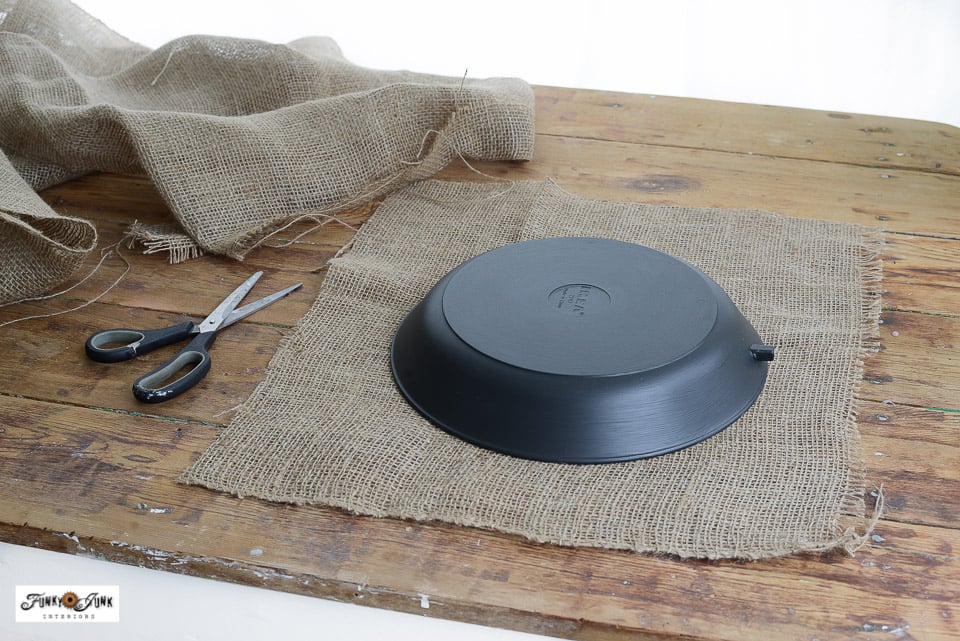
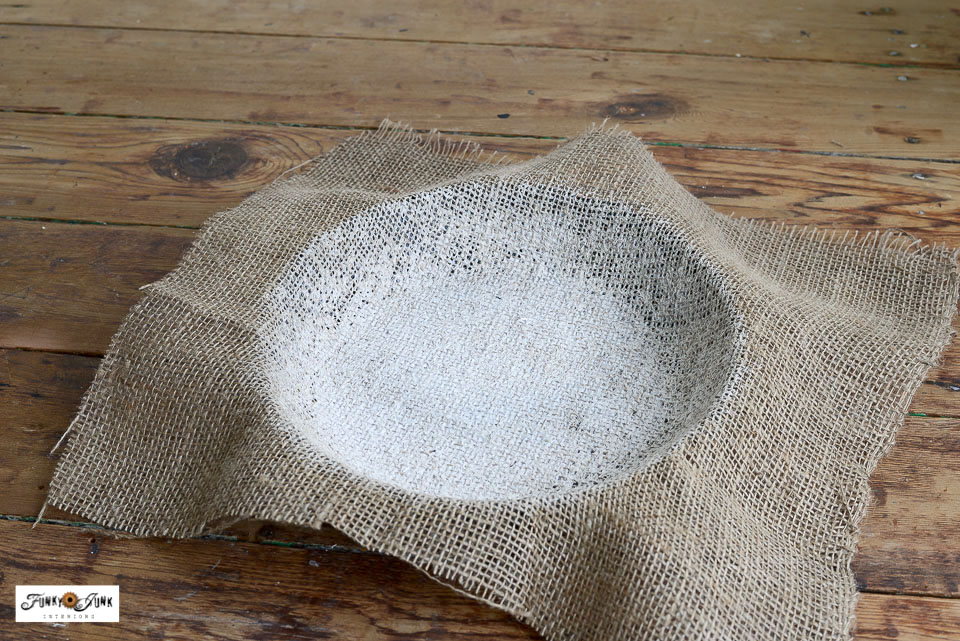
4. Position the painted fry pan open side down onto some burlap, then cut larger than the frypan size.
Burlap is the perfect material to use for this project, since the loose weave easily curves with the pan sides without wrinkles or folds!
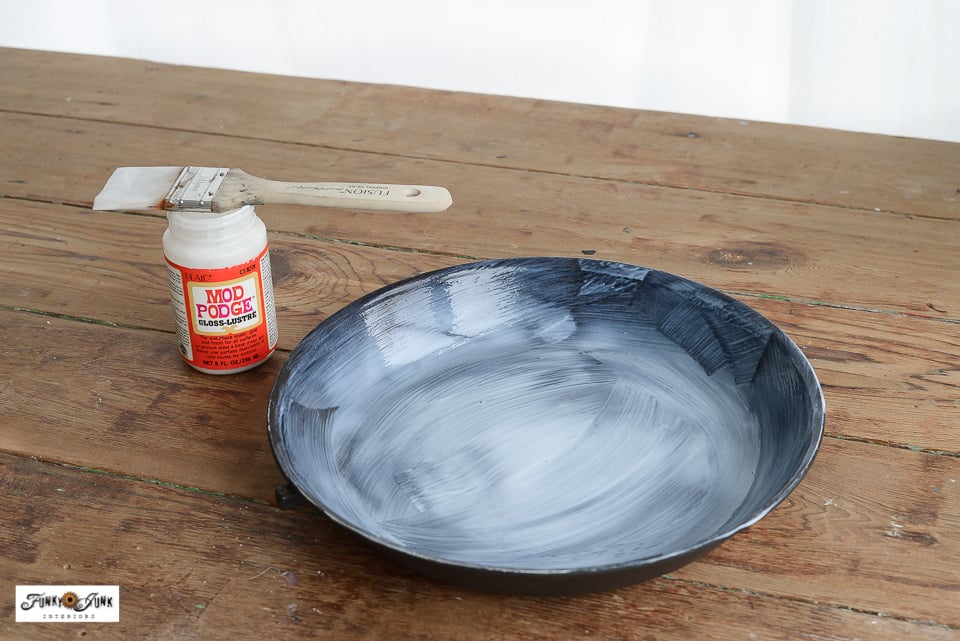
5. Flip fry pan open side up, then coat the inside well with Mod Podge.
Since Mod Podge can be very thick, I added a little water to it.
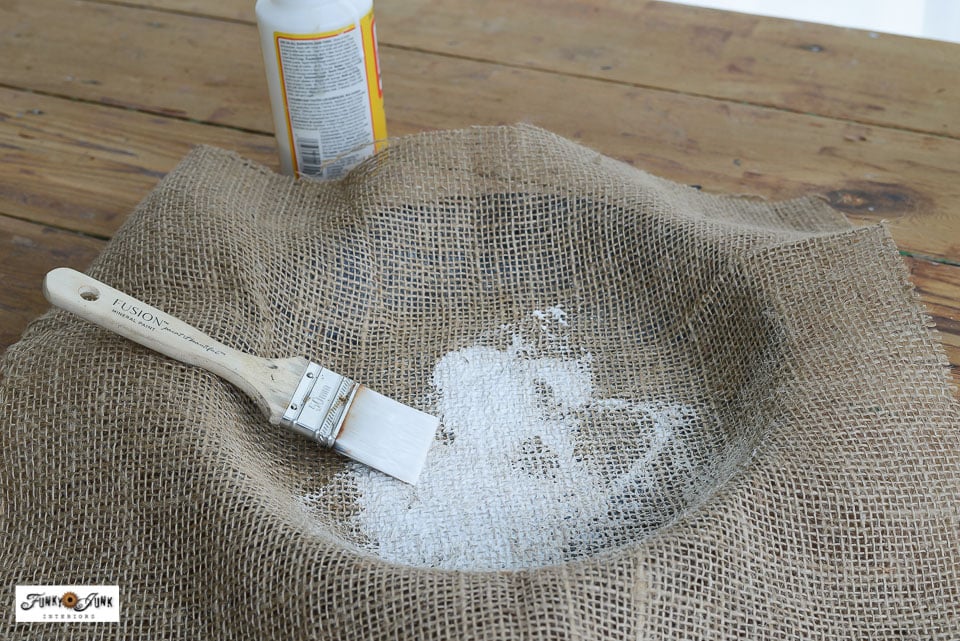
6. Position the burlap inside the frying pan, then press it with your hands so it forms to the pan shape. Paint the top of the burlap with Mod Podge until completely covered.
I also added more Mod Podge in between the pan and fabric edges for extra bonding power.
Since the burlap weave captures so much Mod Podge, I used a rag to dab across the surface to pick up any overly soaked areas so it would dry quicker.
Once dry in a day or two, the Mod Podge magically turns clear!

Trimming the burlap once dry
7. Once burlap is dry, use fabric scissors to cut the burlap along the edge of the pan.
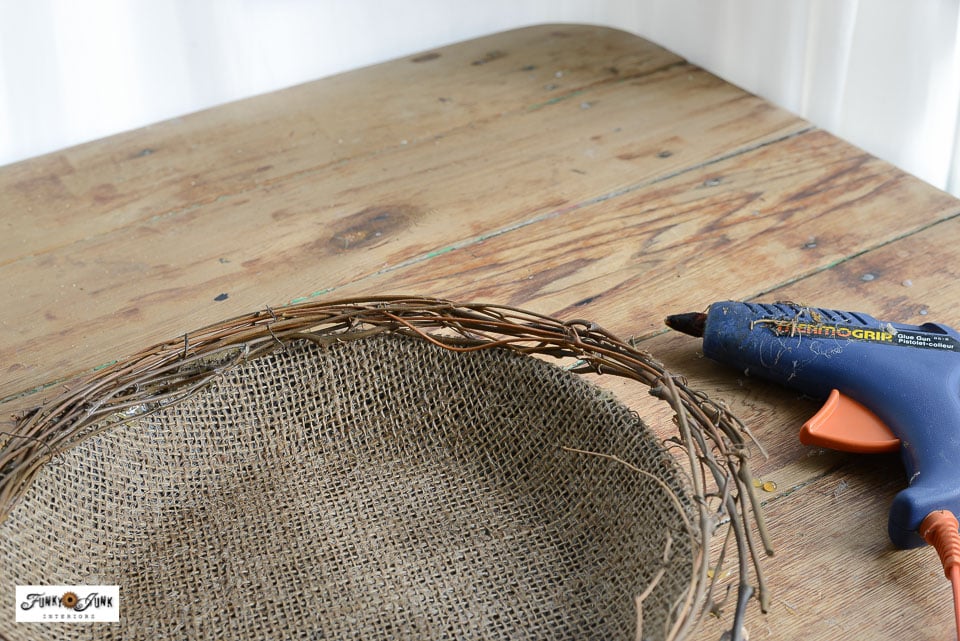
Glueing grapevine garland to the pan edge
8. Cut, then hot glue some thin grapevine garland around the edge of the pan.
I think the pan would look wonderful edged with thicker twine or cotton rope too!
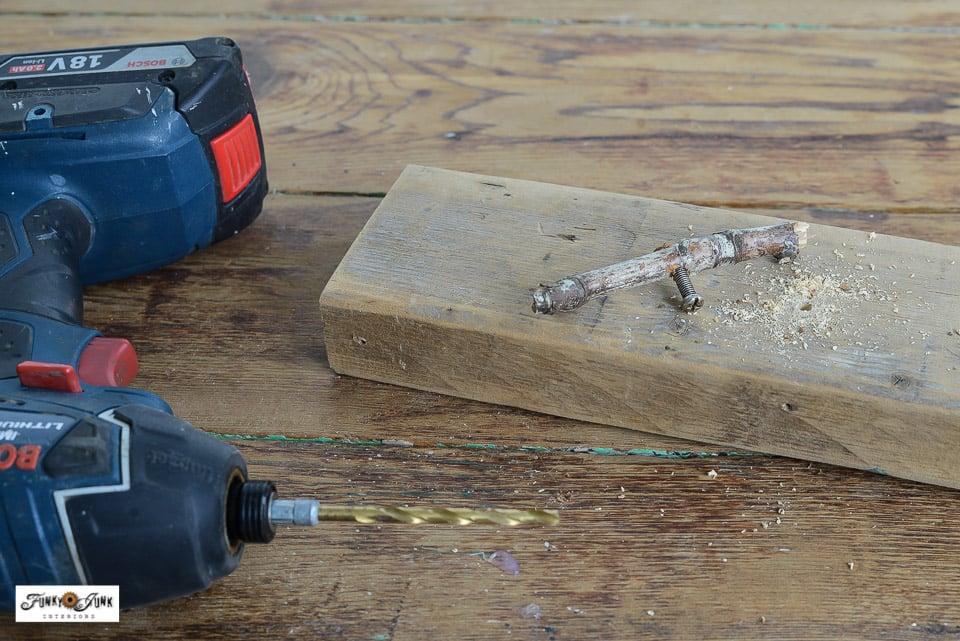
Creating branch handles
9. Using a cordless drill, drill a hole into a small branch so the original fry pan handle screw slips through it.
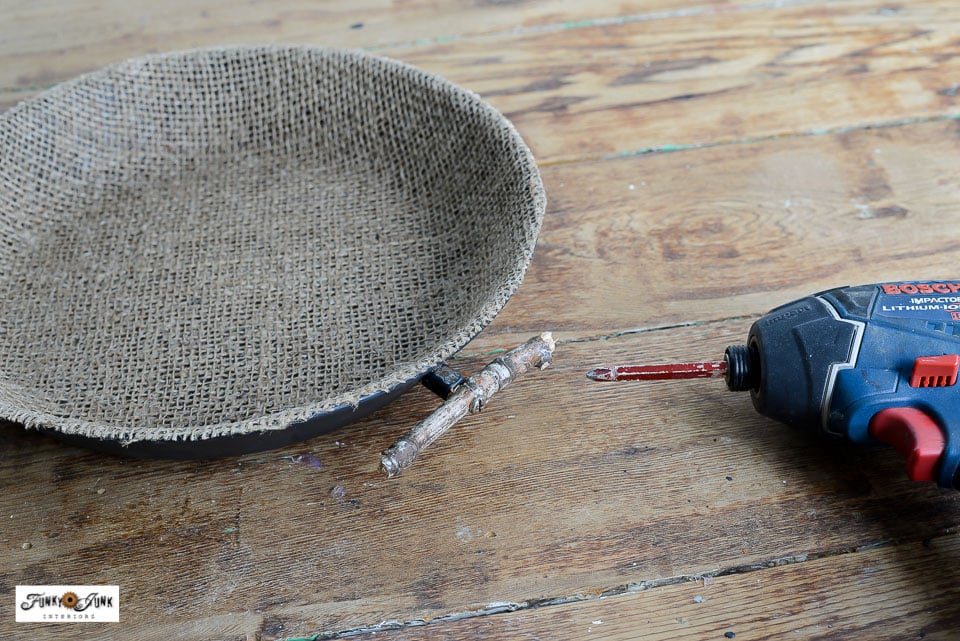
10. Screw the branch handle onto the fry pan. Instant branch handle!
The larger fry pan had two screw handles, and the smaller just one. But I think even with one on the smaller, it still adds a cute decorative touch.
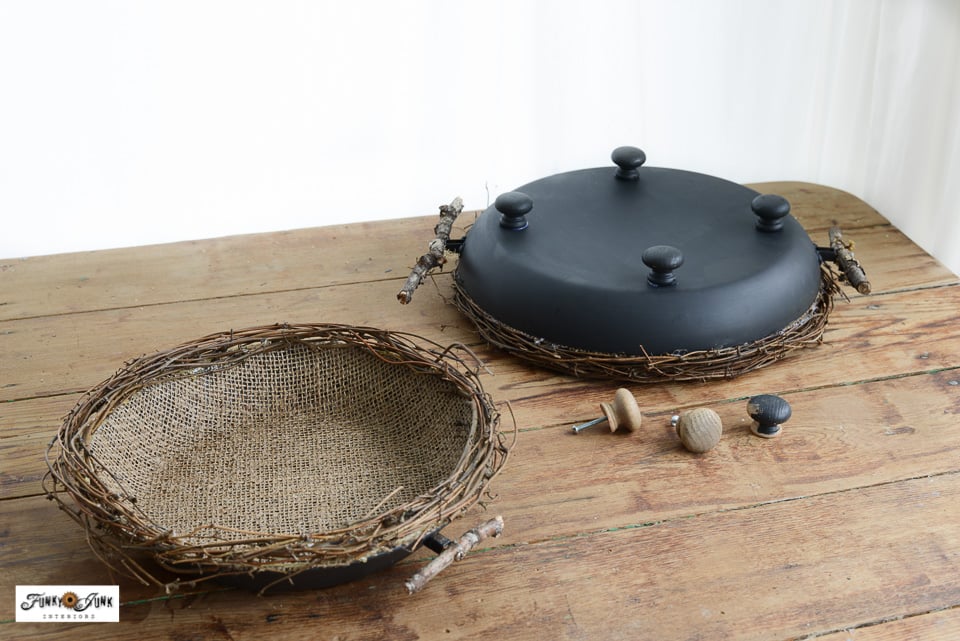
Adding feet to the large pan
11. To add feet to the large fry pan, paint, then hot glue wooden door pulls onto the bottom.
Feet could be added to the smaller top pan as well, however I chose without since I am showcasing this project as a tiered tray.
Adding a riser to create a tiered tray
12. Select a riser of sorts. I had this beefy wood candle stick holder in my stash which I think works perfectly!
Other riser ideas could be an upside down tall cup, block of wood, etc.

13. Position the riser inside the larger pan, then top off with the smaller pan.
I didn’t glue the riser in place so I have the ability to use the two pans as separate decorative trays or bowls as well.
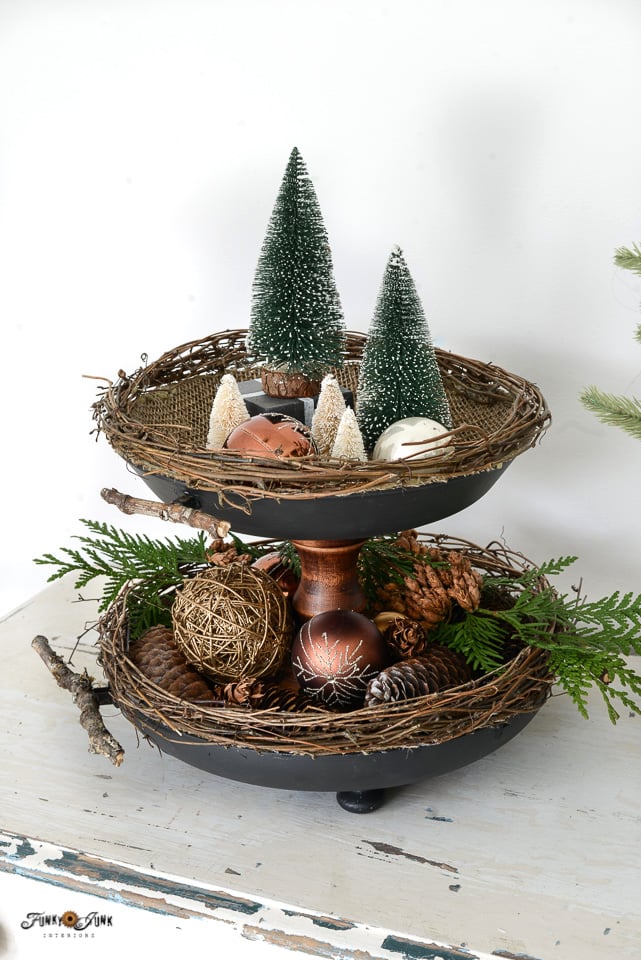
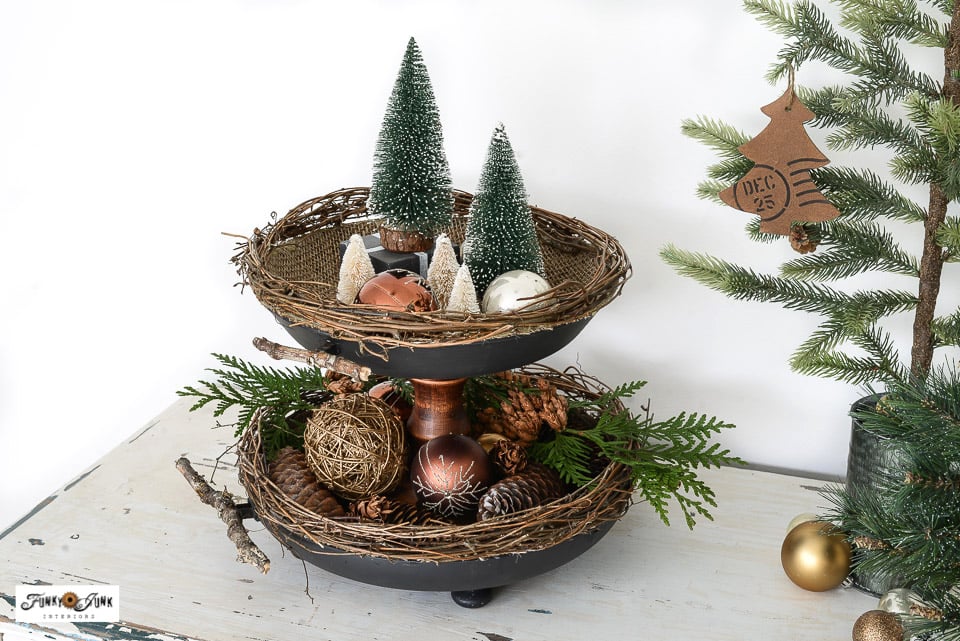
Tiered tray with Christmas decorations
Then load up your new tiered tray with whatever you wish! Since Christmas is just around the corner, I decided to style it with bottle brush trees, ornaments and greenery. It’s just SO cute!
Shop this look! Green and white bottle brush trees / copper ornaments / wicker ornaments / pinecones / evergreen branches 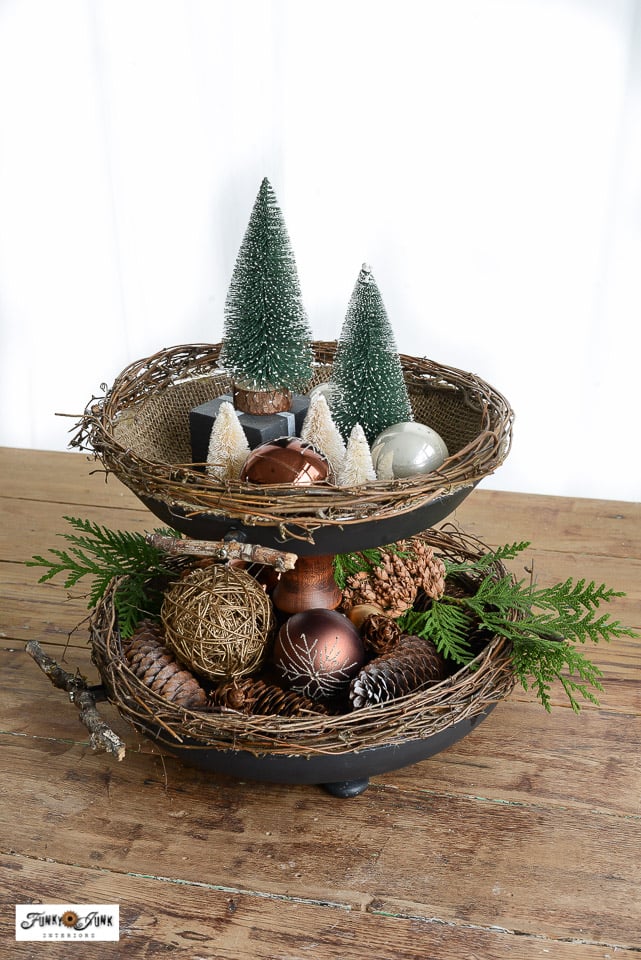
I just love all the rustic, twiggy goodness with the branch handles, grapevine trim against the burlap. Teaming up with that deep paint, it’s the perfect combo!
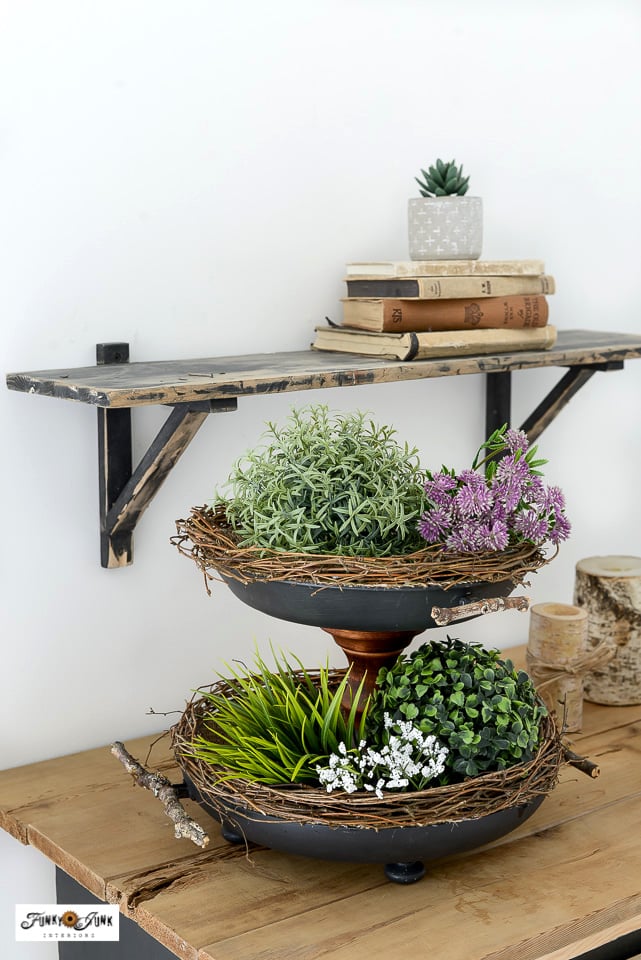

Tiered tray to display faux plants
And here’s an everyday idea for the tiered tray, used with faux plants. How fun!
Other ways to use this tiered tray:
- home decor
- fruit bowls
- candles
- plant stand
- small faux Christmas tree base
- serving food or snacks using a protective napkin
- organizing craft or office supplies
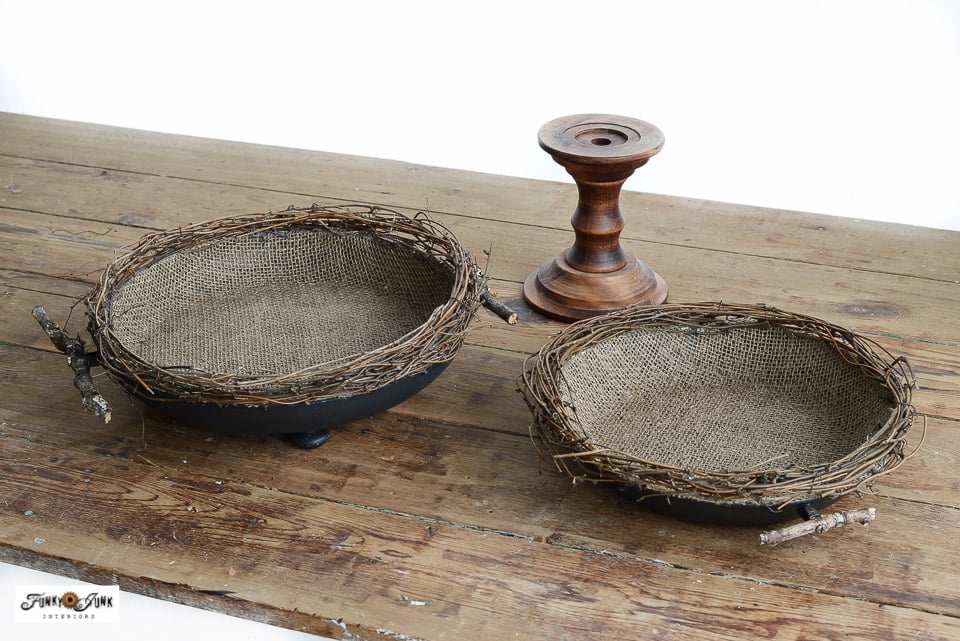
So let’s separate the bowls next…
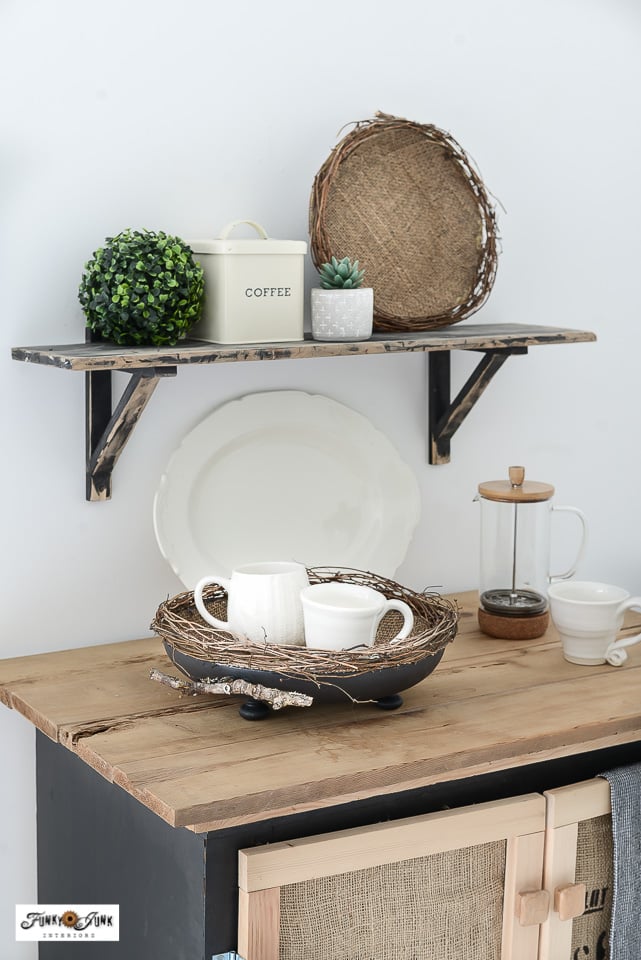

Bowls or trays displayed separately
And just like that, I now have two large decorative bowls that can be used for anything! The large is a nice size to cart around like a serving tray, holding a couple of mugs, used as a fruit bowl, decor, or whatever you wish! And they even look cute propped up on a shelf as decor, ready to be used when needed.
As decorative bowls, they can also be used for:
- home decor
- serving tray
- food
- cookie platter
- candle centerpiece
- small faux Christmas tree base
- as part of a gift basket filled with treats
- arts and crafts (yarn)

And how perfect is the twiggy theme to showcase these rustic pumpkins made from firewood and branches?
The large bowl was also used to display these fabric pumpkins made from socks! As you can see, these decorative bowls really come in handy!
Video tutorial – fry pan tiered tray
I hope this inspires you to take a 2nd look at simple frying pans to see how they can help you organize or decorate in a very unique way! What would you use them for in your home?
Next up, let’s now visit our creative friends to see what they made with their finds!
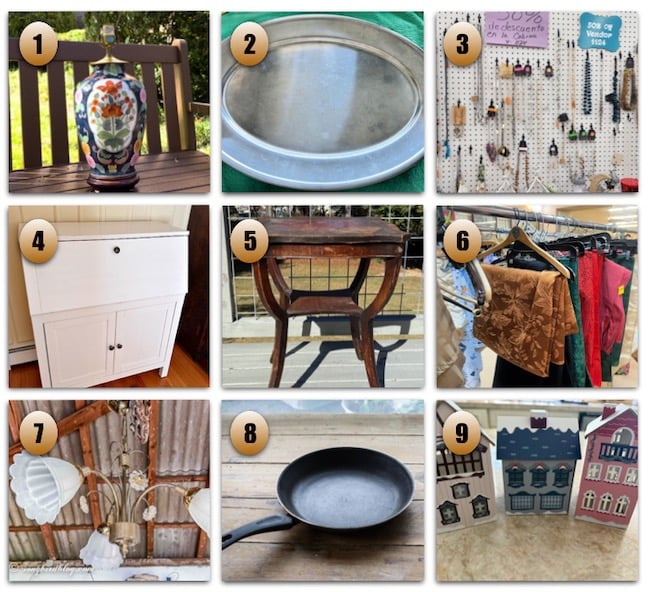

1. Revamp a Lamp
Our Southern Home
2. Old World Santa Christmas Tray
Our Crafty Mom
3. Salvaged Jewelry Suncatchers
My Repurposed Life
4. IKEA Secretary Desk Makeover
Exquisitely Unremarkable
5. Mahogany Side Table Upcycle
Shop At Blu
6. Beautiful Thrifted Thanksgiving Tablescape
Redhead Can Decorate
7. DIY Christmas Bells
Songbird
8. Fry Pan Tiered Tray and Decorative Bowls
Funky Junk Interiors
9. Gingerbread Village from Christmas Houses
My Uncommon Slice of Suburbia
Fabulous upcycle! It’s super festive and crazy creative. I see pans all the time and walk right by…not anymore! Thanks!
Thank-you Kim! I’m still rather floored a greasy frypan can actually look cute! Haha! I had fun with these!
Oh Donna! Only you could come up with this and make it look so good. We actually replaced our frying pans recently, and it didn’t occur to me for even one second that I could reuse them as decor. Now I am regretting getting rid of them of course. The project is beautiful and you styled it to the max.
Thanks Marianne! I’m sure going to have fun with them over Christmas!
Donna, welcome to the Team! I love this little rustic beauty. It’s been crazy cold here in Alabama so I’m feeling this cozy winter vibe. I love the burlap liner! Pinned!
Thanks Sue! So happy to be a part of this inspiring team! That burlap liner was definitely a trial… I wasn’t sure what would take the shape of the pans and the loose weave just worked. WHEW!
So happy you’ve joined our Thrift Store Team, Donna.
Wow! Who knew? I love how the paint levels up the look of the Teflon fry pans.
Oh, and the burlap? I didn’t see that coming. It looks fabulous with the grapevine.
The wooden candle holder, I can only imagine what goodies you have in your stash. After 16 years of doing this, sometimes it’s difficult to “find” something in MY stash.
I love the way your DIY Frypan Tiered Tray turned out!
Pinning!
gail
Thanks Gail, so happy to be a part of this fabulous group! It’ll keep me creating!
I’m still shocked the burlap worked as good as it did! haha
And yeah, my own stash is considerable. I have to purge every year to keep stuff on the shelves and NOT spilling onto the floor. LOL
Donna- This is so beautiful! I never would have thought to do this with pans. (I might have to steal back those old pans I gave my husband for camping lol)
Love how you showed us all the different ways to display, amazing project!
Thanks Kristen! It’s quickly become one of my fav projects… you’ll be seeing these in lots of project reveals I’m afraid… haha!
Wow is this a great idea! I’m going to steal it (lol). Thank you for sharing an up cycled way of using the scratched up non-stick frying pans!
Thanks Sharon, please do! I’d love to see your own rendition! The burlap material makes this very easy to accomplish.
Hi Donna! I see frying pans at the thrift store all the time, and would have never thought to take off the handle…absolutely brilliant! And the knobs for feet…so cute. The options are endless on filling these…now I need to do this for ornaments for our island!!! XO
Thanks Julie! I know, frypans are a dime a dozen it seems. The tricky part is finding the handles that unscrew. Then you’re home free!
This would make such a cute little place for an herb garden, too! I love it.
Oh that would be a wonderful idea Gina! I’d just leave the inside as-is and embelish the outside. Perfect shallow planter idea, I may have to try this too. LOL
This is just amazing. You have such a great eye for the rustic look!
Thank-you Tania! I can assure you this was not a well thought out big pie in the sky plan. I reached for stuff that was nearby that I hadn’t put away yet. And THIS is why it’s better for me not to clean up! Haha!
Love, love, love how this turned out. What a brilliant idea, Donna. Now I have an excuse to replace my crusty old pans, and I do believe they have screw-off handles too 😀
I love this!!! Thank you for sharing.