I’m totally into whites this year. Desiring a more neutral feel for the Christmas tree, I packed all the coloured rah rah away and sat there and stared at a full box of decorations and a bare tree, stumped.

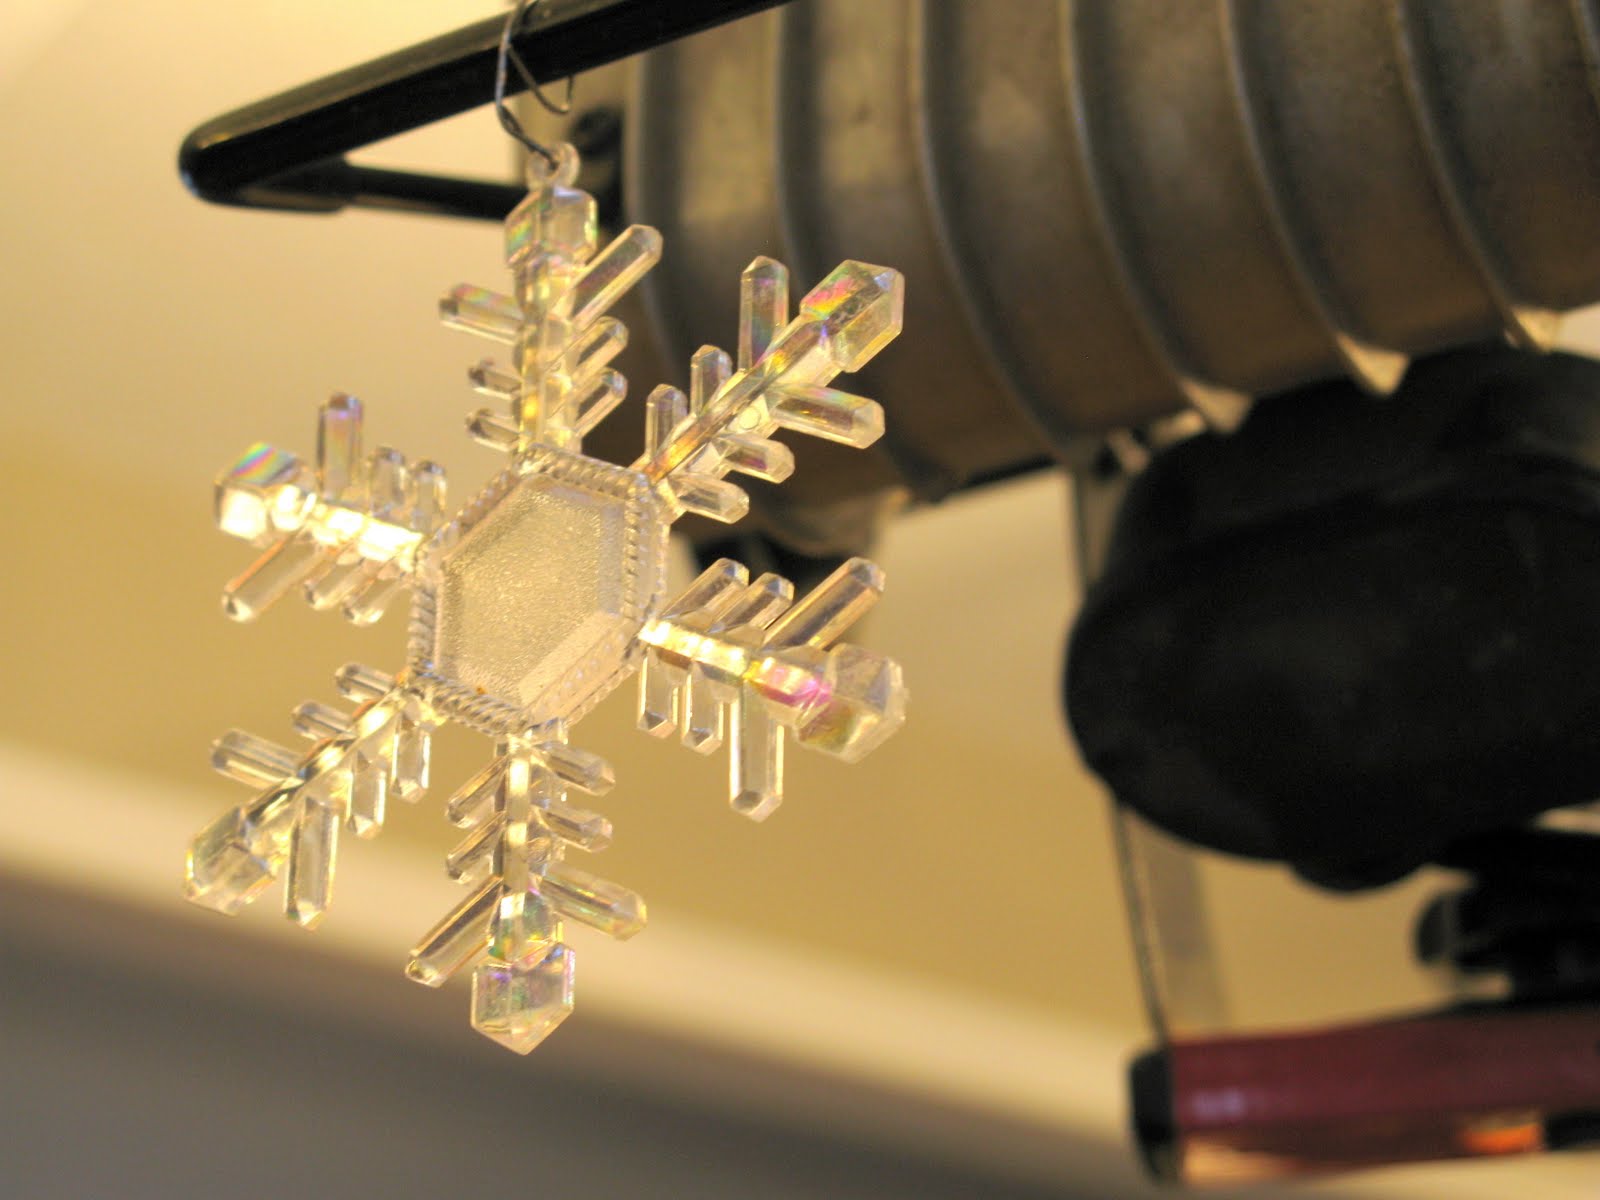
I had landed a bagful of these wonderful icicles at a local thrift for $1, so that was a great start. Aren’t they cool?!?

As well as 4 of these over sized ornaments with what appears to be ice stuck to them. Very unusual!

Laying all the neutral decorations out, I tore some sheets up, leaving the edges frayed. For garland.
Tip: For the ripped garland, I ripped 6″ thick strips for a scrumptious look. Narrower appeared ‘wimpy’ once on the tree.
For the most part, it was looking pretty! But the next morning spelled out the nasty truth. It was lacking spark.
Tip: If you aren’t sure of something, walk away from it. Go back to it at a later time to see if it still has the right impact. I do the same with graphics work and the time lapse NEVER lies. A break gives your artistic idea a rest and allows you to reset. You will see what you’ve done with fresh eyes the next day.

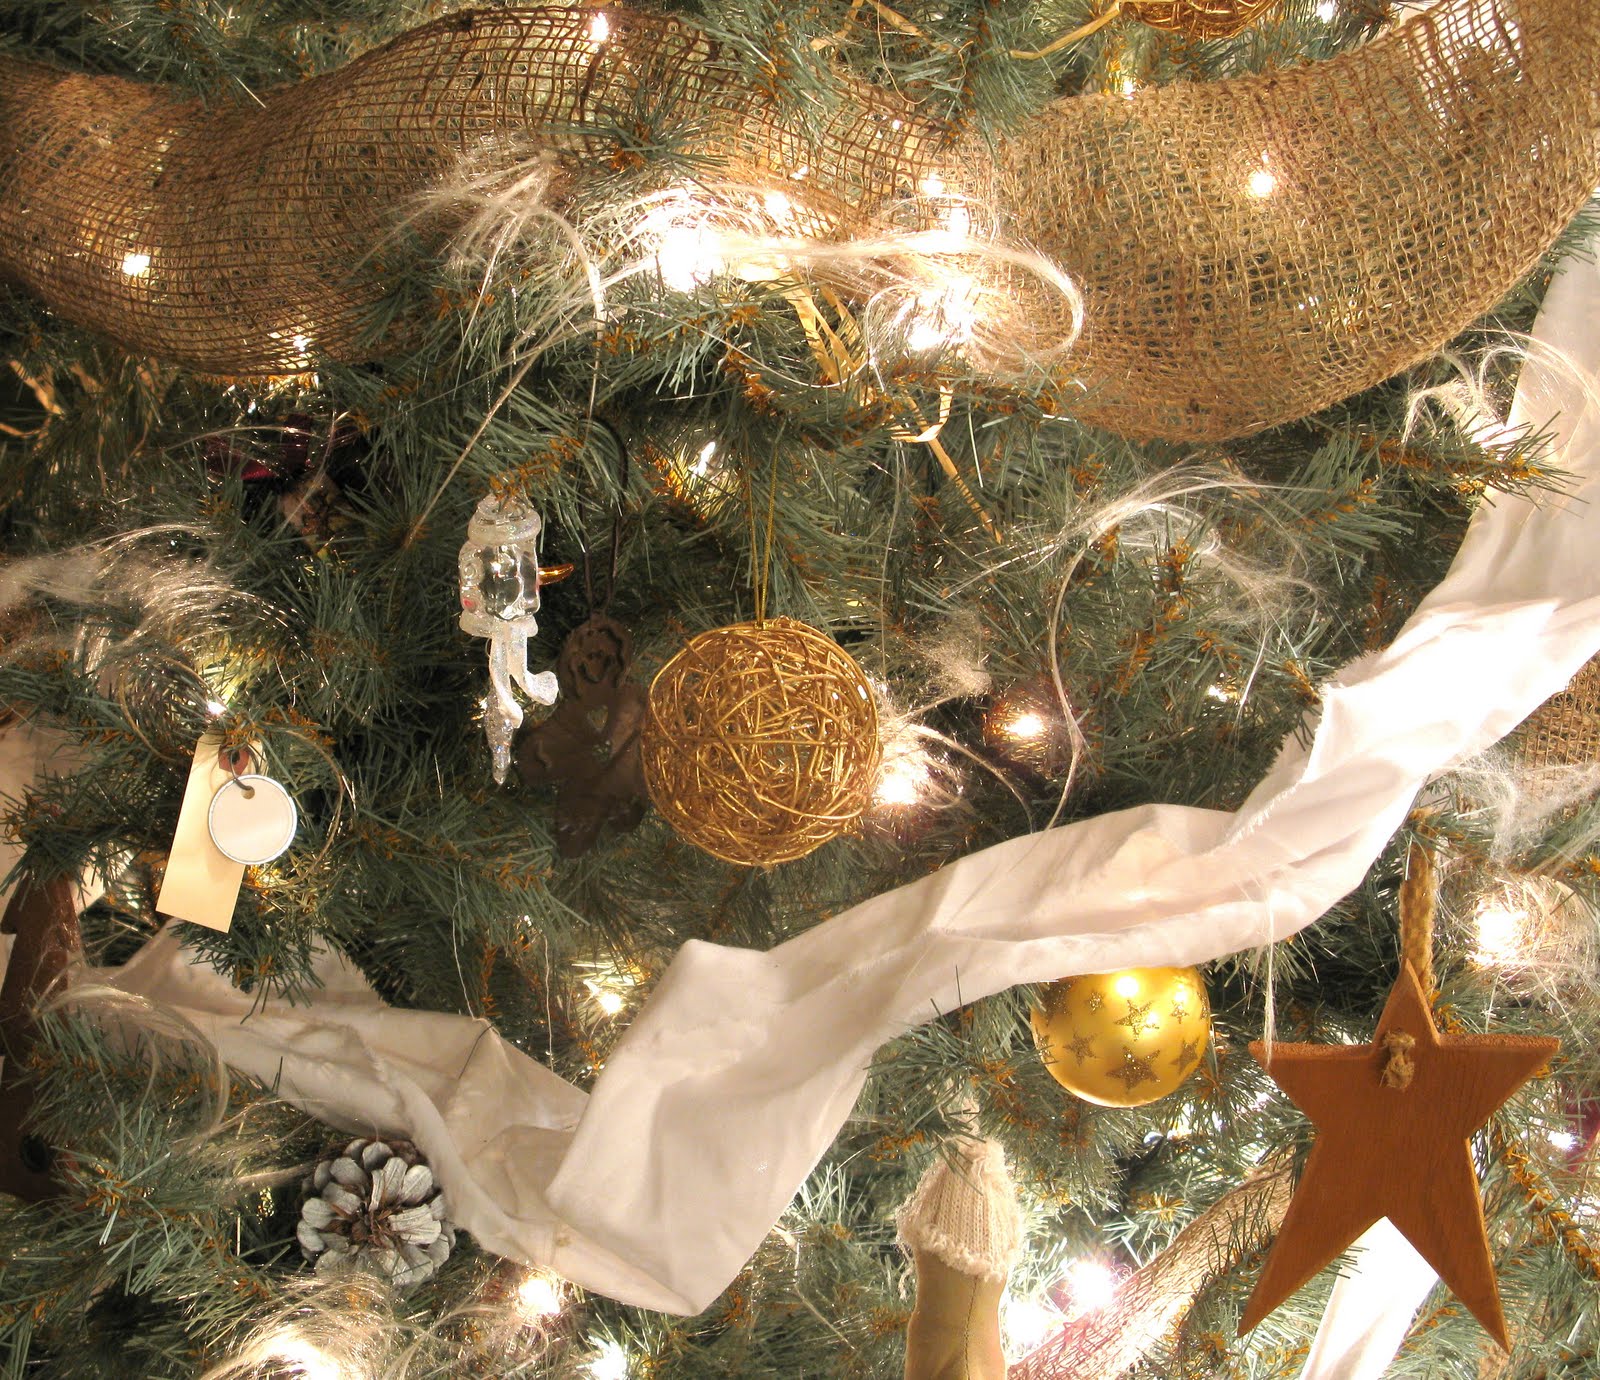
Filler up! More more more stuff was jammed on. Still neutral, but it was starting to work. I hit the pine cones with white spray paint to simulate newly fallen snow on them. I filled up clear glass ornaments with fake snow (idea from Shanty 2 Chic, thanks girls!). The tags are from an office supply store which I bought in bulk. Cheap!

And here’s what I ended up doing. Adding SOME colour. The colours gravitated to dusty deep reds, gold, burlap, and whites. Lots of neutral with a dash of colour that didn’t blind you.

Heavy on the garland please! I found the burlap garland at Michael’s for $6 a roll. White is the ripped sheets, and the ribbon another Michael’s find a few years back. I only had pieces so I wrapped it around the tree as if it wound and wound forever and hid the edges into the boughs. And if I had all different ribbons, that would be even cooler!

Throwing in some meaningful decor was a must and happened to go with my theme. These two sweet Micky and Minnie ornaments simulate my son and I that we indeed got from Disneyland a couple years ago. Wooden carved sweet memories!

The tree skirt is nothing elaborate. Rumpled up burlap to resemble a burlap sack covering the roots as if you purchased your tree in root ball form. I’ve just used a white sheet for years to resemble snow. But you know… it’s a burlap kinda year and all. And made sense here.

Top Secret Tips!
#1. Look for glass angel hair. You can’t find it anywhere these days but if you do, stock up! Pull at it in very small tufts (carefully! or it cuts your fingers) and spread them around on the tree branches and especially over top lights. The angel hair catches the light and creates an amazing glowy effect. (keep it high if you have pets or toddlers – this is real glass)
#2. Light tip – when you put them on your tree, TWIST the string into each and every bough on each and every branch. If you twist it tight against the branches, you will NOT see wires. They totally disappear. I’ve been doing this for years and all you see is greenery and lights. Rarely do others go to the same amount of painstaking work, but if you do, you’ll be glad you did! Now you’ll never view lights strung on a tree the same ever again. You’re welcome. 🙂

The result is a very full and price efficient tree that for the most part, was very neutral but still held enough colour for interest and warmth. My tree is indeed a fake but bought many years ago and constantly fool those that glance at it. I was totally on the fake bandwagon when they first came out and snatched up the most realistic (and expensive one at the time) out there. I’m so glad I did!
How did your tree turn out? Something you love about it? Wish you did differently? If you care to share, go ahead, make your post and add your link for fun! I’d love to see. 🙂 I’ll leave this linky open until Christmas, so feel free to revisit it at any time!
Wanna funky little button? Here ya go!
(scroll button on right sidebar widget.. it won’t play nice here)
Christmas decor – Part 2 HERE
~ Make sure you visit these other fine link parties! I just have. ~


Link for Hooked on Houses HERE

Link for The Inspired Room HERE


![]()
Other current favs!
Decorating the house for Christmas: 2025 home tour
Painting DIY antique brass bells for Christmas decor
Thrifted glass bowl snowman craft for winter decor
Make a free DIY twig and pinecone garland for Christmas decor!
Repurposing Frying Pans Into A Unique Rustic Tiered Tray
Customizable Upcycled Rake Christmas Tree Alternative
Tags: Christmas decor
Love your tree. Mine is going up this weekend. And I am so gonna try your tip about the lights. Those cords freak me out every year.
What a great tree Donna. Personally, i won’t be doing so much decorating this year since we’re packing the house up a bit, so I’ll just live thru you for a while.
Got your box yet?
Donna do you ever stop? I am in awe..
I love that burlap I am on a mission to find some this weekend… gorgeous you did an awesome job… you are such an inspiration.
Hugs Deb
What a beautiful tree ~ Just the right amount of color and ummph to it! You are so right, burlap and creams and taupes are soooo in this year. Love the tree skirt!! My home tour post is up, would love for you to stop by. When I finish my trees, I’ll be sure to link up with you!
Big TX Hugs,
Stephanie
Angelic Accents
It is all so lovely. I love the angel hair. The simple white and browns looks wonderful. I made some vintage ice cycles this year that I love. I might have to do a white tree next year.
I signed up to follow and subscribe.
Cheri
Your tree looks so pretty, Donna! Out of all your tips, the one I don’t always seem to remember to do is step away and come back to it. You’re right that this works for most projects, not just Christmas trees!
Oh, wow, your tree is magazine-worthy. Gorgeous!! I love it. Glad you told me about your party over here. I’ll add the link to my post. Thanks! 🙂
Love your Tree and your style Donna!!!
Your tree is gorgeous! I wish I had room for another one, so I could copy yours 🙂
rue
i do an all white tree….those clear balls with the fake snow inside would be the PERFECT addition to my tree!!!!!
what a great idea~~
chasity
Pretty, pretty tree!
I love the ripped sheets idea – that would be really nice to add to my tree to fill any those bare spots you get with fake trees! Fantastic job as always!
Your tree looks beautiful. I’m especially loving the sheet garland! BTW–I added your party button to my post and it said “this photo has been removed or deleted”. The link still works to bring people to the party but the picture doesn’t show up.
Your tree is so precious! I love that burlapy garland! Everything is so just wonderful.
Be a sweetie,
Shelia 😉
Thanks everyone!
Beth, thanks for the heads up. I’ve tested the link and it’s working for me and have seen it working on another site. Weird. Anyone else have an issue with it, please let me know!
FJ Donna
What attention to detail! I love how you chose a color theme and filled in from there. Lovely!
I finally was able to put your button on my blog. Mine was acting weird too.
rue
I copied a picture I saw in Country Living magazine, and put my tree in a galvanized wash basin. I love it! It’s been so much neater than a tree skirt. I will be doing that from now on!
Hope you have a very Merry Christmas! Beth.
Hi all! I’ve removed the scroll bar button link within the post. That was the one that was messed up and I couldn’t seem to fix it without wreaking havoc with the link party html. Sidebar widget scrollbar button works.
Thanks so much for the heads up!!
Html guru wannabe but will never be, FJ Donna
Everything looks so wonderful. I especially love the burlap garland.
I love your “neutral” tree. It just goes to show us that we can adjust our initial plans to fit what feels right. The burlap and sheet garland are great ideas. My wife and I have our silver, gold, and crystal tree in our living room. The crystal is mostly prisms from a discarded chandelier. We have some light colors that add a bit more depth than the limited palate allows.
I can also second the idea of wrapping the lights around to have a bulb on most branch tips. Get the lights into the tree center a bit too. When you stand back and move the slightest bit, the lights twinkle. Keep in mind done this way you will use more lights than you ever thought possible. I used 1,300+ on living room tree, 1,850+ on family room tree and 800 on smaller artificial in lower level family room. We have the extension cords along the tree trunck that have 3 outlet every 1 1/2 feet (9 per cord) so it is easier to put lights where needed.
Thanks for all your ideas
Rick
What a pretty tree and I agree with all your tips! The little bit of color you added sure made a difference. The burlap garland is so IN this year and looks perfect on you tree.
Your tree looks fantastic! Great job. I’m very impressed.
I have that same type of Mickey Mouse ornament on my tree! I got it at Disney in Orlando last year. I love it, it’s a very classy Mickey look. Nice taste 😉
Hello and thank you for hosting this party! I love your decor; I’d nearly forgot about glass-spun angel hair. That sure brings back a lot of memories!
Happy Holidays to you and yours, and thanks again!
~Arleen
Gee am I jealous! We look for new icicles every year to add to our tree, which unfortunately is still in it’s box…the only thing keeping me from joining your party.
Maybe by the end of the night!
Merrie and all others, you have until Christmas to enter THIS party. 🙂 I’m leaving it up for all to join in as they too put up their trees.
Happy decorating! And thanks for the lovely inspiration. 🙂
FJ Donna
I’m right there with you, almost rid of the dark Christmas colors, ready to be all white and light. Love your funky style…teach me more! I love to learn from all you young decorating DIVAS!
xoxo!
Lamp Tramp
BEAUTIFUL!!!
Very nice tree! I love the Mickey ornaments!
Hope to see you next week for the Holly Bloggy Christmas Bash!
Love the tree! Using burlap is a great idea, really the whole effect is delicious!
Robin
All Things Heart and Home
greetings miss funky junk donna! i can’t even begin to tell you how incredibly excited i am for you to visit my blog and inturn discover YOUR magical place! if i didn’t have a houseful of girls heading over this evening i know where my day would be spent! 🙂 i suspect i will be doing some heavy hitting this weekend at your site! anywho…thanks much for your comments and for the sidebar shout out! i am very humbled…JUNK FOR JOY & i will see you soon!
beth
I love the tree. I too used nuetrals this year and we are really enjoying it.
I’m hosting a Holiday Cookie Exchange next Tuesday, Dec.15th. Hope you’ll stop by and join us!
http://afinehouse.blogspot.com
Your tree is beautiful…
Blessings,
Elizabeth
Okay. I’m hooked!!! LOVE LOVE LOVE your tree..and your writing…and your blog in general. I’m excited!
What a great tree. I’m linked above but for some reason there’s an extra .html in the link so I’m going to add it here. http://melissaburford.typepad.com/burford_designs/2009/12/holiday-home-tour.html
Thanks for this tour!
love the tree–it surely looks real!!! I love the fullness of it with your decorations.
Donna, that tree deserves to be on the cover of Country Living!! GIrl, it’s beautiful, I love all the natural elements, gorgeous.
Thanks for joining the party!! Merry Christmas to you.
Fantastic! Just beautiful!
you have sooo inspired me! although, i will still have to be very kid friendly with my tree for a few more years…i love the burlap!!!!
and i so want to do that galvanized bucket for the stand next year too – like in country living.
thanks for allowing me to link up. happy weekend!!!
kellie
You have such wonderful ideas! And this is just gorgeous. I too, when skeptical about something, walk away and come back with fresh eyes. You’re right! Works every single time!
Brenda
Love that you added the red- it is “just enough”! I’ve been loving burlap this year too… was outvoted on the tree but I have an idea for using it elsewhere in our home for Chrismtas… now I just need to wait until the girls and hubs are back to school/work to get it done. 😉
Love your natural tree!
I love your tree and I love all your tips! Wishing you and your family a very Merry Christmas! I can’t wait to check out the rest of your blog! Patti
Hi! I love your tree. It’s so pretty. Merry Christmas.
Beautiful Christmas tree. Great find on those icicles. I would have loved to snag those. 🙂
I love whites and neutrals too! Your decor is just gorgeous! LOVE LOVE LOVE it!
Your tree looks beautiful.
I love the Mickey ornaments!
Merry Christmas!!!
The neutral and white colors are so calm and pleasing. You have some EXCELLENT talent!
I absolutely love the burlap theme! And the ribbon is lovely, ribbon is tough to wind around a Christmas tree- yours is awesome!
You have a beautiful tree! 🙂
Such a pretty tree. I love the use of burlap….as you said, this IS the year for it..
Thanks so much..I am going to run back over to my blog and find my tree post and I’ll come back and link…Thanks!
xo bj