
My mom was fiercely patriotic. I mean, I am too!
But if you were to give me the choice of flying somewhere in Canada or the US, I’ll always pick the US. Probably because you guys have palm trees… Sorry Mom!

But when LONG TIME blogger friend and master sewer Missy from The Little Green Bean on Etsy offered to send me one of her infamous quilted fabric maps, Canadian style, I gasped!
(this is not a compensated sponsored post, just a friend to friend thing)
My first thought? “My mom would be so proud!”
My 2nd, 3rd and 4th thoughts were, oh my goodness… what special thing could I make with it once it arrived?!
Missy first asked me what my colours and tastes of desire were.


I told her I loved coffee, bean sacks, junk, and antique red.
And goodness… did she deliver! To the ultimate T. Aren’t these colours and patterns stunning?! Mind blown.
I was also told the map would arrive with a few wrinkles from shipping, but a quick iron would take care of that. And she was right. They came out with no issue, on the steam setting. Check!


Hey, at least I found my iron!
And then I raced this beauty around the house, visualizing what it could become.
It looked beautiful as a pillow for the sofa! I nearly went for it, but that would have entailed me to find my sewing machine under the stairs first.
Effort range? 10+ x 2 trillion. Forgetaboutit.
But I loved my 2nd option even more… and it was EASY!
That’s when the map whispered… “I need to become a message centre, because maps are kind of a smartish thing… study, pens, pencils… doncha know, eh?”

Done! I happened to have a 24″ x 36″ bulletin board stored in the garage from a recent garage sale, which was the PERFECT fit!
Meow – “Good thing, because you aren’t very good at math…”
You are right, Girly Girl. (Skye really, but we all ruin our cats with silly names, no?)
And I’m also a cheater of sorts. I wanted to do this in such a way that I could use the map for other projects if I changed my mind.
Here’s how I did it…
How to make a quilted fabric Canadian map message centre

1. Pin the map to a 24″ x 36″ bulletin board, (Amazon affiliate link) with frame intact.
2. Flip it over, and staple the top and bottom into place.
3. Using packing tape, grab the edges of the burlap on the short sides, and attach to the back.


Yes, it held awesome!
The edges are beautifully surged together, so you won’t have any fraying issues.
Master sewer, remember?
Missy, could you please come to Canada and sew me some slipcovers?

4. Hold board against the wall, and insert two screws along the top, and two along the bottom. No need to puncture through the board nor burlap. It will stay.
5. Cut two rustic boards to proper length, then screw one directly into the wall, below the map.


Repeat with a board above the map as well.
(click to enlarge photo)

6. To hide the gap between the burlap and the wood, attach another board on top of the first board, overlapping the gap.
Remember that massive old fence wood haul taking up house and home in my driveway for weeks on end? I used those chippy white boards to contrast, and bring out the white of the map.
And I LOOOOVVVEEEE IT!
I fell so much more in love with the map than I ever thought I could.
It’s staged in my photo studio because the light was much better than in my cave of an office this time of year.
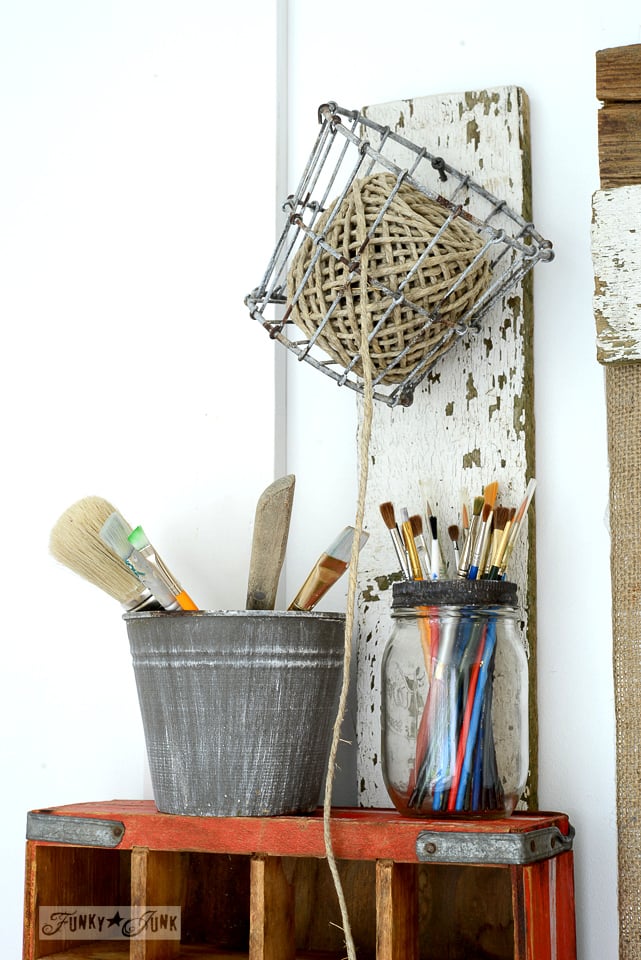
And you know I couldn’t not stage it all cute like, with some cool, repurposed ideas, yes? LOVE this part!
As I was working (playing) away, I really realized how much I love staging things.


It’s easier in my studio, because I can make things become whatever they want to be. A house restricts you moreso because of space and light issues.
I think everyone that creates needs an empty room to play in.
Seriously, it isn’t that hard. Just do without a room (insert hysterical laughter here) that gets great light, and gut it!
You can read more photo studio posts HERE.
I totally need this coke crate turned message centre upstairs pronto!
Sigh… I love Canada even more now.


Ok, Mom, I’m ready for a trip to either Banff, Alberta or the Maritimes! She’d be proud of that too.
![]()
Click to visit:
Little Green Bean on Etsy – infamous quilted fabric maps
Follow Missy’s new creation alerts on Instagram HERE
And see what else she makes and sells on Etsy HERE.
I am so glad there are Missys in the world! Thanks girl, I ADORE MY MAP!
And now my sewing machine can safely sleep for another 10 years… that was close.
Love this Donna…everything about it and especially how visually stunning it looks.
Excellent! When I first started reading I thought “Wow Donna is getting very crafty…” No not the quilting part LOL I love what you did with it! It is perfect on the burlap mixed with all that old chippy wood (which I am very jealous of BTW) … You did a fantastic job on that gorgeous center Donna!
Well, Missy makes it look easy, and very enticing to get sewing! I said the S word… eek. I’m seriously going to start looking around for a new machine. I think one that actually works is a brilliant start.
Thanks Susan!
Gorgeous!
This is a super cool project with PERFET staging!
Gorgeous and what a lovely friend you have! Does she sell these cut outs? Thank you, have a great day!
I’m not sure Elaine, but you could always inquire!
What an awesome idea. Love those fabrics and to put it on burlap…brilliant!:) And the way you used it…double brilliant!
We so love maps…I have a dumb phone so we still use them!!
Thanks for sharing…heading right over to check out her shop…great idea for a present for someone that has everything!:)
Dumb phone… HAHA! I still prefer paper maps when travelling… at least you can see where in the world you are, rather than follow little road by little road. When in Maui, I was always wondering if I’d drive off some lava cliff!
Missy stocks cute, usable fun stuff. I want those stockings next… 😀
Gosh!! Where do I start!! This rocks!! Thanks for the inspiration. This is happening in my sewing space. ♥♥♥♥
Thanks Debbie! Did you see Missy’s sewing / crafting room? Goodness!!!! That’s inspiration enough to get me to have one too, even though I don’t sew. 😀
http://www.thelittlegreenbean.com/2015/01/transformation-tuesday-my-workspace.html
Donna
What a lovely gift and you have re-homed it perfectly.
<3
Pia
Oh my gosh, this fellow Canadian wants one of those maps! Dang, I wish I had known about her Etsy Shop in September because I sent a fellow Canuck friend a quilted map “print” for her birthday. The real thing would have been so much nicer. Love how you purposed your map and staged it, Donna. Heading over to The little Green Bean next.
too cute!! 😀
nicely done, I love it!
Oh, I love this! Both the map (I have a thing for maps) and what you did to decorate it.
Your last couple of posts have made me awfully homesick for BC. Guess I need a road trip.
Kathy
From this Canadian blogger, very very cool. Love what you did with it. We live on the edge of the red Z, close to the Y, on the alphabet fabric that makes up Ontario (funny enough one of our closest airports is Toronto and the code is YYZ.)
Your friend does great work and I like her colour choices.
You really kicked it up a notch though making it into a message
center! I love it.
JAWDROP! I am crushing HARD here…don’t even know what to say besides…WANT! Also, love that Coca-Cola crate turned storage nook…NEED!
K, going to check out Little Green Bean’s Etsy store now! 🙂
Donna,
You are blessed with a cool and generous friend. I like what you did with this map. I hope this is pinnable? because I just recently started to admire burlap, (a little behind the times, I know) so I want to make a board for Burlap Goodies on Pinterest.
Happy Thanksgiving Weekend to you and your son!
Hi Kari-Anne, yes, of course, please pin away! 🙂
Donna, I live in the lower 48 so I have looked at the USA map all my life. It was so cool to see Canada all by itself. I loved to see all the provinces and how far up CANADA goes. wow! Geez I got a craft lesson and a geography all in one cool email. THANKS.
Canada is a hard shape to work with, love it! I love this space, I would just sit and stare–no work, just sitting and coffee drinking here.