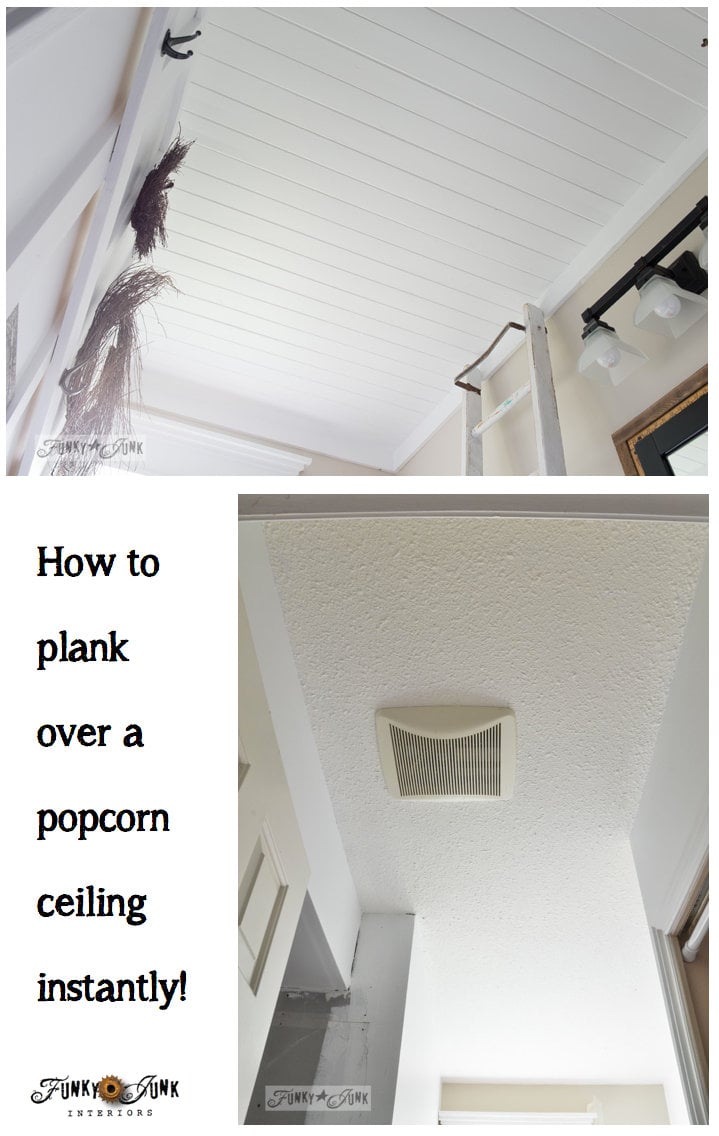
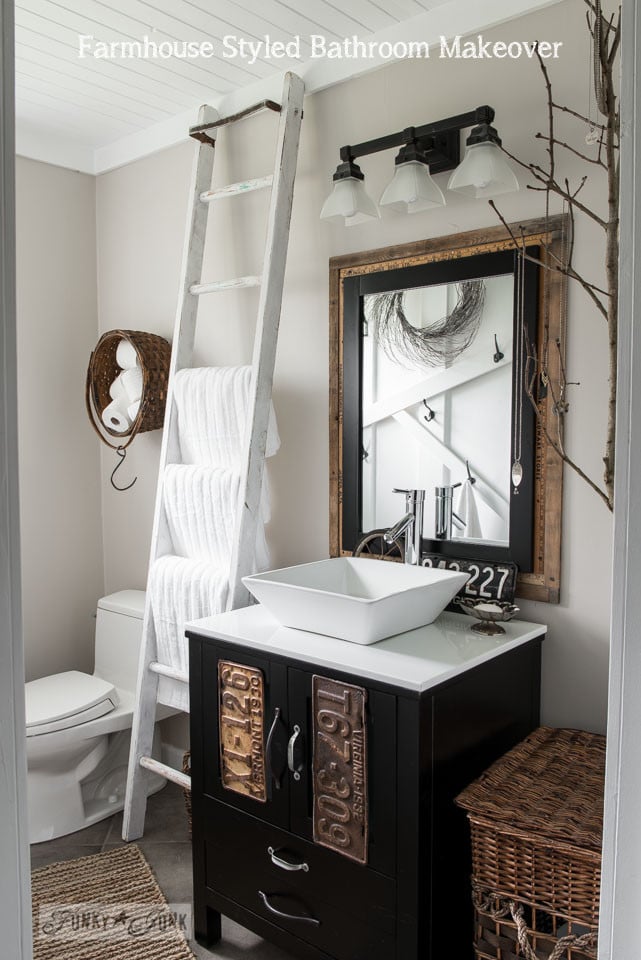
Learn how to transform your outdated popcorn ceiling with beautiful wood ceiling planks with this step-by-step guide. No need to remove the popcorn ceiling first! It’s safe, no mess, ending with instant and timeless farmhouse charm!
As a Fusion and Amazon Influencer, this post contains affiliate links in which I earn a small percentage from qualifying purchases at no extra cost to you. If you shop Fusion Mineral Paint products through this post, you will get 10% off. Thank-you for helping to support my blog!
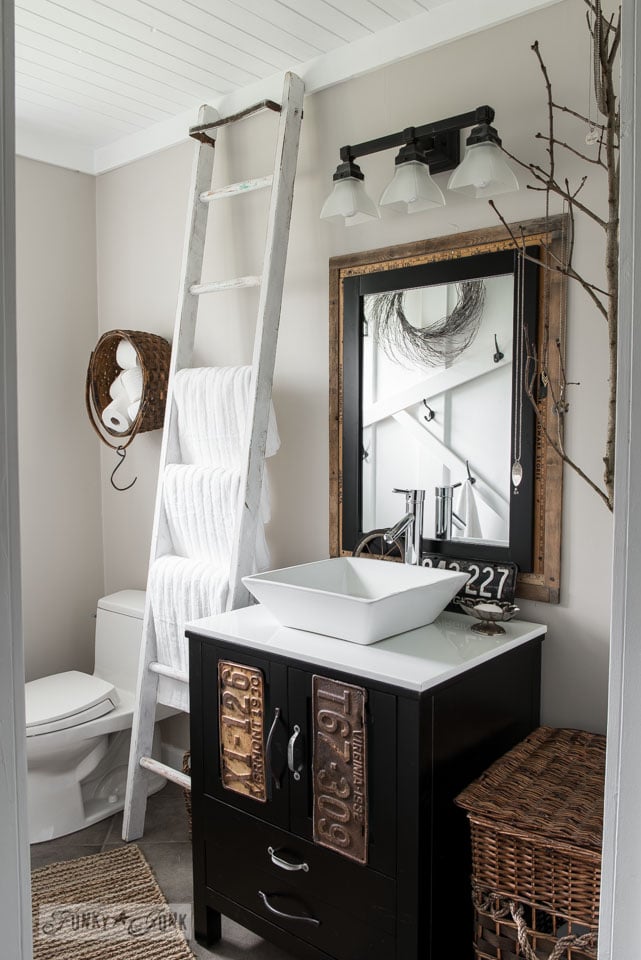
This super cool project is part of my most recent master bathroom makeover.
Take the full salvaged farmhouse bathroom tour HERE
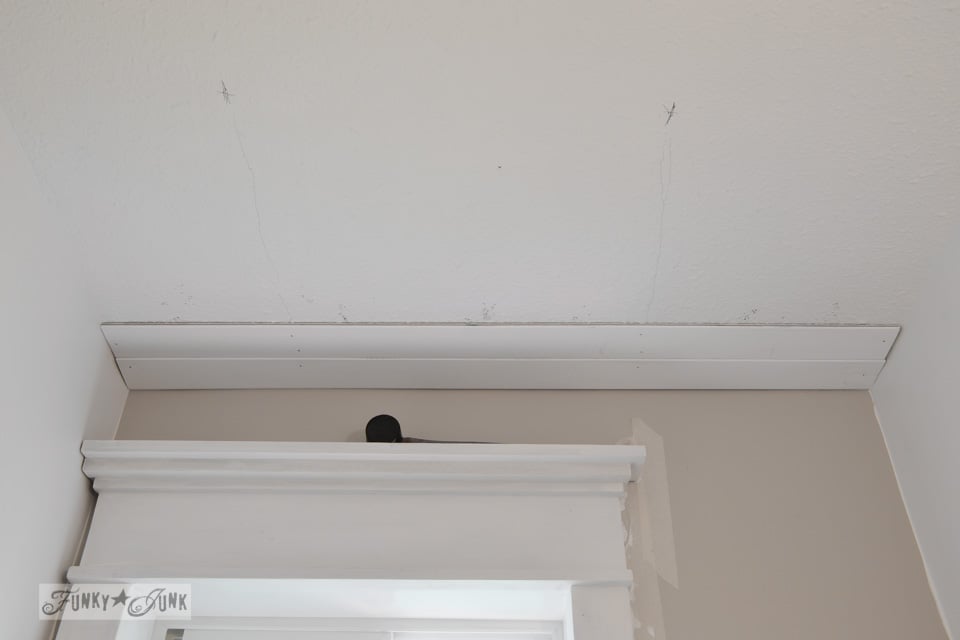
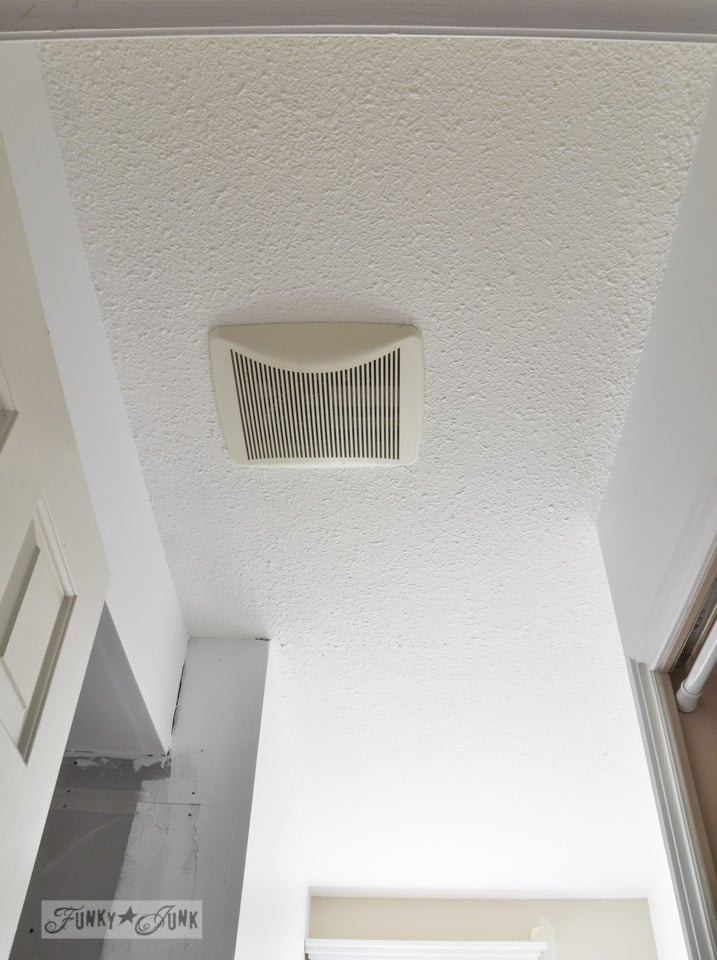
One of the main features in the master bathroom makeover was to add a wood plank ceiling to cover the existing popcorn ceiling.
I’m not a fan of the look of popcorn ceilings. One could of course attempt to remove it, however if popcorn ceilings are already painted, removal can be difficult. Popcorn ceilings can also contain asbestos making removal a possible safety threat.
So I wanted to come up with a safe way to hide the popcorn, without removing it. Adding wood ceiling planks right on top of the popcorn ceiling proved to be the perfect fix! It’s safe, makes little mess, and it’s relatively easy to do!
Why wood ceiling planks?
- relatively easy installation
- lightweight
- adds a sense of warmth and character
- no mess
- looks great in an entire home
- no need to worry about asbestos making it a safe installation
- no need to remove popcorn texture first
Wood ceiling planks offer a crisp, clean, timeless look that never goes out of style! And of course, nothing beats a wood planked ceiling to add more farmhouse charm character while hiding ceiling imperfections!
The main concern was that the boards may have a ripple effect if they went over top of the popcorn. My popcorn texture was minimal, and I’m sure using more of a matte finish paint helps so you don’t see every single imperfection.
However the biggest perk of all? Planking over top of a popcorn ceiling leaves little to no mess! No furniture or floors needed to be covered. In fact, I left my entire rooms perfectly intact.
This is a relatively easy project for homeowner DIYers. However I do recommend starting with a small room first to get the hang of it.
Should you remove popcorn first?
Removing popcorn texture off a drywall ceiling is possible. Popcorn ceilings can be scraped smooth first, then planked over top or repainted if you are going to leave them as just drywall.
However several challenges can come into play with removing popcorn:
- Ensure to test your ceiling for asbestos first.
- Removing popcorn texture is very messy. You’ll need to cover all the floors and furniture.
- Drywall repairs are likely to follow, so be prepared to re-mud and lots of sanding.
- If the popcorn has been painted over, this makes popcorn removal much more challenging if not extra impossible. You may want to hire out help.
- Ensure your popcorn ceiling doesn’t have asbestos in it
Samples of wood ceiling planks installed differently
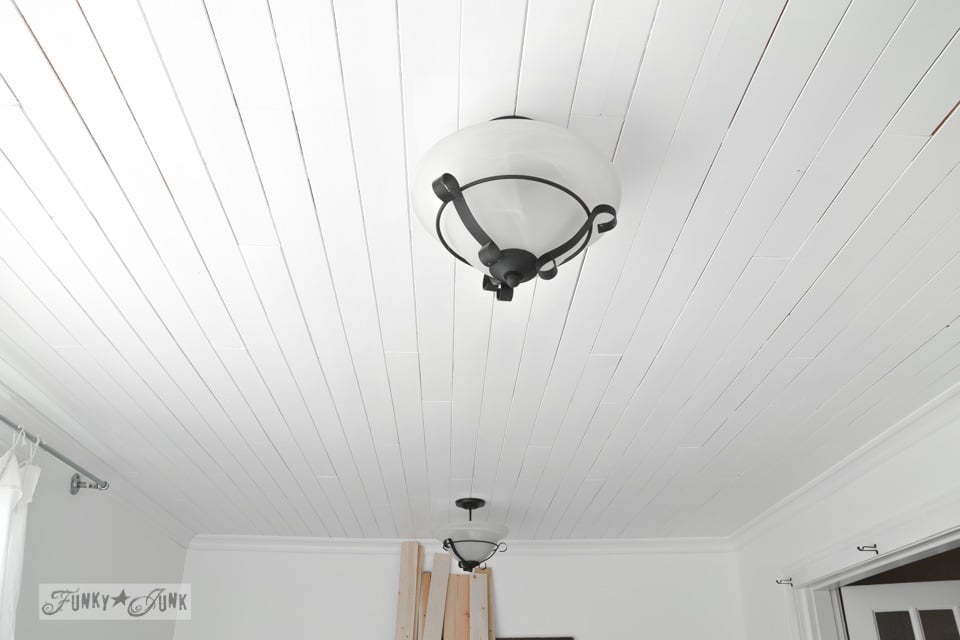
Wood ceiling planks aren’t actually aren’t new to this old house.
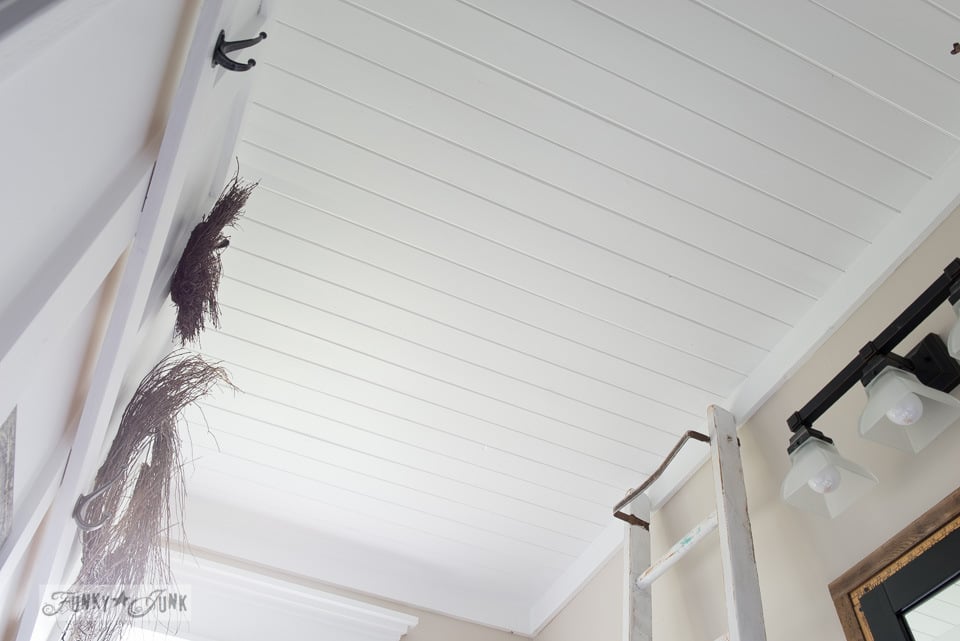
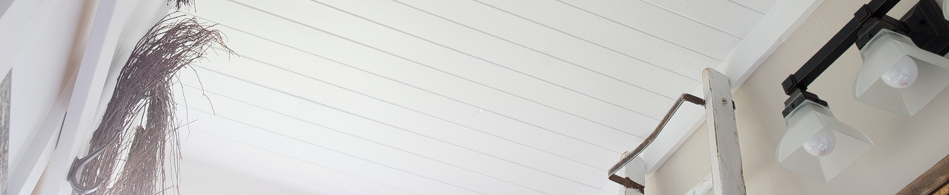
The white planked ceiling above resides downstairs in my photo studio.
When I moved in, there WAS no ceiling, just a jumble of wires. The planks finished it off beautifully! But at the time with no skills, I had the install done for me, then primed and painted the ceiling boards after installation.

However if you look really close, you’ll note some separations in the boards. Boards will likely separate over time so you can choose to caulk the separations and repaint. I personally didn’t bother. It’s still a pretty look, although a little more rustic.
However using this previous installation as a guide to try and do better this round, here’s how I chose to install this next planked ceiling that offered a much cleaner outcome.
And it turned out amazing! So here’s how to cover a popcorn ceiling with wood planks without removing the popcorn first!
How to install wood ceiling planks over a popcorn ceiling, without removing it first!

Supplies I used:

wood ceiling planks – measuring 3.5″ wide
Update: Here are some knotty spruce pine edge v-plank wall boards that would work! that would work!
1 x 4 for the crown moldings
primer and paint
chunk of wood
orbital sander (love my Bosch variable speed)
nail gun and nails (I used 1 ¾”)
aluminum step ladder (with a small platform helps)
hammer and one big nail
room for repainting boards (I like using folding tables)
someone to make dinner for you (I ordered out!)
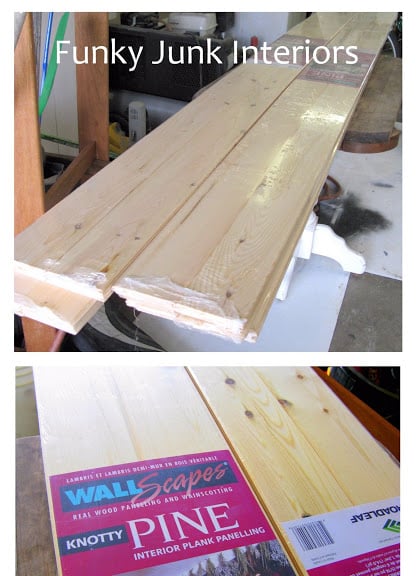
Wood ceiling planks used
I picked up some thin, pine tongue and groove planks in a bundle from Home Depot that measure 3.25″ wide.
Update: Here are some knotty spruce pine edge v-plank wall boards that would work!
This are solid wood planks that appeared to be durable. Although they are on the thinner side, making them easy and safe to install while being a perfectly paintable wood.

Priming bare wood planks
Priming and painting the real wood ceiling planks can be done after installation or before. I’ve done it both ways, and my personal preference that made it so much easier was to paint the wood before installing the planks. Working overhead is just more challenging than painting on a table.
However, you will require lots of space to work. I filled up a room full of planks, then once completed, did another and repeated until all planks were painted.
1. Lay out all the planks you will require, and prime if you are working with bare wood planks. Use a BIN shellac based primer if there are wood knots so they don’t bleed through later.
Be sure to prime each individual tongue and groove as well, however keep the edges super clean by wiping back with a rag, and cutting off any dried drips with an exacto. The edges must be pristine so the boards can be joined.
For quicker coverage, you can roll on the paint, however I would recommend smoothing it out with a quality wide paintbrush so you don’t leave an orange peel texture.
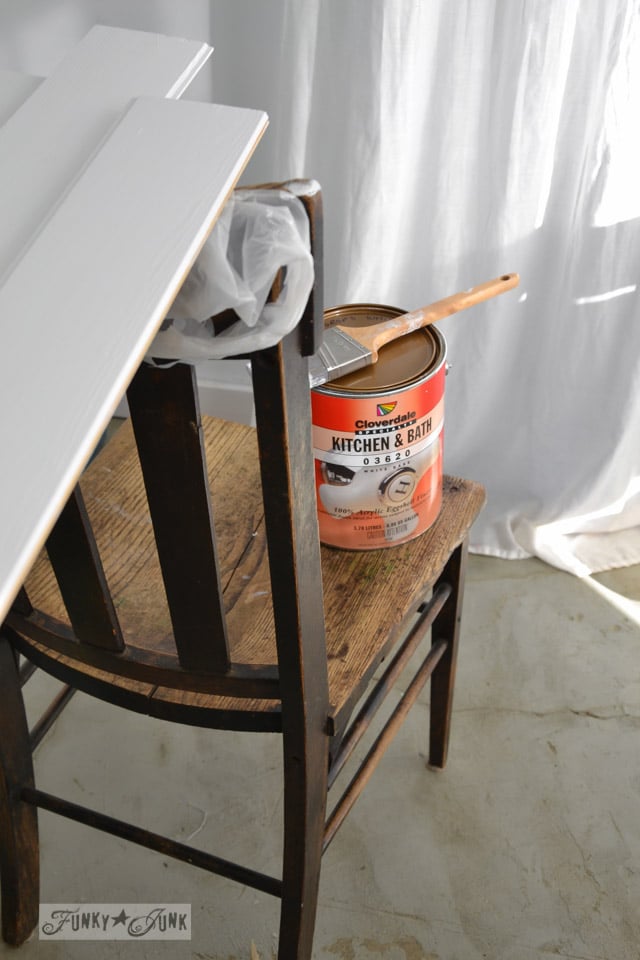
Painting wood planks
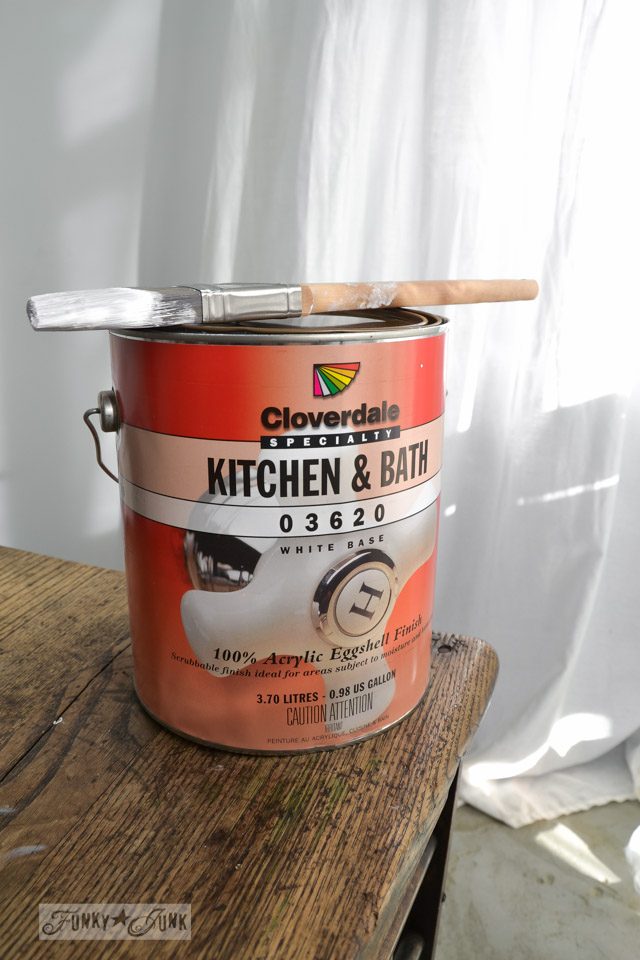
2. Paint the wood planks in a paint of your choosing.
I chose Cloverdale Paint pure white straight out of the can in a Kitchen & Bath quality with an eggshell sheen.
I personally think a wood plank ceiling looks better if it isn’t shiny.
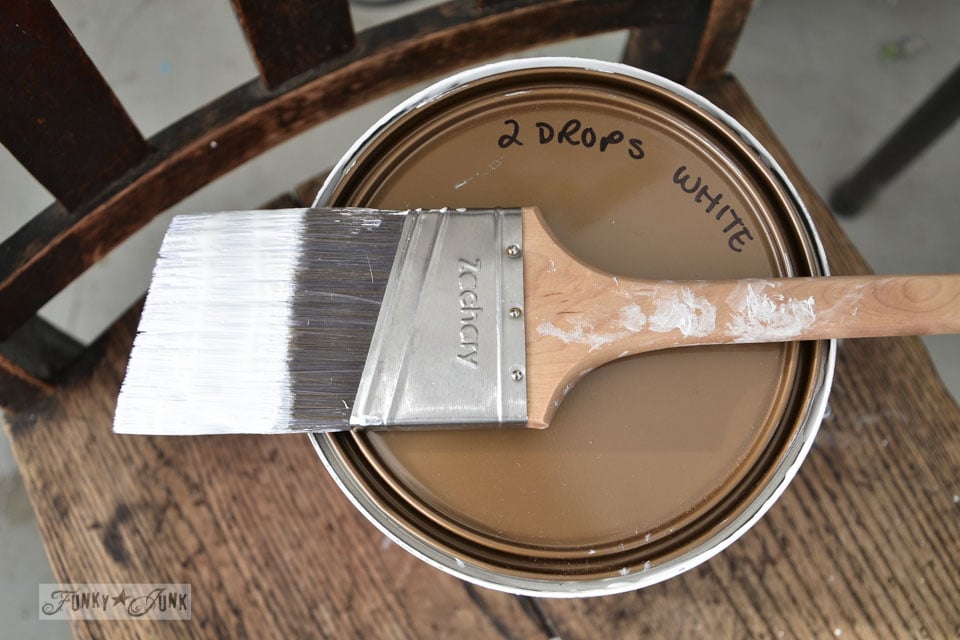
How to get the whitest white paint
I used a tip from Makely School for Girls, called Lindsay White. Lindsay describes it best, but she says if you add extra white to a white paint, will be less transparent and will cover better.
She is right! I’ve been getting paint stores to add more white to white paint for better coverage ever since. I usually request for them to add 2 drops.
Clean all tongue and groove edges until smooth
3. Clean all the edges of the tongue and groove wood planks.
While you paint the wood planks, you’ll likely end up with a little bit of paint buildup where the wood needs to join together.
I run extra swipes with the paint brush along all the edges. Then once the paint is dry, cut away any potential paint drips with an exacto knife. This will save you time when you connect the boards once installed.
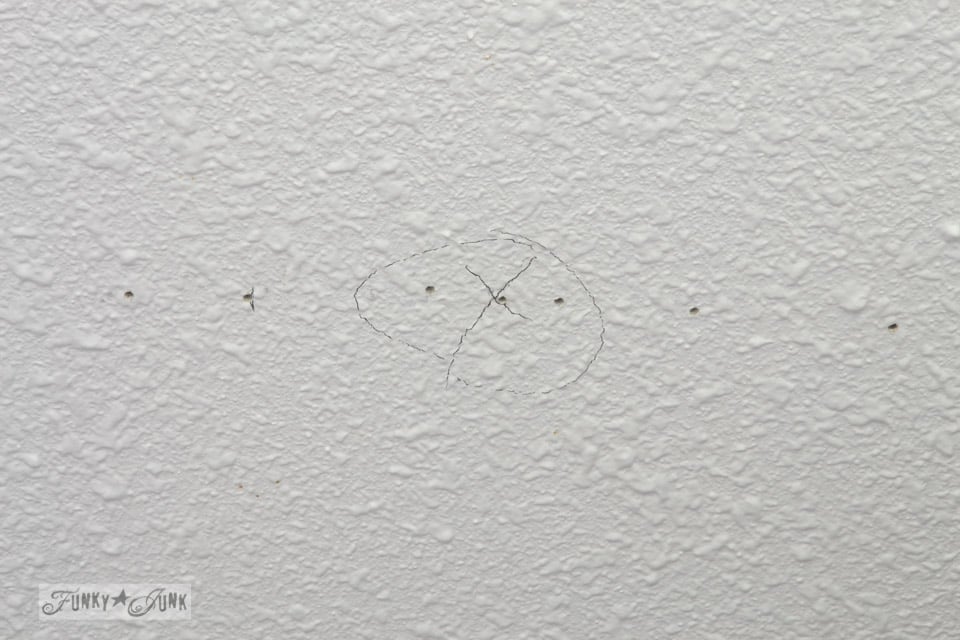
Installation tips: mark ceiling joists
4. Locate, and mark all the ceiling joists.
You’ll need to locate the ceiling joists (and they way they run) so you have something to nail the boards to.
I totally lucked out that the joists ran the opposite way my planks were to go down. If they ran the same direction, I would have either had to add wood strips to the ceiling first, or change my plank direction.
How to check for ceiling joists
Use a stud finder to locate the joists. If this doesn’t work, here’s what I ended up doing:
Pound a big nail into the ceiling with a hammer until you find one. Then measure 12 – 16″ away from it to find the next one.

Attaching the wood ceiling planks
5. Cut boards to right length, then nail into ceiling.
Start the first row by placing the narrow side of the board towards the wall and the slot outwards. Nail in the first plank.
I drew a couple of lines on the ceiling indicating where the studs were located so I knew where to nail.
Also note, I chose to only use planks that ran the entire width of the room to avoid joins. You’ll waste more wood this way, but I plan to use the cut offs for future projects anyway.
If you can’t avoid wood joins, just ensure to stagger them.
Where to nail
.
Place two nails on each joist and one or two nails on each end.
How to join the tongue and groove
Once your first piece is in place, dry-fit your next piece to check for fit. If it won’t willingly slip into place (which 99.9% of them won’t), place a small chunk of wood against the board, then tap the board in place with a rubber mallet.
Some will fit. Some won’t fit. Rather than fight the ones that didn’t, I just nailed them in place as close as possible anyway and continued on, filling them with wood caulk later.
Measure periodically to keep the wood planks squared.

Working around obstacles
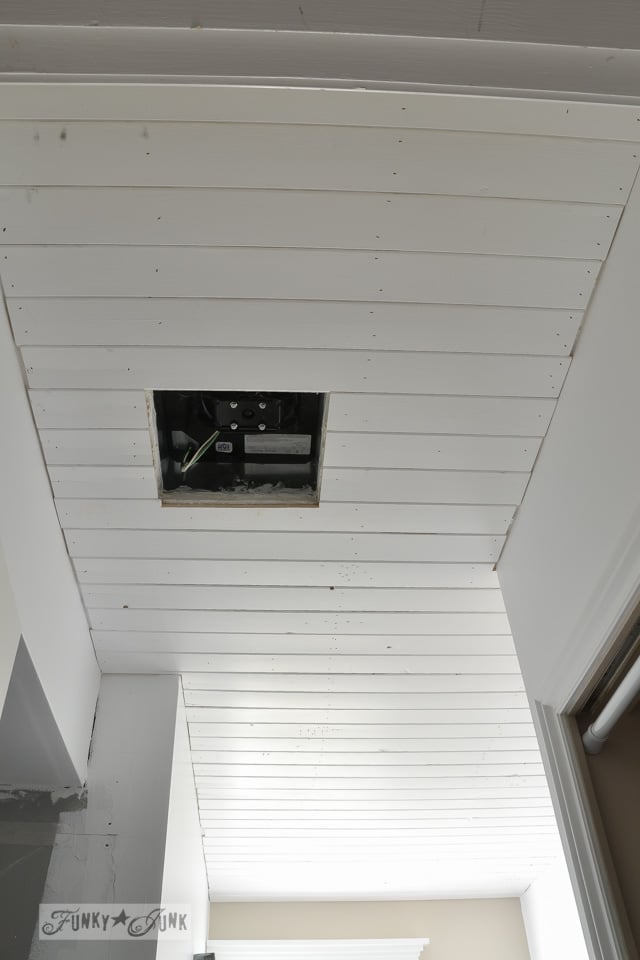
Wall jogs, ceiling fans or light fixtures will likely be in your future.
Measure areas against the walls, then pencil onto your cut to size boards.
To trim, I clamped the wood into a workmate, then cut out shapes with a jigsaw.
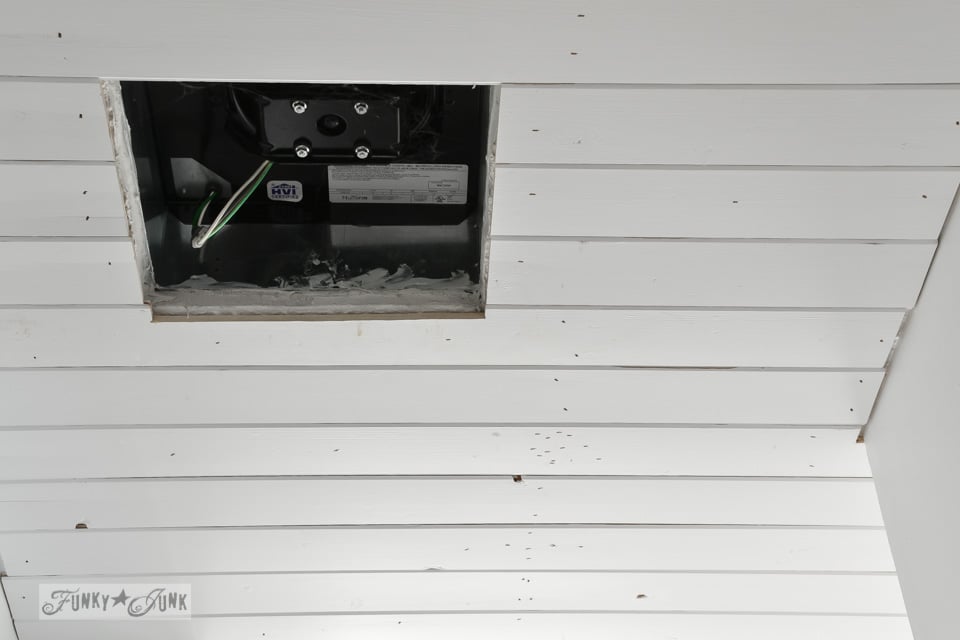
See all those nail holes? Those are times I thought I was missing a joist, but my gun just ran out of nails!
It’s all good. A little humour will help get you through this…


How to fill nail holes and grooves / gaps
6. Fill in holes and cracks with spackling and caulk.
You’re going to be left with some gaps in between wood planks as well as nail holes, so filling them in will improve the finish. Dramatically.
- Fill nail heads with spackle. (I like the featherweight spackling)
- Caulk in between boards wherever there is a gap.
This kind of spackling is ready to use, and easy to spread. It will not shrink, crack or sag, and accepts latest paints with no bleed-through.
- Apply the spackle with a spackle knife.
- Allow to dry.
- Lightly sand.
- Prime, then paint.

How to caulk like a pro
In the areas where the wood planks didn’t quite join perfectly, caulking the joints really cleaned them up and made a dramatic difference over my previous planked ceilings.
Pick up enough tubes to have a plentiful supply along with a good quality caulking gun. You won’t be sorry.
Simply run a bead of caulk where there is a crack, then spot prime, and paint.
Here’s how to caulk like a pro, thanks to being taught from a professional trim contractor:
- cut caulk tube on a very small angle
- apply caulk
- release the gun pressure
- wet your finger with water
- run wet finger along the fresh caulk
- wipe wet rag over top
If you keep your fingers, caulk tip and caulked areas spotless, you’ll have perfect lines and very little clean up afterwards.
After you’re done, insert a nail or screw into the opening so the caulk doesn’t dry out.

Above – nail holes are filled, but caulking between slats is not done yet.
Ignore all the black rubber marks. Rookie move from the nail gun. 🙂
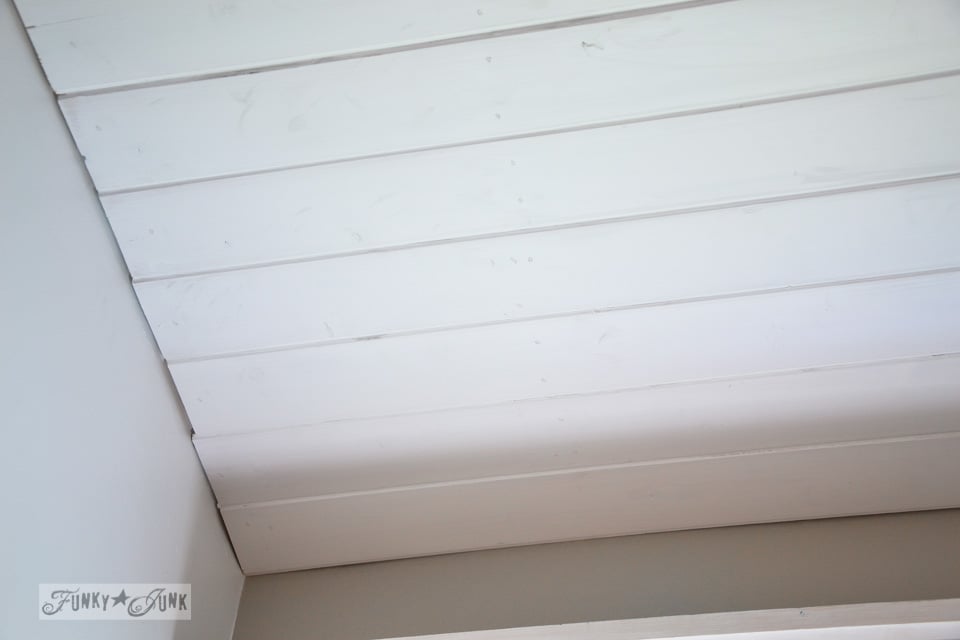
Above – nail holes filled AND caulking done. Ready for touch up paint!
Add a finishing top coat
7. Spot prime, then repaint where needed.
While my own wood planks were pre primed and painted, after the filling you will need to give the works one more coat. But I still find that easier than doing everything once it’s on the ceiling.
I spot-primed over the nail holes with a brush, then rolled the entire ceiling with finishing paint, following with brushing to remove the orange peel texture.
It left quite a beautiful ceiling treatment finish!
Finish off with crown molding
To finish off the ceiling around all the edges, I used 1 x 4s for a simple clean molding. I didn’t even bother to miter the corners. Simply cut them square, position, nail, caulk, then paint.
Other questions:
Are ceiling planks waterproof?
If you are planking a bathroom ceiling in particular, you’ll want to use supplies that offer moisture resistance. Best practices are:
- Be sure to caulk the joins with a waterproof caulk.
- Use a good quality primer and paint / top-coat finishes for moisture-filled areas.
- Ensure the bathroom has exceptional ventilation at all times when using a shower especially. I generally open a window and keep my showers short.
What type of wood is best for ceilings?
I vote for anything that is relatively lightweight, easy to paint, and in smaller pieces so it’s easier to install.
Can you use wood panelling on a ceiling?
It’s actually possible to install anything you wish to a ceiling to achieve a unique look. But just ensure whatever you select is offering you the esthetic you’re after and is easy to work with along with accurate product availability should you want more. From wood paneling, wall planks, bead board, faux wood planks, sheets of faux wood ceiling, cut down plywood or MDF, really, whatever you wish. I just prefer the welcome tradition and natural properties of the wood planks myself.
Will wood ceilings stay in style?
I personally think wood ceilings offer a timeless look that will never go out of style. However if you install them without using glue first, they’d be much easier to uninstall one day should you change your mind.
And that is how I installed DIY wood ceiling planks all by myself!
I am so thrilled with the outcome of this gorgeous planked ceiling! It’s pretty much flawless due to the pre painting and finishing done. Well worth the extra work!
Although any area of your home could have planked ceilings including outdoor patios, I suggest to start with a smaller room to build some experience before tackling a bigger area. Especially if you’re installing a DIY wood plank ceiling solo.
Think you’ll try to plank a ceiling of your own? Which room would you start with?
Other unique bathroom additions to copy:
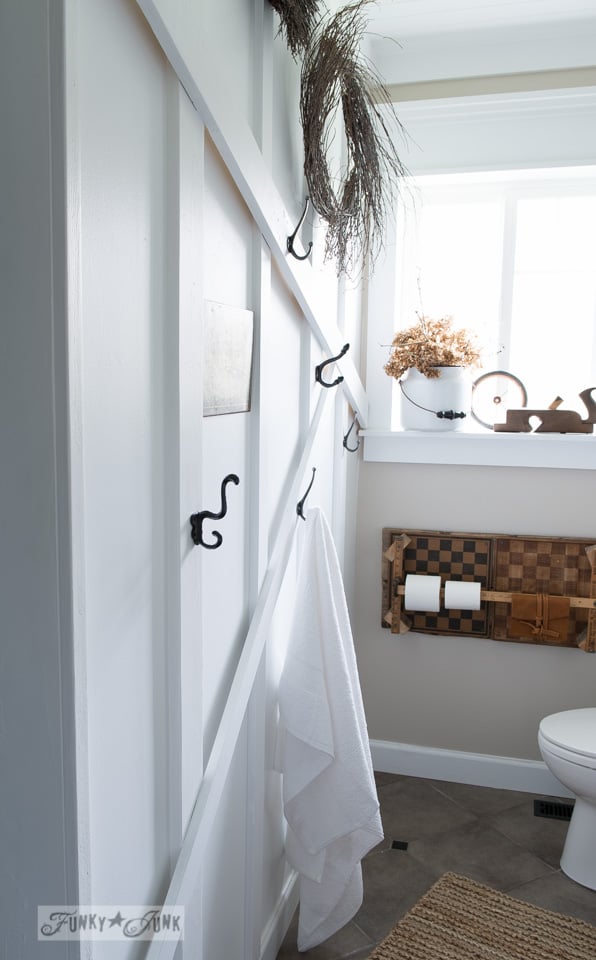
How to create a towel board and batten attic wall HERE
Salvaged Farmhouse Bathroom Makeover HERE
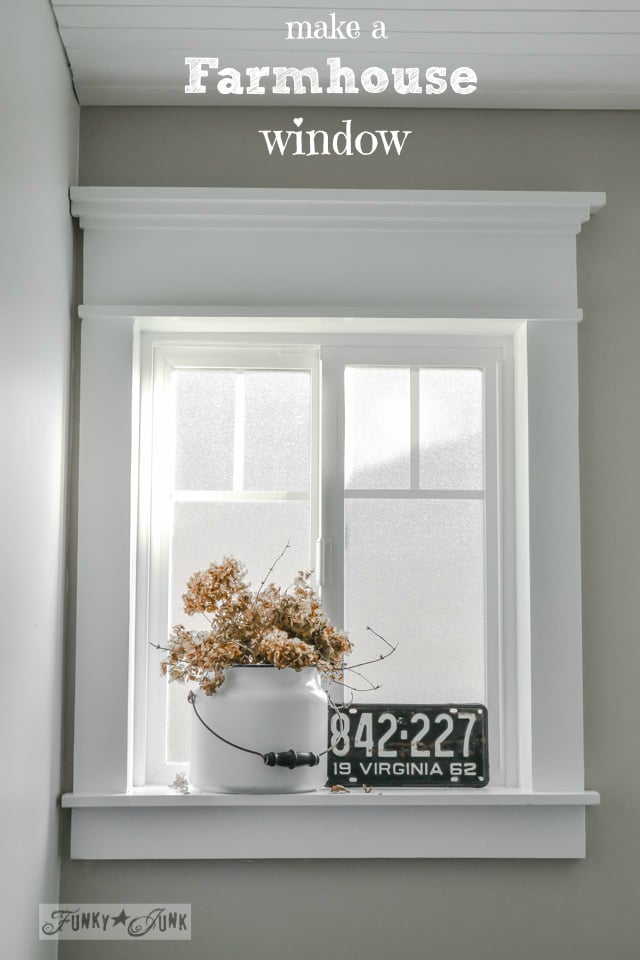
How to make a farmhouse window tutorial HERE
Visit all parts to Master Bathroom 2014 HERE
How to install wood ceiling planks over a popcorn ceiling, without removing it first!
Supplies:
Instructions:
- Measure ceiling area so you know how much wood to purchase.
- Prime, then paint all the boards prior to installation. Make sure tongue and groove board edges are super clean and all paint drips are cut off.
- Mark where the ceiling joists are using a stud finder, or good old fashioned hammer and nail.
- Attach one board at a time with a nail gun, ensuring to use a rubber mallet to pound them tightly together. Periodically check to ensure they are straight.
- After all are installed, caulk all joins to create a super clean look, then spot prime the areas.
- Fill in any nail holes with wood putty.
- Spot prime or add another primer coat if needed.
- Repaint the entire ceiling to finish it off.
Your bathroom looks great and the plank ceiling looks like a wonderful way to do the ceiling.
Denise
Looks great, but what I fell in love with is the toilet paper holder. Genius and makes me smile! (Plus, with room for several rolls you wouldn’t have to change the roll nearly as often.)
It now houses 4 rolls on it.. yes, FOUR. That part is genius I must admit! LOL Thank-you! 🙂
Love the planked ceiling! I just used the same boards and planked my daughters bathroom walls, it took some time but wasn’t difficult and I love the finished results!
YOU are so inspiring. Thanks for the awesome tutorial.
Great tutorial. I love the ceiling, it looks amazing. Hugs, Marty
I just love the new bathroom…awesome! Bead board always looks fabulous…great job.
hi thanks for the tutorial!! you did a great job!
question thou, what is finishing paint? diffidently want to try this one!!
Hi Lori! The paint is shown in the post. I used a white kitchen / bath quality eggshell which looks amazing!
thanks. I was confused.you referred to it as finishing paint. thought it was different from what you had used at the start.(*singing,my bad)hehe
This looks Great! I love that you covered up that popcorn! And most folks don’t do anything to what I call the 5th wall when decorating a room, but I feel it is not done without some sort of application to it. Every room in my home has some sort of treatment done to the ceiling, i.e. beadboard, tin, venetian plaster or different paint color besides white. The ceiling makes the room complete! And that attic wall is so creative, I LOVE it! Awesome job! Love your style! Love your fearless attitude as well! You can do anything! 😉
Cindy @GlassSlipperRestorations.com
I’ve been wanting to do this (to our ugly drop ceilings)for YEARS. You make it look easy! I might just have to give it a go! Thanks for posting!
It is kinda easy, but I’d try a smaller room first. A huge one intimidates me abit! But I’m still going to try it anyway. One day. 🙂
Your bathroom looks great! I love the ladder in there for towels. I have two ladders and would love to use one in a bathroom but there isn’t a good spot it any of my bathrooms for one. They work great to hold quilts and blankets in other rooms though. I love the idea of the planks on the ceiling too, by the way. 🙂
Can I just copy and paste your tutorial on my page for MY series, lol. Ya took the words outta my mouth. ONLY difference with my ceiling were my studs weren’t evenly placed so I was stuck with MANY nails and holes. Oh well, live and learn. And you’re right, a planked ceiling can become addictive. I’m already thinking of planking our kitchen next … whatta job that will be. Yours turned out BEAUTIFULLY!!!
Haha! Well, you can always link to me if you wish! 🙂 Too funny! I think you should post what you did because you had different issues at hand!
Looks great ~ love it!!
Awesome job and tutorial! We’re hoping to plank the kitchen ceiling in our new place. Pinning for later!
Looks so fantastic! What a great (wait, how is your neck feeling?) way to add some character. Thanks for the great tutorial, Donna!
Jeanette
Haha! Well, I think it would have been worse if I hadn’t prepainted the planks. That saved a whole lotta time from my head being cranked in the up position.
So if doing a larger room would you recommend using scaffolding? I would think working on a ladder and above your head would be difficult to hold up the wood and shoot in the nails.
For this short room, it wasn’t too bad. I suppose if one had room for scaffolding, it would be good, but for long planks, it’s my guess you’d need two people regardless. That would be a very BIG scaffold!
Looks great, Donna! I hate to say this but, I would worry that the knots would show through over time without first priming with shellac. Have you had any problems with this in the past? (I have)
Happy to say, none at all Julie! But that’s worthy of a mention for sure! I’ll include the potential in my blog post. Thank-you!
Donna, I have had knots show through a full year later 🙁
Not good! I’m actually referring to my ceiling planks, they’ve been up for 4 years and nothing is amiss. As for the 1 x 4s and wall wood… guess we’ll see what happens… eek. 🙂
Great job on the plank ceiling! Thanks for all the extra little tips-we don’t always think of those! The bathroom transformation is wonderful! Kudos!
You never cease to amaze me. Strength, skill, brains and beauty!
I absolutely LOVE this !! My husband and I have been talking about doing this! I can’t wait to show this to him!! Love Your ideas!!
We have a “old” home in McKinney Tx. and all the original ceilings were tore out over time .. when we bought this house goopy popcorn was what we had.. uuugh.. we bought a ceiling product from armstrong.. it is called Country Plank and it is same as laying wood floors for the ceiling.. it goes up easy it is very light.. & it cuts with a box knife! Check it out! Lowes can special order it.. 10 years ago it was in stock @ the stores as time went by (6 years) as we did room by room it became “special order” only.. still nice to use!
ok. I was totally planning to do this in our bathroom, but it has been met with some hesitation…our bathroom has a shower, and concerns have been raised re: moisture collection between layers even with a fan? I am NOT a diy’r so this is all new territory…anyone have this happen?
In an existing bathroom, they should have already taken precautions against moisture. Especially if it’s newer, it should have moisture-proof sheet rock and taping (we learned this one the hard way). Older houses should still have adequate ventilation. The nice thing about planking is that it allows air to circulate between the planks.
OMG! That pic with the crack fill – WHERE did you get that floor????? distressed black paint on floor planks) Please don’t tell me your house came with it. I want a floor like that in my studio. Did you do it yourself? I’m so jealous!
And I love the ceiling!
Ahhh… sorry to disappoint Paula, that is an old trunk! 🙂
Hi Donna,
This looks great. Do you think this is more or less expensive than having the popcorn removed?
Thank for the inspiration!
Phyllis
Hard to say Phyllis, I haven’t priced out the removal process at all. The ceiling ran me a little over $100 I believe so to me that was very worth it! Regardless, I love the look of planked so I would have chosen that anyway. 🙂
What is the crown moulding??? It looks like its just 1×4 maybe?? Is that all?
Yes, the crown is 1 x 4s! I forgot to add that to the post. Doing it now, thank-you!
My popcorn ceilings are really bumpy. Did you boards lay flat over the popcorn??
Hi Bette! Yes, they did pretty well. If something stuck out too far in the odd area I just cut it down with an exacto knife, but I only had to do that once.
Beautiful job. Where did you get the ceiling light fixture from?
Hey Cindy, it was from Home Depot. They still have them in stock!
I’m still in the convincing stage with hubby. He doesn’t like them but refuses to look at any other solution than hiring a professional to scrape and refinish. I love this so I have something new to show him!
I like it! Thanks for the idea!
beautiful!! I can’t wait too get started on my bath room !!!
Jeannie, you’ll be so amazed at the outcome… I really hope you go for it!
I did the same thing in my bathroom. As the pine has aged though the oil in the wood has started to come through the white paint making yellow stains in the ceiling. I will have to repaint to cover them.
any suggestions on type of paint to use so that this doesn’t happen again.
I used Behr kitchen and bath from home depot.
Oh no Jeannette! I might suggest to use a bonding primer first, then paint to fix it. I used Cloverdale Paint (in Canada) drywall primer, then kitchen and bath satin wall paint, and I’ve had no issues to date.
Wow! I can’t wait to get to Lowe’s!!! I have ALWAYS wanted a plank ceiling. Thanks for the step-by-step directions. I think I can do this!!
hi, love your bathroom… can you tell me what color you used on the walls? it’s a perfect blend of Gray and beige.
Great work and well documented. I’m just starting my bathroom planking, but I have a cathedral ceiling with a skylight to deal with. After seeing this I think I’ll pre-paint.
Thanks, John
We have popcorn ceilings in the family room and two of the bedrooms but the rest of the house has conventional ceilings. I love what you’ve done and I really want to do something with the popcorn but the family room is 36 x 24 and is one continuous ceiling with the hallway. As much as I love what you’ve done, I can’t see myself applying this for days virtually on scaffolding on my back. The master bedroom has a high gabled ceiling so the slope concerns me. I think our only option is to hire it out, but the budget won’t stretch that far for now.
I agree, sounds like hiring out is the way to go. I got my entire home quoted because that is too much for me alone, but the price has me making new friends with the popcorn… groan!
So glad I found this, Donna! Our kitchen had fake beams fixed to the popcorn ceiling. When we took them down we were left with ugly grooves in the popcorn. We wanted to drywall over top of the popcorn but we live in the country and can’t find a drywaller who’ll come out here, and previous experience tells us we’re not the people for the job. But planking we can do! Going to do the bathrooms too, while we’re at it. Thanks for sharing this – you’ve really inspired us!
I love this! I am going to go for it after reading it. Thanks for the humor as well.
Missy
i would love to do my bathroom like that would like too have a try if i get the stuff used to watch my boyfriend do it thanks for the things to try it cannot wait too do it
It worked so well! I hope you get a chance to try it out!