Learn how to build an IKEA trestle desk into a sewing table stained with a cool Restoration Hardware looking finish! Easy to do! Includes assembly instructions and sewing room storage ideas!
I have an exciting new guest bedroom update today!
For months, I envisioned this IKEA trestle desk turned sewing table would be a part of this guest bedroom. And it’s finally happened!
This guest room now hosts a beautiful Ikea trestle desk with a decadent stained Restoration Hardware type of finish with one of the easiest stains to use!
Here’s how I pulled this all together:
This post contains some Amazon affiliate links in which I earn a small percentage from qualifying purchases through these links, at no extra cost to you. Thank-you for helping to support my blog!
Rustic IKEA trestle desk or sewing table
To catch up:
.
Cool Ikea rustic floor to ceiling shelving HERE
Visit the entire room revamp series HERE
I desired this space to house a piece of furniture that could easily double as a desk or sewing table.
Hoping for an upcycled look, I chose the Ikea trestle desk components which emulate two upscale sawhorses for legs.
Very industrial farmhouse cool!

Supplies I used:
.
IKEA has a range of mix and match components so you can customize your own desk.
So I chose two Finnvard trestle desk legs in pine so it was easy to stain in order to create a rustic look to match the antique bed and shelving in the room.
I also picked up a table top from Ikea sized at approx 47″ x 23″. (on Amazon HERE)
Fusion Mineral Paint Stain and Finishing Oil in Golden Pine and Cappuccino

Get all Fusion Mineral Paint products for 10% off HERE

Custom-mixing the stain
However, I desired the bare wood to resemble more of a Restoration Hardware finish. So I set up a little staining station in my photo studio.
How to stain to achieve a Restoration Hardware looking finish:
.
- 1 part Fusion Mineral Paint’s Golden Pine to a little bit of Cappuccino added.
- Stir to mix.
- Test the wood to ensure it’s the look you desire.
- Mix a full batch once you’ve achieved the tone desired.
About Fusion’s Stain and Finishing Oil all-in-one
.
Fusion’s Stain and Finishing Oil is my favorite wood stain to use! While it does have a scent, it’s much less powerful than most stains I’ve ever used.
And it comes complete with a top coat built in!
Plus you can choose your finish! The more coats you add, the more sheen you achieve.
I used one coat on this project to achieve a matte finish and it turned out amazing on this particular wood!
Tip: Stains will look different dependent on the wood it’s going on, so it’s always wise to do a test.

Staining the trestle legs
.
Next, I placed some cedar wood strips across a worktable, so the stained pieces could be elevated off the table, no matter what their size. It worked great!
To keep things neat and tidy, I stained on the mixing table, then brought the pieces to the drying table after they were wiped.

How to stain wood:
.
- Ensure your wood pieces are clean and dust-free. A light sanding with high grit sandpaper is a good idea.
- Brush stain onto your chosen substrate, wait a few minutes, then wipe away excess with a soft clean rag.
- Paint the stain inside any small holes with a paintbrush to achieve an even finish.
Get even more staining tips from the shelving post HERE
Read more staining tips at: All About Fusion Mineral Paint HERE
What a difference! I love the fact that the trestle table legs come as unfinished solid wood, making this a super easy project.

Sanding tips:
.
1. Allow stained wood to dry overnight.
2. Wrap high grit sandpaper around a sanding block, and give it a gentle sand.
The finish turned out butter-smooth!
I have been following this advice my woodworking brother gave me and I will admit it really upped my sanding quality game!

Assembling the trestle legs
Then it was assembly time!
Ikea’s directions are exceptionally easy to follow as they are all pictures and no words.
The trestle table legs went together in a snap! Ikea designers are puzzle experts because their furniture always fits together perfectly.
And the installed look was so professional looking, thanks to staining the pieces before assembly!

By the time I built the 2nd trestle leg, I didn’t even need the directions. It went together in minutes.
These are the little dowels that slipped into pre drilled hole as part of the trestle shelves.
I love how all the pieces looked so good! It really pays to stain before assembling. You get a much nicer professional finish!

The stained and assembled Ikea trestle sawhorse
.
The stained trestle looked amazing! I think it has a home-spun up-cycled sawhorse-look without having to build one from scratch.
Plus the stain finish was so pretty! It really did have a Restoration Hardware vibe to it. And a note of interest, while the stained dried over time, the wood got a little lighter, which was even more perfect.
Adjustable height options
.
Another neat part about these trestle desk base legs is the adjustable top. You can higher the top to counter height, or even angle the top into a leaning-towards-you art table if desired. Kinda cool to have those options.
With the two trestle table legs complete, it was time to team it up with the top in the sewing room.

The assembled IKEA trestle desk
.
Isn’t it pretty?!
This trestle home office desk can be used for most anything! The workmanship of the legs is so nice, with bolts you can tighten up at any time if needed for added stability.
The desk tabletop (approx 47″ x 23″) comes in various finishes, colours and sizes. As luck would have it, this top was the perfect dimensions for this wall space! One more inch larger would not have worked. Crazy, right?
I also chose a white top to bring more lightness to the space, as well as for exceptional photography purposes when sewing a new project.
The top has a little bit of a matte feel to it so it isn’t exactly like a laminate, but pretty close.
Doesn’t it pop perfectly against those stained trestle legs?!
I think the white top and darker stained rustic legs is a beautiful, classic combo that will stand the test of time in ANY room.

Built-in shelves
.
While this trestle computer desk doesn’t have a drawer or two, I do love the fact that the trestle legs have shelving that makes storage very accessible. Placing a wicker basket or crate becomes pretty attractive storage.
Thus far, I hide the sewing pedal cord inside this wicker basket, creating more of a home office look when guests stay over.
So let’s turn this desk into a sewing table!
View more: wicker baskets / rustic crates

Turning the desk into a sewing table
.
With the table finally in place, it was time to bring up all my old high-school days sewing gear.
What a jumbled mess! But I’ll gradually replace old with new sewing thread and pick up a few other sewing supplies for my needs.
It’s going to be so nice to finally find sewing supplies in a well-organized sewing workstation!

Thread sorter
.
I also recently took a super spontaneous trip to Hobby Lobby in the states with my friend Susan.
This beautiful antique-looking galvanized organizer is too perfect for organizing sewing thread and so forth! And fits perfectly on a trestle shelf. Cool!
Isn’t that antique finish to-die-for? Pretty cool for a reproduction! I got it at 50% off too landing at $15 US! Whoop!
However HERE’S some other super cool galvanized metal totes you may like!

Wall decorating with vintage sifters
.
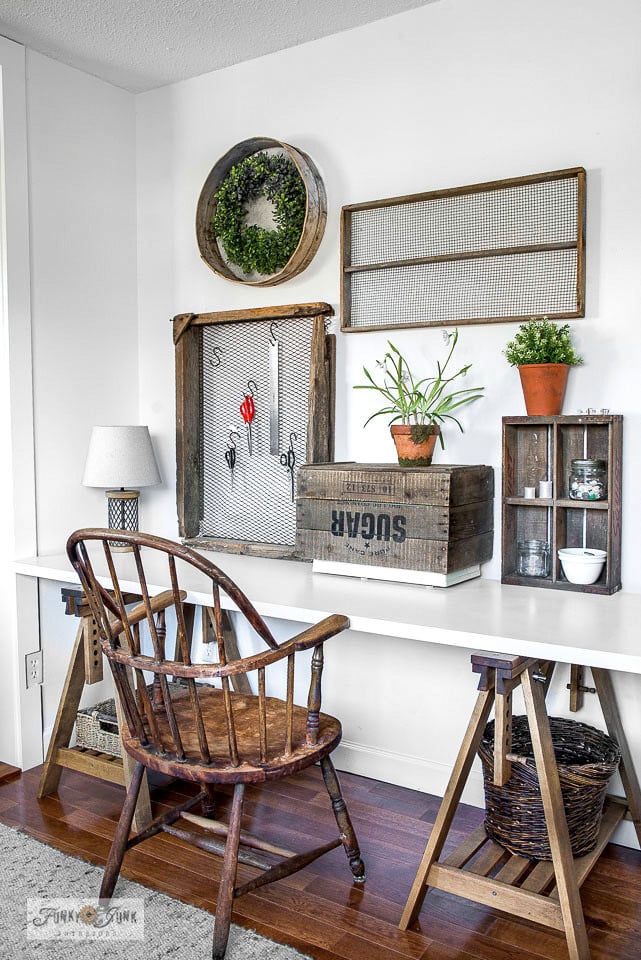
As wall art for the guest room, I visioned this wall showcasing my small collection of antique soil sifters and crates as art and productive organizers for sewing.

The Sugar crate (originally shown HERE) hides the sewing machine (I have plans to make a larger one), and another crate became an instant mini shelf.

Scissors storage on an antique sifter
.
This large wood framed antique soil sifter became the perfect place to hang a few scissors with added S-hooks!
How fun, right?
The cute little caged wire lamp is from Walmart from a couple years ago. It’s perfect with all this other gear.

Before…
.
What was once a plain white wall… (hello pretty new moulding!)

The finished trestle desk turned sewing table!
.
Is now this sewing area that will double as a guest desk!

Update: and HERE’s how I grain sacked a chair to really complete the look of this desk!
I love it. And it looks so pretty too!
.
Above is a short video of the initial Ikea shopping trip and includes some great staining tips!

The rest of the room
.
The other side of the room is also ready! The little antique fold-out table will provide extra sewing surface space, and I’ll eventually ether buy or sew a cover for the antique ironing board. I mean… it IS a sewing room after all… first project perhaps?!
And… another new thing to come. A new curbside find which will greatly help with sewing storage will be placed beside the ironing board.
And I have closet doors to still paint… and crates to make…
Will this project EVER end?!
With any luck, maybe not… 😉
What do you think of the new desk addition?
Other desk ideas to make:
Pallet wood, ladder and sawhorse office desk
Farmhouse DIY Desk made from free scrap wood
Flip top desk made from a coffee table
Office bulletin board and chalkboard
View other unique office projects HERE
Other guest room features you may enjoy:

Visit the antique bed that changed the theme of this room!

Learn how to make rustic Ikea shelving that extends to the ceiling.
Find the entire guest room series HERE
Visit other Ikea furniture posts HERE and Ikea shelving HERE
Oh wow!! I totally love it! Matter of fact I love the whole room! You sure come up with amazing ideas!
Thanks Thelma! I must admit, my own bedroom is starting to look VERY tired in comparison… haha oh boy. Here we go again…
Love it! The trestles look great, and I hope it works well for future sewing projects. The room is coming together beautifully.
Thanks Deb! Yes, the real trial will be when that machine starts to hummm…. best get on that or this is very expensive wall art. haha
As always, you did an amazing job, it looks GREAT!
Thanks DonnaRae, I must admit this room has really started the ball rolling with completely finishing rooms up! Every room I scan needs work. Funny how I didn’t notice that until I started finishing just ONE room… 😀
Donna,
Very nice!
Thanks Nancy! This room appears to be taking forever but maybe that’s normal for full room makeovers? Looks like I required the official practice! 😀
How very nice. The whole room holds together so well, has an uncluttered vibe, and is just lovely. I know you put a lot of thought into this project and the results show it. So nice. Job well done.
Thanks Brenda, you nailed it! I’m pulling a Konmari on myself and ensuring everything has a place this round. It must be possible… maybe if I stop buying stuff too… haha
Appreciate the kudos! This one has been fun!
This room is turning out so nicely! I just love that bed; it is gorgeous. Love the wood, white and black theme you’ve got going.
Thanks Lora! It’s my fav room in the house so far, which I guess means my other rooms need redoing! Does it ever end? Hopefully not…. I think! LOL
Your guest/sewing room is great. It has turned out awesome. Is your decorating style a little like minimalism? I am drawn to it at times, but at others I desire more. And then it’s necessary to edit. Guess I’m learning. Does that ever happen to you? Anyhow, Donna, I really, really like the legs for the sewing table that look like sawhorses. My dad was a carpenter and sawhorses remind me of him. And my sons, boy they would really like it if some of the industrial(that’s what I call it) touches you have could be incorporated more here at home. Thanks for showing us the progress and I eagerly await the rest.
Hey Joanne! Yes, I do feel I have turned towards a more minimalist approach when I compare my earlier days of decorating.
My goal is to have the spaces look quiet, yet still filled with warmth if that makes sense. I do that warmth effect through reclaimed wood. Instant cozy!
You said it best. Decorate, then remove and play around until you are happy. I do this with every single room I decorate! A LOT! To properly refresh a tired room, I gut it except for the main components that will stay (ie sofa or bed), then place stuff back until I’m completely happy.
I also take photography into consideration when I decorate which most wouldn’t have to. I tell ya, that extra step really makes you work at it! haha A good thing I think!
Hi Donna
I love that table, and I’m considering byuing one, but my husband warned me saying that it will rattle and shake and be unstable. Well, is it.
And are the shelves of any use? I was thinking that I could park the serger on one and steam station on the other.
Would appreciate your comments.
Hi Henrik! I use a couple of these sawhorses under a work table in my garage so they get hard use. I find with heavy use, the bolts can use an occasional tightening up which is easy to do. But as a desk, it’s as sturdy as a rock from the day I put it together.
The shelves are absolutely helpful! I park wicker baskets on mind to store things. I think your idea of parking a couple more useful machines is a great one! They would definitely hold that weight.
I was so pleased to find this! I was ready to get rid of my trestle legs given to me for free because they looked clunky and ugly– I also use this table as a sewing table in my small one bedroom apartment and was looking to make it easily convert to a dining table should I ever have guests. This hack will do just the trick to make this nicer and match my decor
Thanks Sandra, and glad you found inspiration through this! The table is now used as a large TV media stand which looks just as good as-is! I love this setup!