
Love antique crocks? Here’s how to DIY any outdoor or indoor plant pot into DIY antique crocks easily with a stencil!
I have a rather large plant pot collection. Terracotta posts in particular are a big favorite of mine, however I’ll also collect various ceramic pots or just anything that looks interesting.
However you may be surprised with all the uses beyond using them to plant small house plants in!
Plant pots are obviously fabulous used as indoor planters, succulents, indoor green houses, displaying artificial flowers in and more, however I rather like using them as storage containers or to organize office supplies.
And while I love plant pots, I’m not always fond of their original finishes or colours.
So I decided to solve that problem by creating a way to turn any ‘ol plant pot into cute and easy DIY antique crock!
Why antique crocks?
.
Once upon a time, I use to collect loads of old crocks of all sizes. The jars came in handy for storing a larger quantity of sugar, flour, onions, potatoes, and more. What’s not to love about a real antique old english croc pot?
Unfortunately, most antique crock pots are so large, I just didn’t have room to collect them any longer. So I eventually sold my collection.
Most recently, when I came across a plastic plant pot at the thrift, to me it resembled an antique crock. And that’s when I got the idea… why not make a stencil so any plant pot can be revamped to resemble a vintage crock?! I couldn’t get to my design computer fast enough!
And then it was like I had this vintage planter awakening. There were oodles of plain cheap pots, containers and vases that begged for some DIY attention!
So I brought the one larger plastic pot home for a whoppin’ $1 along with a few other pots, then gathered up my own orangey terracotta plant pots at home to see what I could come up with…
Not only did the outcome turn out so charming, I now never worry about what a plant pot looks like today… because it’s so easy to revamp them to anything I desire!
So here’s how to revamp ANY flower pot into a charming DIY antique crock pot for plants or to store anything desired!
How unique is it to create your own type of crock?
(This post contains some affiliate links in which I earn a small percentage if you purchase anything through one of my links, at no added cost to you. Thank-you for helping support my blog!
Revamping indoor plant pots into DIY antique crocks!
.

View Vintage Crock Numbers stencil HERE
Antique crock numbers stencil:
.
Vintage Crock Numbers is a stencil that helps you achieve an antique crock pot look on any project desired! Included are numbers from 0 through 9, with charming borders mimicking authentic vintage crock pot number markings!
And they are perfectly sized to fit nearly any plant pot you may come across!
But first, let’s texturize these cute pots making them resemble old world clay, then finally detailing them to turn them into vintage crock wonders!
Be sure to watch the video at the end of this post, sharing loads of invaluable details!

Other supplies I used:
.
Vintage Crock Numbers stencil from HERE
Get any Fusion Mineral Paint product HERE for 10% off
On pots: Fusion’s Algonquin and Champlain
Paint for stenciling: Fusion’s Midnight Blue, Liberty Blue, Chocolate, Coal Black, Ash
Fusion’s Fresco Texturizing powder
(Visit a local Fusion retailer HERE)
Container for mixing
Container of choice: / planting pots / buckets / etc.


How to add texture to plant pots
.
1. Pour 1 part Fresco to 2 parts paint into a mixing dish.
How to mix Fresco texturizing powder
Fresco is a texturizing powder that can be added to any paint. The powder takes on the tone of paint you poured it into, so you don’t even need to paint afterwards unless you desire to.
Once you mix the the powder and paint, it creates a lovely texture that is easy to paint, and is extremely durable for indoor pots and weather-resistant for outdoors for all your outdoor gardening! And the coverage is incredible. It will literally hide anything under it.
I personally can’t attest how it is mixed with any other paint than Fusion Mineral Paint though. Which of course, was formulated to work together.
2. Mix Fresco with the paint well until all the powder has had contact.
You have some choices with this one. If you desire LOTS of texture, add more powder! If less, add more paint.
You can mix with a stirring stick or spoon, however I generally find mixing it with the brush to be adequate, as well as it loads the brush with paint as well.

Above: Algonquin mixed with Fresco – plant pot above is from IKEA
3. Paint small plant pots with the mixture until you achieve your desired coverage.
The coverage will be dependent on what the pot is made of, the design you are covering, and the tone of paint you choose.
I personally found the coverage exceptional with one coat.
And while any paint tone will work, choose paint tones that mimic real antique crocks to get more of an authentic look.
Don’t you think this paint tone takes on the look of a real clay crock?!


Above: Champlain mixed with Fresco
4. Add more coats if you desire more texture.
Wait for the paint mixture to dry first, then add another coat or two to layer on the texture.
Different painting techniques to try
- Stippling
- Cross-hatching
- Back and forth
- Up and down
5. Paint inside the pots.
If you will use the plant pots for real greenery, flowers, plants or perhaps air plants, I might suggest to paint a few inches down inside the pot rim so they look nice as well as weather well when it comes into contact with soil and to drain water. Too much water may be hard on the paint.
However if used for home decor, I vote to paint the entire inside of the pot.
And now that your plant pots look absolutely adorable with all that delicious antique crock colour and texture, let’s add crock numbers next!

Above: Champlain pot / Chocolate #7 and rim
Stencils: Vintage Crock Numbers HERE
Stenciling Vintage Crock Numbers
.
6. Decide which Vintage Crock Number will go on which pot, and in what colour.
Look at authentic antique crocks and note their tones together. Try a few authentic and perhaps a few colour combinations of your own to suit your home decor!
7. Hold the stencil in place with one hand, then tap the paint through the stencil with a very dry-to-the-touch stencil brush to achieve a somewhat faded stamped look.
Now we are getting that cool vintage crock numbered planter vibe!
More on how to stencil:
.
- Load stencil brush with paint
- Unload most paint onto a rag
- Test the tip to ensure it feels dry and try on a sample piece first
- Tap or swirl your brush to stencil the images
Learn much more about how to stencil and my fav supplies in THIS POST.


Above: Champlain pot / Liberty Blue with Grain Sack Stripe G5L / Ash No. 6 and on rim
Stencil: Grain Sack Stripes HERE
Stencils: Vintage Crock Numbers HERE
Additional details to add
.
8. Enhance with other details such as paint splattering, rim colour, Grain Sack Stripes, plus! Here’s a few to try:
- To detail the pot rims, drag the brush along the top in a contrasting colour.
- Add paint splatters for more ‘grit’, flick the wet paint brush onto the pot to create splatters. (shown how in video below this post)
- You can also paint over the graphics and start over if you add too much using the same base paint. So easy to fix or change!
- Add Grain Sack Stripes found HERE (shown how in video below this post)
- Distress your stenciling by lightly dragging a brush over top of the graphics with the base colour.
- Stain or glaze the painted pots for added depth if desired.
- Change your mind? Simply replaint over to start over with your base paint! Easy!
- Stencil on vent or drainage holes with this unique VENT HOLES stencil
View many of these techniques in the video below this post.

Above: Fort York Red pot painted over with Champlain, Algonquin both mixed with Fresco / stenciled and dry-brushed with Liberty Blue.
Stencils: Vintage Crock Numbers HERE
While I did intentionally paint the pot in two colours, the chipping was a happy accident! Here’s how to create this look:
How to achieve a chippy 2-toned pot
.
- Paint pot a base colour first. (in this case, red)
- Add a paint resist, such as Furniture Wax to areas of the pot.
- Paint over pot with two tones of Fresco powdered paint.
- Before the paint is completely cured, lay sticky tape over the pots, then pull away to create chips and chunks.
Fun, right?!
And now to put this fabulous newly painted and stenciled vintage crock numbered planter group to work!
Here’s how they turned out!

The finished vintage crock numbered planters
.
Aren’t the new and improved Vintage Crock Numbered plant pots just adorable?
I ended up stenciling numbers on some painted plant pots while leaving others in their natural state.
They all look equally fabulous!
Have a favorite plant pot in this group that offers you inspiration?

See the tan crock pot on the far right with the cute #4? That’s the $1 plastic pot I didn’t even bother painting over! Talk about instant antique crock charm, huh?

The #6 pot on the far left was still filled with old grit. Perfect! It wasn’t even washed before stenciling on the antique crock number.
It’s pretty amazing what a big difference a simple, quaint number makes!
Each pot has such a personality that you get to decide on.

Authentic antique tips
Here are two old weathered terracotta plant pots I didn’t paint prior. And they are completely and utterly adorable! So don’t be too quick to paint everything… perhaps try them natural first!
And keep in mind to use a really light hand with the antique crock pot markings, so they look as weathered as the pot itself.

So many cute pots! I can’t wait to sprinkle them around the house and put them to work holding either fresh cut flowers, planted herbs, flowers or plants, or for home decor holding pencils by the phone, etc!
Now that’s a collection of crocks I can use… and store!
What would you use them for?

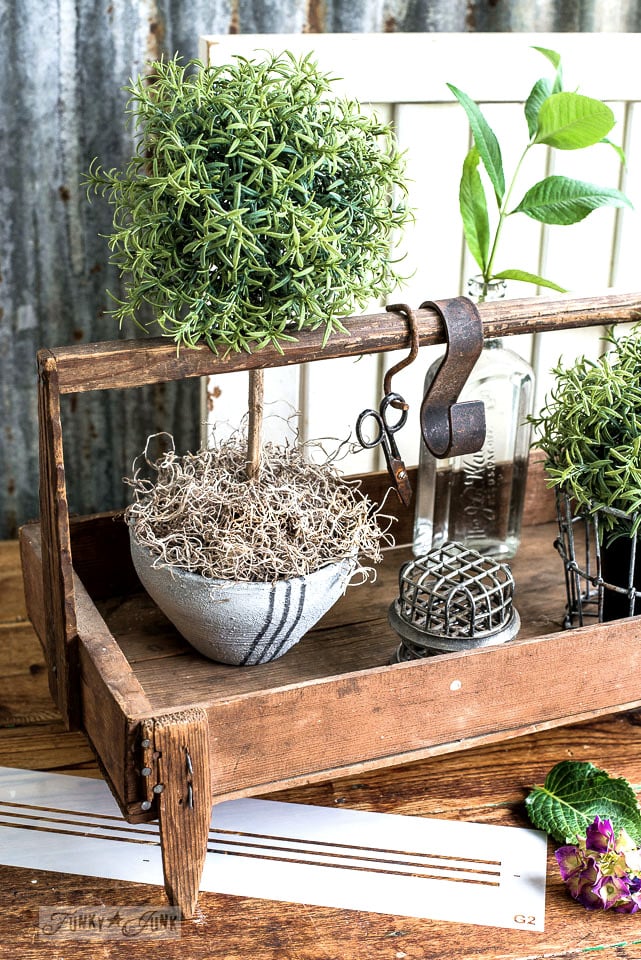
Oh, I have to tell you about that rusty orb! My neighbour Hank who helped me build my reclaimed wood garden fence HERE made those and gave me a handful! So you’ll be seeing them pop up here and there! How cool right?

And finally… a use for my rusty toolboxes! Enhance them with a little hemp oil and have them work at arranging your new plant pots!
Read How I Enhance Old Metal in THIS post.
Video – Revamping indoor plant pots into DIY antique crocks!
.
.
Click above to watch a video tutorial on working with Fresco with loads of finishing touch details!

So from standard terracotta clay orange… or whatever other colour you want to avoid…
Check out loads of terra cotta pots to choose from on Amazon HERE
… to this indoor plant pots antique goodness! Aren’t the softer hues just adorable?
So don’t overlook those ugly plant pots you find or might have… pick up your ceramic or outdated copper planters and a paintbrush, and make them into what you wish instead!
Think you’ll be enhancing a few indoor plant pots of your own this summer with some of these ideas? How would you do yours up?
View Vintage Crock Numbers stencil from HERE
Other related posts you may enjoy:
How I created a cement-looking flower pot (with Fresco again!)
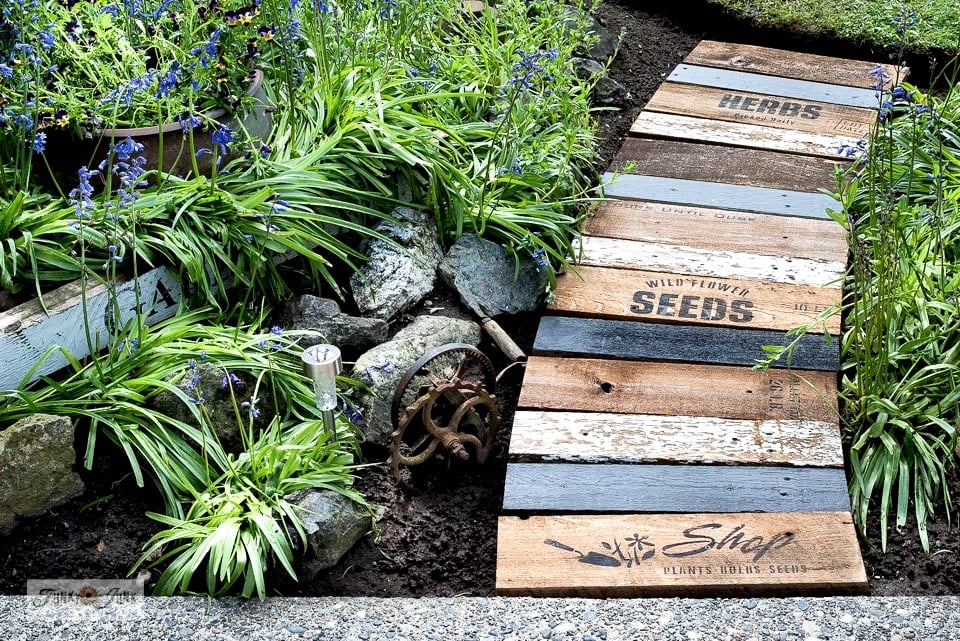
Make a garden-themed scrap wood walkway
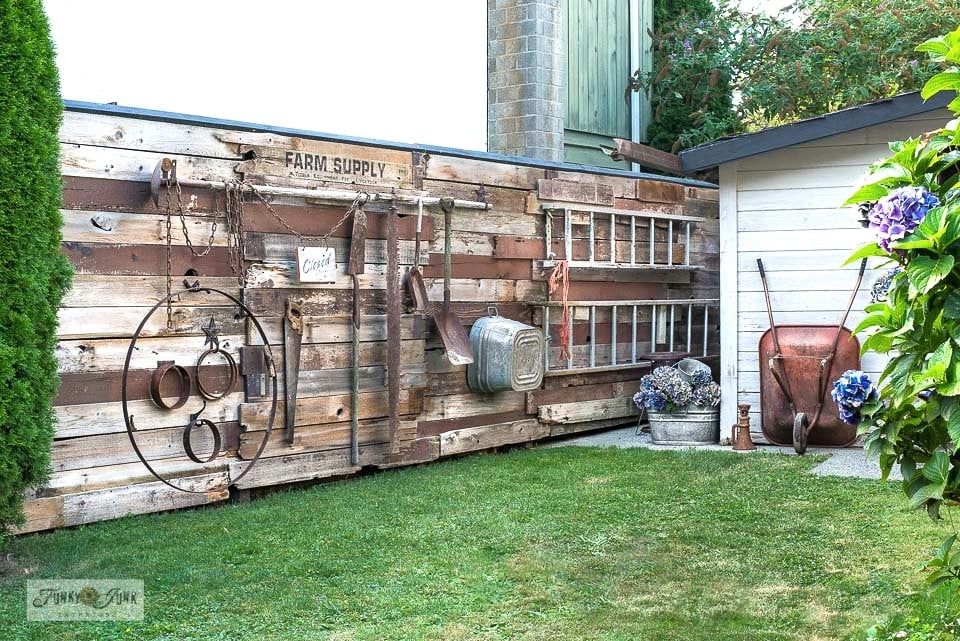
How to make a reclaimed wood fence
Visit other stenciled projects HERE
Check out all my other OUTDOOR and GARDEN projects
![]()
Click above to visit all our stencils in-store!
I just couldn’t love this project more! Sometimes the simplest ides can make the biggest impact. I can’t wait to give this a whirl!
But first, I need to buy some Fresco.
Another brilliant idea Donna!
Thank-you Kim! Glad you get my vintage ways! haha
Well you know I love the stencils, but how about that fresco treatment too!!! You are always so full of ideas, and I happen to have some of the Fusion Fresco and tons of crocky pots.
Yeah, that Fresco is pretty cool! I’ll be waiting to see what you come up with yours!
Donna,
I agree with Kim. What a great idea. Love the rusted orb also. Does Hank sell any?
Thanks Nancy! No, Hank doesn’t sell the orbs but he certainly could! They are beyond adorable!
oh my gosh Donna … these vintage pots you’ve done up are so amazing ! Thank you so very much for sharing all of these great ideas with us … it is just so much fun to be following along with you. Have yourself a wonderful day!
Jayne
That’s just so cool Donna and they look like the real thing too. Definitely something I would spend a pretty penny on.
Love the pots, it amazing how just stencilling a number on them can make them so cool.
Love this project! Just wondering if this type of paint will withstand the outdoor elements.
Thanks Janet! Fusion is good for outdoors but I’m uncertain about Fresco. I’d think the paint would protect it! I’ll try and find out though.
I love this idea and your pots are so cute! Pinned
Wow! These are awesome! I Love this idea. I have lots of plants that could use some new pots. Definitely putting this stencil on my list. Thank you for the tutorial!