
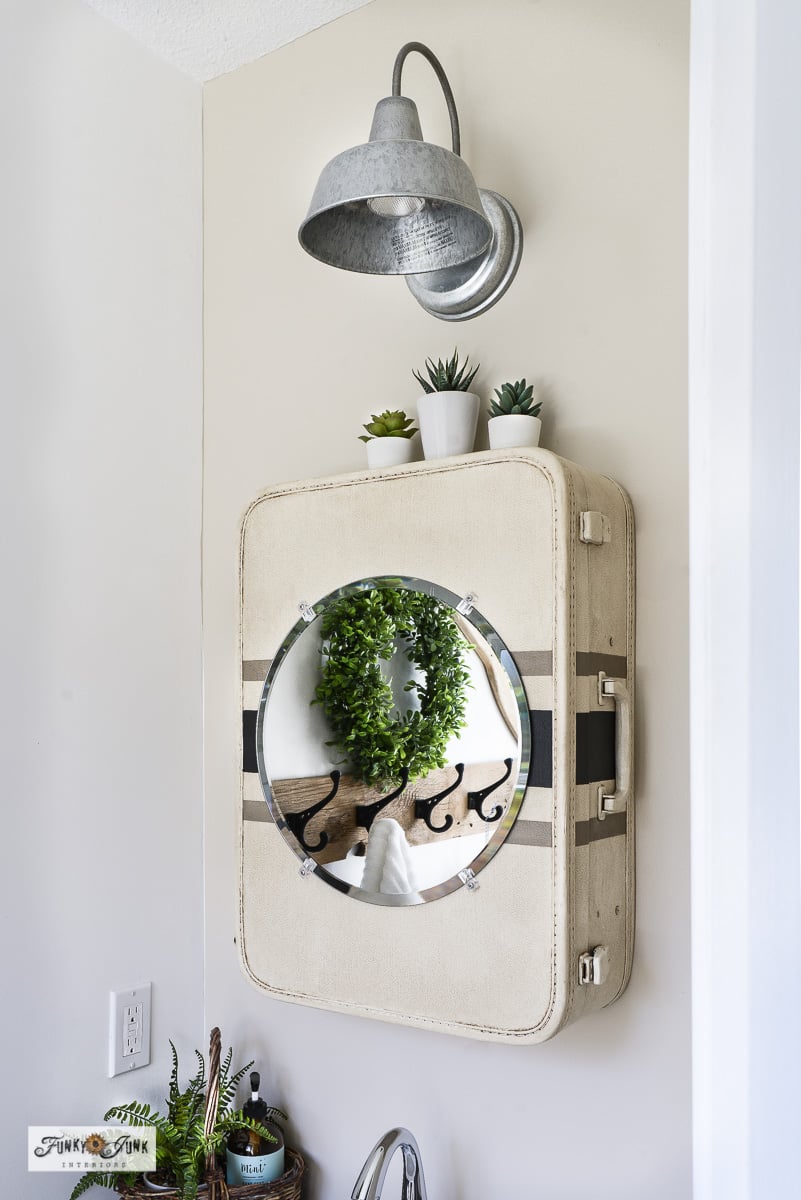
Transform a plain vintage suitcase into a stylish and functional medicine cabinet complete with shelves, mirror and hooks: perfect for adding rustic flair with organized storage to any space!
As a Fusion and Amazon Influencer, this post contains affiliate links in which I earn a small percentage from qualifying purchases at no extra cost to you. If you shop Fusion Mineral Paint products through this post, you will get 10% off. Thank-you for helping to support my blog!
Be sure to also check out today’s newest Upcycle Ideas 849 HERE, to see other brand new upcycles others have made too!
Welcome to the smallest ensuite in the universe…
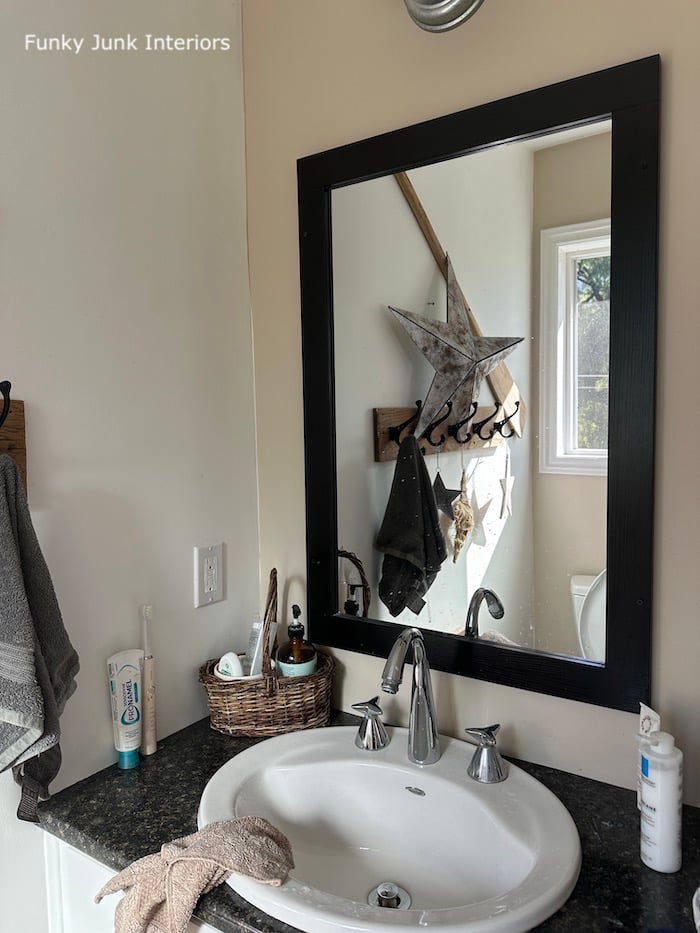
Ensuite – before
My ensuite hosts a tiny vanity that hugs the wall on 3 sides, across from a window behind the toilet, and that’s about it. It’s so small, I can’t even fit it in one picture! So as you can imagine, the countertop gets very cluttered in an instant! And it’s very inconvenient to bend over and stuff everything behind the vanity doors which gets equally jammed with too much stuff.
An actual medicine cabinet has been on my mind, but I’ve never really fallen in love with any I saw. They all felt too modern and sleek, which is not my vibe. So I just did without.
Until… I came up with a way to make my own DIY medicine cabinet from a vintage suitcase… in my rustic style! OH YES I DID!
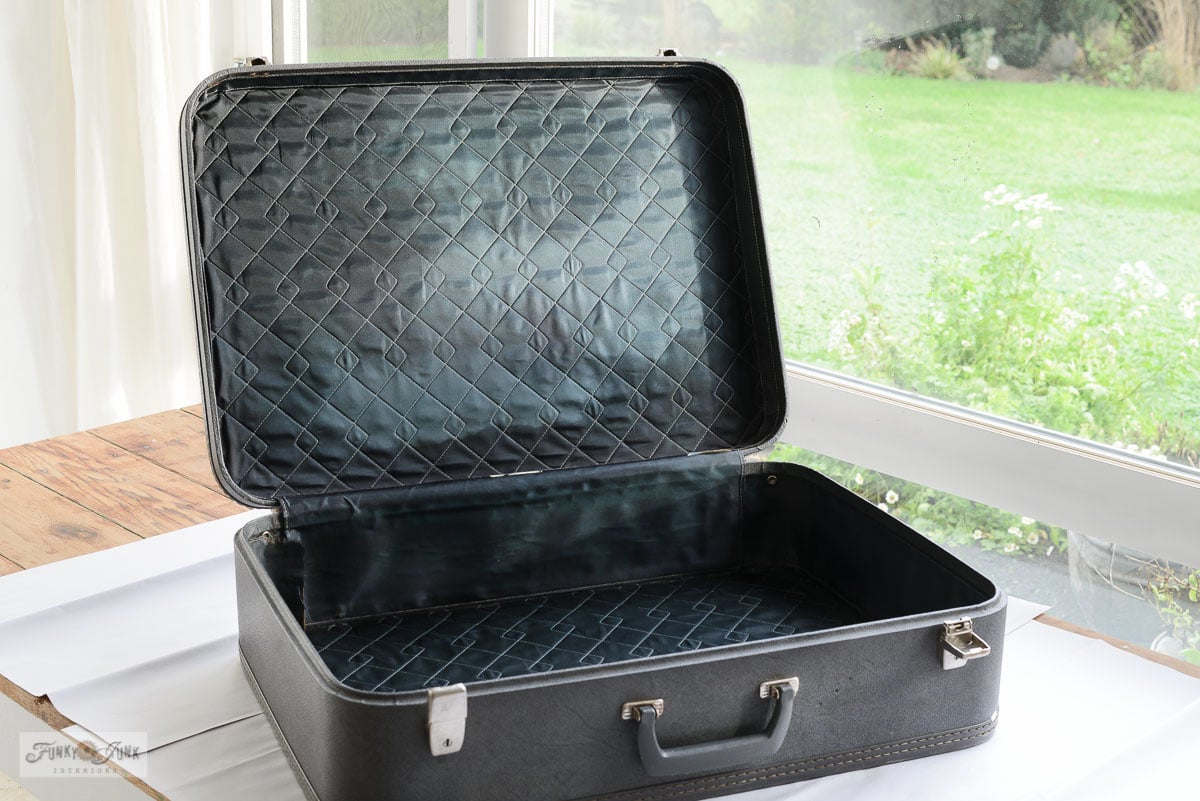
Vintage suitcase – before
This one piece of vintage luggage started in a drab deep grey-blue tone, which was found at Value Village not that long ago for $6. I don’t often come across hard sided old suitcases there, so this was a very lucky find!

Read Part 1: Vintage Suitcase Writing Station HERE
It was then revamped into a mini entry writing station you can see finished HERE! This post includes it being painted and striped, then decked out with the rest. VERY cute and fun project!
However, the need for a medicine cabinet was NOW. So I reworked what was already done, and re-upcycled my upcycled vintage suitcase to something even better this round!
So here’s how I flipped a vintage suitcase into a medicine cabinet that not only turned out SO cool, it holds everything I need right at eye level with NO clutter to be seen! In a look that works for me!
Here’s what I did:
Part 2 – Vintage suitcase medicine cabinet
Supplies I used:
Vintage suitcase with flat sides
Small round mirrors (or any mirror that fits on the lid)
Short mirror hardware screws ( kit screws are too long)
Fusion Mineral Paint in Cast Iron (get 10% off)
Fusion’s Decoupage and Transfer Gel (get 10% off) or Mod Podge
Fusion Mineral Paint’s Antiquing Glaze (get 10% off)
Paint brushes
Rags
Burlap (choose high density for a tighter weave)
Wood planks for shelves
Cedar strips or wood lath
Fusion Mineral Paint in Cast Iron (get 10% off)
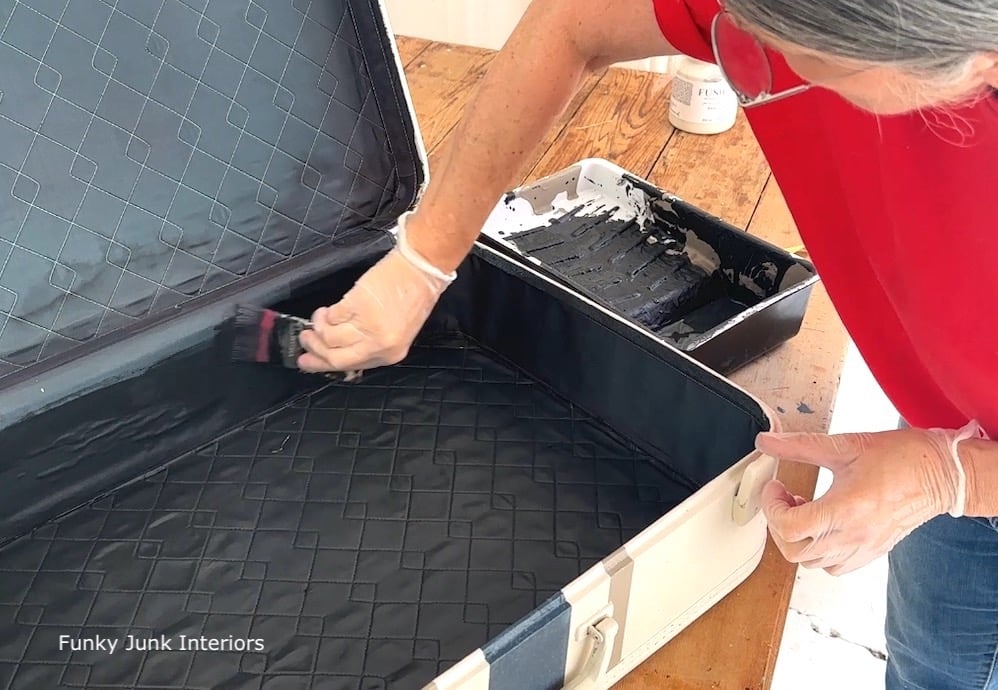
Painting the inside of the vintage suitcase
1. Paint the interior of the suitcase in Fusion’s Cast Iron.
Since the fabric was in great shape, I gave it a good wipe, then painted it using a small paint brush in Fusion Mineral Paint’s Cast Iron. And honestly, you can’t even tell it’s painted! You just see this crisp black-like tone as if it was already like that. This fabric painted up like an absolute dream!
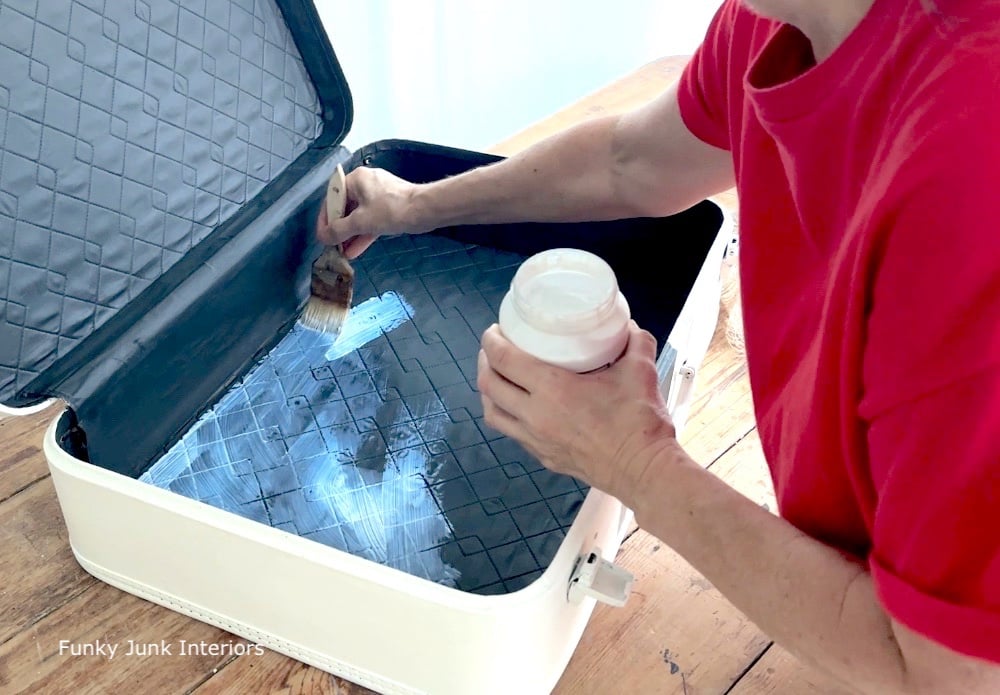
Fusion’s Decoupage and Transfer Gel (get 10% off)
Applying Transfer Gel to the bottom liner
2. Paint the inside of the bottom with a thick coat of Mod Podge or Fusion’s Decoupage and Transfer Gel.
This product is very similar to Mod Podge, which can glue fabric and dries clear.
Because my plan was to cover the back of the cabinet with burlap,I painted a heavy coat of transfer gel to the bottom of the suitcase, but not up the sides.
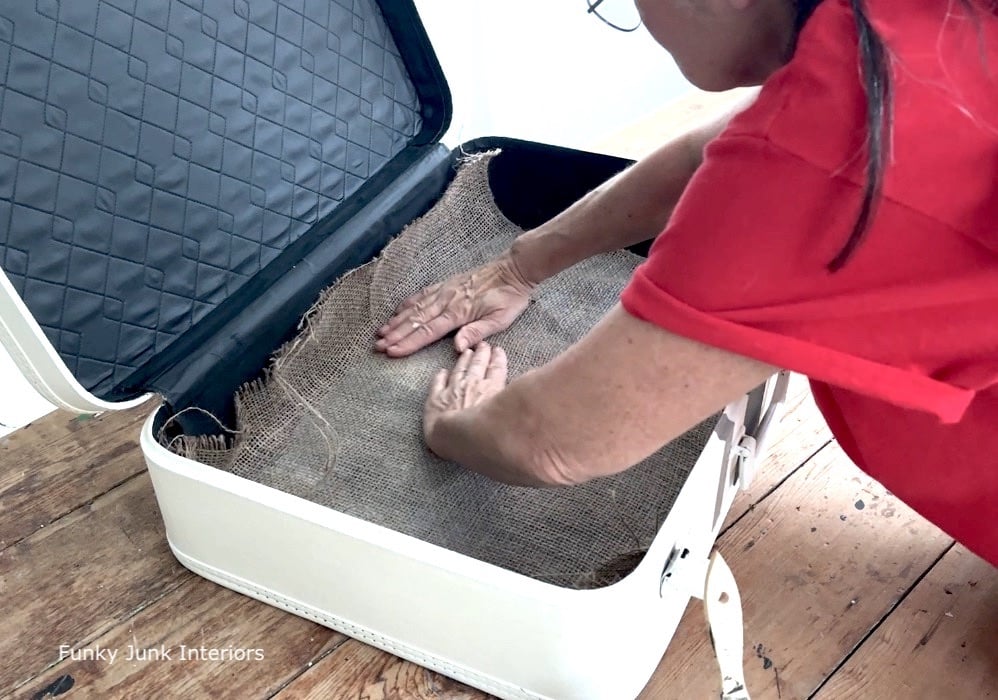
Covering the suitcase bottom with burlap
3. Lay a piece of burlap across the entire bottom of the suitcase, then smooth it out with your hands. Lift the perimeter, then cut the burlap to fit the bottom of the suitcase without travelling up the sides.
After the burlap was cut, I also added some extra transfer gel along the edges to get the best adhesion possible.
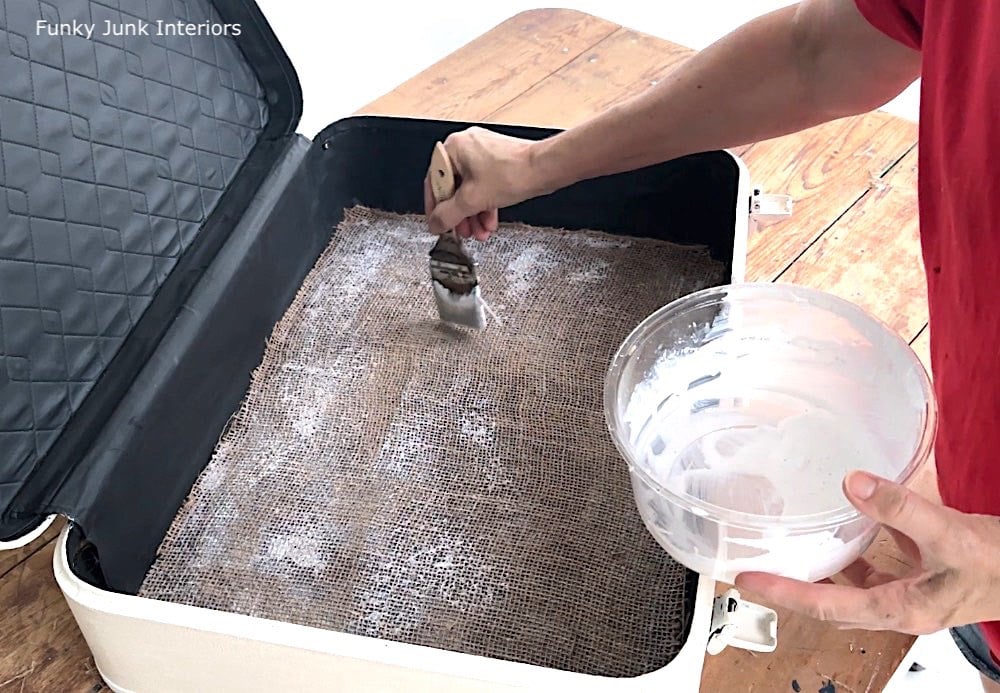
After trimming, I watered down the transfer gel, then painted it across the top of the burlap. This protects the fabric, offering a wipeable surface.
Then I allowed this to dry overnight. The next day all the white went clear!
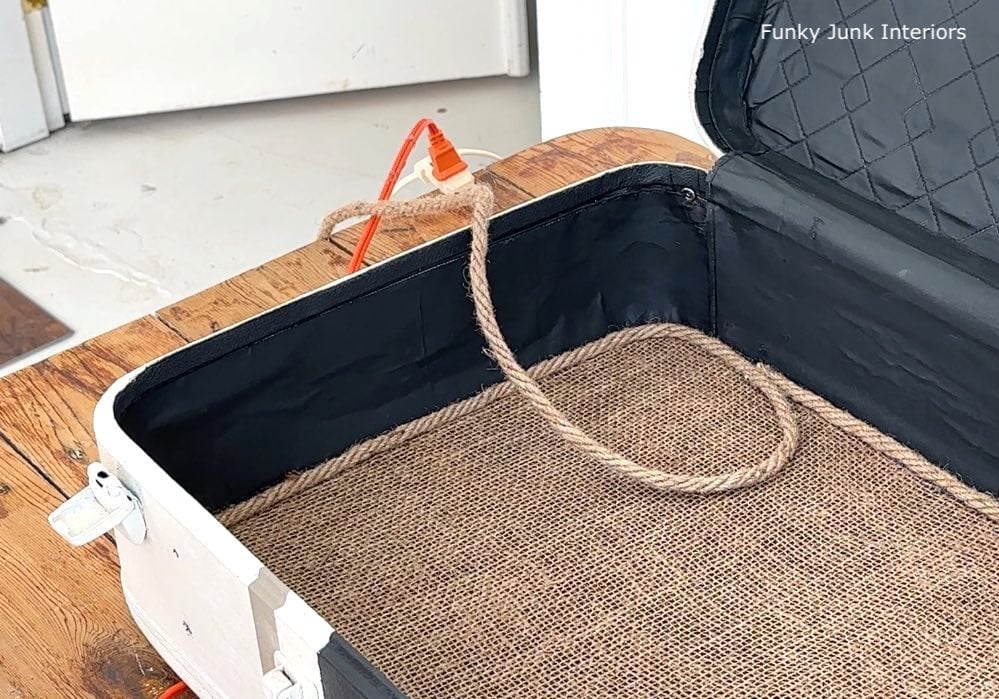
Edging the burlap with heavy twine
4. Hot glue some thick twine along the edges of the burlap to create a clean edge.
This worked out SO well and chimed in so nicely with the burlap!
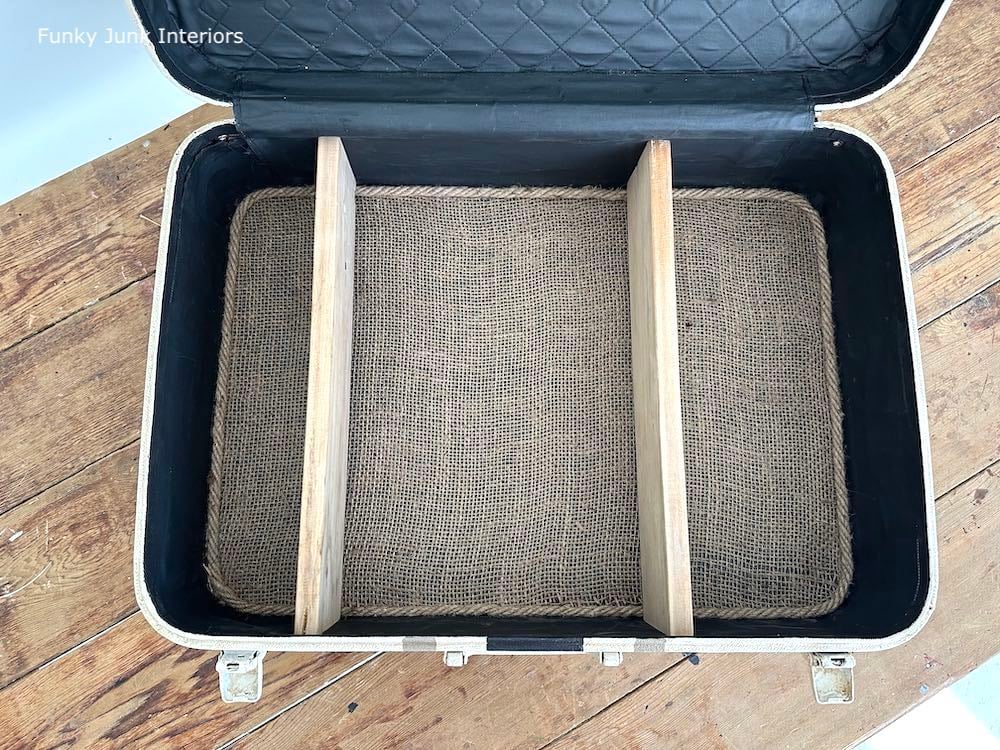
Adding wood plank shelves inside the suitcase
5. Cut, then sand some wood boards that fit inside the suitcase so they will fit where you desire shelves.
The shelves were then attached from the outside of the suitcase with screws. Then I painted the screws over with the base colour of the outside of the suitcase to hide them moreso.
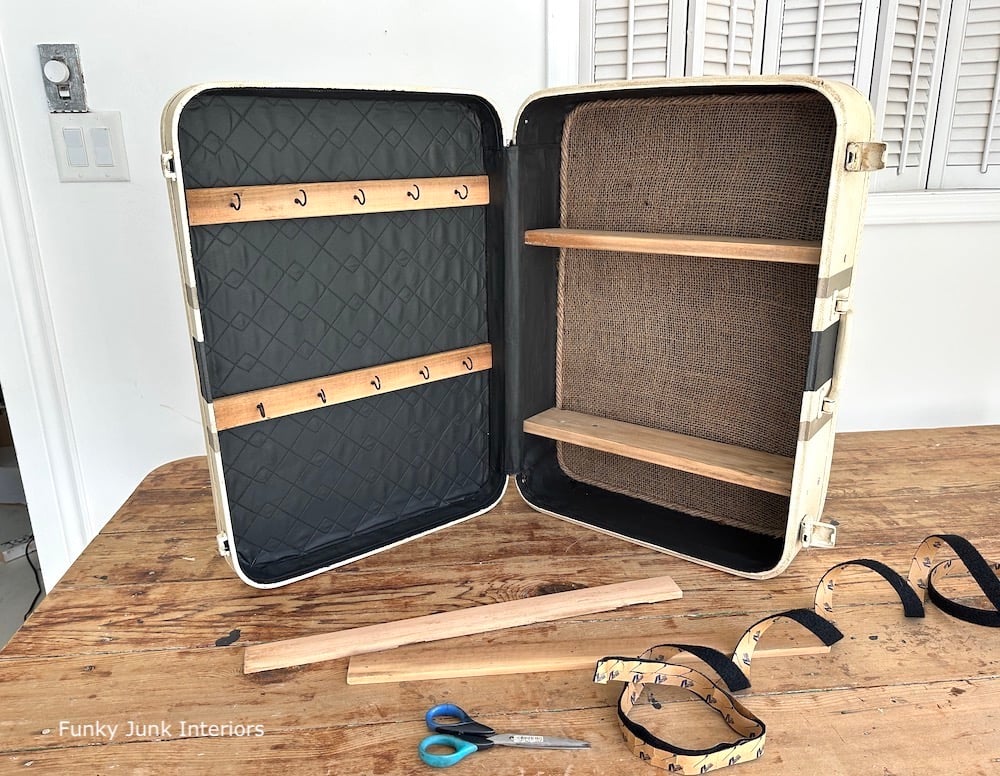
Adding hooks to the inside suitcase lid
6. Cut some cedar strips or wood lath to the width of the suitcase lid, then screw in black cup hooks.
I used velcro strips to attach them to the lid, but you can also glue or screw them in permanently.
Now that the inside is complete, let’s tweak the outside of the suitcase!
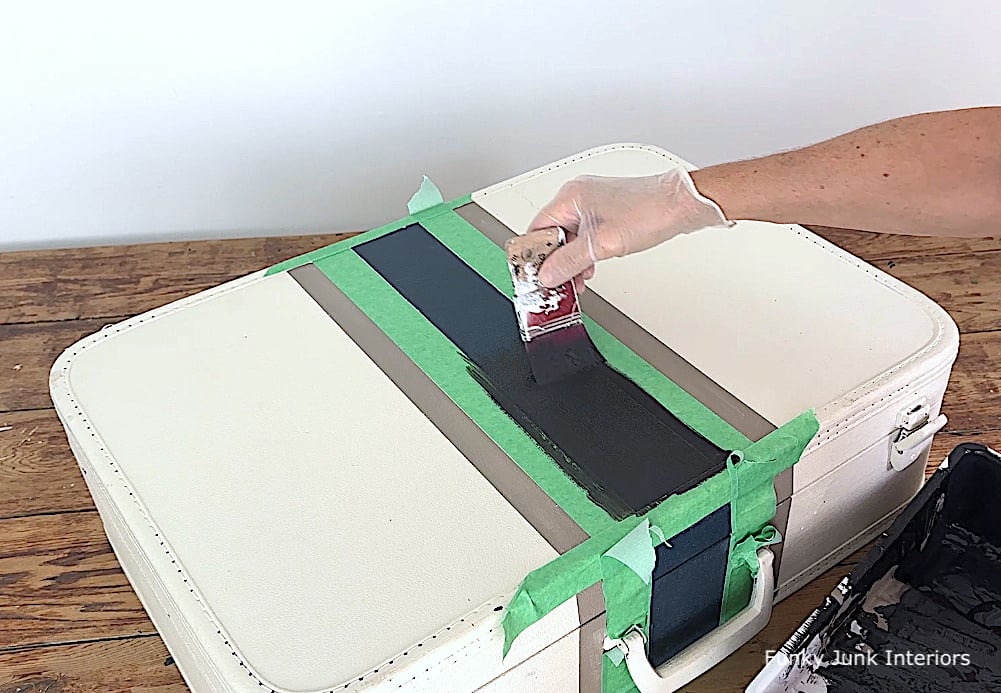
Painting a grain sack stripe to the outside
7. The suitcase was previously painted in Fusion’s Raw Silk (10% off), then striped in Algonquin and Willowbank. You can catch those full painting details in THIS POST.
I just wanted to change the main thick stripe to Cast Iron so it matched the inside, so I taped off the edges, and repainted it.
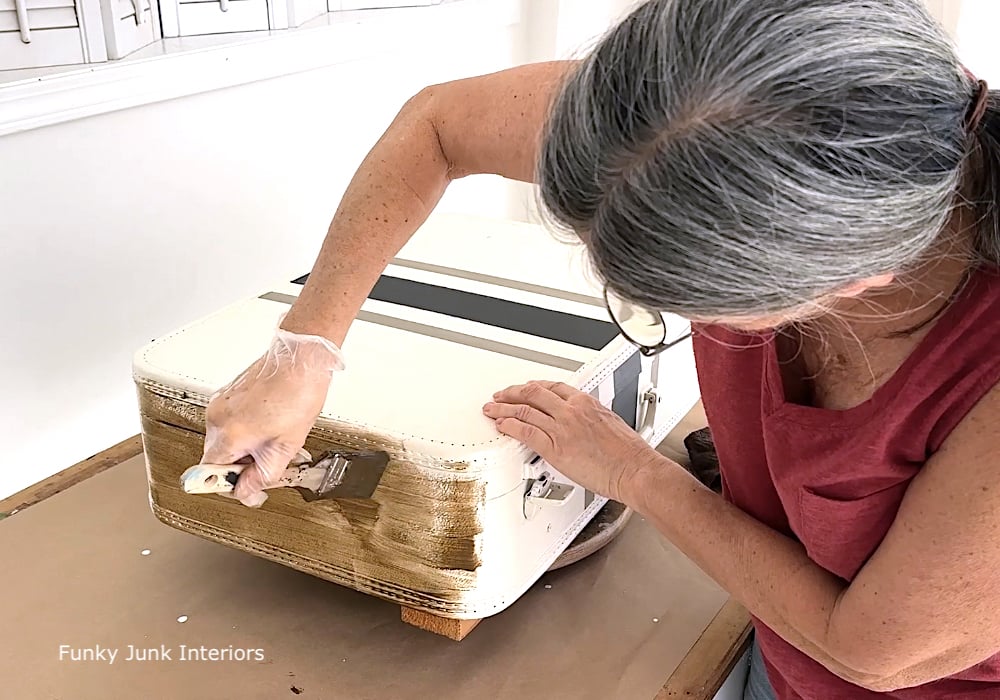
Fusion Mineral Paint’s Antiquing Glaze (get 10% off)
Adding an antiquing glaze to age the suitcase
8. Use Fusion’s Antiquing Glaze on the outside of the suitcase to create a realistic antique effect!
While the suitcase did look nice with a new look, I desired to add the extra step of adding an antique glaze to it so it resembled a very old suitcase.
I brushed on the Antiquing Glaze, then wiped it off with a clean cloth. A dry and wet cloth were rotated until I achieved the effect I wanted.
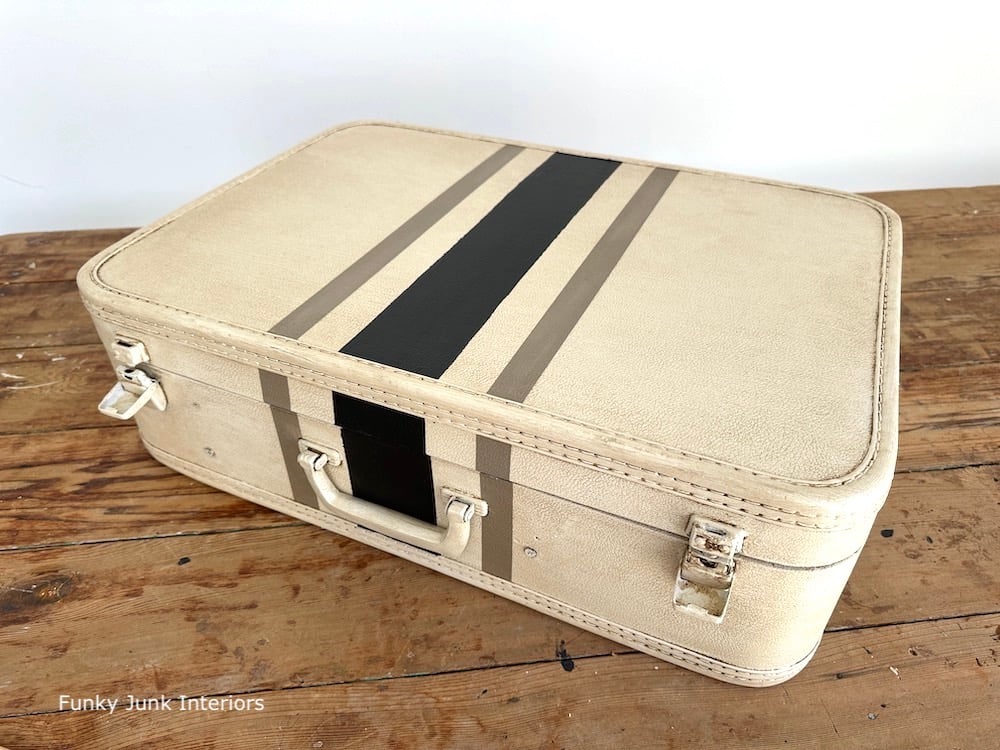
Fusion Mineral Paint’s Antiquing Glaze (get 10% off)
Now the suitcase has that special vintage warmth to it!
More about Antiquing Glaze:
Antiquing Glaze is a very forgiving product that gives you loads of open time, so you won’t have to worry about it drying on you before you’re ready. It comes tinted offering a neutral effect that works on most any other surface or colour.
However, it’s also possible to make your own! Simply get the Glaze in clear, then add a paint of choice to tone our own!
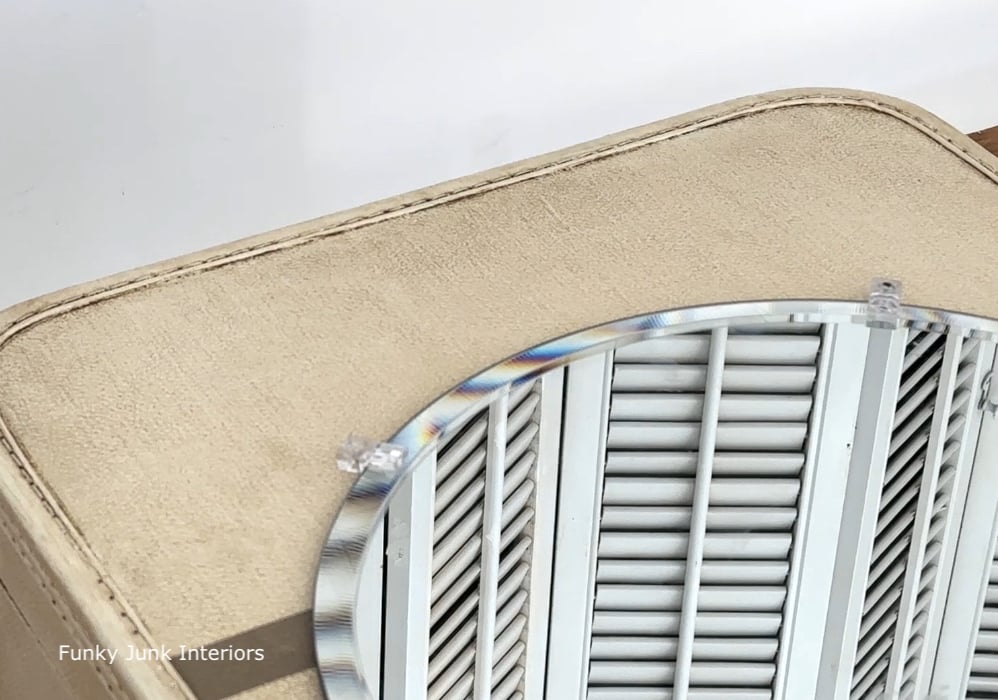
Installing a mirror into the suitcase
9. Attach a mirror to the front of the suitcase that fits, using mirror brackets.
I head to my local hardware store and picked up these clear plastic mirror brackets, which resembled vintage style! I felt they were perfect.
The round bevel-edged mirror was picked up from the thrift store which fit perfectly! I then positioned it where desired, and screwed in the brackets, starting with the bottom first, then the top. Although I did use shorter #8 screws I had on hand than the kit came with, so they didn’t protrude too far inside the suitcase.
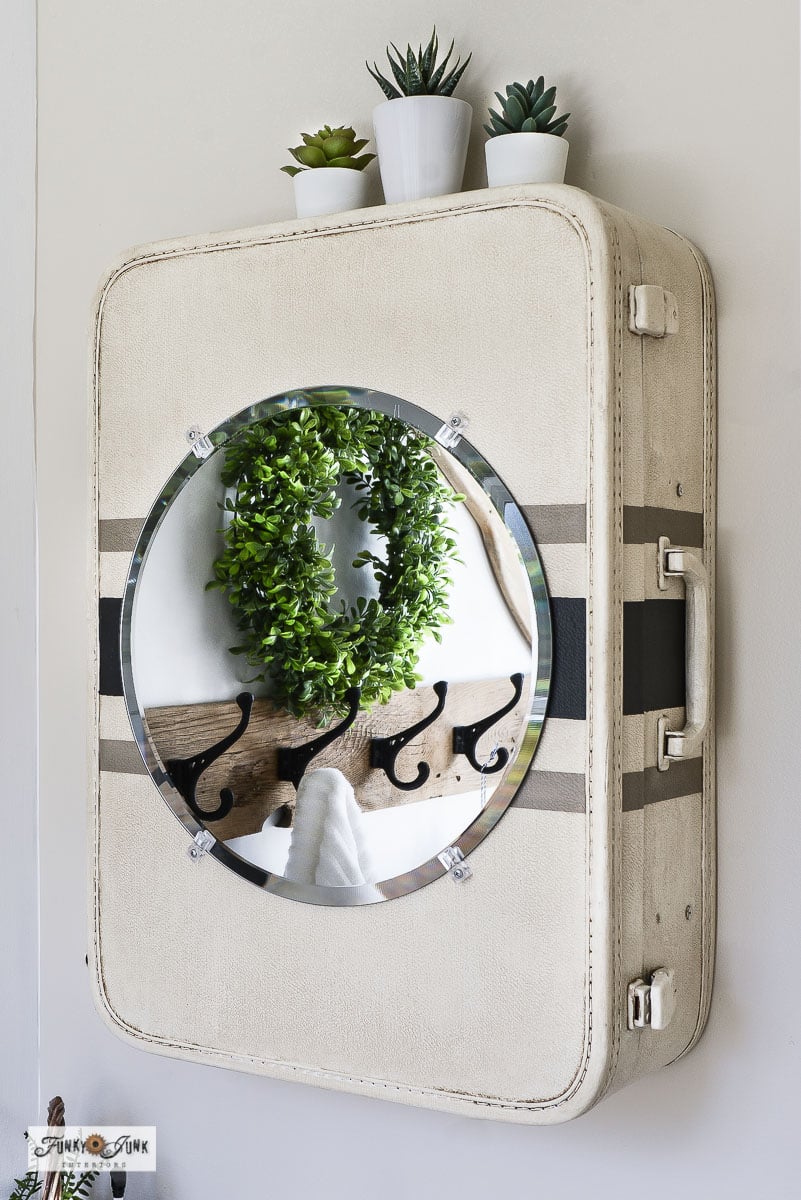
Mounting the suitcase to the wall
10. Install the suitcase to the wall, then load it up!
Using one hand to hold the suitcase, I inserted one screw, rotated until level, then added more screws. Using wall anchors or screwing into a wall stud would be the most secure.
And my beautiful new vintage suitcase medicine cabinet was ready to use and enjoy!
Outside of the vintage suitcase medicine cabinet
I just LOVE how it fits this small ensuite wall so perfectly, leaving plenty of space above and below. There was even room along the top of the suitcase to add a few smaller faux plants!
Get this look:
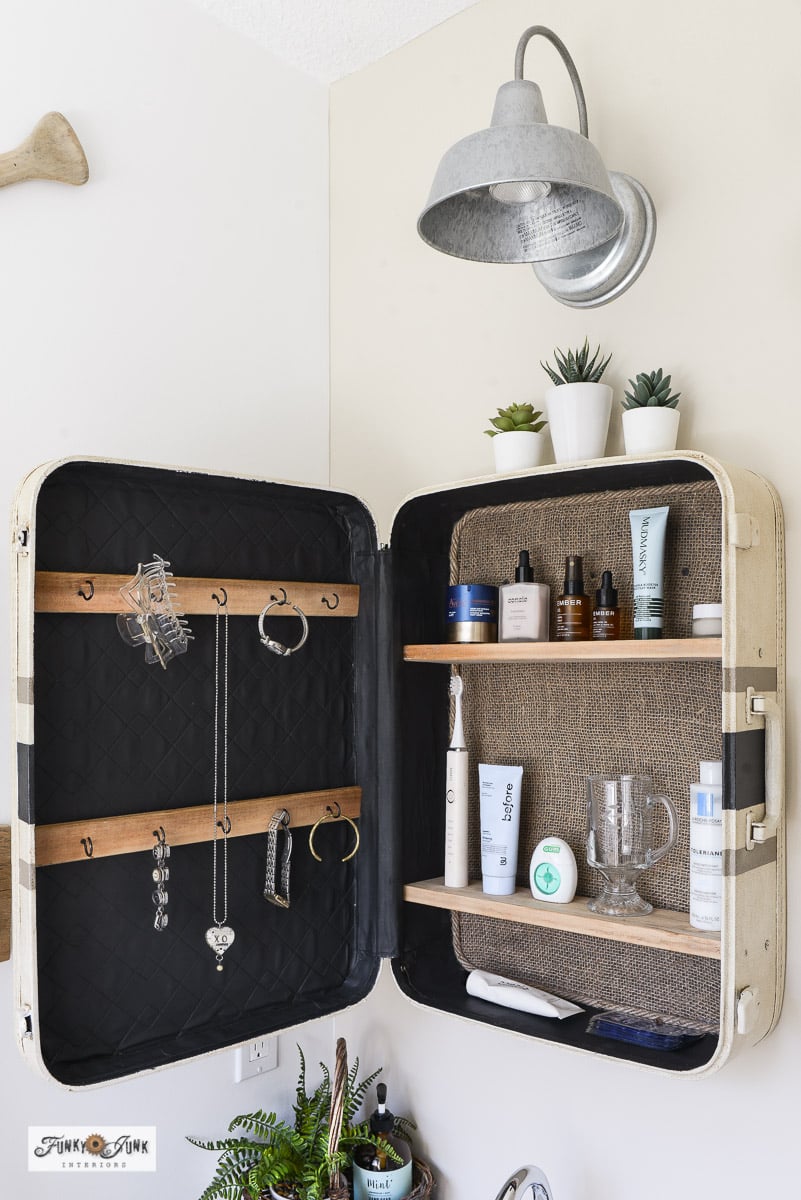
Inside shelves and hooks of the vintage suitcase medicine cabinet
Then open it up to reveal loads of shelving space for all your bathroom essentials, as well as plenty of hooks for jewelry, watches, hair clips, or whatever else you desire!
I just adore the burlap backing against the black paint! It offers a rustic yet very clean vibe!
This DIY medicine cabinet hosts the neatest look, with the added luxury of everything in its place! I feel so fancy now.
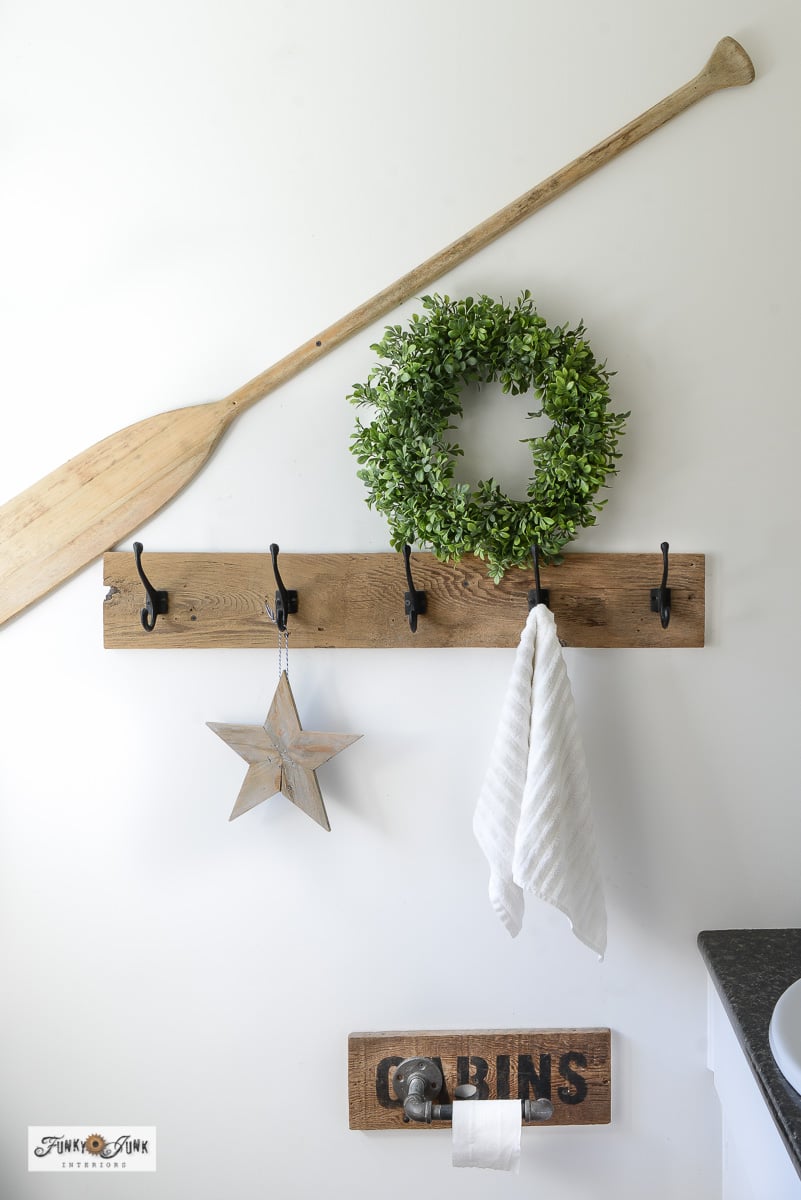
The other rustic accents in this ensuite include wood planked towel hooks, pipe toilet paper holder and wooden oar, giving this entire ensuite a ‘cozy’ cabin vibe. If it’s gonna be small anyway, may as well make it work for me!
Get this look:
- Wood wall mounted coat rack
- Wood star
- Wooden oar
- White ribbed hand towel
- Pipe style toilet paper holder
- Faux boxwood wreath
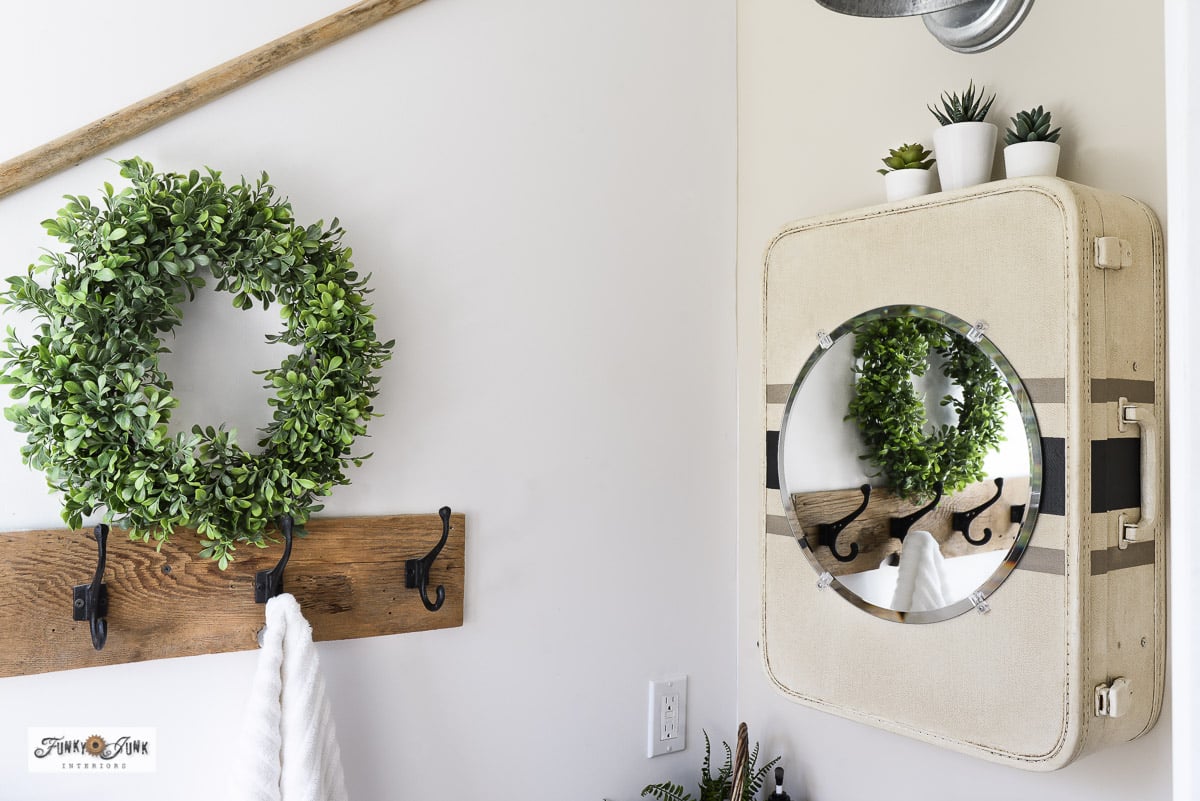
Which marries perfectly with the vintage suitcase medicine cabinet, wouldn’t you agree?
Isn’t it cool?! Would this kind of DIY medicine cabinet work for your home? How would you style yours?
And be sure to check out the newest upcycled link party HERE, featuring others’ brand new projects, now live too!
Other unique cabinet projects to make:
Coffee-themed wood and burlap cabinet
Vintage wooden cabinet for wall storage
Dresser revamped into a cupboard with burlap doors
See many other storage solutions to make HERE
DIY Vintage Suitcase Medicine Cabinet
Tools:
Supplies:
- Vintage suitcase with flat sides
- Mirror that fits
- Mirror hanging hardware
- Fusion Mineral Paint - Cast Iron (get 10% off)
- Fusion's Transfer Gel or Mod Podge
- Fusion's Antiquing Glaze
- Paint brushes
- Rags
- Burlap
- Thick twine
- Glue gun
- Wood planks for shelves
- Cedar strips or wood lath
- Black cup hooks
- Sticky backed velcro
Instructions:
Inside of the suitcase
- Clean, then paint the inside fabric of the suitcase in Cast Iron, if it's in good, sound shape.
- Paint Transfer Gel thickly along the bottom, then smooth burlap on top. Trim edges. Coat watered down transfer gel across the top of the burlap and allow to dry overnight.
- Hot glue thick twine around the edges of the burlap.
- Cut lath to size, then screw in cup hooks. Mount to back of lid with velcro.
- Cut boards to width of suitcase to create shelves. Attach with screws from the outside of the suitcase. Touch up screws with outside paint.
Outside of the suitcase
- Paint the suitcase your desired colour. Mine is Raw Silk.
- Tape of pin stripes, then paint as desired. I used Fusion's Algonquin and Cast Iron.
- Brush Fusion's Antiquing Glaze all over the outside of the suitcase, then wipe off until desired effect is reached.
- Mount the mirror to the front of the lid using mirror hardware.
- Mount the suitcase to the wall using screws with a level across the top. Use wall anchors or screw into a wall stud if possible.
- Load up all your essentials into your new vintage suitcase medicine cabinet and enjoy!