Maximize your kitchen space with this DIY multifunctional side of fridge storage rack, featuring convenient coffee mug hooks for easy access and stylish organization. Transform clutter into order while keeping your favorite mugs within arm’s reach!
Made with price efficient cedar strips and dollar store hooks, it’s cool AND economical, and looks like it was originally built with the kitchen!
As a Fusion and Amazon Influencer, this post contains affiliate links in which I earn a small percentage from qualifying purchases at no extra cost to you. If you shop Fusion Mineral Paint products through this post, you will get 10% off. Thank-you for helping to support my blog!
My woodsy cozy kitchen may have many good things going for it, but one thing it really does not have is an abundance of storage.
I’ve played with several things to help give it more space, such as THIS really neat DIY coffee-themed appliance garage, and THIS reclaimed wood phone shelf!
However, is there ever enough room for coffee mugs in a cabinet? Not so much.
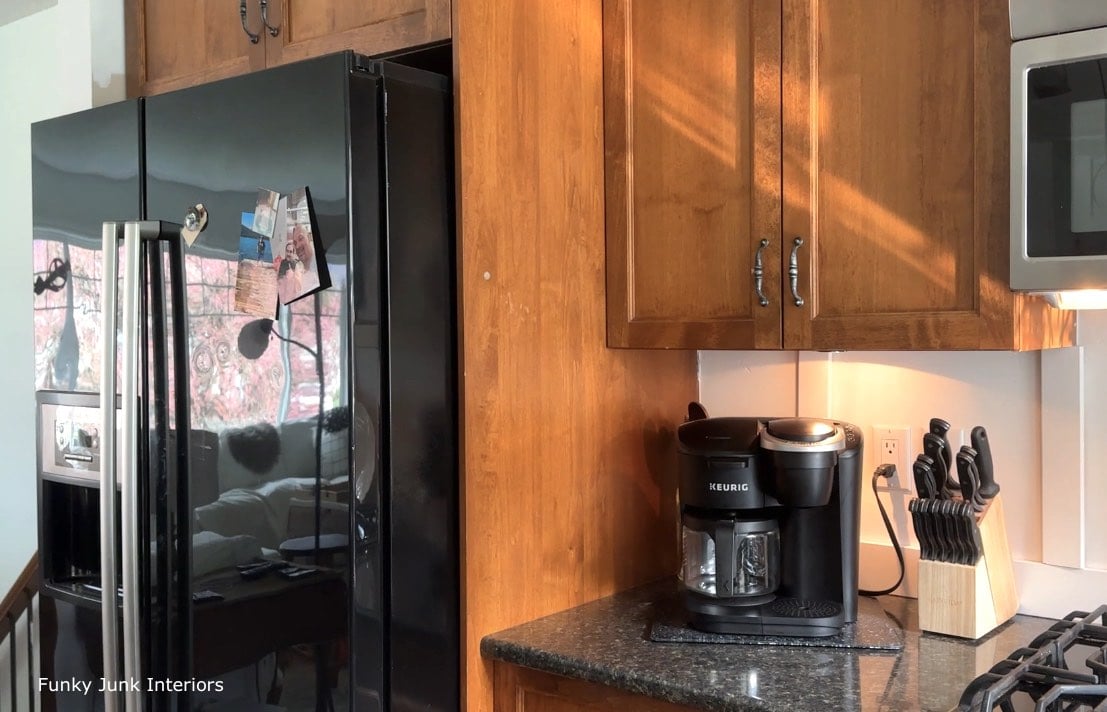
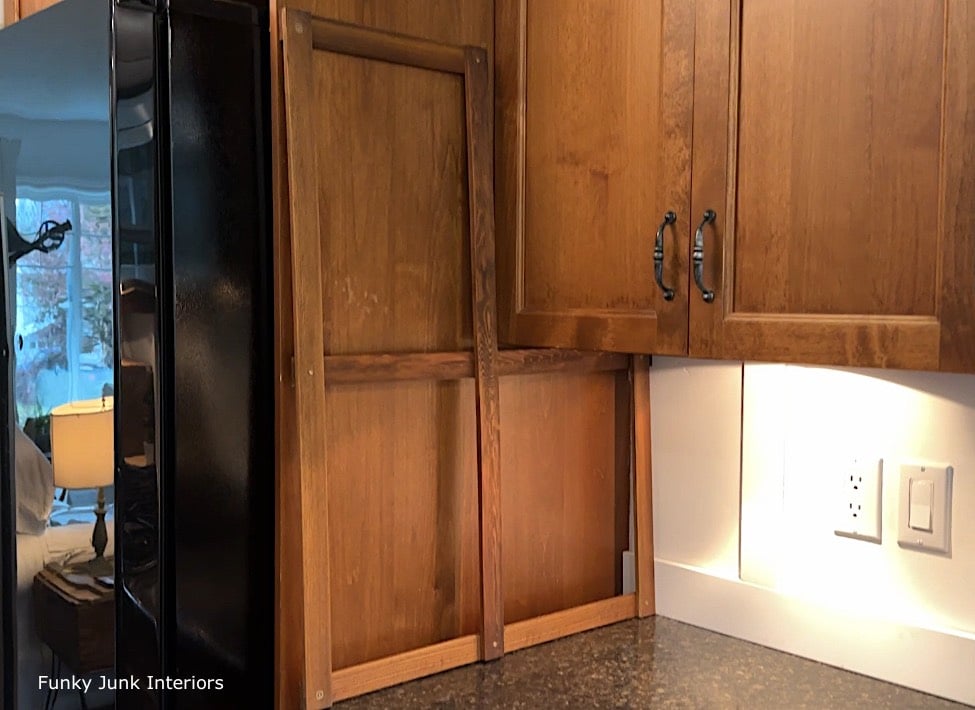
So after eyeing up the bare side of the fridge cabinet, I decided to attempt to make up my own built-in side of fridge storage system of some sort! Can’t hurt to utilize that unused space, right?
And I’m happy to report, not only did my little brain storm fly, I think it makes the kitchen SO much more cozier… while gaining more coffee mug space! I can’t wait to share this one with you because it’s just that good!
So if you too have bare space along the side of your fridge, here’s some inspiration so you can dream up your own side-of-fridge storage rack to suit too!
Here’s what I did:
DIY Multifunctional Side Of Fridge Storage Rack With Coffee Mug Hooks
Supplies I used:
1.5″ cedar strips (50 pack bundle)
Heavy duty sticky backed velcro (similar to this)
Rag
Row of metal hooks from the dollar store
Black spray paint for outdoor grill (excellent durability!)
Bosch or Makita cordless drill
Pre-drilling holes bit (I like these drill bit kits)
Cutting wood for the storage rack
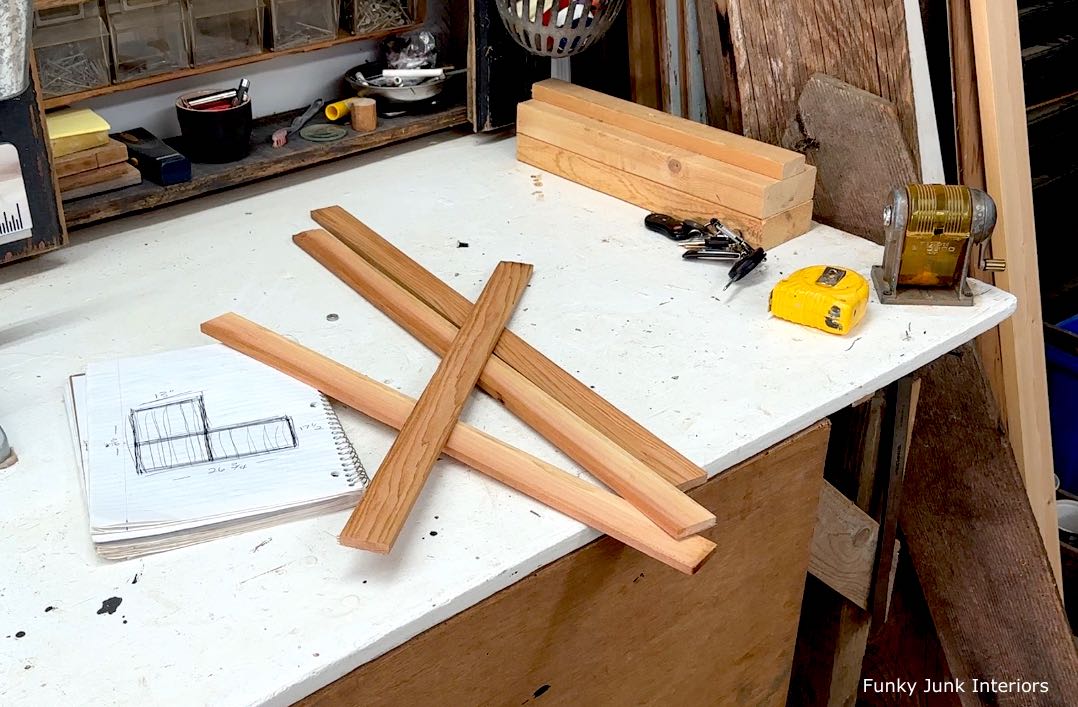
1. Sketch, then measure the area for your fridge rack.
I drew the basic shape I was going for, then added measurements so I knew how long to cut the wood frame and pieces.
My chosen wood was 1.5″ cedar strips because they are very shallow boards which is important if I wish to continue to open up my kitchen cabinet door beside the storage rack. If you use thicker wood, you’ll likely need to leave more space in front of the door.
Wood cutting measurements I used:
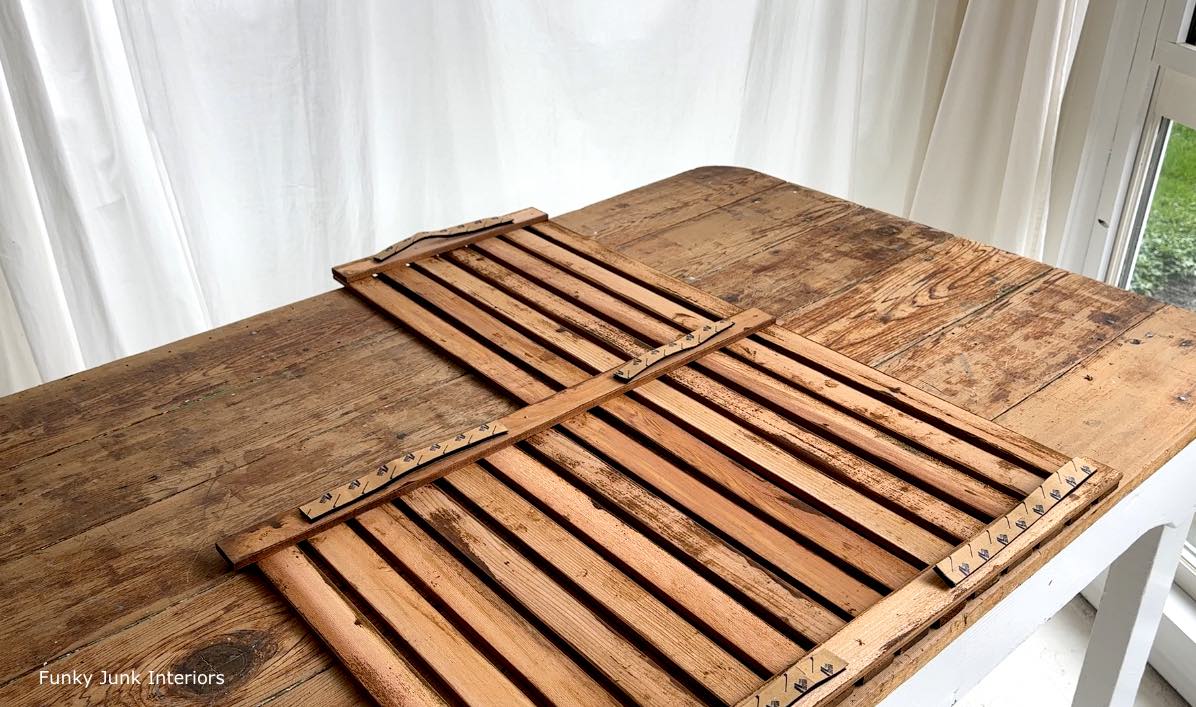
2. Cut wood strips to build the frame, then more strips to cover it.
I used 1.5″ cedar strips from a 50 pack bundle.
5 pieces of wood were cut to build the frame, then an additional 7 strips to cover the entire frame.
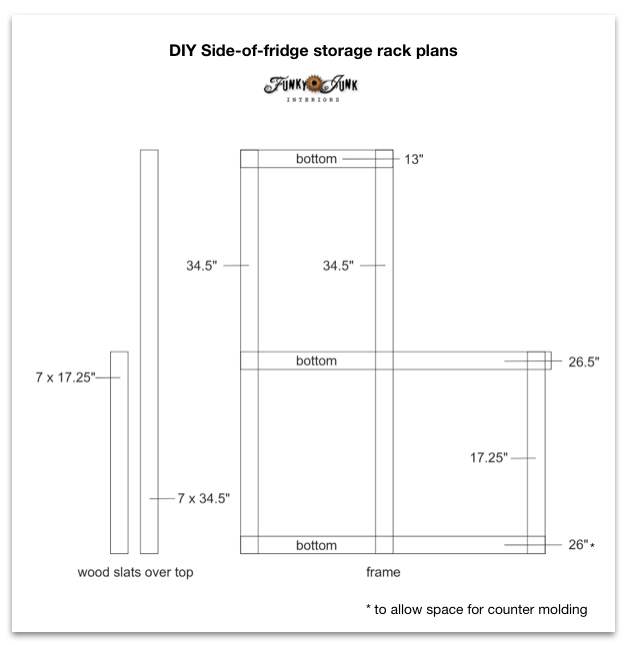
Although you will need to cut your wood to your own custom size, here’s my dimensions for a better understanding of construction and scale:
Overall L-shaped frame size: 26.”5 deep x 34.5″ high
Horizontal frame strips
- 1 x 13″ (top)
- 1 x 26.5″ (middle)
- 1 x 26″ (bottom)
Vertical frame strips
- 1 x 34.5″ (left)
- 1 x 17.25″ (right)
Added vertical wood slats for on top of frame
- 7 x 17.25″
- 7 x 34.5″
3. Lightly sand all the wood strips with a sanding sponge, then dust off.

Staining the wood before assembling the rack
4. Stain or paint all the wood strips before assembling.
Pre Staining or painting makes it much easier to cover all the nooks and crannies!
Since I was working with wood grain cabinets, I stained my wood strips and lucked out. The tone match was nearly identical!
The wood strips were placed on two blocks of wood placed on both sides to elevate the boards, then the stain was brushed on, then wiped off nearly immediately, then left to dry overnight.

Building the side-of-fridge storage rack
5. Cut the frame, then lay it out first.
6. At all the joining areas, predrill holes slightly smaller than your chosen screws, then attach with screws.
Pre-drilling holes is recommended as cedar tends to be brittle where screws can split the wood.
7. With frame facing good-side-up, cover the remaining frame with the additional wood slats, then attach to the frame along the top and bottom by pre drilling holes, then assembling with screws.
Attaching velcro to the back of the rack
8. After all the wood is assembled, flip the works good-side-down, then stick heavy duty velcro strips to the top, middle and bottom framework.
Since I didn’t wish to drill permanent holes into the fridge cabinet sides, the velcro did the job perfectly! That makes this project rent-friendly too!
Attaching hooks to the rack
9. Attach the structure to the side of the fridge cabinet.
I slid the structure into position, tested the cabinet door to be sure, then pressed firmly along the velcro strips until they attached well.
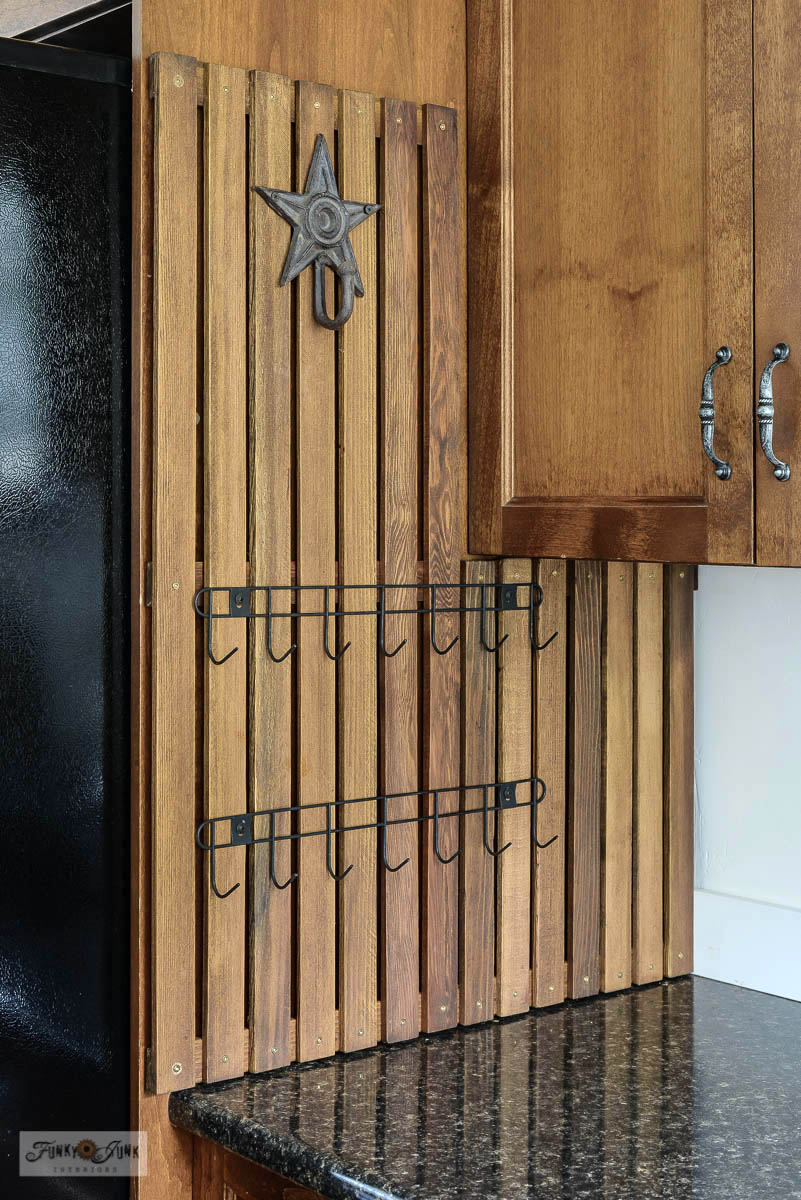
10. Style the structure with hooks, crates or other hanging apparatus desired.
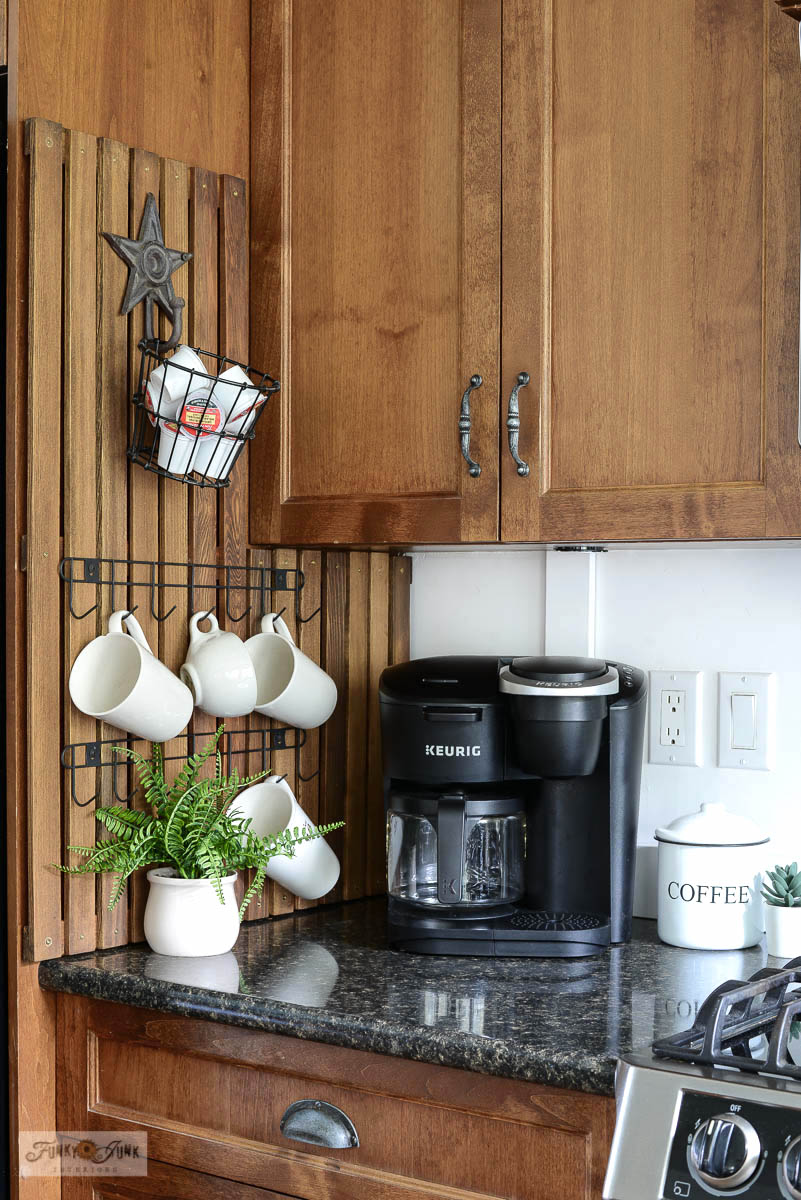
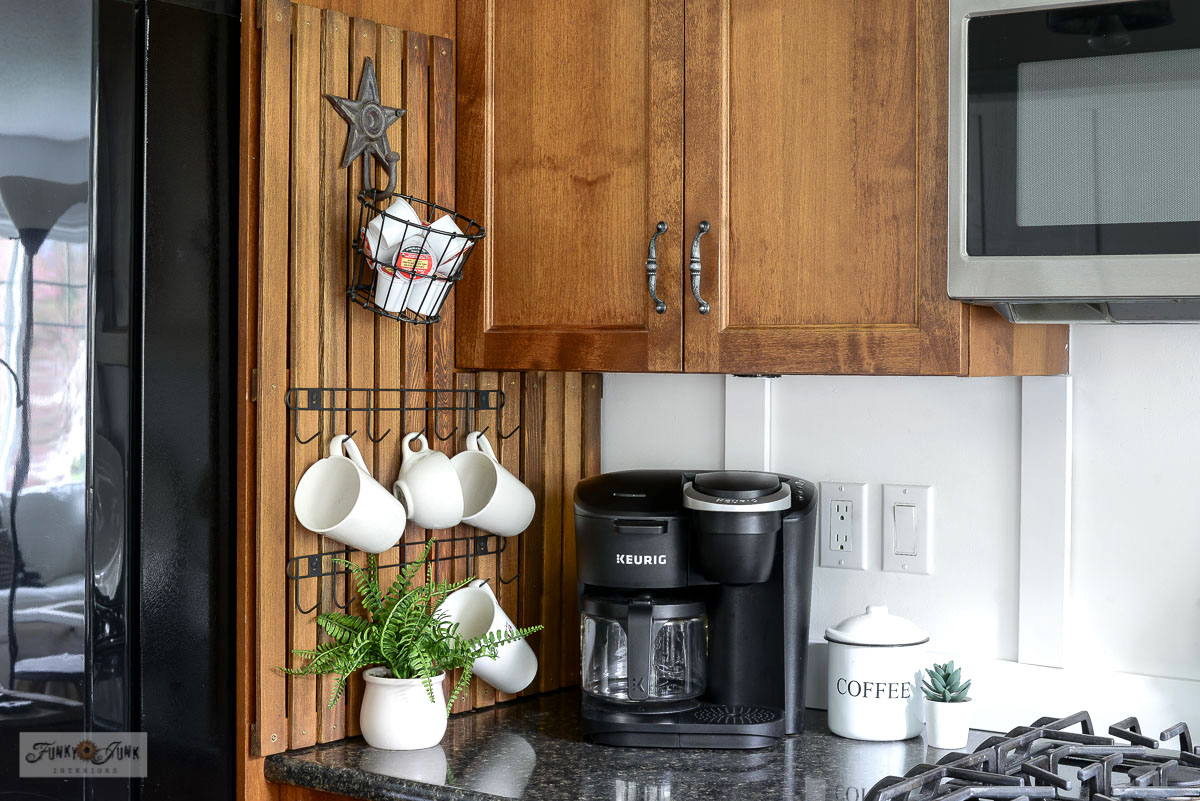
I decided to mount one larger star hook along the top to hold coffee pods, then two rows of dollar store metal hooks I had previously spray painted in black.
The mugs were hung on the hooks before installing so I knew where to position them.
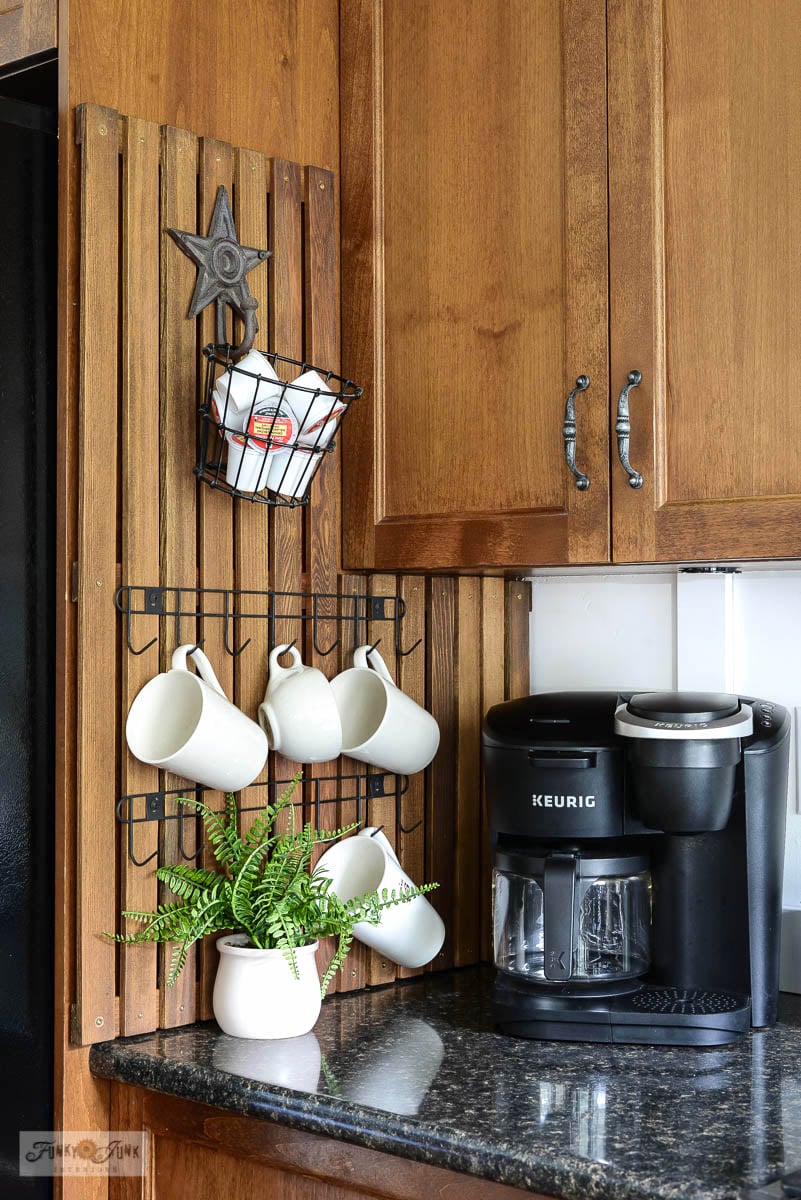
Doesn’t the side of fridge storage rack look amazing already?! Nearly seamless, like it was always there!
Hanging mugs on the hooks
11. Hang your apparatus, then move back in!
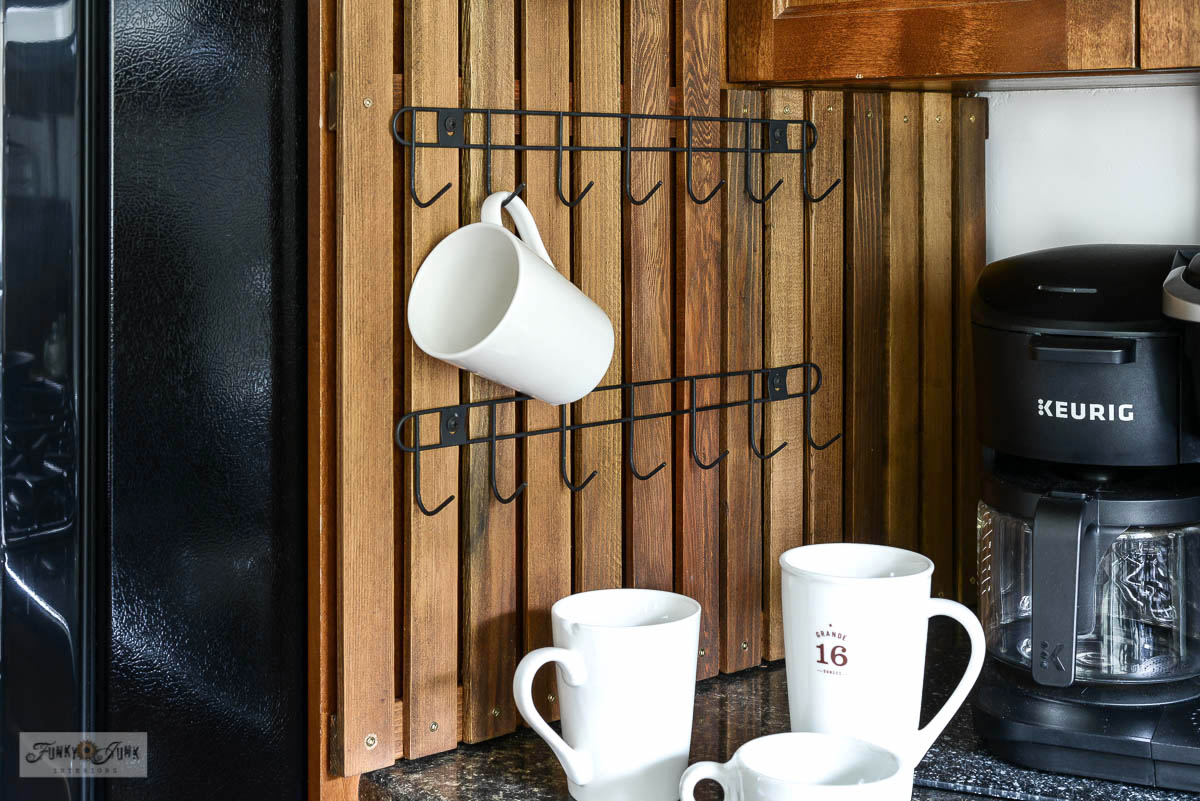
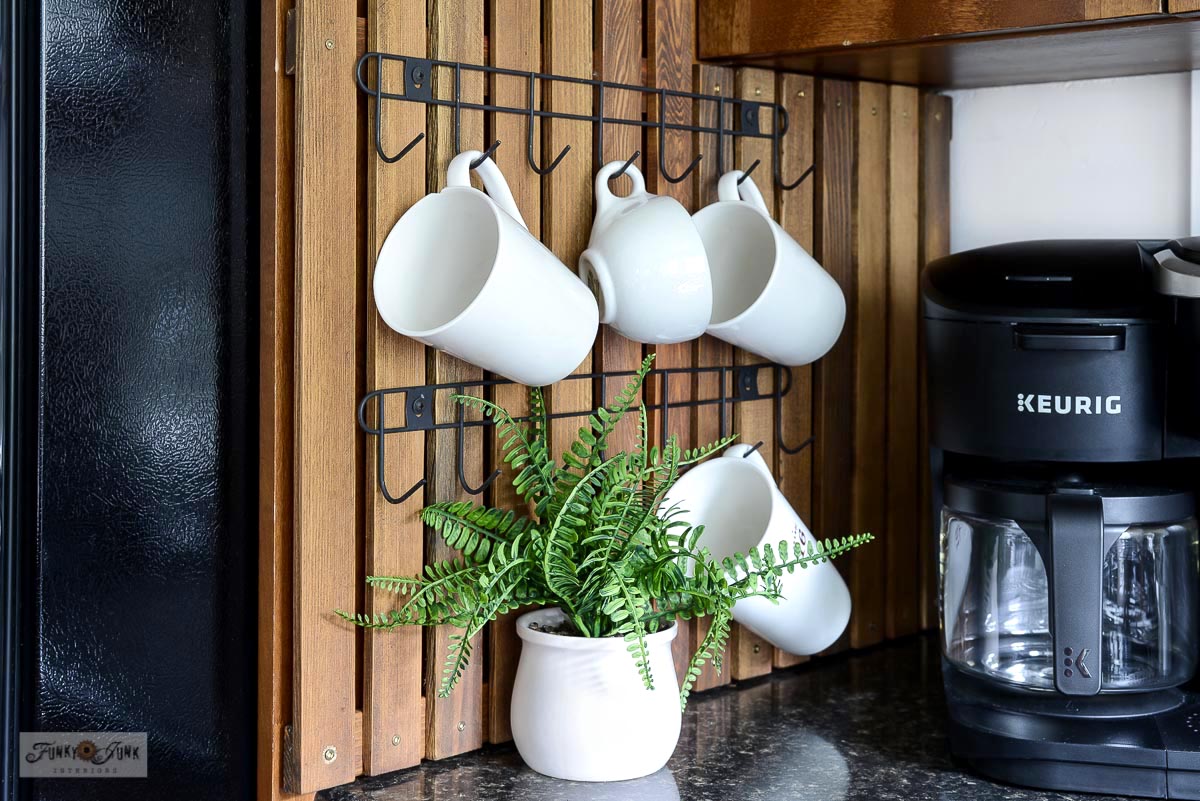
I hung an assortment of random white pottery style mugs on the row of metal hooks so they’d be within easy grasp of the coffee maker. This is going to be SO handy and look cool too, mimicking an official coffee station setup!
The completed side of fridge storage rack for hanging coffee mugs
Then with a smaller wire basket holding coffee pots, my new side of fridge storage rack was ready for business! And it’s perfect!
Incidentally, THIS is the coffee maker we use (while the one linked is fancier now which I love more!) and adore it! It’s a dual regular coffee pot with a Keurig side.
The little fern plant in the white pot is VERY similar to THESE two cuties, from the same store!
Other ways to use this side of fridge storage rack
And while this area is perfect for my coffee mugs, it could also be used for so many different things, depending what you need or where yours is located! Here’s some ideas:
- Attach thin shelves for spices
- Hang tea towels and oven mitts
- Use for kitchen utensils, racks or pots/pans
- Add a soap dispenser and cleaning tools if near a sink
- Create a plant wall with small faux hanging plants
With 2 rows of hooks, I have free reign to position and hang as many mugs I wish, or whatever else is desired!
Since hanging hardware can be very expensive, these stainless wire racks from a dollar store in the laundry aisle were a very affordable fix! I painted them with black metal spray paint meant for a grill, which made them very durable and scratch resistant!
You can see the same wire racks attached to THIS wall-mounted coffee mug rack.
Now my kitchen coffee station area looks intentional AND cozier than just a bare cabinet wall beside the fridge!
And it was so easy to make! It truly looks like it was there the entire time, doesn’t it?
Before…
And after!
NOW it’s coffee time, in fine side of fridge storage rack style!
Isn’t it wonderful?!
What would you hang from your side-of-fridge storage rack?
Other unique coffee themed projects:

Coffee mug rack with dollar store hooks
Coffee-themed appliance garage
Organic Coffee hooks for a kitchen
See many more coffee-themed projects HERE
See other unique kitchen accents HERE
DIY Multifunctional Side Of Fridge Storage Rack With Coffee Mug Hooks
Tools:
- Drill bit kit that creates holes
Supplies:
Instructions:
- Measure your area beside the fridge, then transfer the measurements to a sketch of your main frame.
- Cut cedar strips to the size of your frame, then cut additional strips to cover the frame.
- Line up the framework. Where the wood overlaps, pre drill holes, then assemble with screws.
- Place the additional strips vertically on the frame by predrilling, then attaching with screws along the tops and bottoms.
- Flip the frame good-side-down, then attach velcro strips. Attach the structure to the side of the fridge.
- Hang hooks and screws to the structure as desired.
LOVE the look!! Very professional looking, looks like it was meant to be there! Possibly the wood should have been brought up to the top of the refrig? No holder for coffee creamer can’t open cupboard… hang towel instead? But LOVE it, just my two cents 8) Thanks for sharing your great ideas always LOVE them!!
Now that’s really clever. Our fridge is so full of photos you can hardly find the handle, but I think I can move a few for something like this. Plus, I’m convinced our coffee cups make babies while we’re sleeping and maybe if they’re out in the open we can keep an eye on them.