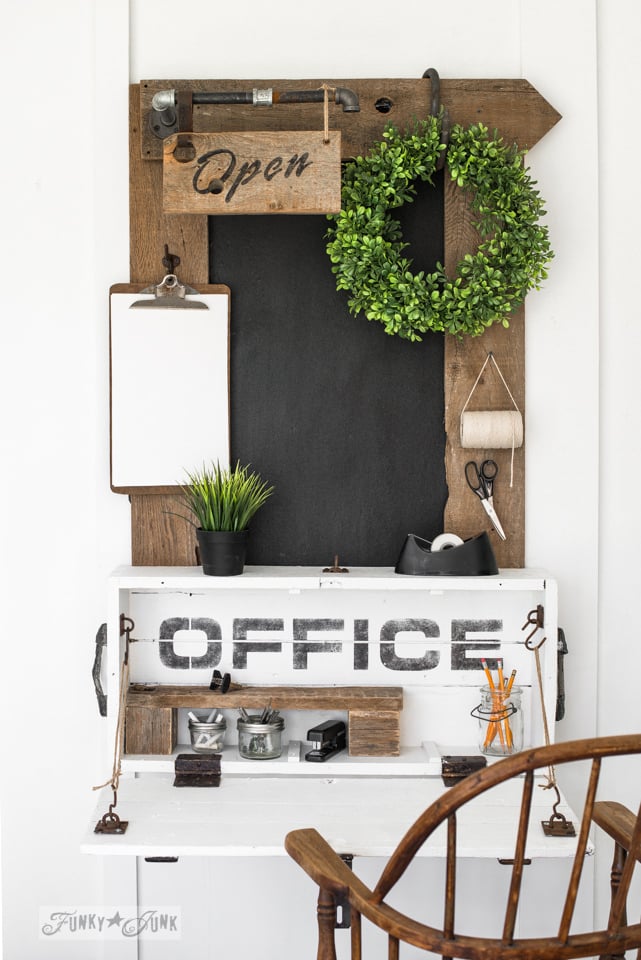
Desire a small writing space somewhere? Here’s how to create a compact and creative office desk shelf with an ammunition create! No-build, easy to hang and hides all the office clutter!
I think I’m going to call this lidded ammunition crate my lucky lidded crate. It’s come in so handy and useful for so many projects over the years! And apparently, the count continues to climb.
You may remember this antique crate as part of a storage wall gallery.
Then it became a garden-themed entry desk.
And today… it’s a full fledged mini office on a wall.
Ever desire a small writing space somewhere but can’t find office furniture in the right size? That’s where this cute and compact ammunition crate comes in.
Install it to a wall, and it becomes a mini office desk, that can even close up to hide all the office clutter! While it doesn’t have a drawer, you can add small compartments to it to increase office storage.
But sometimes you just need a small writing space, period. Or perhaps to act as a monitor shelf or monitor riser.
And this little office crate setup did the trick!
But not without decking it out with an office look first! Along with a few other nifty surprises on the way, such as a bulletin board chalkboard, open sign and more!
Here’s how to get a little extra work space with some true office vibe inspiration …
This post contains some affiliate links in which I earn a small percentage if you make a purchase, at no extra cost to you. Thanks for helping to support my blog!
Compact and creative office desk shelf with an ammunition crate
Supplies I used:
Lidded ammunition crate
Reclaimed wood planks (from an old fence)
Rusty junk hinges and twine to hold the lid up
Fusion Mineral Paint’s Casement (white) and Coal Black
or get all Fusion Mineral Paint products for 10% off HERE
1/2″ pipe fittings to desired shape
Cordless drill, screws, saw, sander
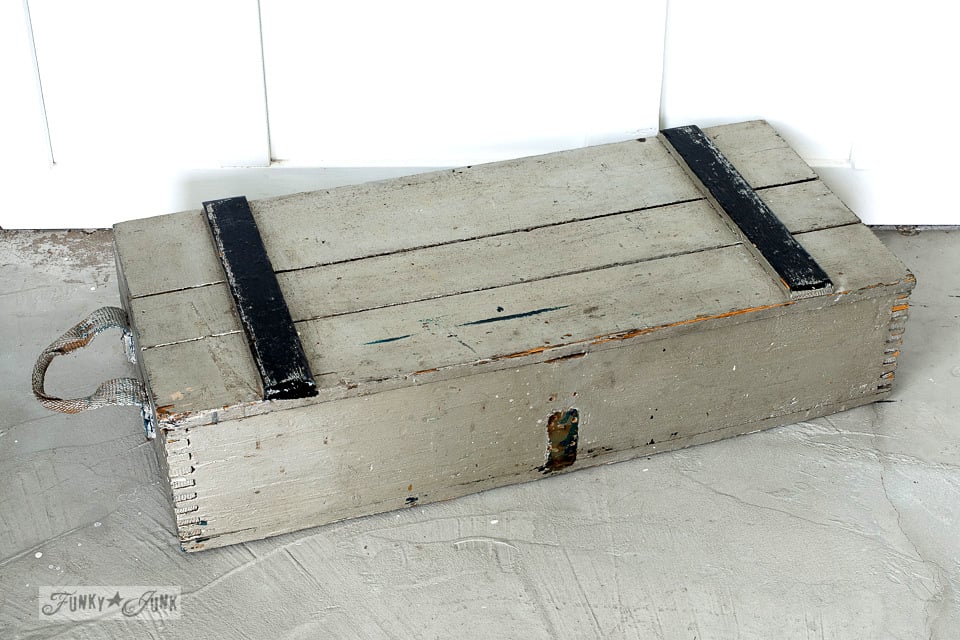
The ammunition crate before
Here’s how the little ammunition crate started. I got it from my brother’s garage sale. It had a strange silver metallic paint on it with some black trim. Let’s fix that.
And I think my brother needs to have more garage sales…

Painting the ammunition crate
The ammunition crate was was first painted in Fusion Mineral Paint’s Casement, which is their whitest white.
How to paint with Fusion:
- Clean your project with Fusion’s TSP alternative. No need to rinse!
- Lightly sand the entire crate with an orbital sander or sanding block to smooth it all out.
- Paint at least 2-3 coats of Fusion’s Casement for full coverage using a paint brush or velour roller.
Get the full details on my favourite Fusion Mineral Paint products from my review post HERE
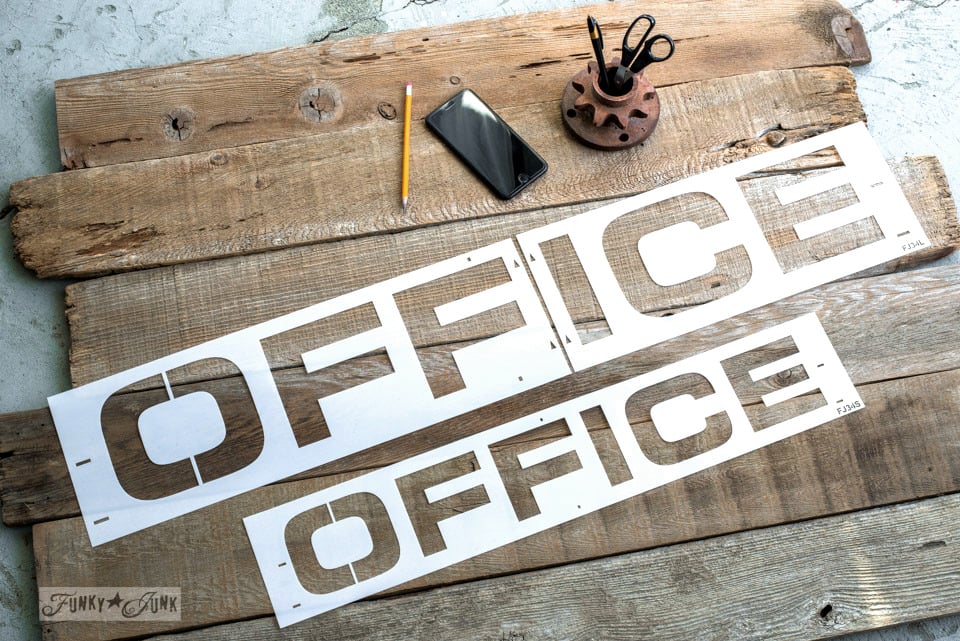
Where to find Office stencils
A small Office stencil was used to label the inside of the crate!
Office comes in two sizes, perfect for larger or smaller projects.

Stencilling an OFFICE sign inside the crate
After the crate was painted white inside, the small Office stencil was positioned then stenciled using Fusion Mineral Paint’s Coal Black.
How to stencil with flawless results:
- Load the inside how you desire to use it first to determine where to position the OFFICE sign.
- Position stencil where desired, and hold in place with masking tape.
- Load a dome-tipped stencil brush with Coal Black paint, then remove most paint until the brush feels dry.
- Tap or swirl paint through the stencil until the desire effect and coverage is achieved.
Read more about HOW TO STENCIL in THIS POST.
The OFFICE stencil fit so perfectly, you’d think that stencil was made for this very crate! Talk about the perfectly themed sign that couldn’t be easier to make…
Creating hardware to hold lid open
So the key to a hidden desk is that you want it to be open when you desire to use it, then closed when you’re done.
Some rusty junk hardware hinges were attached to each side of the lid, and sides of the inside of the crate. Then S hooks and twine were positioned and used to hold the lid open and at the right level.
Installing the crate to the wall
The wall crate was installed by holding it against the wall at the position desired, then screwing it to the wall right through the inside of the crate.
Attempting to hit studs is key. If you don’t, you can add some wall anchors prior. Or attach a horizontal board across the back of the crate attached two two studs. Then screw the crate to the board.

Creating a framed bulletin board / chalk board
A small 24 x 36″ bulletin board was painted in Fusion Mineral Paint’s Coal Black, then was propped on top of the crate, attaching it to the wall.
The paint is durable enough to withstand chalk erasing. It works great as a handy DIY office chalkboard!
Painted bulletin boards are so fun to make! Check out this other clever Office bulletin board that’s a little simpler to make.
Adding a wood frame around the bulletin board
Once the bulletin board was positioned on top of the ammunition create and screwed to the wall, reclaimed wood planks were cut to size to frame around the bulletin board.
The planks were then screwed directly into the wall.
Screws were then added to the wood frame to act as hooks for hanging office supplies and a wreath.
And finally, an open sign was created on scrap wood, hung from pipes!
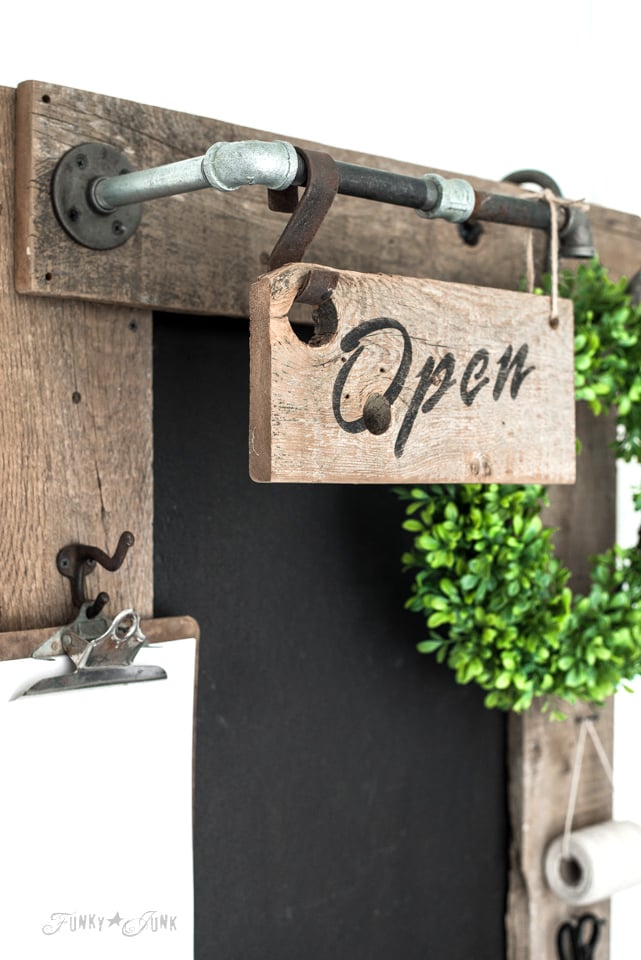
Open sign hung from metal pipes
For a dash of added ‘cheek’, a reversible Open and Closed sign was created to compliment this little mini office on a wall.

Find Open / Closed Flourish stencils kit HERE
Open / Closed stencils
This stencil kit comes complete with an Open, Closed and fancy flourish design so you can create a custom look for your own any way you wish!

It is designed to compliment the Office stencils, to create loads of fun variations!
Doesn’t that flourish have an old world look about it? It feels like it should be gold leafed onto an old glass storefront door.
So let’s make a reversible Open / Closed sign with pipe hardware!

How to make a small Open / Closed sign
- Cut a small chunk of reclaimed wood to the desired length.
- Position Open in the centre and on a slight angle.
- Stencil in Fusion Mineral Paint’s Coal Black.
- Turn sign blank to the other side.
- Stencil Closed on the other side.
- Drill holes to hang with twine if desired.
- My sign blank had one built in hole, so I utilized that. How quirky was this outcome?!
- Screw together 1/2″ metal pipe components to the desired shape.
- Attach the pipe to the top of the framework.
- Hang the Open sign from the pipes.
Isn’t the finished desk shelf the coolest? It’s quirky, with a super rustic vibe and it suits my own rusty junk aesthetic perfectly.
Installs don’t get much easier than screwing a few 1/2″ pipe fittings together.

Looks as if this mini office is apparently open for business!
Get a load of that extra space to write, work, used as monitor stands or hold a cup of coffee wherever desired! All you need to do is add a mouse or your phone and you can get right to work. Or play. It’s a great office space that can save you loads of great savings over new office furniture!

The finished office desk shelf space
Then add your own new items and office helpers as desired.
To the left is a leaning plank that’s holding wicker baskets as extra office storage.
The inside of the desk houses two wood block risers with a small plank of wood creating a mini shelf for extra office supplies.
Then the lid is wide open and available for your other office needs!
What do you think of this little compact desk shelf office space placed anywhere desired?
Where would you use it?
More unique office projects to make:
.
Visit ALL the office setups in one click HERE or click below…


Reclaimed wood BIG office sign computer station
Office crate desk with pipe Open sign – you are here

Reclaimed wood farmhouse Office sign chalkboard with twine
Find many other junk-styled office projects HERE


What a fun desk station you’ve created! Love the compact size and clean lines. The touch of greenery softens the hardness of the unit. The pipe hanger is a clever touch of architecture that provides just a bit of useful fun. Well done! Your other projects this week are most enjoyable, but my favorite is today’s creation. You’ve been very busy!
Thank-you Sharon! Yes, I’ve been stockpiling all these projects for awhile… nice to finally get them out there to share!
Amazing, as always! How do you think this stuff up? I love the pipe! Happy Easter, Cheryl
Thanks Cheryl!
Thinking stuff up comes out of need for me. I then dig through my stash to see what could possibly do the job and just play around until something ultimately works. Or not. LOL
Its official. I want to move in with you! I love your house and your sense of style and your creations!
Haha! Moving in comes with cleaning up too… and my messes are not as pretty as my projects! Come on over, the coffee’s hot…
Yeah, cleaning up isn’t my strongest talent… 🙂
Hi Donna,
Great mini work area. You have so many ideas and so creative.
Thank-you Nancy! This crate just does not want to retire it seems… it’s way too useful! 🙂
Recognize there crate. It has had quite a variety of uses. A couple of ways to use it come to mind. By my phone with my index of numbers or with incoming bills and outgoing mail and even to hold my makeup. A mirror could be mounted inside. This would help as the lighting on some of my other rooms is better to see what I am doing. And I could close it when done and no one would be aware of its use. They could just admire the “cool” looking crate! And please excuse my typos. It seems that my phone has a mind of its own! Cool multi-use for an item!
Yes, closing the crate to hide the mess is #1 in my book too! Love your makeup idea!
Hmmm…. this would come in handy in my big office upstairs… I feel another redo coming on already. Goodness…
Love this – all of it! You are amazingly creactive ?
If my office looked like this I would never, EVER leave. Simply stunning Donna
Donna, maybe you can help me?I don’t understand drill sizes. So there is 1/2 inch 3/4 inch,etc.etc, yet the bits you buy fit in any of these sizes.can you explain that to me? or is it just for builder guys to know?
THANK YOU,July A
Hi July!
Every cordless drill accepts one universal size that comes with each drill bit on one side. That’s the part you put inside the drill.
From there, the bit tip on the other side is offered in different sizes, need depending.
My suggestion is to visit a local tool store, hopefully a place that offers personal service, so they can demonstrate this for you. That’s the best way to learn.