For part 2 of this easy pallet chair guide, we’ll show you the step-by-step of building an extra comfy pallet chair from scratch. Perfect for beginner builders!
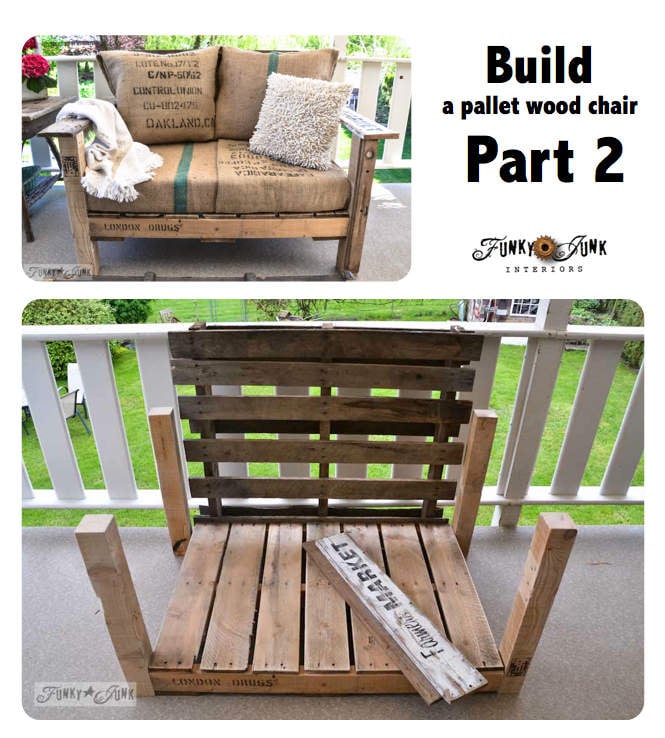
Welcome to Part 2 on how to build a pallet chair! This post will share every detail on how to build this easy and comfy wood chair from scratch.
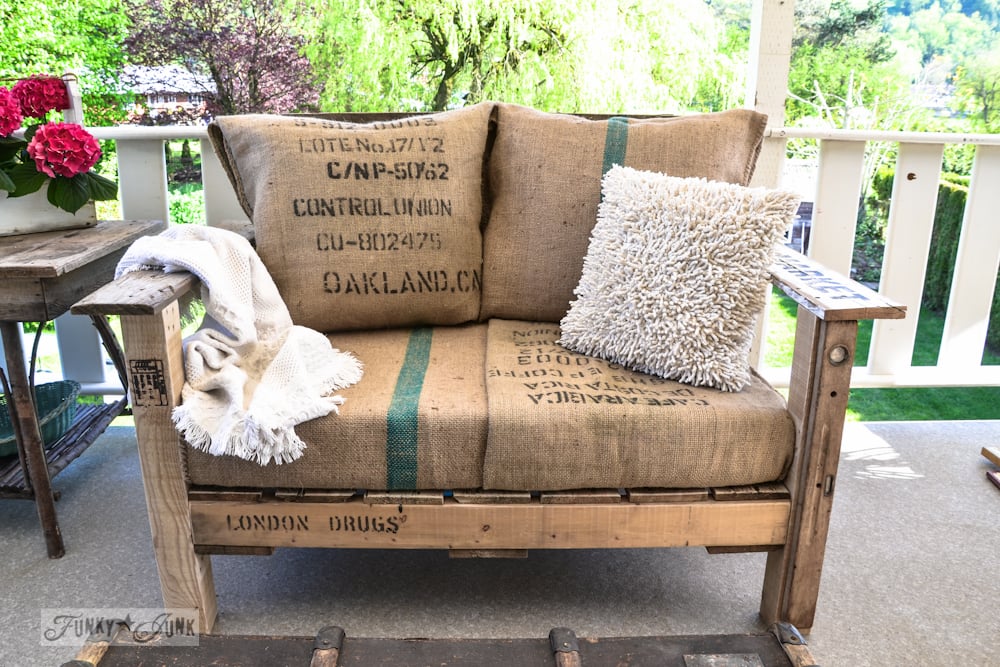
This project came about when I desired some original outdoor furniture that was super comfy. So when my eyes landed on two pallets in my own yard, I came up with a vision of an easy, oversized pallet chair to accommodate my other pallet furniture for on my covered patio!
And boy has it delivered! I’ve now had it for 12 years and it’s still perfect!
To view the reveal of the finishing details of the chair, visit part 1.
Visit Part 1 HERE
So let’s build! Read on for the complete details with these easy instructions.
This post contains some Amazon affiliate links in which I earn a small percentage from qualifying purchases through these links, at no extra cost to you. Thank-you for helping to support my blog!
How To Build An Easy DIY Pallet Chair – Part 2 Step-By-Step
Supplies you’ll need:
2 pallets of the same dimension – any size will do, but the key is that they are both the same size.
4 square posts for legs
2 cedar planks for arms
Long screws or nails
Miter saw or handsaw
Wood glue is optional. I didn’t use any.
View all my own tool suggestions at: DIY Tool Must-Haves
Designing the pallet chair
1. Start with two pallets of nearly equal size if you can.
One will be your seat and the other will be your backrest.
2. Sand the pallets well using an orbital sander.
Make sure wherever you sit or touch is extra smooth. I started with coarse sandpaper, then moved to a finer grit using an orbital sander.
Caution: Since pallet or reclaimed wood can be contaminated, please do wear breathing, hand and eye protection while building.
3. Cut the 4 support leg posts to desired size, then sand until smooth.
The height of the legs will be determined upon the kind of padding you choose for your chair.
The arm length (front to back) should slightly extend beyond your pallet seat depth.
– – – – –
My chair measurements are:
padding – new 5″ foam
legs – 25″ high
arms – 5.5″ wide x 32″ long
pallet seat – 42″wide (left to right) x 30″ deep (front to back).
pallet backer – 42″ wide (left to right) x 36″ high.
How to select safe pallets
Read how to select safe pallets from THIS POST: EVERYTHING YOU’VE EVER WANTED TO KNOW ABOUT PALLET WOOD.
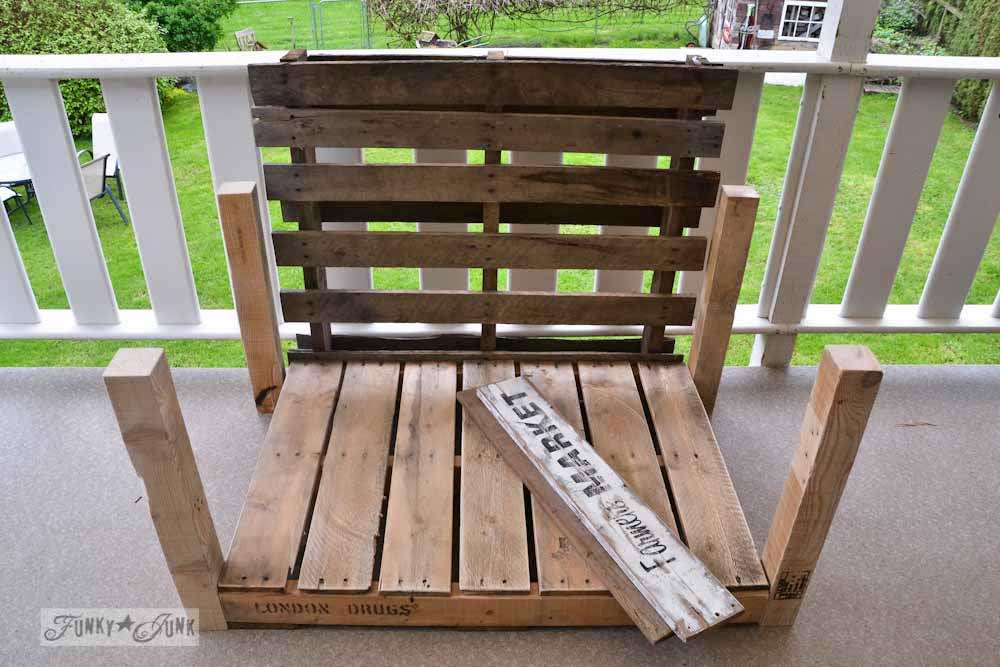
Dry-fitting the pallet chair
4. Dry-fit all the chair components to make sure they fit well.
I also placed something underneath the bottom pallet to determine the height I wanted for the seat before attaching.
I chose to not attach the backer pallet because I had a railing for support. Allowing it to lean also offers you a nice comfortable angle to lean against.
If you wish to attach the back, I’d rig up a support board behind the back that attaches to both arms.
Creating leg supports:
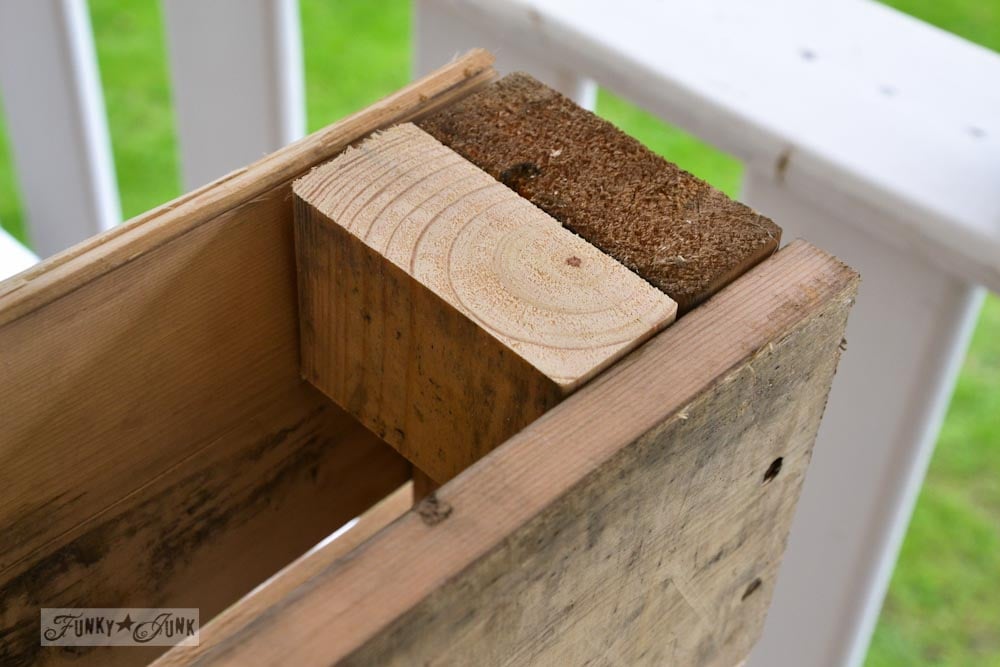
5. Cut 2×4 chunks to fit inside the pallet seat opening, then attach into place with screws.
Before the seat pallet was attached to the foot posts, the inside of the pallet was reinforced with small cuts of 2x4s to fit.
The small reinforcements give the back and front legs something more to grab onto.
6. Determine the height of your seat.
To determine the height of the seat, you’ll first need to decide what you’ll be upholstering the seat with as part of the finished height.
I placed boxes underneath the pallet to help determine the desired height.
The height of my seat from floor to top of pallet is 12″.
The foam I chose was 5″ thick, so I lowered the pallet seat height to accommodate that.
Finished height with pallet and foam cushion was 17″ from floor to top of cushion.
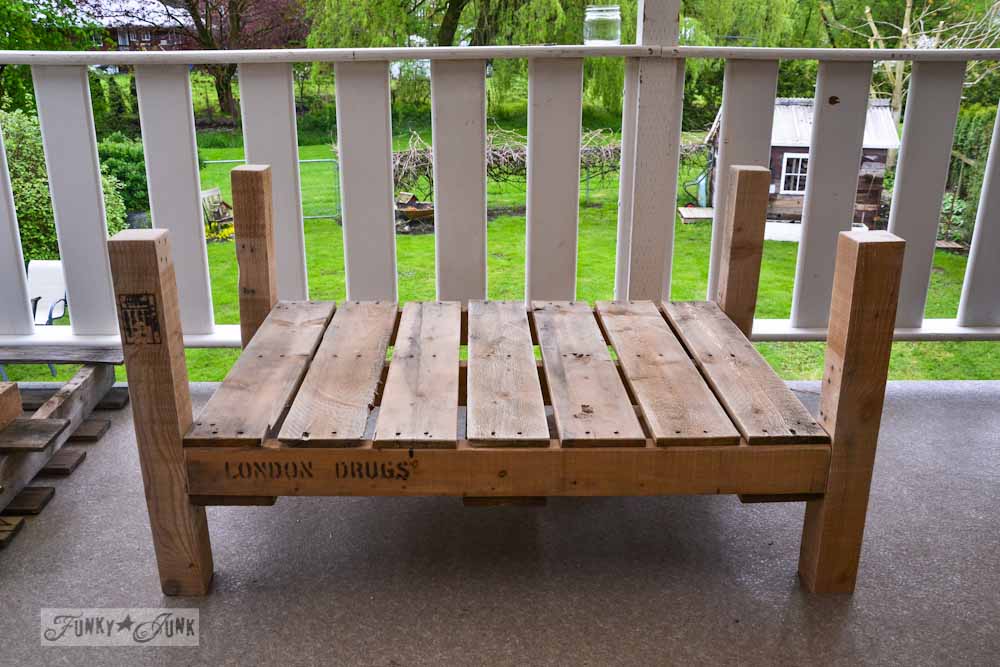
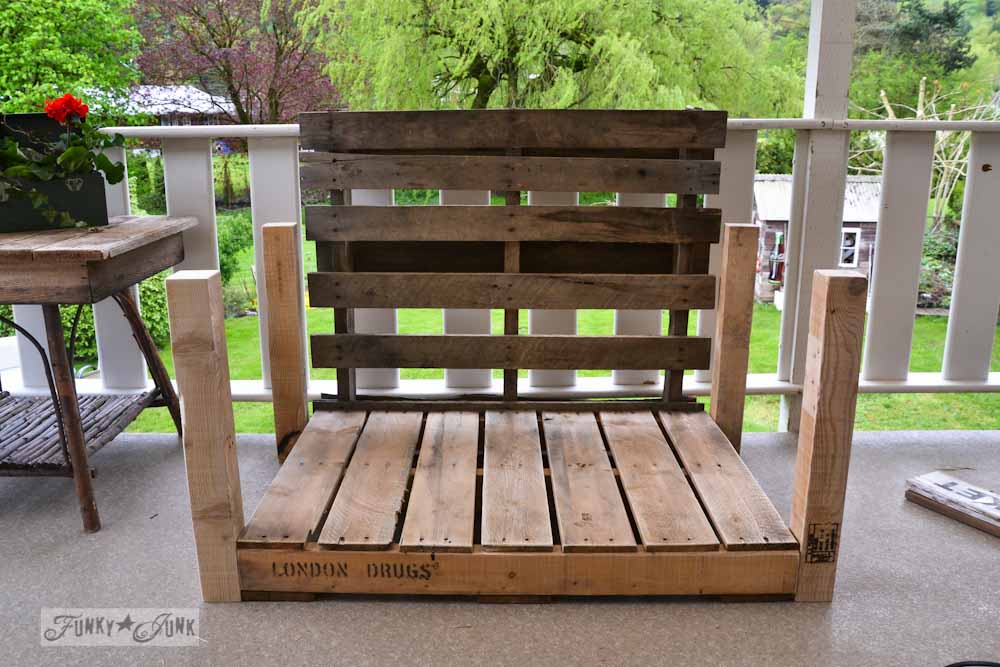
Attaching the pallet chair legs
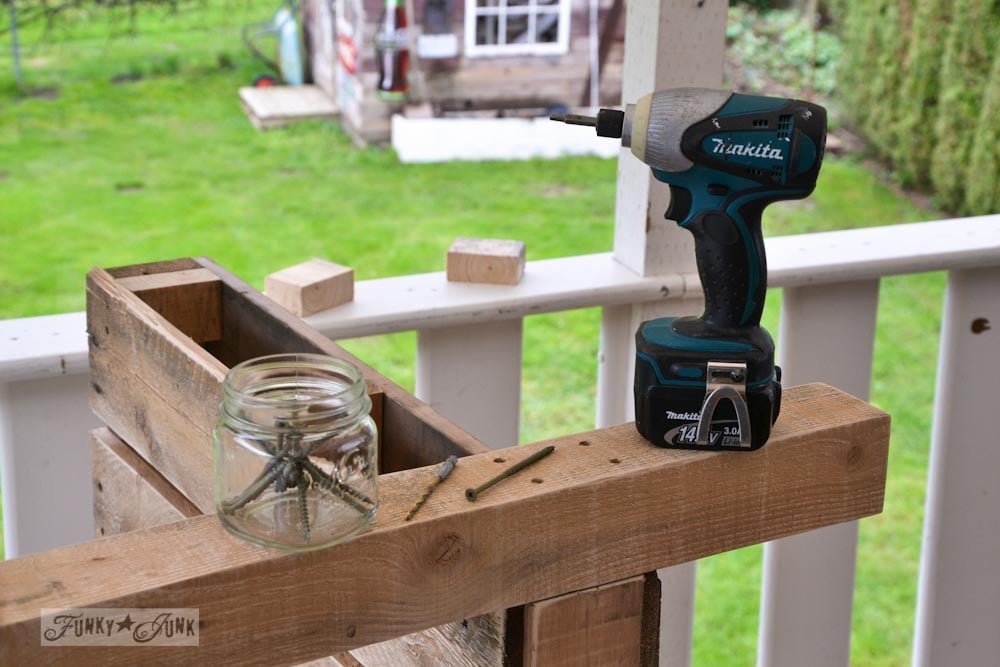
7. Attach pallet seat to the legs by pre-drilling holes, then attach with screws.
Turning the seat pallet on its side, the legs were attached with 4 screws as shown above.
Pre-drilling the holes will really help for assembly.
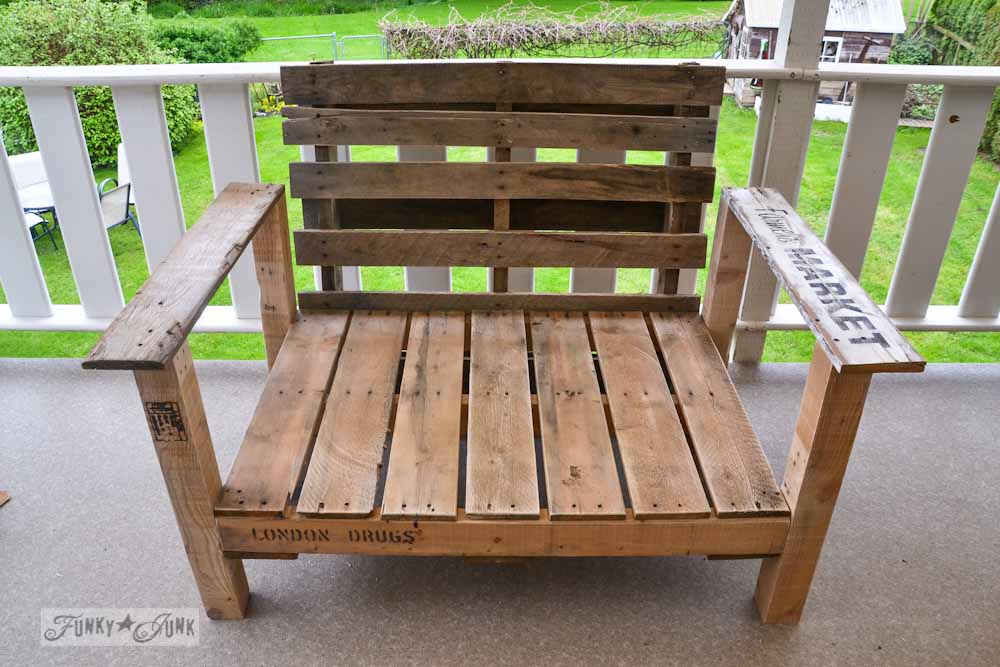
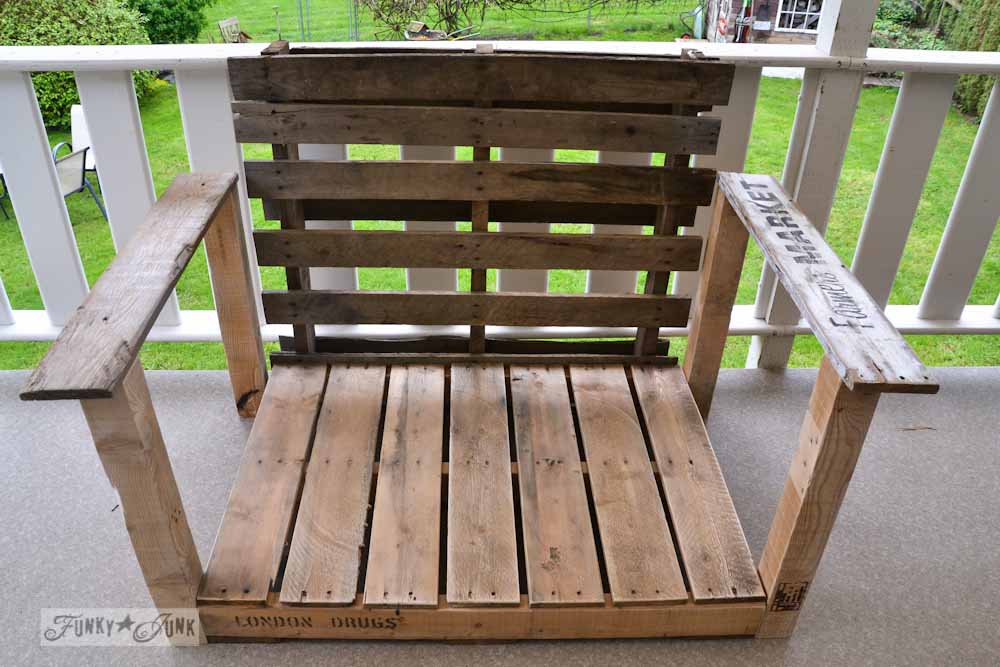
Adding chair armrests
8. Screw on your choice of board armrests.
I chose cedar planks that were wide enough to hold a cup of coffee. Just be sure to sand them really well to avoid potential splinters.
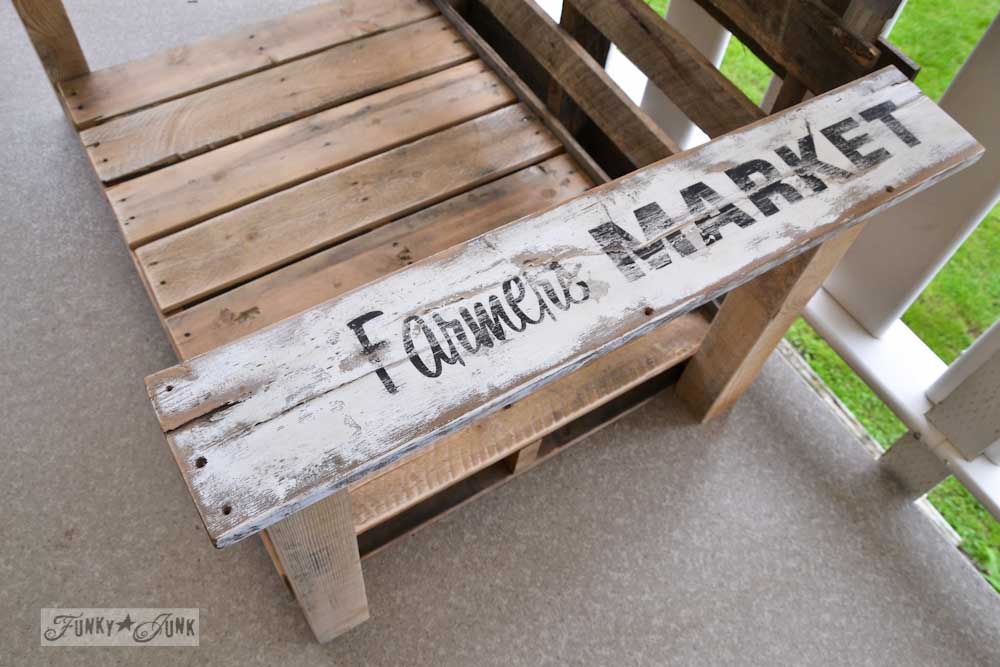
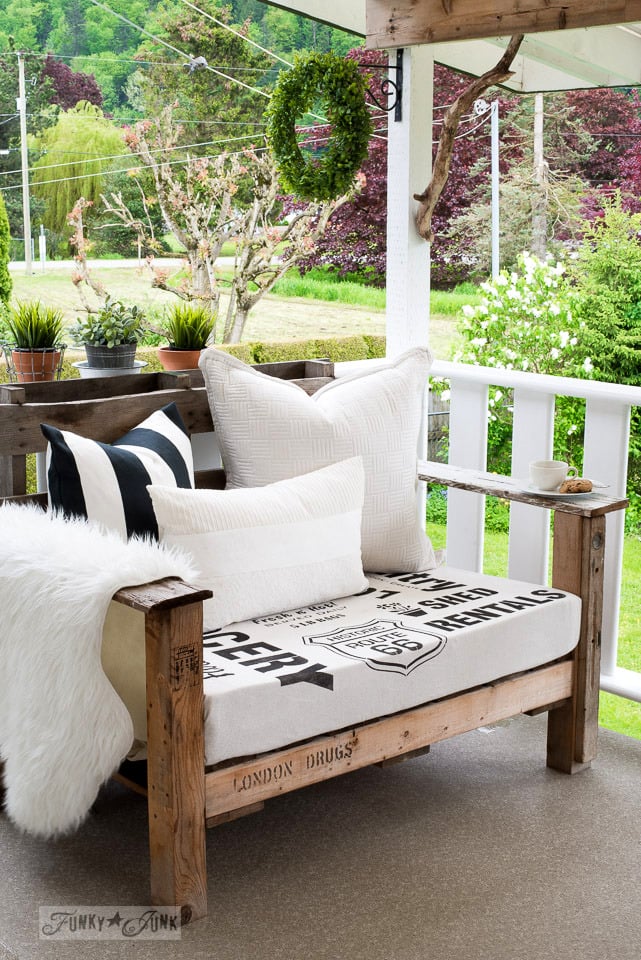
And adding an old sign to one armrest was a fun twist too!

View Farmers’ Market stencil from HERE
Visit many other sign stencils HERE
I used this Farmers’ Market stencil to create the sign.
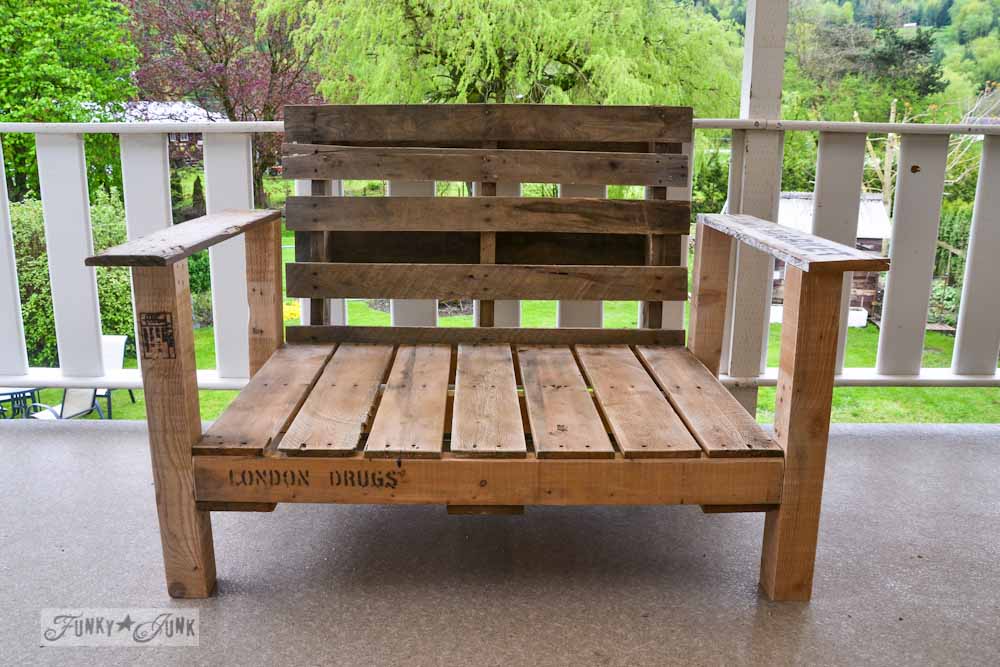
The assembled pallet chair
Pretty funky, right?! Now it’s looking like a real chair!
So let’s make it super comfy next.
Adding upholstery
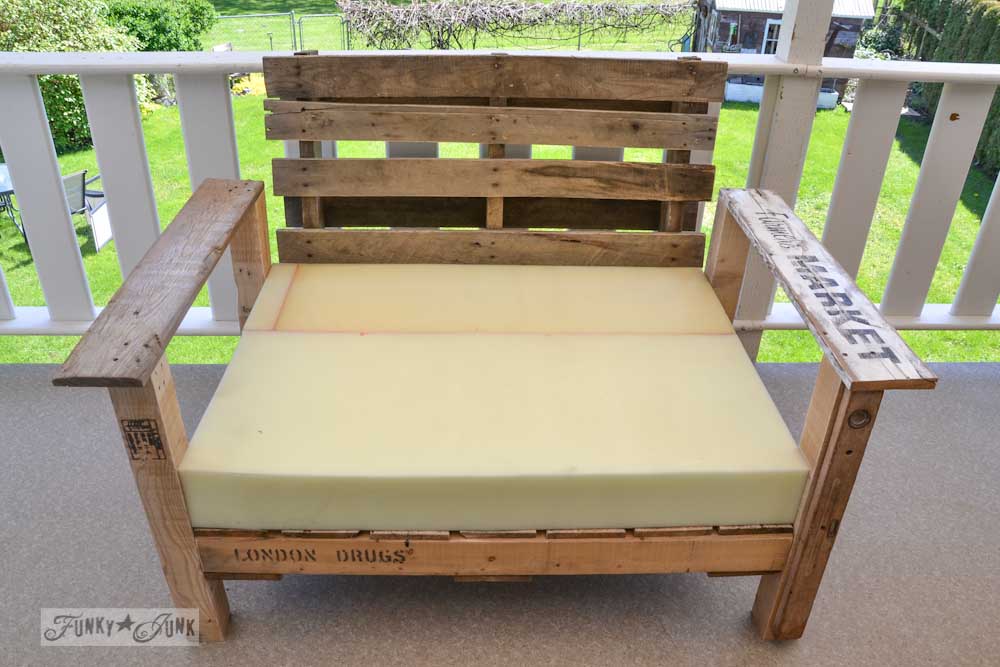
9. Choose your seat cushion.
Pallet projects are obviously not comfy on their own, so you’ll need to figure out some kind of soft padding for this simple chair. I purchased brand new cushion foam that I got cut to size at an RV upholstery place.
I chose 5″ foam because I did a trial on a sofa cushion we had and I loved how it felt! 5″ foam is not cheap though, as this seat alone ran me $100ish. But if you can land some reclaimed foam or choose something thinner, you’ll save money.
Make sure you do a trial and actually sit on the foam you choose to ensure it’s comfy, as the density chosen will determine the softness.
Outdoor foam is another option, but it can double the price. I just bring this foam piece indoors when it’s damp outside.
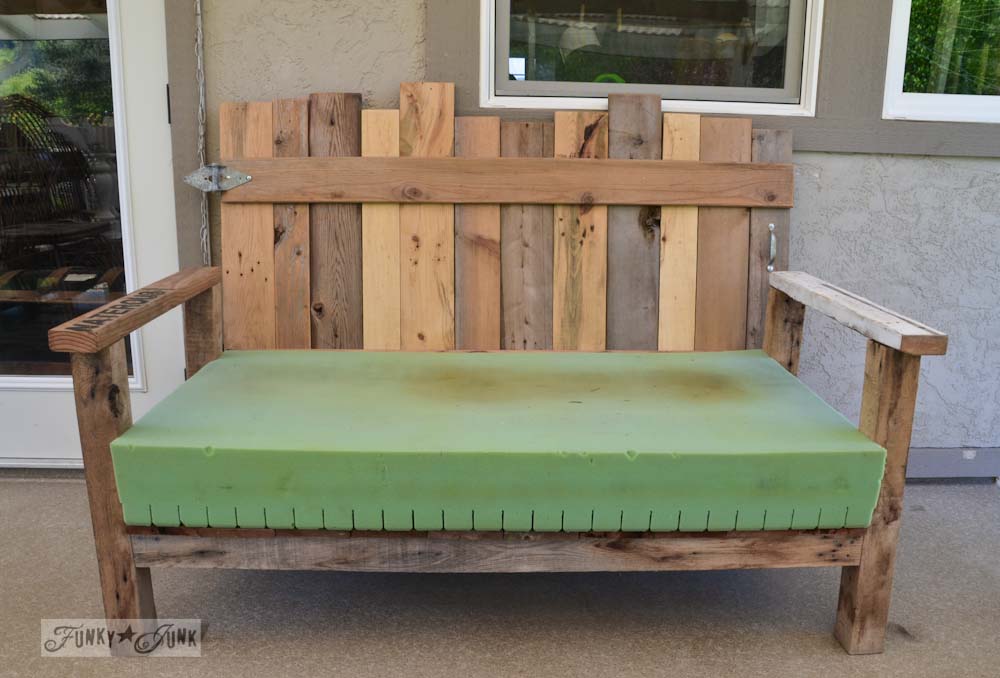
Pallet Sofa option
I also built this pallet sofa using reclaimed foam. It is 6″ thick and super soft.
The pallet sofa was built to suit the reclaimed foam purchase, so that made things a little more affordable. However this build is much more involved, being built with loose reclaimed lumber.
So let’s check out more about how to get custom seat foam cut! This was so interesting.
Getting new seat foam custom cut
Getting new foam cut for your pallet chair is not the cheapest option, but it is a good one if you have an odd-sized pallet you can’t outfit anything else with.
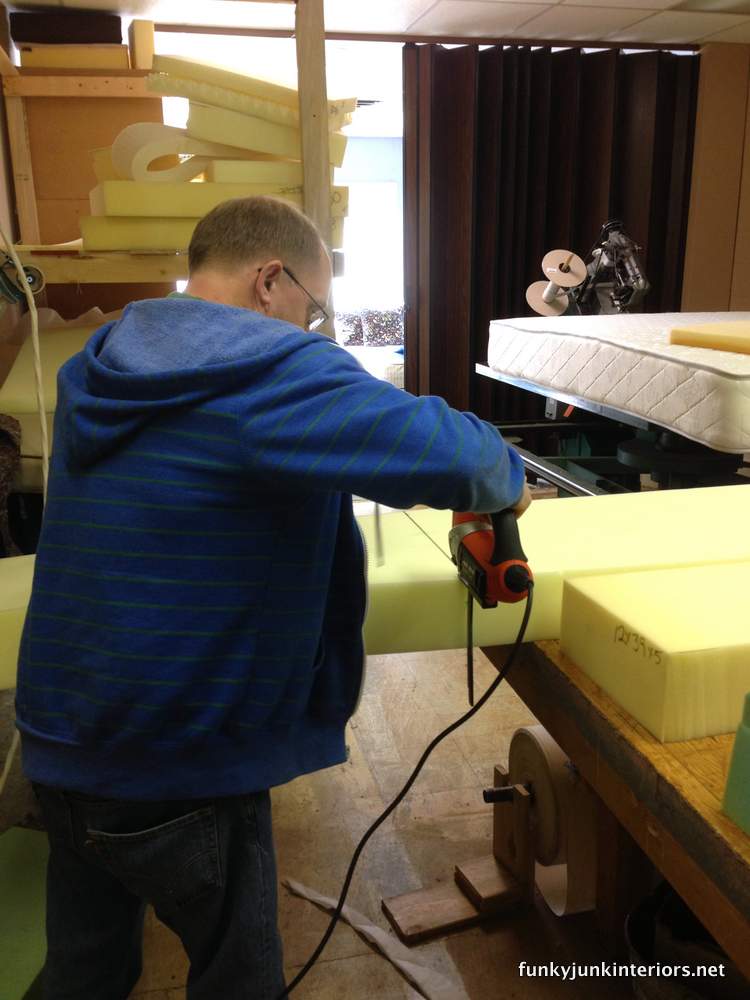

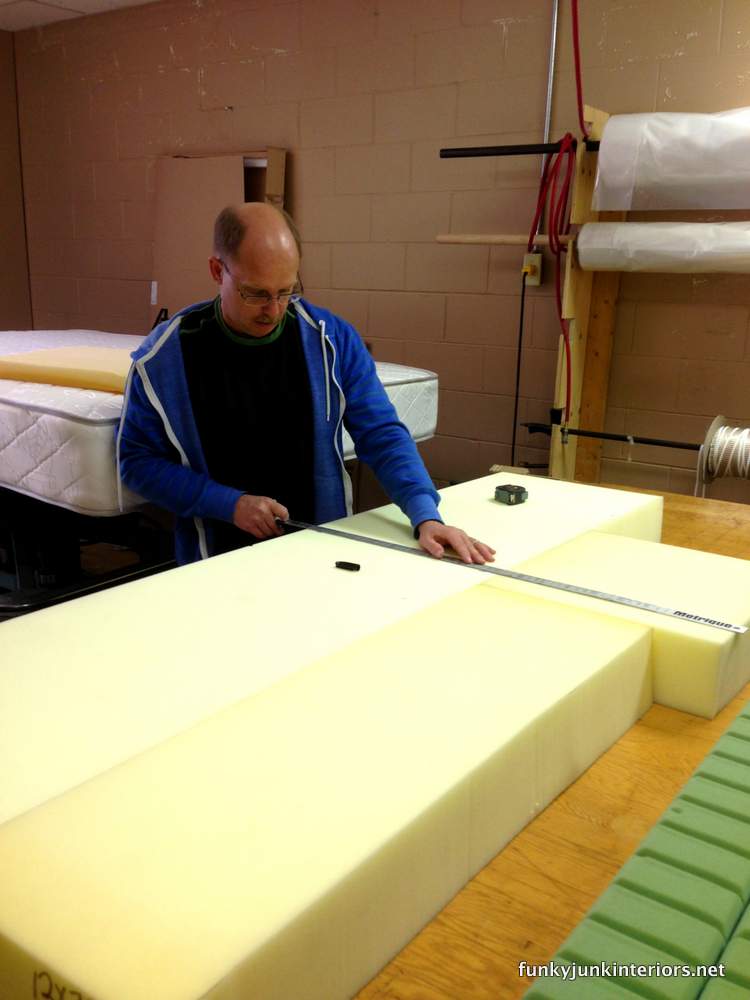
I got this foam cut at Kingdom Mattress Factory in Chilliwack, B.C.
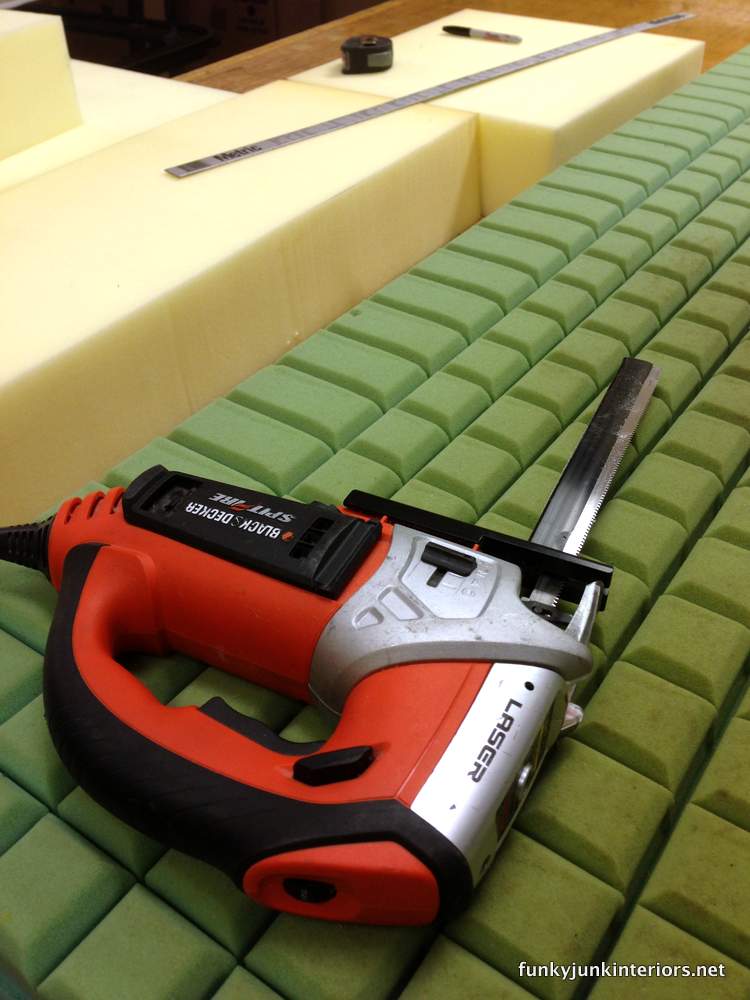
Fred used a foam cutter, and glued the foam chunks together creating the exact size cushion required. It could have been cut out of one chunk if he had it on hand. You can’t feel the seam at all so it worked out great!
Update: The joins later separated, so if you can get 1 solid piece, I’d recommend that. Or possibly be prepared to reglue at a later date.
Also shown above is a glimpse of the green reclaimed foam I purchased intact and custom built a pallet sofa around.
Visit the larger pallet sofa in THIS POST.
The bean sack upholstery
Over the years, I’ve used many different seat covers for this pallet chair.
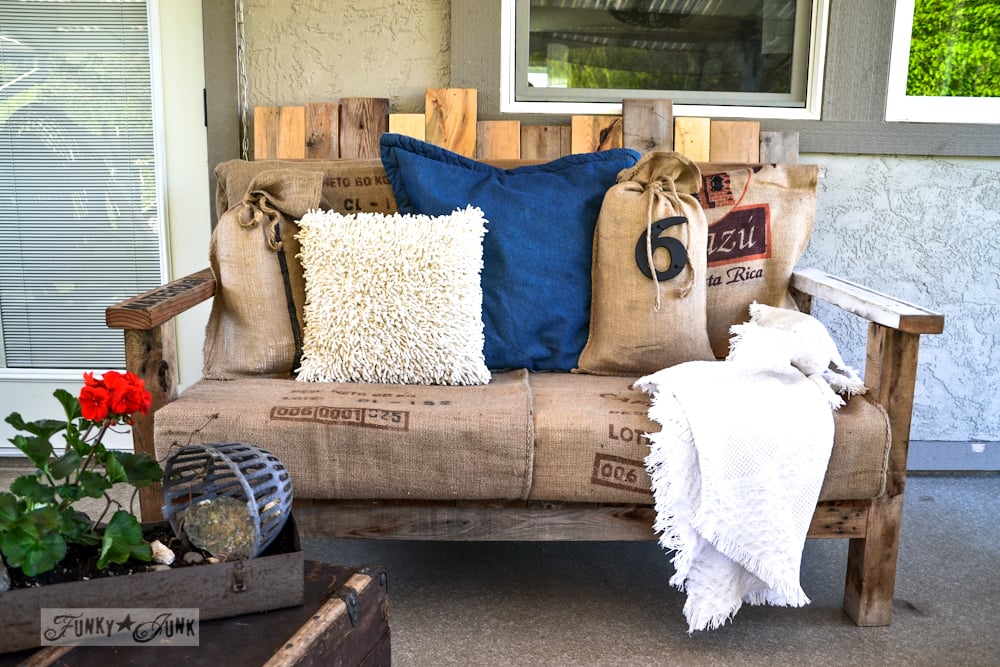
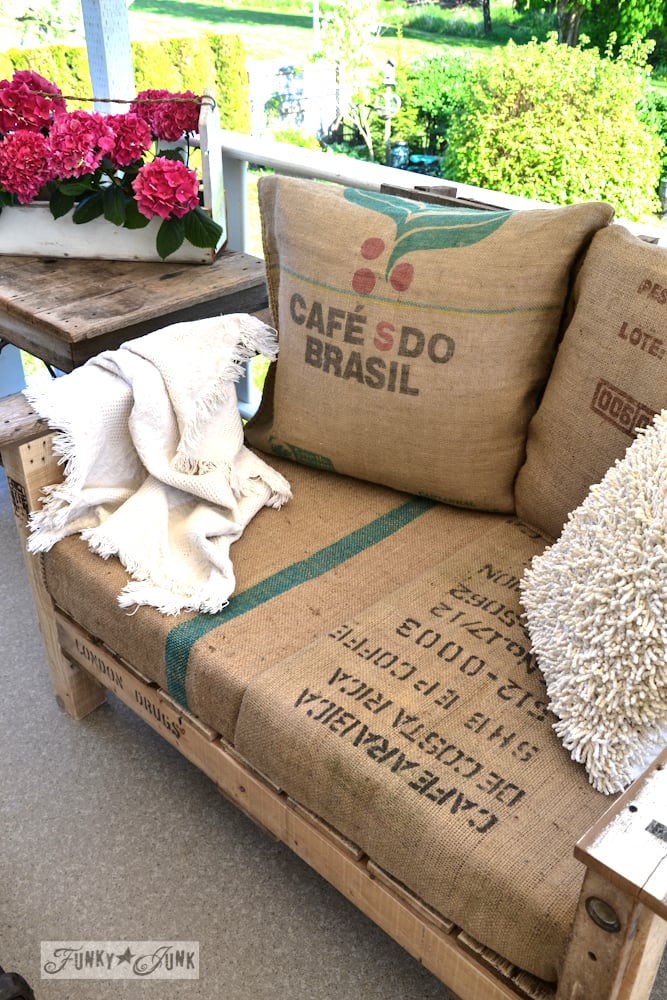
However to start, I chose to use authentic coffee bean sacks because they are pre sewn and I love the look!
The bean sacks were wrapped around the seat cushion, then the back has pillows inserted into the sacks. Instant, easy and no sewing!
See more of the upholstery in Part 1 – Pallet Chair Reveal HERE
Burlap pillows
The large 26″ pillows were slipped into the bean sacks, then the edge flapped over towards the back. The pillows fit perfectly!
The pallet chair seat
The bean sacks are loosely wrapped around the seat foam. I just didn’t want to sew, but you certainly could.
They are a little itchy when you sit on them with shorts, but during those times, I just plunk a blanket down first and all is well.
How to store the upholstery
Because the foam I chose was not outdoor durable, all the foam, pillows and sacks come in at night or during damp weather so they don’t get mouldy. It’s a little bit of back and forth, but I find the comfort of the chair outweighs the work involved.
I have a special place underneath the sofa where I slip the foam into hiding when it’s not being used. Underneath a bed is where the larger one resides.
Bean sack stencils
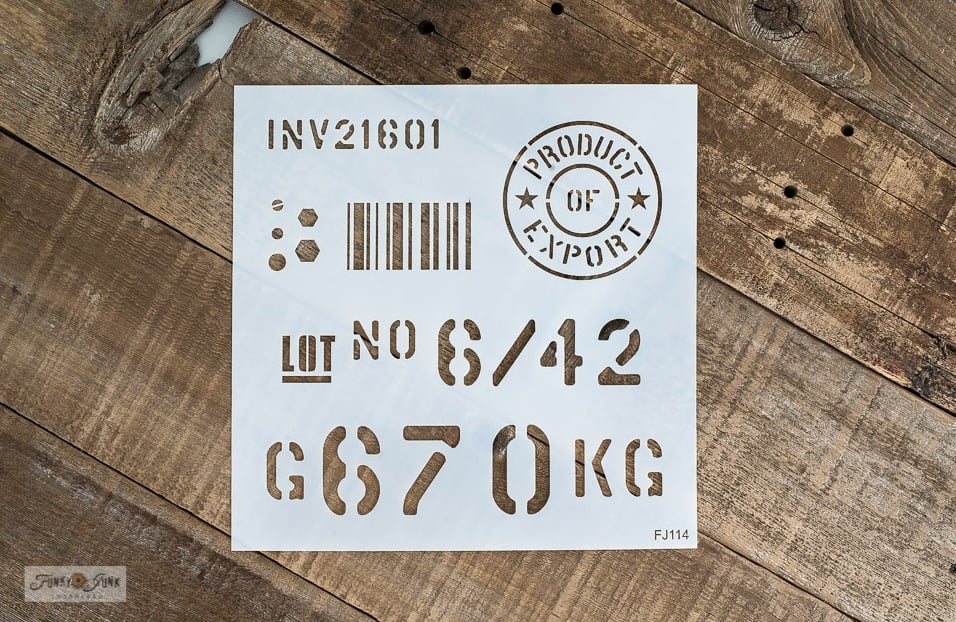
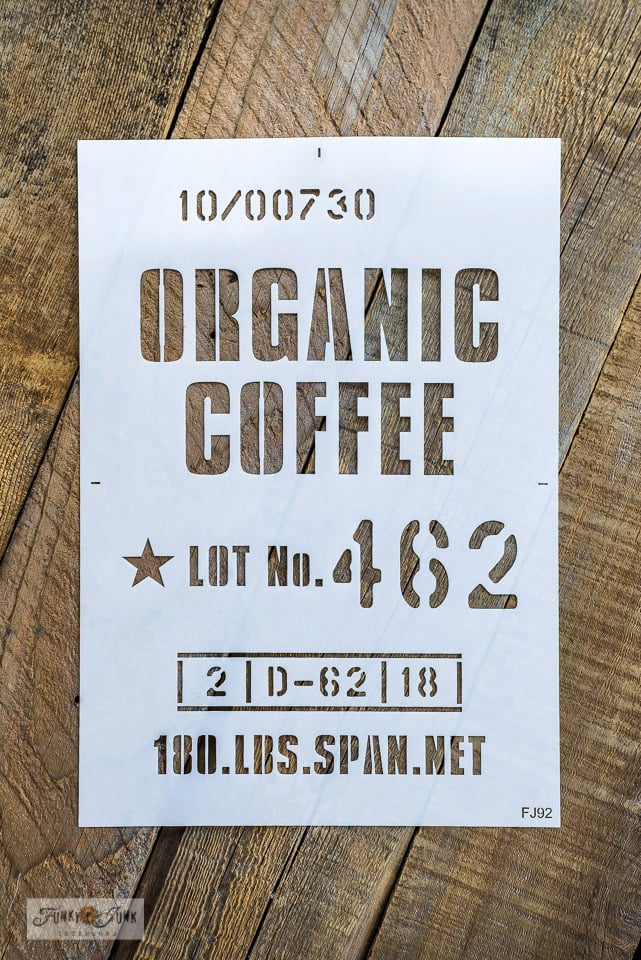
If you can’t land authentic bean sacks, consider purchasing burlap material (or a painter’s drop cloth) then stencil them with one of these rustic pallet styled stencils which would be perfect!
Visit more pallet stencils HERE
Subway chair stenciled fabric for the pallet chair
Here’s how the painters’ drop cloth looks when stenciled with a funky subway style look!
These fabric covers were wrapped around loosely, and washed up beautifully! And they were nice and smooth against legs in shorts as well.
I hope I’ve inspired you to try your hand at this recycled pallet wood chair build! Or maybe a couple of pallet benches are something to consider.
All I know is, DIY projects are awesome, since they are so easy to customize to your own needs and size requirements.
Besides… you can rest in complete comfort after your efforts… and all summer long too! Think you’ll give one a go?
Pallet wood chair reveal – Part 1 *HERE*

Other DIY pallet ideas:
Pallet sofa reveal from 2012 – Part 1
Pallet sofa build from 2012 – Part 2
How to know if pallet wood is safe
My other pallet wood creations
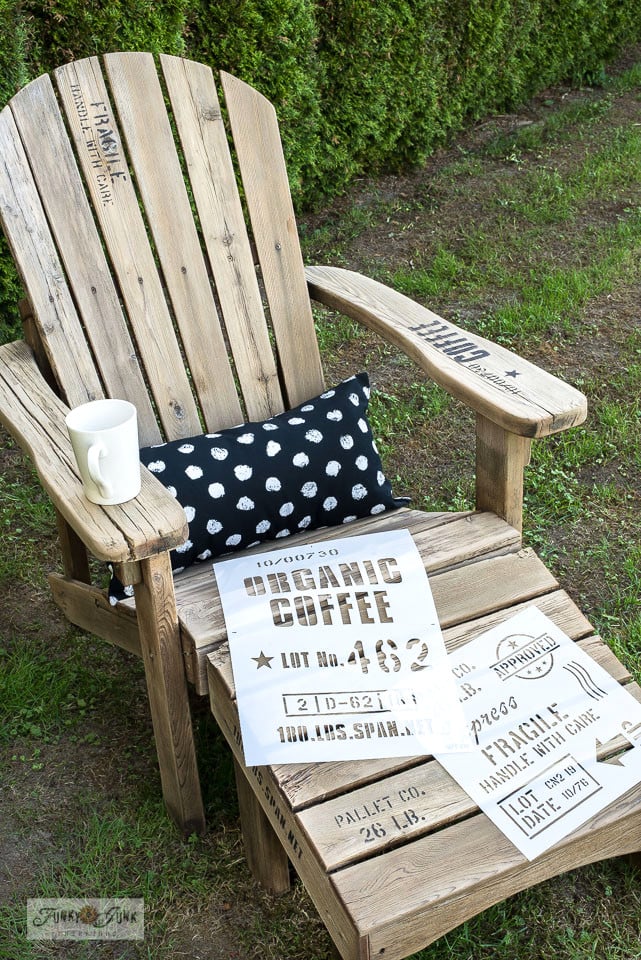
How to create pallet adirondack chairs with stencils
Completely awesome, Donna. I won’t likely be making one, but I really enjoyed seeing how it’s done! Absolutely love the look!
Jeanette
What a fabulous idea!! This is so awesome. I think my deck needs one of these, new spring project here I come!
I love it! I love working with pallets! And the burlap covers….awesome!
Shelly
Amaing! Beautiful porch!
D.
It’s awesome! The sign arm rest takes it to another level. And don’t sell your skills short, do you realize there are those of us who have A+ builders in our family who show them YOUR projects and say “make it exactly like that”?
Bliss
Bliss, that is way hard to believe… don’t wake me up if I’m dreaming! 🙂
AHHHHMAZING YOU MAKE IT LOOK SO EASY! GOD BLESS YOU AND YOUR AMAZING TALENT =)
HI. Thanks for the tips on the foam! Do you put any sealer on your outdoor wood pieces? I’m building a table and have lots of choices on how to finish it. Decisions.
Casey
Hey Casey, no sealer whatsoever! My patio is covered from the elements so I’ve never bothered. I’ve found most pallet wood to withstand weather pretty well unprotected though but it isn’t a bad idea!
Wow, I am in LOVE with this chair! Thanks for the inspiration and I think I may just have to attempt this project this weekend because I have 2 pallets outside that have been waiting to be transformed 🙂
~Katie
Thanks for sharing Donna, I love your tutorials and great looking furniture! My huband and I just got a hold of 100 + pallets I can’t wait to see what he makes out of these!
I’ll be celebrating Cinco de Mayo with some super nachos, a pitcher of margaritas and making this!! Really cool!! And perfect timing actually 🙂
I love the pallet sofa and chair! Please build versions for indoors! I have been contemplating this very thing and have been paralyzed with fear! I can’t wait to see what you whip up!!
I saw this today and have already found two pallets and intend to start making this weekend, wish me luck, I think your idea is fantastic.
Oh my goodness! Super cute sofa. And so funny, I bought a framed coffee sack of that “Cafes do Brazil” that you have as a pillow from a local gas station! Now I have something good to do with those pallets hanging out in the barn…
Hi Donna.
Love this post. I’m so sad though, in New Zealand you can’t really reuse pallet wood, trust me I’ve tried. It’s awful rough sawn pine with lots of splinters. I made planter boxes out of some once but they were awful to work with and didn’t look that great. A shame.
Keep up the great work!
Hi Donna.. Try sanding with coarse sand paper first then use fine sandpaper. It really makes a difference in working with the wood..
Hi Leah. Have a look around some different places for pallets. Most are in poor state but occasionally some good ones come along. It can depend on the industry/use… And you have to work the sander/elbow pretty hard but they can come up nice. Good luck. Matt (NZ)
Hey Leah, I use a palm sander.. it’s mandatory! You could also go a step beyond with a belt sander. I’ve been debating on picking one up myself. Ours can be very splintery as well so sanding is totally needed.
I have an old futon frame, I was thinking about using to make some sort of chair, or loveseat. What are your thoughts on that?
I think you should try it Lori! Sounds pretty cool!
This is such an amazing project… Thank you so much for sharing. I am pinning!
Hi,
These are adorable! I’m wondering if the wood is treated or if I need to treat it to leave them out in our back yard?
Hey Michelle! I did not treat the wood as it’s under cover. I’ve never found that pallet wood deteriorates all that quickly anyway. But to be safe, yes, it would be a good idea to treat anything wood that will get hit with all the weather elements.
Thanks so much!
What a beautiful love seat! Did London drugs just give you the pallets?? I’ve never seen them there before. I’ve always wanted to build things with pallets but never know where to find them. On that note, where did you get the coffee bean bags, too??
I found the pallet with a pile of other pallets at a firetruck manufacturer. Guess it got around. 🙂 The coffee bean sacks are from a local coffee roaster in BC Canada, called The Back Porch.
I love this! Its amazing! Where did you get the 4x4s from? I love how they match the rest of the wood.
Hey Leanne! The 4×4’s are from very large crates / pallets. They were free too! 🙂
Simply delightful. Welcoming and charming…
Plan on making one for my new home. It is going to be decorated in country, and am already using some reclaimed wood for other projects from my husband’s old family home, which is nearly 100 yrs old. I am moving, I became a widow 6 mos. ago and am using the old wood to bring part of my late husbands family heritage with me. We have some left over pallets and I am going to use this idea. Thanks. Debbie
I think this is awesome and I am going to try it!
The burlap bags r truely a crowning jewel on this piece.
However, might I suggest a water resistant or a marine fabric instead? If you dont want itchy, uncomfortable, waffle butt every time you get up.
(If you DO decide to do this) Make sure you use a heavy duty needle on your machine or use a commercial type to avoid going thru needle after needle. I would call ahead and save yourself the time and expense or wasted gas. You could also sew each piece, fronts and bottoms with a different fabric for a quick and easy “change out”. A 4th of July theme on one side would be so charming. Also, make sure to use a high density foam. There really IS a major difference. Put your money where it really counts.
*** For “broken” down foam, simply remove covers and just use a steamer to magically puff them right back up, doing small sections at a time, holding steam in place until its reached its limit. You can use this trick on ANY broken down pieces, to revive the look of worn, broken down cushions. In or out! I hope somebody finds any of this usefull.
Totally wonderful advice, Sandi! Thank-you!!
What size screws did you use?
Hey Donna
Love this post and can’t wait to try it out. Question: I know you said you just picked up the burlap sacks and stuffed pillows in it, but it looks like the edges have been tapered? Did you make an edge and a zipper or did you literally just stuff them in and if so how did you hide the opening of the burlap sack?
And for the button cushions… Did you have to get different sized sacks? And if so, what would they be called?
Thanks so much for your help
Jackie
Hey Jackie! I just slipped the pillows inside the coffee bean sacks as if they were huge pillow cases and flopped the front over towards the back. Nothing fancy at all.
Any smaller pillows were either gifts or purchased. I didn’t make them. The smaller coffee bean sack pillow was indeed cut to desired size, then stuffed.
Check out for grain sacks in your area, they are generally much smaller in scale and easier to stuff as accents.
My pleasure to help!
Hey!!
I absolutely LOVE this! And I have seen a lot of other ideas for pallets all over, but I don’t know where to get pallets from. Can you help me? I would so appreciate it!!
Thanks,
Lizzy
Hey Lizzy! Look around at industrial areas that ship big stuff. Mine are from a firetruck manufacturer. I’d suggest to avoid places that ship chemicals though. And always ask, some return pallets for compensation. Good luck! They are everywhere!
Hello Lizzy! I am attempting this project right now and I found my pallets at a nursery. They had a ton and were more than willing to let me take as many as I needed.
Trina
I love this idea! I’m curious though, where would you go to get these pallets, and do you you have to pay for them? Also, I love the burlap sack idea, but I have the same question there. Where do you go to get them?
Oh, nevermind….I should have read the other comments, looks like my questions were already answered!
I loved the step by step directions! I have been looking for foam though and having no luck, any suggestions on where I can get 3″ foam for my bench? I also used a waterproof mattress cover (ones they use for toddlers beds) under my cushion covers and that seems to help for my outdoor projects!
Thanks
Tasha
Charleston, IL
This chair looks great!
Has anyone figured out how to attach the back to this? I I build two or three of these, I will only have one against the wall.
Thanks,
Beri
Hey Beri, I would suggest extending the arms towards the back, then running a support connecting them. Then attach boards, brace them from behind, and lean that section on the arm supports. I think it would work!
Donna,
A lot of people have seemed interested in building this but don’t know where to start, or if it will work… Well here’s the answer, we are going to “feature” this DIY love seat in our next episode of Me & Mom Barefoot & Bluejeans, so stay tuned and we will see how we do :0).
Hey ! This is adorable… but for future projects … baby matresses can run as low as $30 at a walmart or target and almost all baby matresses are vinyl-y ( to avoid staining from accidents) they are small.. comfy .. and water resistant ! and about a third of the price !
Hey ! This is adorable… but for future projects … baby matresses can run as low as $30 at a walmart or target and almost all baby matresses are vinyl-y ( to avoid staining from accidents) they are small.. comfy .. and water resistant ! and about a third of the price !
Just a grandma that loves to use things over and over. When it warms up and I can get to the shop, I have projects to finish. Enjoyed looking at your refreshing old things.
the pallet chairs and sofa look really cool. i have to do a project that is made out of recyled things. got any ideas on furniture i could make?
Hi Sierra, thank-you! You can view all my projects under MY PROJECTS under the main header. You should get lots of ideas there! Good luck!
I am wondering were you can get the foam that you are showing here. Is it only available for commercial sales.
Hi Arne, I just got it made from an RV sales foam place. They were happy to custom make it for anyone that walked in. Maybe google for a place like that in your town or close? Good luck!
I made your pallet chair yesterday, it only took me 45 min to build. It turned out awesome and it looks awesome on my porch. I was able to get the 5 inch upholstery foam from Amazon for only $35 dollars and I even had enough to do a cushion for the back. LOVE IT!..Thanks for the idea.
Oh WOW! That is so cool Raena! I’d love to see a picture of it! Feel free to share it on my Facebook page!
Love it
Pretty sure I’m making this soon! So excited.
You could remove covers wrap foam in plastic. Then put covers back on and spray with a water repellant spray or you could just try the spray by itself. You could test it with a water bottle.
I have 2 dogs, who I searched and searched for a large cheap chair for them in the house..I did luck out and found a lazy boy BIG MAN chair, they love it, wish I woulsd have thought about a pallet chair, BUT I will end up making one for me outside and of course one for them to enjoy outside also!!
Thank you, GREAT IDEA>
Hi Donna! I picked up some pallets last year to make some outdoor furniture and I was waiting for inspiration. You have done such a beautiful job! I was wondering where you got your burlap sacks from? I am in the Fraser Valley so when I saw that you went to Coquitlam for the foam, I got excited that you might be able to help me find sacks in my area. Thanks for your advice!
You bet I can help! Check out The Back Porch at Harrison Hot Springs. They don’t always have them in stock though. But it’s still worth a drive out. Their coffee, pottery and junk are divine. 🙂
Donna, I absolutely admire you and your talent! This chair is too cute! What a build! I do love the burlap look of the cushions, but as you allude, they are scratchy…Have you thought about using a drop cloth…maybe with a cute transfer of words on it…maybe a strap(cut from drop cloth, also)on back for easy carry into home at night?
Love, Love, Love what you have done!
Thanks for sharing!
Marilyn
Yes I sure have! But… just haven’t implemented it yet. Because I do believe it would require bringing my sewing machine out of hiding… not sure how that would work out! haha One day…
Love the idea. I’m concerned about the support. Doesn’t seem like the 4 screws per leg would be enough support.
Mine is as sturdy as a rock, Julie! Seriously… so sway nor jiggle in sight.
I found foam at home depot for $25 for a 24x72x3 piece. Im gonna cut it in half because i want it deep and Three -four cushions across. Im gonna double them so its thicker. The cheapest I’ve found yet. I also looked on crags list for super cheap ugly sofas for sale. I found one for $50 with great cushions. Im keeping the back and seat cushions to recover then tearing apart the sofa and throwing it away. Ikea also has cheaper cushions and cheaper pillow fillers. If you get outdoor waterproof fabric and recover the foam it doesn’t matter if its waterproof foam.So fun I can hardly wait to get started. I dont have a lot of experience building but I do have some. I have a lot of experience sewing so I can hardly wait to make cushions and pillow covers.
What fabulous ideas, Valerie! I hope you’ll share the outcome with me when you’re done, I’d love to see it! 🙂
Going to try this on weekend
Great ideal, I love how rustic it looks and it looks like a professional built it. Thanks for sharing.
Cheryl-Chattanooga, TN.
hi looks awesome,, I have some pallets so going to try this, what are your exact measurements you used to build the chair?
Love it)))))))the best in whole world
Would it have been cheaper to use several foam egg crates from Walmart? Just a suggestion.
That would certainly be worth checking into Cyndi! Being that I planned to move them in and out all season, weather permitting, one piece has made that a little more effortless. We honestly use the outdoor sofas so much, I’m (finally? haha) ok with what I paid.
I found your pallet chair and my husband and I are going to build one for our son and surprise him with it for his front porch in Charleston! He has access to burlap coffee bags as he works next door to Charleston Coffee Roasters.. This looks like him and will be perfect on his porch. Thank you for your creativity!!
Cricket
How awesome, Cricket! Your son will LOVE it!
Love the chair and want to make one but what I need to know is how did you attach the back?
Hi Michele, I believe in one of the two posts I specify the back rests against the patio rails. The back is loose and just leans against rails and seat structure. However you could of course attach it with screws if desired.
Me and my hubby are making two chairs next weekend! His job has pallets they need to get rid of and I have to couch cushions that in perfect shape with nothing to do with em! 😉 I’m gonna fine outdoor fabric to recover them (which my mom will Do). Thank you for this! If you want, I will send you a picture when we are done!
Hi I love your chair definitely intend to make one. Another idea for cheap cushions is to watch for people throwing out sofas or big chairs just cut the foam to whatever size u need. I’ve done this and covered with outside material which I used on an outside bench??
That’s a great idea Judy! As long as they are pest free of course!
How do you attach the back pallet to the seat pallet and legs?
I personally didn’t, but you could! I would angle the back pallet a little, then attach some board supports in some way. I meant to design a free standing chair this summer but it didn’t happen. I’ll try and do it next summer for sure!