Transform old wooden pallets into a comfortable and stylish outdoor pallet chair with this easy DIY tutorial! Perfect for any skill level, this project is a budget-friendly way to spruce up your outdoor space with comfort in mind!

This post contains some affiliate products in which I earn a small percentage from qualifying purchases at no extra cost to you. I only endorse products I love to use. All opinions are my own. Any mention of Fusion Mineral Paint product will get you 10% off if you shop through this page.

A cool pallet wood chair anyone can make! – part 1
PART 1 HERE – A cool pallet wood chair anyone can make! (you are here)
PART 2 HERE – Full tutorial on how to build the pallet chair
View MORE outdoor furniture HERE
Why a pallet wood chair?
There’s lots of outdoor furniture to be had.
However, I desired some outdoor furniture for the patio that was unique. Something you couldn’t find in a big box store. And something super comfy! Plus affordable. Sound familiar?
I’m also an avid collector of pallets and reclaimed wood. So when I ran out of interest in what the stores had on the market, I decided to come up with my own idea to create a DIY pallet chair.
So I gathered up some pallets, a post and got right to work!
And the end result? This outdoor pallet chair took under 2 hours to build. And it’s so easy, even a beginner builder can make it!
Curious?
So let’s go over each finishing detail to start so you can decide how to design your own pallet chair before building it.
Then you can visit how to build it in Part 2 HERE!

Gathering the pallet wood
This pallet wood chair requires 2 pallets that are exactly the same size, one for the sitting area and one for the back support, and 4 short posts.
You’ll also need two thinner longer planks for the arms. That’s it!
All the wood will have a rough finish, so to avoid splinters, be certain to stock some sandpaper in various grits for your orbital sander to work the wood to a safe, smooth finish.

Determining the size of the pallet chair
Because this pallet wood chair is made from whatever pallets you find, that will determine your final size.
You can work backwards, and find a comfy seat cushion or cut foam to start first if desired as I did in THIS pallet sofa tutorial.
However, since I wanted this chair tutorial easy, I made 2 identical wood pallets work.
I would consider the final size of this oversized wooden chair to resemble more of a loveseat.
However I believe that has something to do with the way it is styled. See how I made it look more like an oversized chair below.

Decide on your cushion
Since wooden pallet chairs aren’t soft by a long shot, you’ll need to add a cushion to your pallet chair.
You could start by finding a chunk of foam or small mattress, then build your pallet chair to suit.
Or do like me… I built the chair first, then got a piece of RV foam cut to fit the seat slats pallet.
Read how the foam was cut is HERE.
For the pillows, I used 2 large 26″ pillows simply slipped into burlap coffee bean sacks, and wrapped the seat foam with them as well.
Achieve this graphics look with any of these crate-styled stencils from HERE

View authentic coffee sacks on Ebay HERE
Using burlap sacks for pallet chair covers
Burlap coffee bean sacks are a great no-sew upholstery! And they look rustically appropriate with pallet furniture too!
However, burlap can feel itchy. So when I’m wearing shorts, I throw on a blanket first.
For the pillows, full coffee bean sacks work like giant pillow cases that allow large pillows to just slip inside, then fold over the top.
For the seat, the sacks are loosely tucked into place.
Coffee bean sacks can be found at any local coffee roaster near you, or check out ebay.
See how the large pillows were done HERE.
View authentic coffee sacks on Ebay HERE

Creating soft and washable drop cloth covers
Here’s another way to make it look more like a DIY wood chair. Isn’t it pretty? I love the oversized look and feel of the garden chair with room for lots of pillows! This wooden pallet chair is fun and easy to style in different ways!
While coffee sacks look super cool, if burlap isn’t your thing and you prefer to throw your covers in the washer, I personally love the softness and washability of this super durable, easy-to-make fabric out of painter’s drop cloth!
And yes, the stenciled fabric washes and dries up beautifully!
Learn how I stenciled my own fabric slipcovers HERE
Check out the many variations the pallet wood outdoor furniture has taken HERE

Take advantage of authentic pallet markings
Pallet markings are cool! So don’t forget to take advantage of that fabulous free lettering!
When you are building the pallet chair, face the lettering towards you so you can enjoy the markings!
However, if your wood doesn’t have any crate stamps, here’s how to add some in seconds…

Add authentic details with pallet stencils
Not lucky enough to land the perfect graphics on your pallet wood? No worries!
These stencils were designed to mimic the look of pallet markings exactly where you’d like them to go! That’s even better! So build your chair with confidence, then add the details later.
Shipping Crate Stamp stencils HERE
View the entire CRATE STENCILS COLLECTION HERE

Pick up any Fusion Mineral Paint products to stencil with for 10% off HERE!

Adding signs for a quirky armrest
You’re going to need some kind of planks for the arms. I personally used 5.5″ fence planks cut to size, that were already stenciled as signs! But they would look great plain too. Or perhaps painted two different tones.
Just make sure the arms are extra wide for that special coffee cup, and the bottom edges are well sanded so they are smooth to the touch.
I used a stencil to create this Farmers’ Market sign you can get from HERE
Posts for legs
You’ll need some kind of lumber or posts for the legs of the chair.
I used square posts that came off pallets.
However even 2x4s will work. Try doubling them up to get a beefier look and search for reclaimed if you can find it, for that special old patina only old wood can offer.
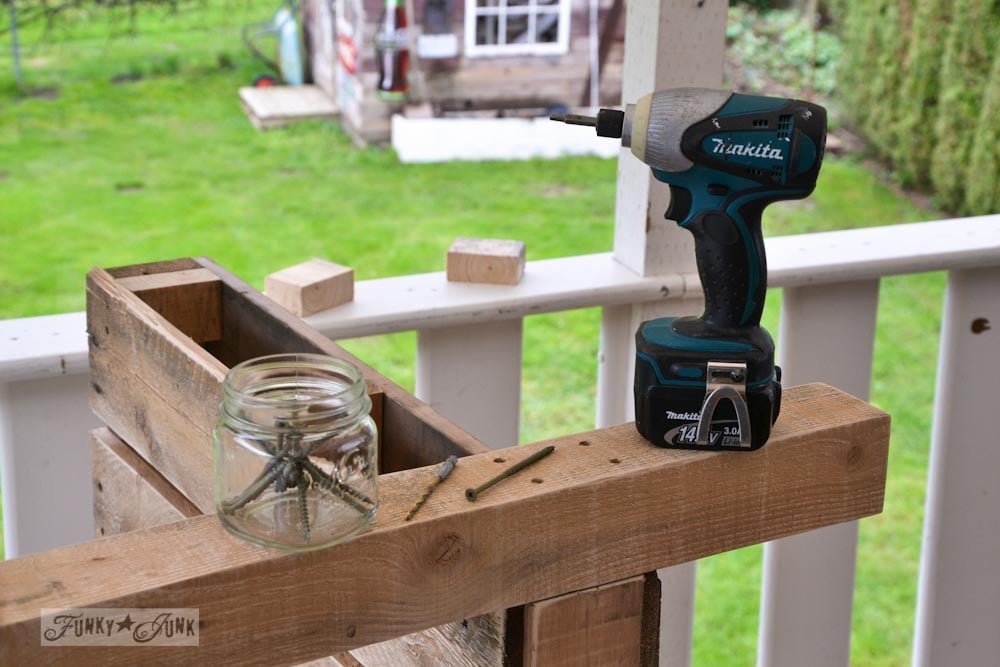
You will require long screws and a well charged up cordless drill and bit to drill pilot holes if you wish to assemble your chair the way I did.
Since the finished DIY wood chair is so heavy, I’d suggest to consider adding caster wheels to the feet, for easier moving when pressure washing the floor. I would most certainly do that next round!
I did not use wood glue nor nails for this project.

Embellish wood chair with antiques
After your chair is built, you may wish to incorporate some unique elements to truly make the chair your own!
This leg got a little extra detail with an antique wooden level.
The tiniest little extra ordinary details will make you look twice! And set your pallet wood chair apart from others. So go grab your bucket of rusty junk and play.
Browse for a few rusty junk antiques like THESE HERE

No need to attach the back if you have a patio rail
Not wishing to obstruct the outdoor mountain view behind the chair, a pallet the same height as the patio railing was chosen as the backrest. It is loose and not attached to the chair.
This makes moving the chair around a little more effortless since it’s less weight. This is not a light wooden chair once built!
However you could attach the back to the rest of the chair if desired, through some additional rear back supports or framework connecting the back to the chair.
Consider a slight angle to the back to provide a more comfortable position.
If the back slats aren’t decorative enough to your liking, you could add more wood, or custom build a pallet chair back like I did on my pallet sofa HERE
However bear in mind, the cushions cover the back anyway.
Protecting your pallet chair outdoors
Since my pallet chair sits underneath my patio roof, it has protection from the elements so I did not protect the wood in any way.
It’s now been years, and the wood looks as good as new!
However if you have yours sitting in the weather, I’d suggest to consider tung oil (10% off HERE) or some kind of wood protectant varnish that will stand the test of time so your pallet wood doesn’t rot.
Painting bare wood with Milk Paint (10% off HERE) would also work fabulous.
—
Now that you’ve learned all my pallet chair building secrets and suggestions, below is how to build the chair from start to finish!
Then you can pencil in time to make a straight line towards that coffee and comfortable chair in just a couple of hours!
How to build the pallet wood chair part 2 is below!

The pallet chair build part 2 – visit *HERE*
Part 2 – Learn how to build the pallet chair HERE

Other cool pallet projects to build:
Enhanced pallet wood tool organizer

An easy pallet wood gate and boardwalk – above

Reclaimed wood walkway – above

Reclaimed wood and pallet wood outdoor sofa reveal


How to know if pallet wood is safe.

Farmtable styled pallet wood desk
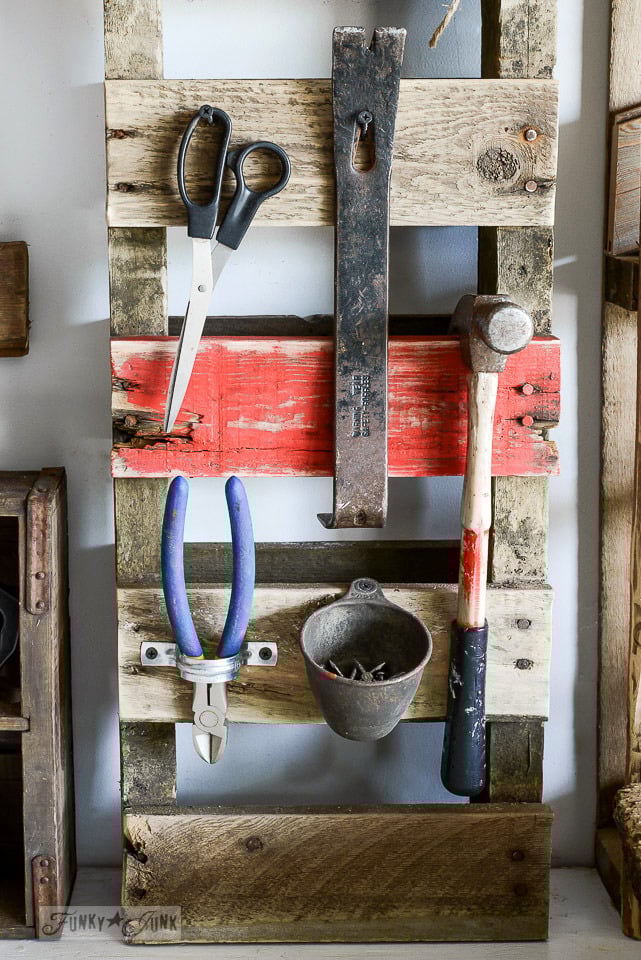
A Pallet wood hammer organizer
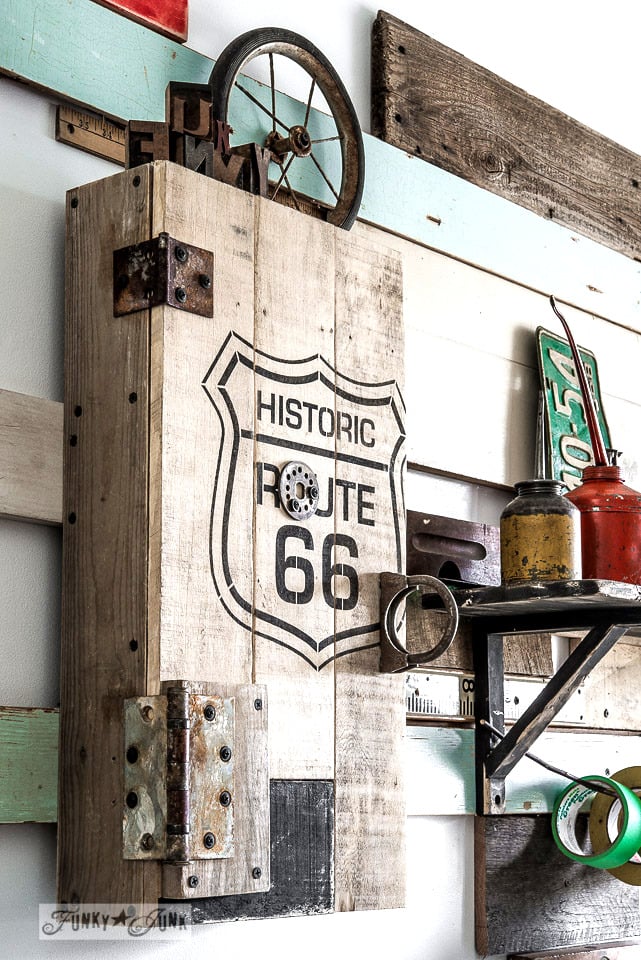
Pallet wood Route 66 cabinet in a workshop
Build this pallet wood shelf with branch bar
The pallet chair build part 2 – click *HERE*
Visit all my other reclaimed wood projects HERE

Visit more pallet building ideas on Hometalk HERE
What an amazing project. You have to just stand back and pat yourself on the back after all of your hard work. I can’t even begin to tell you how you have inspired me over the years. I wonder if you could help me make a quick decision on my blog. It will only take a minute and I would love to have other people’s opinion as well. We are building something for a Charity auction for kids and we want to make the right decision and your input would mean the world to us.
Thanks Donna.
Hugs
Becky
This is way past awesome!! I love it!
OH I CAN NOT WAIT FOR PART 2 LOL I SERIOUSLY LOVE YOUR
PALLET FURNITURE =)
Oh wow I love this pallet chair in so many ways!!! I wish I needed furniture for outside because I would totally make this!!!
Katie, I gotta tell ya… this thing is so comfy it would make wonderful indoor furniture! I’m seriously debating on doing that!
Do you have instrutions on how to build it? I have a few pallets id like to try and build one.
Hi Krista, the blog post above shows a link to Part 2 / the build too. 🙂
I love working with pallets. I’ve been looking for a simple furniture design to use on a wood deck I just finished. This is perfect!!
So far I’ve made 5 hanging pallet planters, a really cool headboard and potting bench and some other smaller items. There is no end to what you can do. Can’t wait to check out part 2.
Great job Donna, and so YOU!
Your style is so fun! What a great project.
The porch and pillow vignette is charming.
Deb
When does part 2 come out?!? Such an awesome idea I’d love to do!
Fabulous look and great job building it! You rock!!!
Donna, this is so cool! My husband and I have been admiring your pallet projects lately because we have a few we’d like to tackle. Thanks so much for the ideas and inspiration!
This is so amazingly cool! I love everything about it, especially the cushions!
Donna have I told you lately how amazingly talented you are? I haven’t well YOU are amazingly talented! Love this idea….Brilliant! Super cool chair with so much style too!Only you could think to do something so chic and unique like this!
xx
Anne
You are just amazing! Love the look for our really rustic cabin (outhouse too) in Adirondacks, NY. This would be great on the little porch and fit right in!
I love the idea of taking a very basic thing and making something functional and beautiful!
XOXOXOXO YOU!
Logan
I love the sign for the arm, the words on the wood and the sack fabric with the print. Great job, Donna!
Love your pallet chair and as always the beautiful photos. Have a great weekend
I have two big pallets sitting in my driveway. YOu have inspired me to get busy on them. What a great chair and a very creative use for pallets! Kudos!!!
Love this! Thank you for making it simple and quick. I’m going to attempt to make two of these to sit down near our farm pond. May have to drill a hole in the arm to hold a fishing pole!
Thanks again Donna! Blessings and keep sharing!
Angie
I know I already commented earlier about how much I LOVE this pallet chair, but I just wanted to let you know that I’m going to include it in my Friday Favorites round-up today 🙂
I can’t wait to show this to my resourceful husband and sons. I have started to walk in nicer neighborhoods and pick through their cast offs. Now don’t get all up on this (I go to the door for an OK). We have been doing some garden boxes from the book “Lasagna Gardening” out of my finds and scrap wood. They aren’t as nice as this chair though. Now I will be out looking for pallets.
You are sooooo awesome! Wonder Woman! yeah! My kind of chick! I love it! You did a Fantastic job! I love working with wood, and made a breakfast bar at my great-grandparents acreage in Rokeby, Nebraska. It was a blast!!! Now….I’m definitely going to try the coffee table out!!! Thanks!!!!
Annette
Donna you inspired me to try to build my first furniture from pallets.
It will be our sofa for the leaving room.
Please continue with your wonderful creativity.
Many thanks to share with all of us.
Susana.
Oh boy here we go with another pallet project. Almost every time I read my blog emails I print out at least one pallet project. Poor hubs says he’ll be making things til the cows come home.
Love the chair, great project. We have lots of pallets and some other lumber so will be able to make this. Maybe keep it for our back deck. Sure glad I found your posts on Furniture Feature Friday. I find some of the best projects on the blog parties. Hooray. Great post and love your blog.
Enjoy your holiday weekend.
Oh how cool! Welcome Jane! Yes, you’re in trouble here if you collect junk. You’ll just want more of it now. Good luck, hubby! haha
Oh this is Beautiful! Thank you so much for this i am going to make one of these for my den! Any suggestions on taking pallets apart easily? Thanks you!
Wow! It looks really great! This project is definitely going on our to do list for this summer! Thank you so much for sharing.
This is so adorable! Thank you so much for sharing.
This is awesome!! I love it! I have a couple of pallets just screaming my name. Just 1 question, Where in the world would I find the burlap sacks?? Can ya tell I’m not a country girl?? LOL!
Thanks so much!
Mary
Ps. I love your website too… 🙂
Hey Mary! I suggest to check around at a local coffee roaster. They always have them on hand, and for a decent price!
love what you are doing with the pallets….no end to the imagination
I love it, but my first thought as a mama of two busy boys is that it would be dangerous having the chair against the railing up high! Ha! Funny how you notice all these things.
You are so clever making these pallet creations.
Good call Gem! I think everyone needs to decorate according to where their life is at this current time. My son is 15 so he has no desire to climb.. just sleep! haha
Thanks for sharing! My grandfather and grandmother worked in a little rustic woodshop behind my home growing up. They owned and operated a very small business making wood pallets for a local lumber shop. We grew up listening to the soothing sound of either a saw cutting the wood or both of them hammering away making the pallets! All of the grandchildren loved to play King of the Mountain on the piles of sawdust they had. Many great memories and I have often thought it would mean a lot to do something with a pallet in memory of them!
Hey,
I just want to say how awesome your website is, you have inspired me to try sooo much! I am actually debating trying to replicate your blogging desk, i’m absolutely in love with it and my boyfriend would really enjoy the rustic meets modern feel.
I tried making your pallet sofa and it was a pretty good project for my first project I just wish i had your sign making skills because it would have been awesome for the arms! Here’s a picture! http://media-cache-ak0.pinimg.com/originals/ef/7c/46/ef7c46da75e804c3fd2b175b01f99ae8.jpg
Oh my…. so fabulous! Way to go!!!! Thanks so much for sharing yours, it’s gorgeous!
I can’t seem to figure out How you attach the back pallet so that it has show lean and isn’t a 90°angle. Can you give any tips on that?
Hey Scott, mine leaned against the wall so I didn’t have to worry about it. But I’d think if you extended the arms towards the back and installed a cross beam, that would support a leaning back nicely!
Thanks! That should work! I can’t wait to try it!
Where did you get the coffee bean burlap sacs??
Where can I get the plans?
Sorry, was being really blond there, found them!
hello. This is not my first diy project, but I think every time I’ve tried one I think the project will take x amount of time but I run into problems and it takes like ten times as long!!! How did you cut your 4×4. Lowe’s says their saw doesn’t cut 4×4… And the circular saw I have ( probably because I’m not quite talented enough) won’t make a straight cut. HELP! So excited to have this patio furniture, but so frustrated with the difficulties I’ve been having. Also, where did you find screws over 4 in long? Lowes, and ACE also don’t carry those
Hi Kelsey!
I use a table top miter saw to cut nearly all my wood. It’s very worth the investment to have one, makes DIY nearly effortless!
I may have used 4″ deck screws which I found at my local hardware store. I’d think most places would carry such a standard thing. What I’d do is measure the wood prior, then just make sure your screws are longer.
And don’t you worry… with any new project, comes TONS of growing pains. They happen to me every single day. Just think of all the things you’ll know about after this one is a wrap. 🙂 Don’t quit!
just love your ideas we used pallets to make our picket fence (painted cream)for our front garden in england then we did the same atop of a wall around our small garden (painted french blue) to our cottage in france
Now I know how to make a cool pallet wood chair.
Add me to your email/follow list! LOVE your site! Just came up on it via Pinterest.
Keep the ideas coming! and, thanks!
Hi Sandie! Thanks for your interest! I’ve added you to the daily post emails, weekly newsletter, and Old Signs very periodic newsletter. You may opt out of these anytime you wish, under those very emails you will receive. Please do verify your subscription though you will get in your email to activate the daily post updates. 🙂
Can you please just post simple step by tep instructions without wading through all the pictures and cruft? Thanks.
Did you click PART 2 – HOW TO BUILD THE PALLET WOOD CHAIR in this post? That’s where the nitty gritty is.
Love the chairs, nice work. Thank you for sharing . Will try this next spring.
Heather
Thank you so much for your idéas,