Learn how to make your own rustic wood pumpkins using branches from your backyard. This easy and budget-friendly DIY project is perfect for rustic fall decor!
As a Fusion and Amazon Influencer, this post contains affiliate links in which I earn a small percentage from qualifying purchases at no extra cost to you. If you shop Fusion Mineral Paint products through this post, you will get 10% off. Thank-you for helping to support my blog!
Each time fall decor time rolls around, I love to come up with fun and easy ways to create a scrap wood pumpkin of sorts!
Wood pumpkin decor is so fun and easy to create! If small enough, each wood piece takes up very little storage space, plus they are sized compact enough to display in nearly any given space, making this one of my favorite fall crafts.
Other diy wood block pumpkins to make:
Jack O’Lantern pumpkins made with 2x4s
Pallet-style wood block pumpkins with grapevine tendrils
This year’s wood pumpkin version is not only rustically cool, it’s super simple to make, plus most likely free, thanks to a few found thick branches or firewood you have on hand!
So if you too love unique, rustic projects for fall, put this easy idea for even beginners on your list… for FREE!
DIY wood pumpkins made with branches
Supplies I used:
thick branches
round firewood logs
smaller branches for pumpkin stems (these faux stump branches are pretty cool!)
miter saw (I like Bosch) or jigsaw
Makita cordless drill and a drill bit kit that creates holes
fall leaves (faux leaves or real from your backyard)
wire spring spine (I upcycled mine from an old notebook)
optional: orbital sander (I like Bosch variable speed)
Mini alphabet stamps with ink pad
What kinds of wood and branches to choose
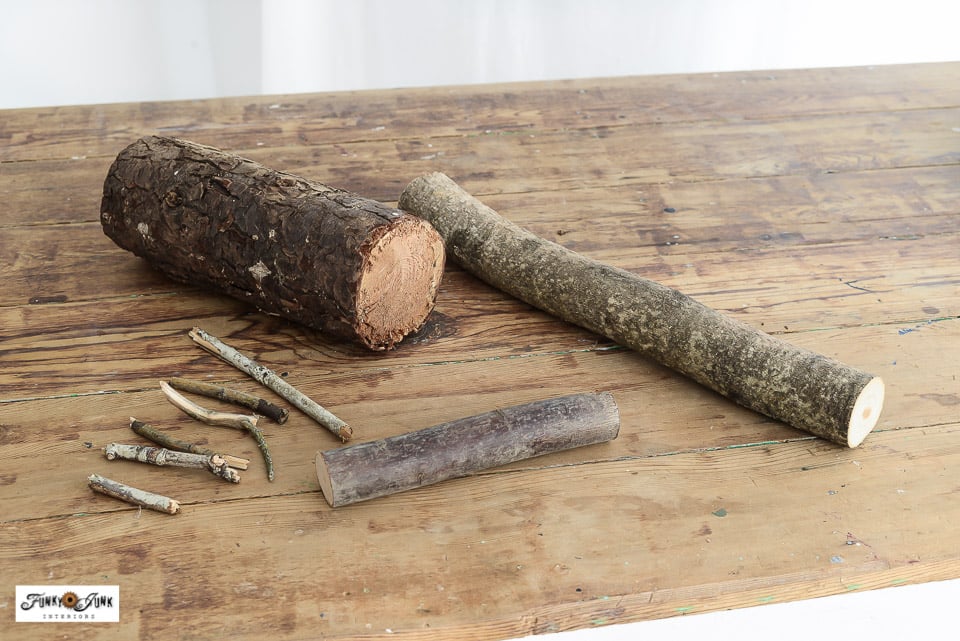
1. Select a thick tree branch and round fire logs to create different sizes of wood pumpkin bases.
I’ve used wood blocks in the past for other wooden pumpkin decor, which worked out great! However I decided to try round wood this time for a totally different look.
2. Cut each branch or log at different lengths so you end up with a nice, varied effect when grouped together.
3. Shop your yard for a few smaller branches to use as pumpkin stems.
The branches were hand-broken into smaller lengths to create the perfect pumpkin stem sizes.

Creating twig pumpkin stems
4. Team up drill bits that will drill holes a tiny bit larger than the smaller twigs.
I used several different sized drill bits to accommodate the different twig sizes.

5. Place the firewood logs onto a sturdy flat work surface. Hold the log in a gloved hand for added protection, while drilling a hole into the middle.
I found if you start the drill slowly, you first make a small dent. Then it’s easier and safer to apply speed to drill a deeper hole.

6. Add a dollop of hot glue into each hole (if desired), then slip in a twig.
Creating pumpkin tendrils with a spring
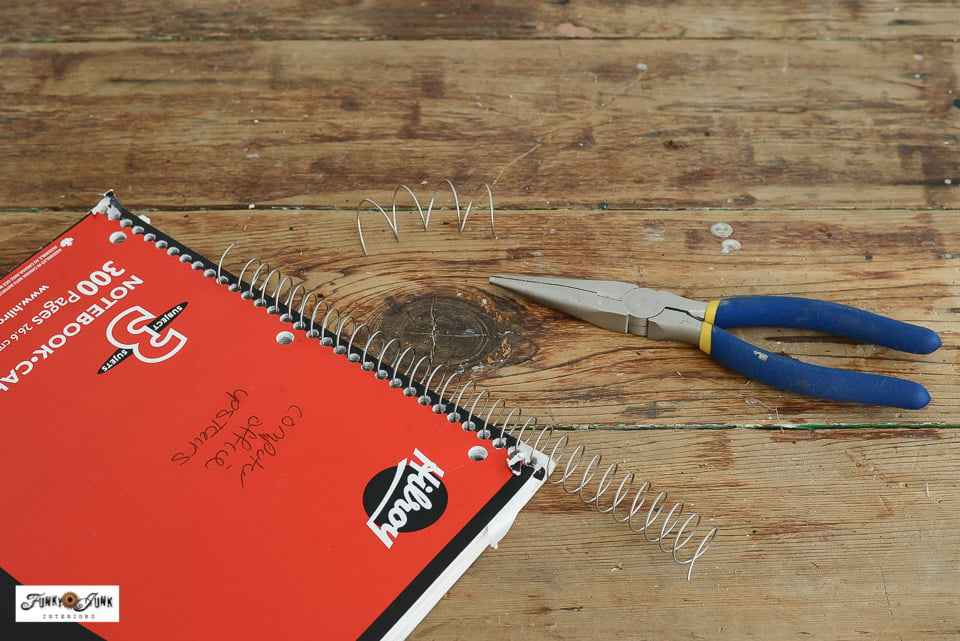
7. To create pumpkin tendrils, remove a spiral spine off an old notebook.
How to remove the coil from a spiral bound notebook:
It’s easy to remove the spiral spines off of a notebook if you use this method! Great idea for recycling those old notebooks too!
- Unhook each side of the spiral and snip off the hook parts on both sides.
- Pick up the notebook with two hands, spring-side-up, then slowly twist the spring in one direction with both hands, until the spring clears the notebook completely.
- Clip to the desired length using wire cutters.
- Pull on the wire a little to create more length or twist into different shapes as desired.

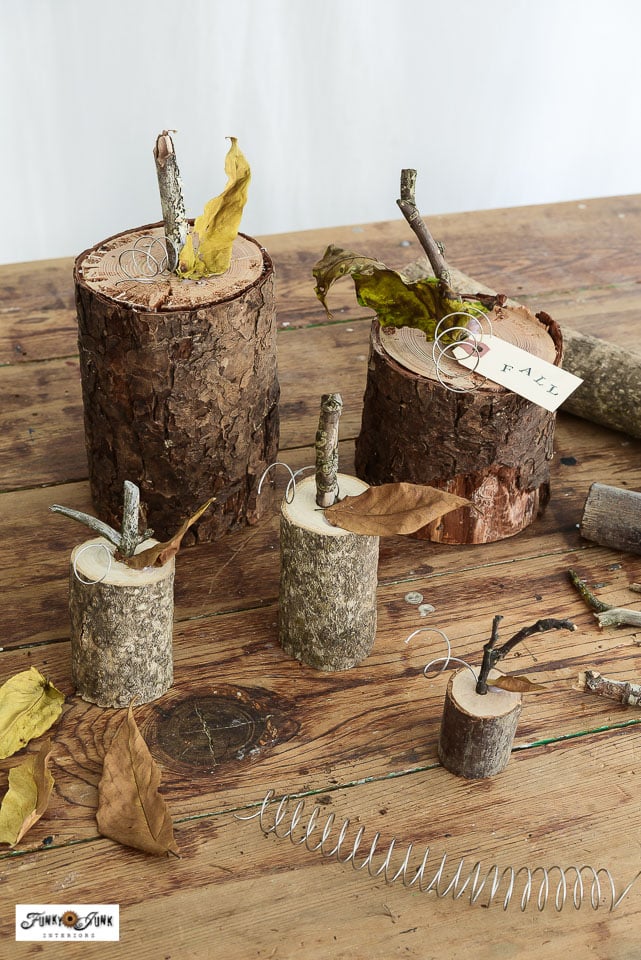
Adding real fall leaves
8. Position the spring over the branch stem, then position as desired.
You can also glue them in place if desired, however I didn’t find I needed to.
9. Hot glue a real or faux leaf for each wood pumpkin.
I chose leaves from outdoors that were already crispy and dry.

Love the look of real leaves! And the tendril could also be painted a rust colour if desired, however I liked it left metal for a slightly industrial twist!

How to make 2×4 wood pumpkins HERE
Making pumpkin tendrils from real grapevines
Another even easier way to create pumpkin tendrils is by snapping those squiggly things off a real grapevine, like I did to these 2×4 pumpkins! However you will need to wait until they turn brown, so this is a good thing to collect the year prior for your fall crafting desires!

Creating a fall label sign with stamps
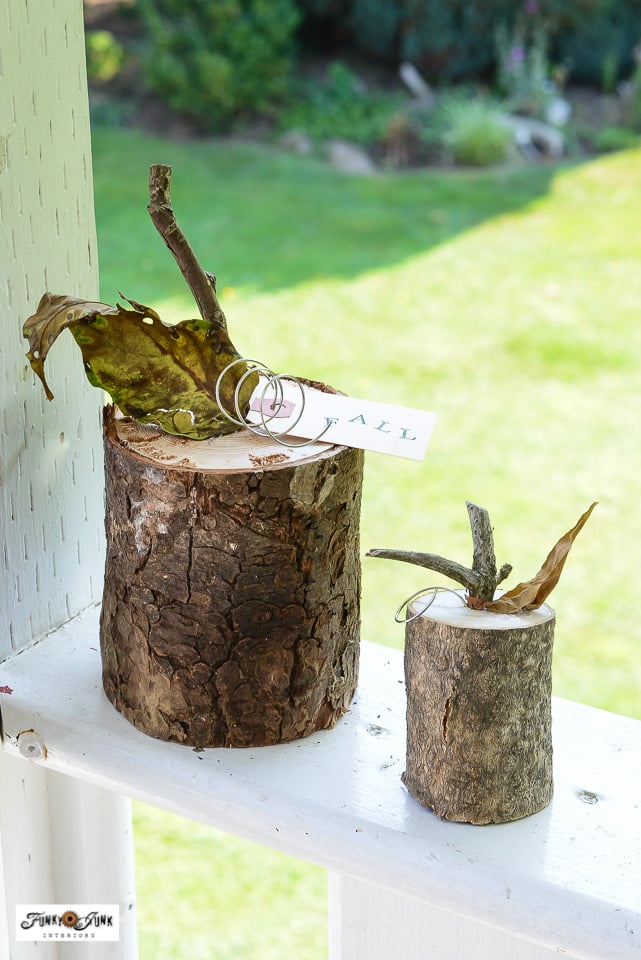
8. Create fall sayings on paper labels if desired, to further detail the pumpkins.
As luck would have it, I landed this incredible mini alphabet stamp and ink pad kit from a local thrift store! I knew it would come in handy, and it sure did, to create custom labels for my rustic wood pumpkins! I’ve been yearning for a stamp set for a long time, so I’m calling this investment very worthwhile, even if you purchase it new.
I stamped the word FALL on my label, but other sayings that would be cute are:
- hello pumpkin
- pumpkin spice
- harvest
- happy fall y’all
Then slip the label through the tendril, or tie it with twine around the pumpkin or pumpkin stem to attach.

Adding the final touches
At this stage, you can call your pumpkins done! Or feel free to further embellish with chalk paint and wax, white or orange paint of any type or wood stain.
And my friends, that is how to achieve this adorable family of wood pumpkins of all shapes and sizes!
Oh that rustic goodness! I love the unique shapes and sizes of each wood pumpkin, plus their quirky stems!
As you can also see, I coordinated smaller branch stems to the smaller pumpkins to maintain a good scale. However I did end up using the same size wire tendril. I just pulled it longer and cut the tendrils shorter on the smaller pumpkins.
I think they all turned out SO cute!

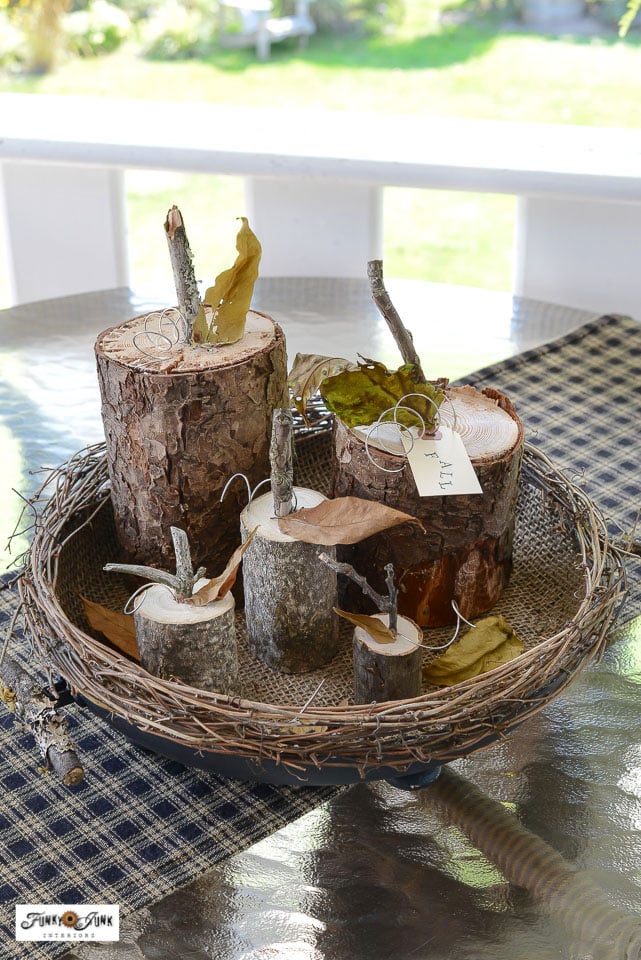
Staging a group of wood pumpkins on a tray
And naturally, you can decorate with these rustic wood cuties in singles or in a group!
I decided to use my rustic upcycled fry pan lined with burlap and twigs as a tray of sorts since the themed married them both perfectly!
A tutorial on the blog is planned to upcycle another frypan so I can share how I did it! Until then, you can view the short video tutorial on Hometalk’s Facebook HERE It’s a really cute piece and one of my fav creations!

But goodness… aren’t these wood pumpkins something?
They could also pass for wooden apples if you remove the tendrils and cut them a little shorter.

You could even make similar wood pumpkins using closet dowels or round posts! Then paint or stain them as desired.

However I really love the natural rustic vibe of the branches, bark and leaves!
Other unique ways to display wood branch pumpkins
And they look equally cool displayed separated as well! Here’s a few other ideas to display them:
- positioned with books on a bookshelf
- along a window sill
- inside baskets or crates
- on serving trays or cutting boards
Or simply plunk them in the middle of a coffee table or outdoor patio table and enjoy the wood pumpkins as the perfect rustic fall centerpiece!

I hope this inspires you to collect a few thick branches or reach for your own firewood pile to make a few of these rustic wood pumpkins (or wooden apples) of your own!
If you make some, be sure to comment below! I’d love to hear how you made yours!
Where would you display them?

Other unique fall projects to make:
Wood block pumpkins with Pumpkin patch sign
How to make 2×4 wood pumpkins
Stenciled pumpkins in a 3d wood wagon fall sign
Visit many other unique fall decorating projects and fall signs to make HERE
DIY wood pumpkins made with branches: easy, rustic and free!
Tools:
- Bosch variable speed orbital sander (optional)
Supplies:
- Thick round branches or round firewood logs
- Smaller twigs for pumpkin stems
- Glue gun
- or wood glue
- Natural or faux leaves
- Wire spring spine
- Wire cutters
- Jute twine
- Paper labels
- Mini alphabet stamps with ink pad
Instructions:
- Using a miter saw, cut varied lengths of round branches or firelogs.
- Snap smaller twigs to create short pumpkin stems.
- Team up a drill bit to a smaller twig, then drill holes into the center tops of the branches or firelogs.
- Add hot glue into each drilled hole, then insert a twig to create a stem.
- Embellish the tops by hot gluing real dried leaves or faux leaves near the stem.
- To add pumpkin tendrils, snap real dried tendrils from a grapevine, or use wire spiral coils to create your own. I upcycled mine from old spiral bound notebooks. The tutorial shares how to remove them easily!
- To create small fall label signs, use tiny alphabet stamps or a printer to create your desired messages. Or simply hand write. Hoop the hole through the tendril to attach, or use hot glue.
- Arrange your pumpkins on a tray, bowl, or by themselves. They are
You are the absolute most talented blogger! I love your ideas and your decorating style. I’m always energized by what you accomplish! “We” have done some of your “easy” projects for our annual “girls week retreat” and may try this one this fall. Some of us don’t have online skills so the rest of us must share your ideas. But please understand that some “Besties” in Oregon think you are one of us, or at least a “kindred spirit”!!!
*We will have to twist florist wire around pencils (and fat pens) for tendrils as I don’t have enough spiral notebooks to dismantle!
Really nice project!