Desire to grow grass in a new area? Here’s some tips on starting up a new lawn from scratch, as well as how to maintain it until it’s well on its way! Includes the best lawn gear and timers to use so you don’t have to babysit your yard!

This post may contain Amazon plus other affiliate links in which I earn a small percentage from qualifying purchases at no extra cost to you. Thank-you for helping to support this blog!
Isn’t the lawn above picture-perfect?
Well, this lawn sure didn’t start out this way! But thanks to a few recent yard improvements, growing grass from seed became a needed thing!
And little did I know how drastic the newer lawn care supplies have changed over the years, making planting a new lawn from seed SO much easier!
So today I’m sharing how I flipped a weed infested gravel driveway into a post that shares how to start a new lawn from seed with all the latest lawn supply gadgetry that took this task to next level awesome… with an amazing outcome!

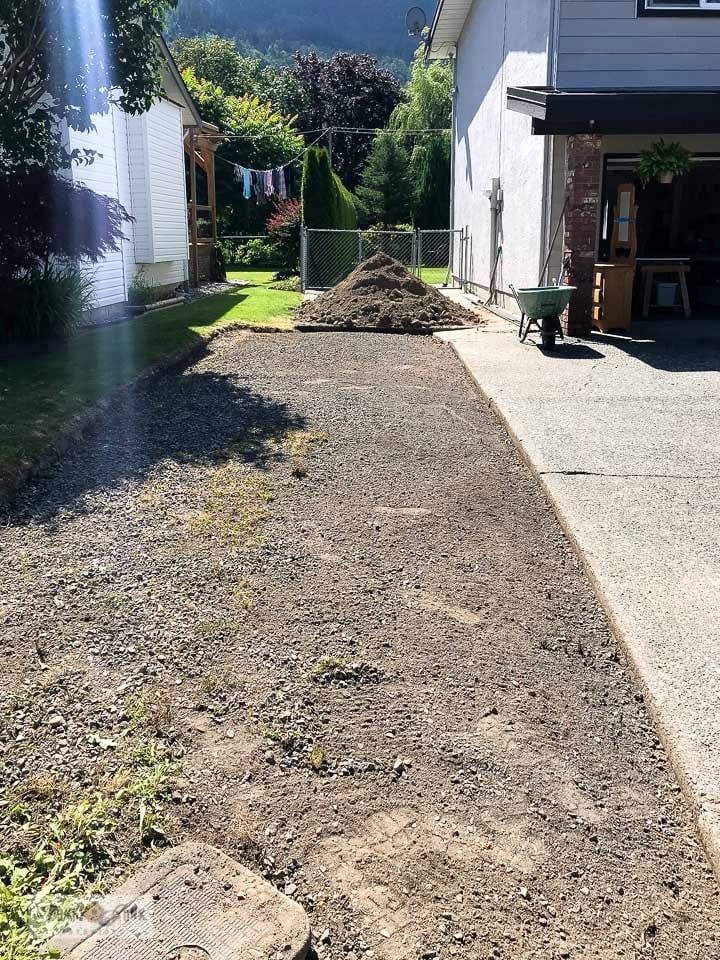
The before
.
Welcome to one side of my driveway. This is a tree that required endless pruning all year long that I was totally done with. I just couldn’t keep up with it.
Another thing that needed to go was the old RV driveway. It use to be gravel, however had long since grown in with weeds. After getting rid of the trailer, I started mowing the weeds which resulted in a poor looking lawn substitute!
So after a chat with neighbours Jake and Janette, we decided to team up and remove the RV driveway with new lawn, remove the allen blocks that separated our yards, and remove the high maintenance tree to an evergreen tree that didn’t need any maintenance at all!
While adding a cute split rail fence feature.
It was an incredibly big job, but so worthwhile!
Read Part 1 – Creating a split rail fence HERE
Since writing that post, the new strip of lawn has finally grown in… so this post shares all the steps we took on how to grow grass starting from seed, along with some outstanding lawn care supplies I had no idea existed, making this task so much easier!
Along with a few mistakes we made as well, so you don’t!
Here’s what we did next:
How to grow grass starting from seed
.
Preparing the yard
1. Remove old growth.
- spray any old growth to remove the weeds
- after 1 week, scrape off growth
The gravel driveway had grown in with mostly weeds.
Because it was so weed infested, we chose to kill off all the old growth to start over again by spraying on some weed herbicide.
After sitting for about a week, the spray turned the growth to yellow, then to brown, which made scraping it off the old turf and weeds with shovels a lot easier.
Don’t get me wrong. This was hard work because we were working on top of gravel. But it would have been impossibly difficult if we didn’t stop the old growth first in our case.

Adding fill
2. Add clean fill, with a layer of fertile topsoil.
By some miracle, someone in the neighbourhood was looking for a place to dump clean fill! So I quickly requested they bring it to us, and it ended up being the perfect amount for our needs!
Now, this is clean fill, which isn’t the same as fertilized topsoil. So if you want a lawn that will likely not require much feeding to stay green for years to come, I recommend fill first, then adding a layer of topsoil filled with fertile compost.
Since this was such a small area and we had enough soil as-is, we took a chance with just adding the clean fill.
Tip: Go on Facebook and request clean fill. We later saw many other offers of people looking for places to drop off clean fill so they didn’t have to dispose of it at the landfill for a high fee!
Update:
Since this area was over gravel, we would have greatly benefited from using deeper soil. The grass grows green, however because of the gravel base, the grass dies quickly in the hot summer.
And you can never go wrong with added nutrients. Testing topsoil with a soil test kit or bringing it in somewhere for testing would be a good idea. The topsoil we used was adequate, but it could have been great with some soil amendments. We just need to fertilize more frequently and end up with some bare patches during the high heat of summer.
Smoothing out the fill / topsoil
- rake back and forth to level the soil
- hit the soil with the rake head to crumble any large dirt chunks
- remove rocks as they surface
- rake in all directions
- use a lawn roller to compact the soil
The topsoil was spread out, then leveled with a metal garden rake.
Endless raking I might add. As the rocks surfaced, they were removed by hand.
When larger dirt chunks emerged, the rake was used to pound it down. If they couldn’t be raked smooth, they were removed or buried deeper.
We chose not to use a lawn roller because we didn’t own one, however I think it would have been better if we did. For the first little while, the lawn mower wheels sunk into the new lawn surface, so a more compact lawn would have been much better, especially for a larger area.
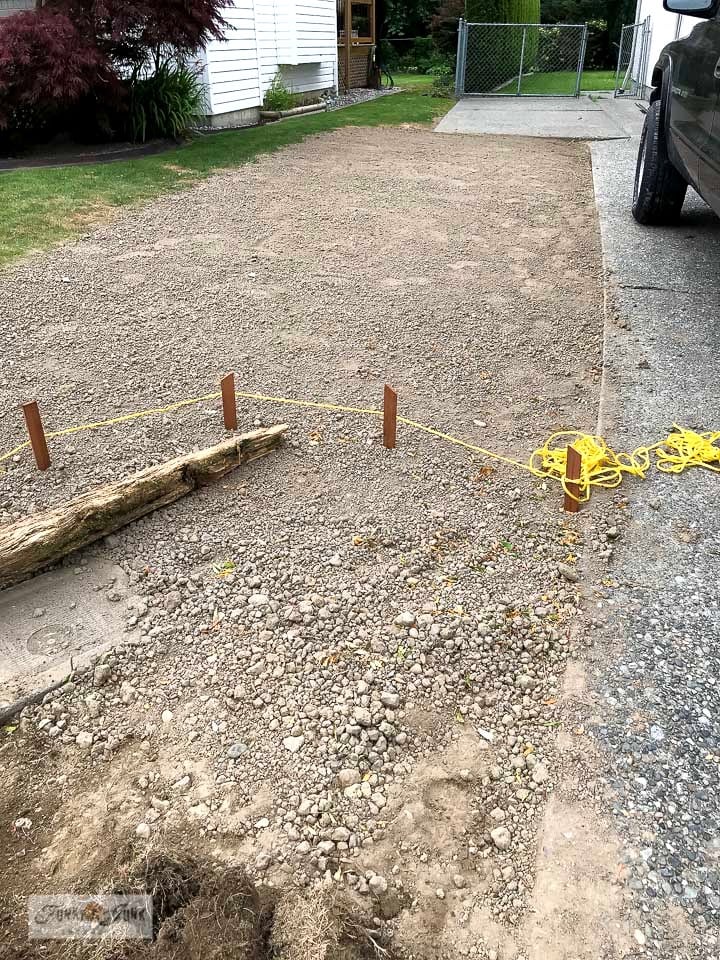
Search out wooden garden stakes HERE

Planting grass seed
- gently fluff up the soil with a rake
- plant lawn seed – we threw it on by hand
- sprinkle soil with Lawn Starter
- gently rake to cover the seed
- water by hand until germination transpires, keeping the area wet at all times
Since this area was so small, we spread the seed by hand. However in larger areas, it’s much wiser to use a broadcast spreader to get even coverage. I purchased one after the fact of course… and use it to fertilize the lawn.
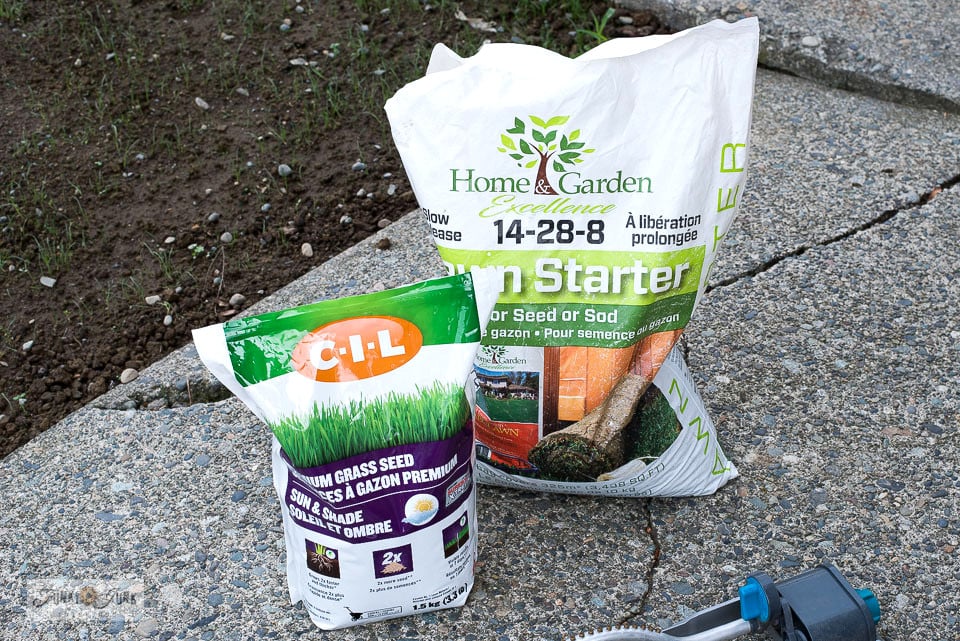
Lawn seed and starter used
Once all the soil was smoothed out, we planted the lawn seed by hand, followed with lawn starter, which helps strengthen the new lawn as it starts to grow. And boy did it keep the new lawn so green!
Just be sure to do some homework on the type of grass your selected area and growing region does best with. The right grass seed can make all the difference.
I used:
Lawn Starter by Home & Garden Excellence
- 14-28-9
- this is a starter fertilizer that helps the sprouted seeds grow quicker and stronger
- apply a thin layer with the grass seed
CIL Premium Grass Seed
- good for sun and shade
- be sure to sow the best grass seed that’s suitable to plant in your given area

Hand water until seed has germinated
- keep soil full of moisture by hand watering until germination starts
- avoid water pooling, which will wash away the seed
- switch to a sprinkler on a timer after seed germination
The most tedious part to all this was hand watering until the seed sprouted. An irrigation system of course would be epic long-term! However and a watering wand would ultimately suffice this round.
However, just a sprinkler to start would have created pools of water, washing away the lawn seed.
So I picked up a Melnor hand watering wand which is wonderful!
The key was to keep the soil wet. We took turns watering the newly seeded lawn every 2 hours during the day for about 5 minutes, stopping at 10pm and starting up at 8am the next day.
But it got old fast. This stage was relentless and the most ungratifying step because it’s like watering dirt with a no thank-you for your time. LOL I honestly thought at first there was something wrong with the seed, because it took about 2 weeks before it finally started to sprout!
And then… it finally sprouted. I felt like hosting a lawn sprouting party! And once sprouted, the lawn grown came on full force.
By that time, I was LONG over watering every 2 hours by hand, so I started to research what I could use to get the job done with a sprinkler and timer. I wanted my life back!
And that’s when I came across two of the best lawn growing supplies you will ever pick up if you too are planning to start a new lawn from seed… GIFT YOURSELF with these tools! They are epic!
Shop for garden watering wands HERE

A water sprinkler with all the options
- get a sprinkler with width, length and height adjustments
- I got a Melnor XT Oscillating Sprinkler with Flow Control
I had an old sprinkler in my garden shed, but some parts were missing and it was a mess. So after chucking it in the garbage, I went shopping for a new one. And boy was this a game-changer move! New lawn sprinklers have come a LONG way!
This is a Melnor XT which is an Oscillating Sprinkler with Flow Control that covers 4500 square feet.

View this sprinkler on Amazon HERE
In plain english, you can get this sprinkler to water EXACTLY where you want it to.
You can adjust the sprinkler fan by width, height and how far you want it to fan out from one side to the other. Every single function is individual!
Set the water sprinkler to your exact requirements, test it out, and you’re done. No moving it around. No watering your vehicle or sidewalks. Set it right and you literally walk away and leave it alone.
Nearly! Adding a lawn sprinkler timer was a must…
View other watering sprinklers on Amazon HERE

View this B-Hyve Smart Hose Faucet Timer on Amazon HERE
B-Hyve water sprinkler timer
- B-hyve Smart Hose Faucet Timer with Wifi Hub
- wifi required
- with a phone app, you can set it to water your lawn in ANY time increments!
Planting new grass during a heatwave proved tricky. I didn’t want to have to babysit keeping the soil wet every 2 hours, so I started to search out lawn sprinkler timers.
One frustration was trying to find a lawn sprinkler timer that watered as frequently as I wanted. Most watered only x amount of times a day, or x amount of hours in a given day. It was never enough to keep our soil moist.
Luckily, someone in a hardware store directed me to an irrigation place in my town. So after investating, they did have something that did the job PERFECTLY!

How to set up the B-Hyve hose faucet timer
- download the B-Hyve app from HERE
- connect your sprinkler
- get everything paired through wifi
- set the app with your desired times
- off you go!
- Watch how to set up B Hyve on YouTube HERE
This is a water sprinkler timer that uses Wifi and an app on your phone to set any desired times.
So you purchase the B-Hyve sprinkler, then download their app from HERE.
I did have some trouble getting everything bluetooth-paired on my own. Some of the sprinkler instructions weren’t explicit enough for me, so I emailed the manufacturer.
They sent me THIS YOUTUBE LINK that explained every single step. This did the trick!
Watch how to set up B Hyve on YouTube HERE
Because we were experiencing a heat wave, I set the timer to do what we were doing by hand. We watered every 2 hours, for 7 minutes each time, ending at 10pm, and starting up at 8am the next day.
Let the lawn watering games begin and the endless babysitting to be over!

Keep lawn soil wet
Wondering how to grow grass in the sun? It’s tricky. The key was to keep the soil damp at all times, without the water pooling. So dependent on your weather, you’ll want to watch for the needed sprinkling frequency.
But using this fancy lawn sprinkler with all the settings teamed up with a timer that did it all? I got my life back again. I could even actually leave for a day of shopping in town! And the grass seedlings got what they needed 24/7.
Just be sure that the sprinkler is well positioned so it doesn’t flip over.
Troubleshooting
So I did run into 2 glitches, so it pays to watch over your system for a couple days before taking off to ensure it works.
At one point the sprinkler stopped going back and forth. After promptly replacing it, it’s worked ever since. Must have been a bad batch or glitch.
And one time the water didn’t spray through the sprinkler. The timer was still working and the sprinkler appeared to be in order. I later found a kink in the hidden part of the hose I had buried in plants! Oops. So get a non kinking water hose too maybe…
The new lawn – AFTER!
Check. That. OUT.
You’d never know there use to be a weed infested gravel driveway in this spot! The lawn flows flawlessly from one yard to the other. And it is perfect.

It’s clean, simple and SO green, thanks to that lawn starter!

With any new lawn, it will thicken up over time as well.
And while we followed all the suggested tips on how to grow grass from seed, something we did do is add more grass seed than originally suggested to ensure we got decent coverage. And even add new seed in the bare spots as it grows.
Before
During

After!
And that my friends, is how to grow grass from seed.
Here’s a few How To Grow Grass questions and answers you may find helpful:
When is the best time to plant grass seed?
Honestly? I’d say late spring or early fall. We had our hands full keeping up with the heat wave that hit us while we worked this project. Next time I’ll work with mother nature and work the soil when the climate is cooler and ready to water the seed for me!
Can I just throw grass seed down on existing lawn?
You can, but the seed won’t likely stay put unless you have lots of bare spots exposed. It would be better to layer some topsoil on your lawn, then add some seeds into that.
What’s the fastest way to grow new grass?
Turf! LOL But that’s a more expensive way to start. If we’re talking seed, as long as the soil is kept moist, the seed will sprout in a matter of a couple of weeks. Once it sprouts, we had a thick lawn in about a month.
How do I speed up grass seed germination?
Keep the soil slightly damp at all times. As soon as the soil dries out, the seeds can’t germinate. And use a lawn seed starter so it can begin to fertilize the new growth as soon as it sprouts.
When to grow grass seed?
Late spring or early fall. When the rain becomes reliant and the temperatures outdoors even out, that is the time I would plant seed. Then at least nature can help out a little rather than you doing all the work.
But it all worked out. We ended up with a beautiful green lawn we are proud to share with our neighbours without that jumbling mess it use to be!
Thanks to all those fancy pants lawn tools that saved my sanity of course…
How to grow grass next time though? I’d definitely wait until spring or fall!
What are your own fav lawn growing tips? Think you’ll try some of the supplies I used?
Other yard projects to create:

Creating a split rail fence garden feature

Building a reclaimed wood yard and garden fence
View Farm Supply stencil from HERE

Installing a garden walkway using scrap wood!
Find garden-themed stencils HERE
Visit many other unique OUTDOOR PROJECTS HERE