What’s more fun than a rustic wooden Christmas tree? A whole group of DIY alternative Christmas trees displayed as a collection in a vintage cabinet! Learn how to make 5 different DIY wood Christmas trees with tips on how to style them!
Scrap wood Christmas trees in a vintage cabinet
You might say I collect vintage cabinets… but it wasn’t on purpose!
When my brother had a garage sale, he gifted me with 2 little vintage bathroom cabinets that came from my childhood farm, along with an ammunition crate. And boy have I had fun displaying them as a group on a wall for unique and decorative storage!
However they eventually ended up in storage for a number of years… until now that is…
I’ve long admired Michael from Inspired by Charm’s vintage cabinet filled with Christmas ribbon HERE. The ribbon collection is still very usable, however when displayed in a glass doored cabinet, it makes such a beautiful Christmas decorating statement!
And then there it was once again while scrolling online today… and inspiration hit! So today was the day to make my own collection in a cabinet happen!
This post contains some affiliate links in which I earn a small percentage from qualifying purchases through these links, at no extra cost to you. Thank-you for helping to support my blog!
Why displaying a collection in a vintage cabinet is a good idea!
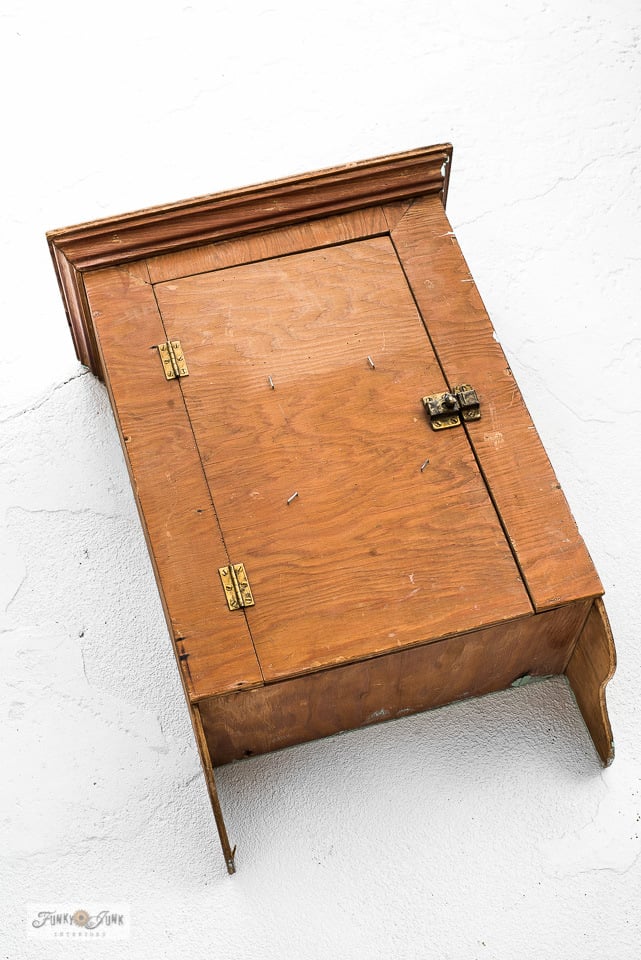
So I pulled out this cabinet to use, since it oozed with bare wood rustic charm.
The cabinet display idea intrigued me. My home is short on surface space, so I don’t have a lot of room to display collections or trinkets.
However this little vintage cabinet solved that problem! It could hang on a wall not eating up valuable surface space, while creating a mini instant shelf of sorts!
But what could I fill the cabinet with? It needed to be a collection of some sort. What did I have lots of that could be perfect for Christmas decorating?
After digging through my Christmas decorating, an entire box of DIY scrap wood Christmas trees spilled out, destined to be displayed in a new, unique way this year! Perfect!
How to choose a collection to display
- think of something you have lots of
- marry the collection through color, theme, size, or what it’s made out of
- ensure your items fit into your chosen cabinet
Just for fun, check out my main storage shelving for ALL my collections HERE.
Don’t have a collection of scrap wood Christmas trees but would like to? The good news is they are super easy to make for absolutely free!
How to make scrap wood Christmas trees
Each mini Christmas tree shown in this post will lead to its own specific tutorial, however here are the basics.
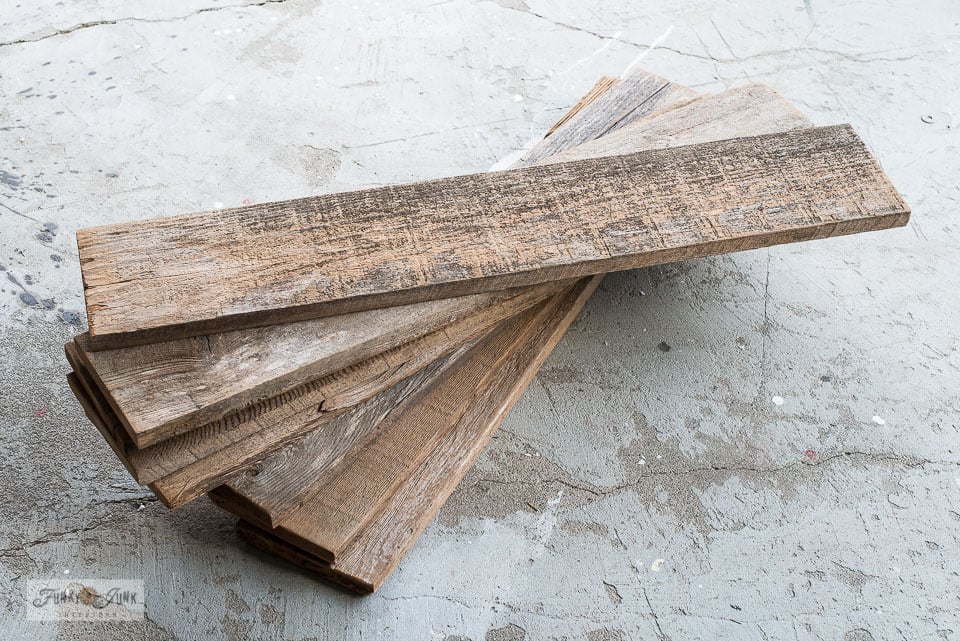
All these little diy Christmas trees are made from various reclaimed fence wood planks, with simple angle cuts to basically create triangles.
You could also cut apart wooden pallets to create pallet wood trees as well.
The key is to choose wood that is thick enough so the trees have the ability to stand up on their own.
Supplies you will need:
Thicker reclaimed wood boards
Paint of choice – I like using Fusion Mineral Paint
Find a local Fusion merchant HERE
Christmas decorating accessories
How to cut the wood for the trees
1. Prepare the wood by cleaning it, then lightly sanding with an orbital sander.
Read how I clean reclaimed wood by pressure washing HERE
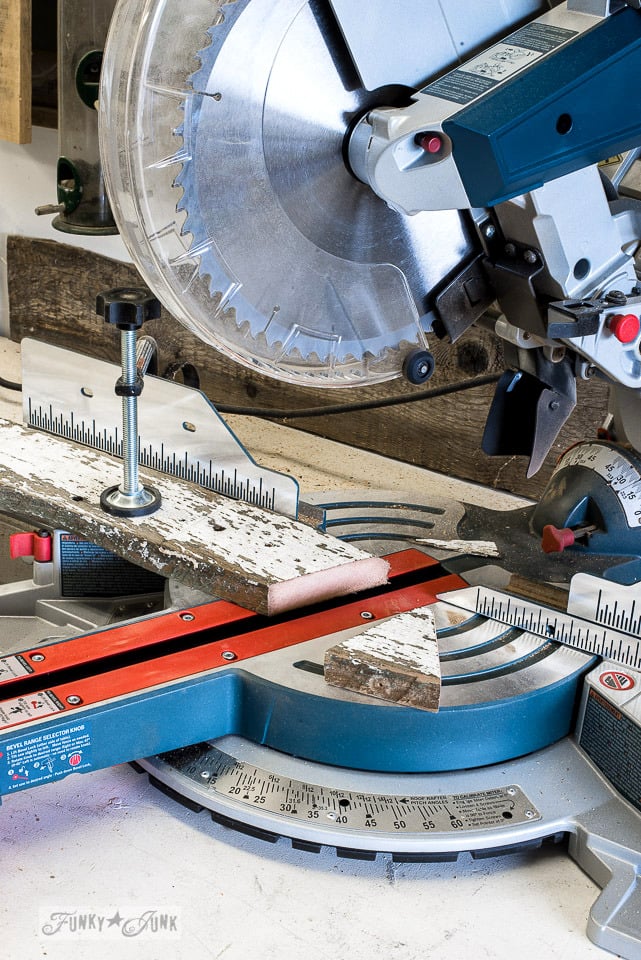
2. Position a plank in a miter saw, position the blade on a desired angle (I generally choose about 35 degrees), then make a cut. Flip the board over, and repeat the cut, leaving a triangle.
3. Lightly sand the edges.
4. Embellish wood trees as desired.
Video of cutting the wood
Click above to watch a short video of how to cut the wood.
So here’s a few different tree styles to make!
Different wood Christmas trees to make
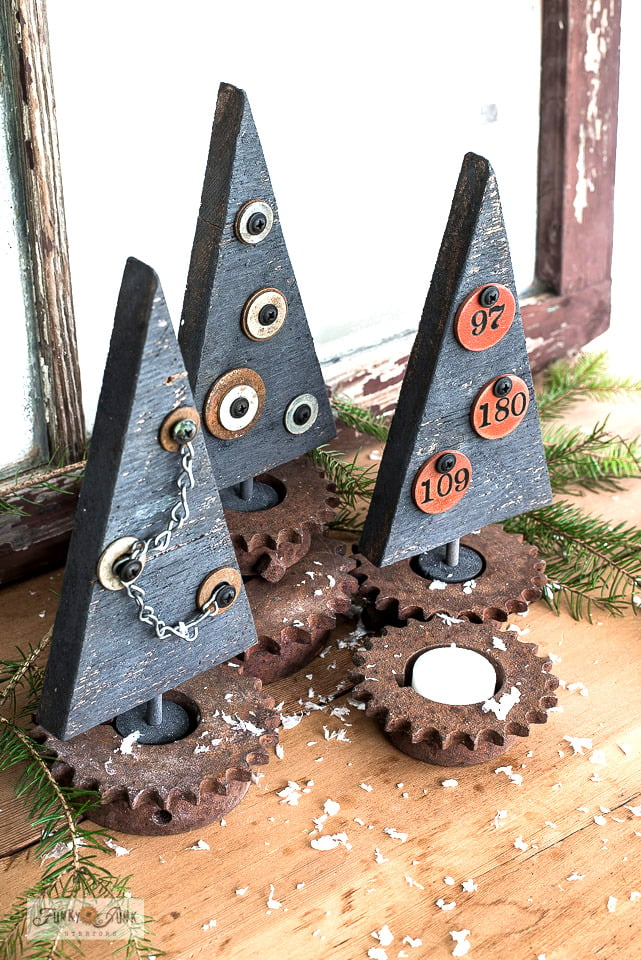
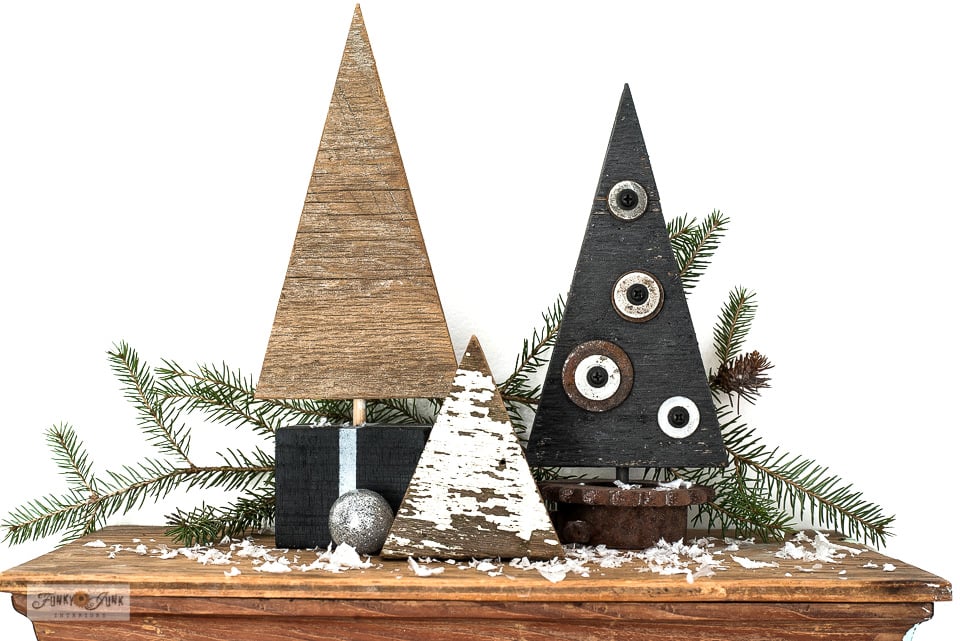
Industrial wood Christmas trees in rusty gears
These edgy black Christmas trees dressed up in rusty metal serve as candle votives as well!
Decorate the trees with washers, screws, chains, and vintage locker tags if you’re fortunate enough to land some!
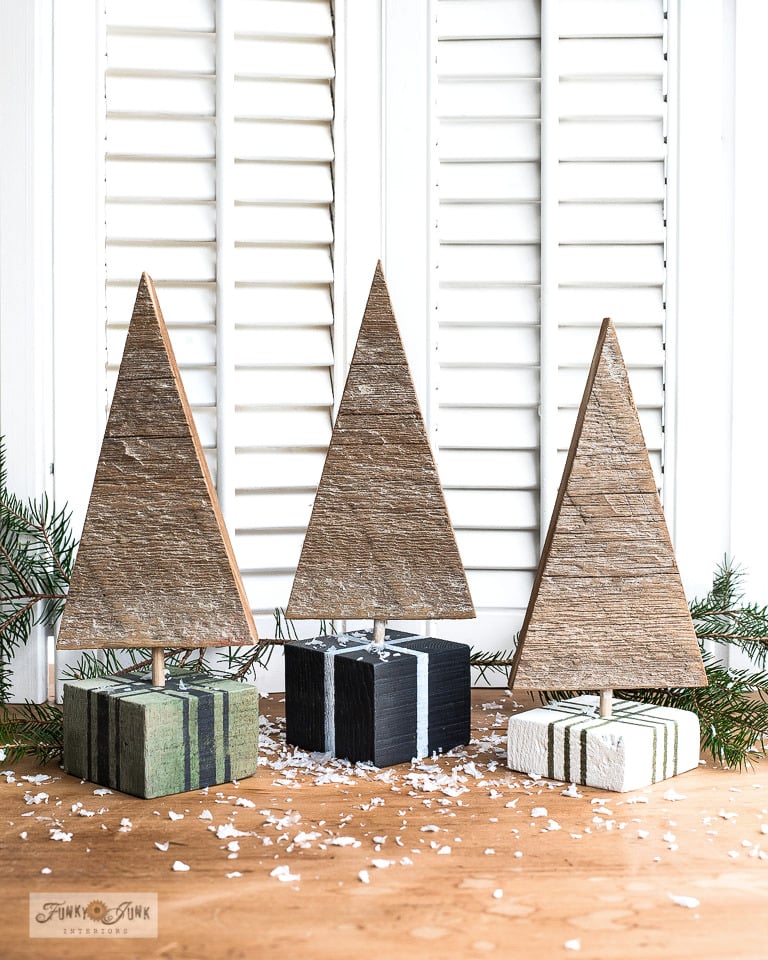
Wood Christmas trees in present bases
Blocks of wood were painted and stenciled with Grain Sack Stripes stencils to create present bases for the wood tree stands! Cute, easy to customize and as simple as can be.
View Grain Sack Stripe stencils HERE
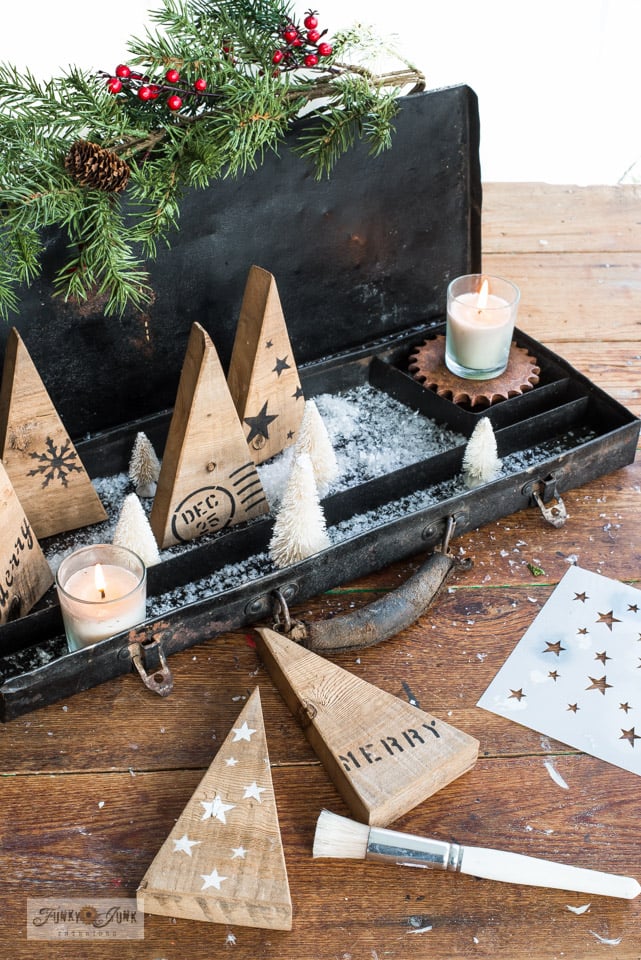
DIY wood Christmas and winter stenciled trees
Simple triangles are stenciled with Christmas Crates and Mini Christmas Patterns to create Christmas and winter-themed trees!
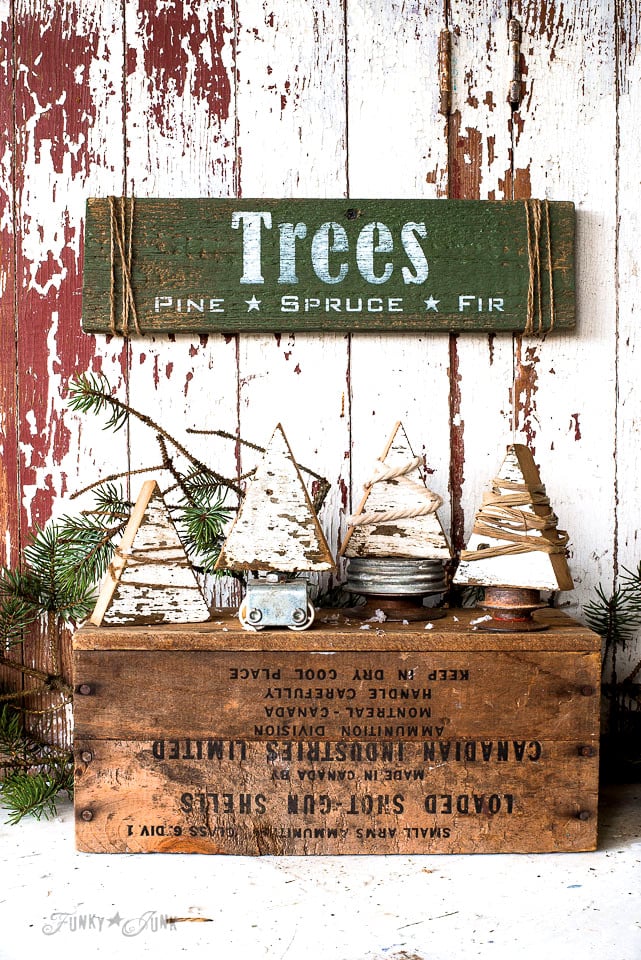
String wrapped Christmas trees with junk tree skirts
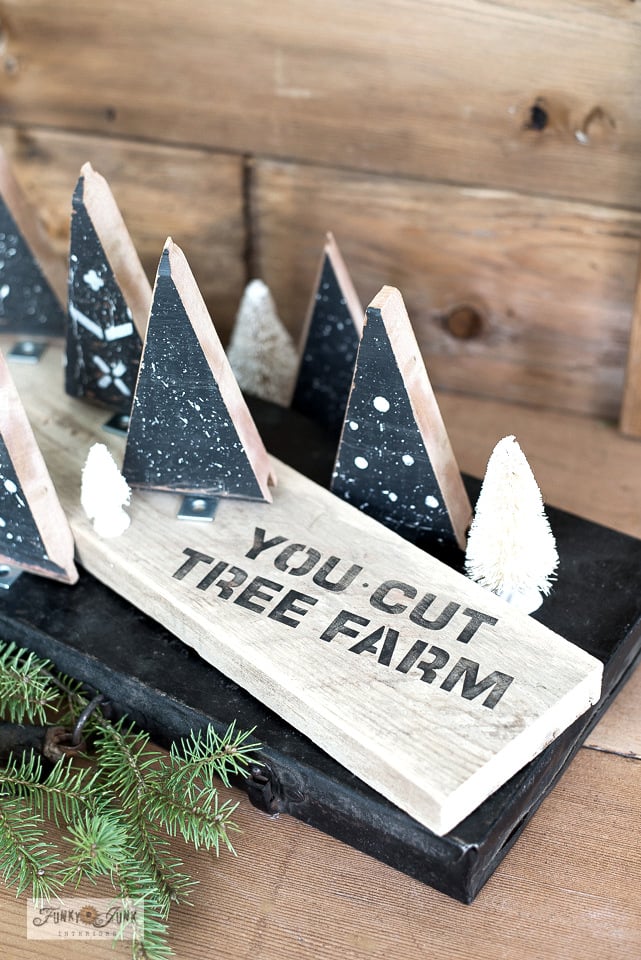
Chippy white fence planks were cut, then wrapped in twine and raffia, set onto rusty junk pieces for Christmas tree skirts. And a little Tree farm sign finishes this vinette off. So cute and funky!
As you can see, each wood Christmas tree certainly has its own personality! So now that you know how to make them, let’s arrange them for a whole new look!
These black Christmas trees are mounted to brackets so they stand. Team them up with Mini Christmas Signs stencil which is a perfect scale!
So let’s prep a cabinet next!
Preparing a vintage display cabinet
Since the wooden cabinet had been in storage, it needed a good clean.
Vintage wood cabinets can be found in thrift stores or antique shops.
Since I didn’t plan to change the overall look of it, it wiped it down with a rag, then old staples, screws and nails were removed for a fresh start.
I was so tempted to sand it! However since this cabinet would be displayed open, I decided to leave the finish the same, inside and out. For now anyway.
How to arrange the trees
When I first started loading the cabinet with the trees, I thought perhaps arranging the trees by their styles may work. But I quickly changed my mind. Grouping them that way made them feel visually off.
So I mixed them all up instead, which gave the group more balance.
- Load the cabinet with your collection.
- Try separating the collection into themes.
- Or mix it all up to create one overall look.
- Place the largest objects first, then smaller around.
- Leave space for decorations if desired.
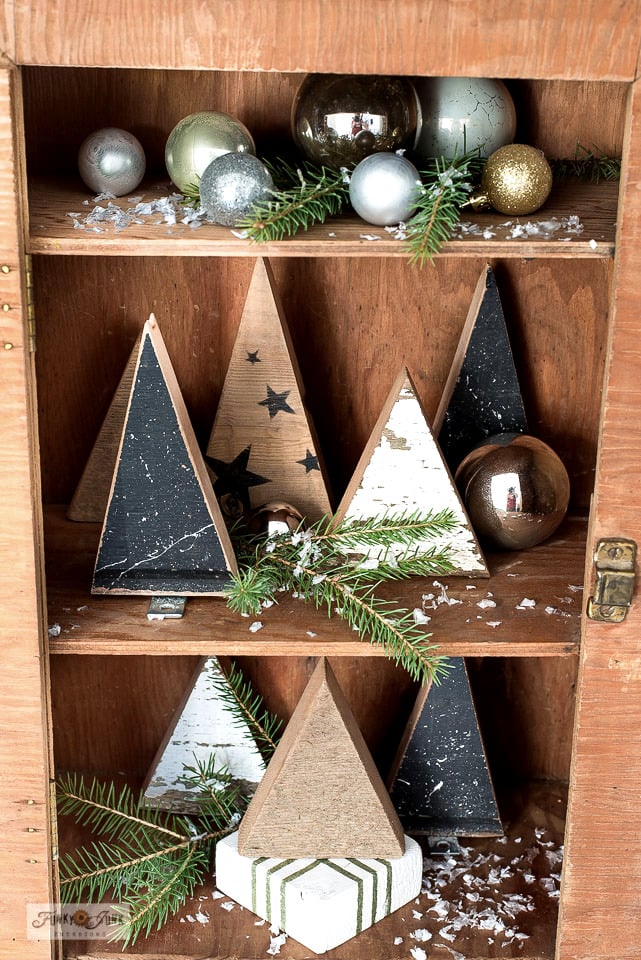
Once the trees were all positioned, I added a few Christmas decorations, and fresh cut evergreen branches along with some faux snow to finish off the display.
Decorating accessories to try
- Neutral Christmas ornaments
- Real evergreen branches or holly
- Faux snow
- Christmas ribbon. Buffalo Check would be pretty!
- Wrap twine around the trees
- Add a small string of fairy lights or string lights
- add small faux votive candles
HERE is a post of wood snowmen in a cabinet strung with mini lights. Very cute!
The finished wooden trees on display!
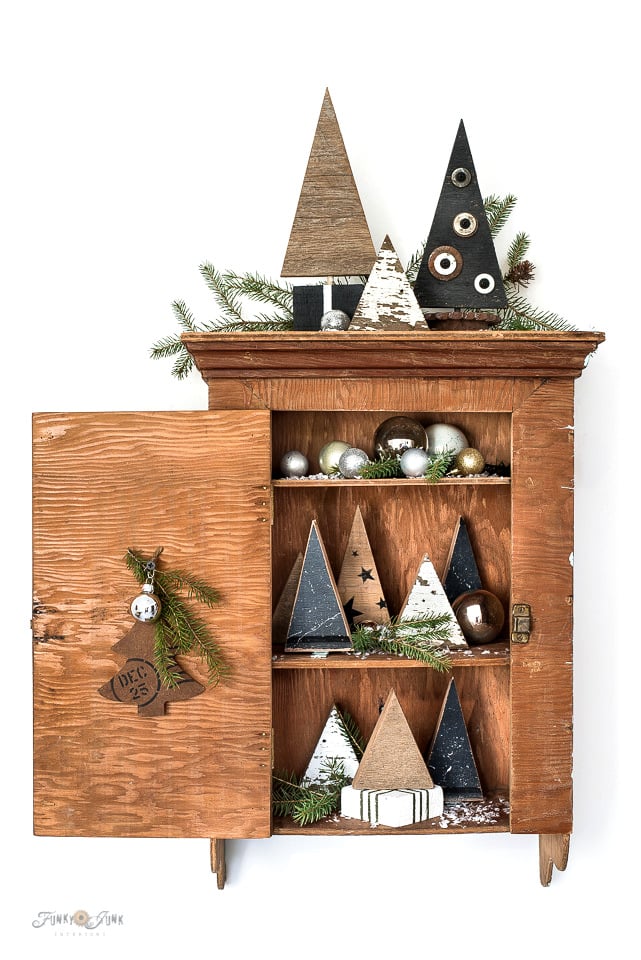
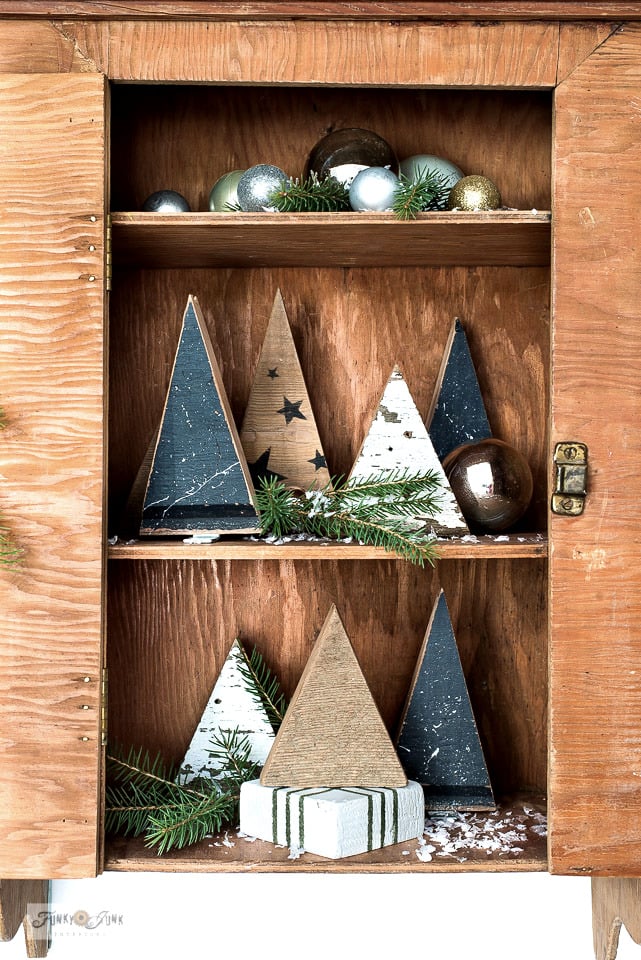
And here’s the adorable result! These wood Christmas trees in a vintage cabinet cost absolutely nothing and make quite a holiday season impact, don’t you think?
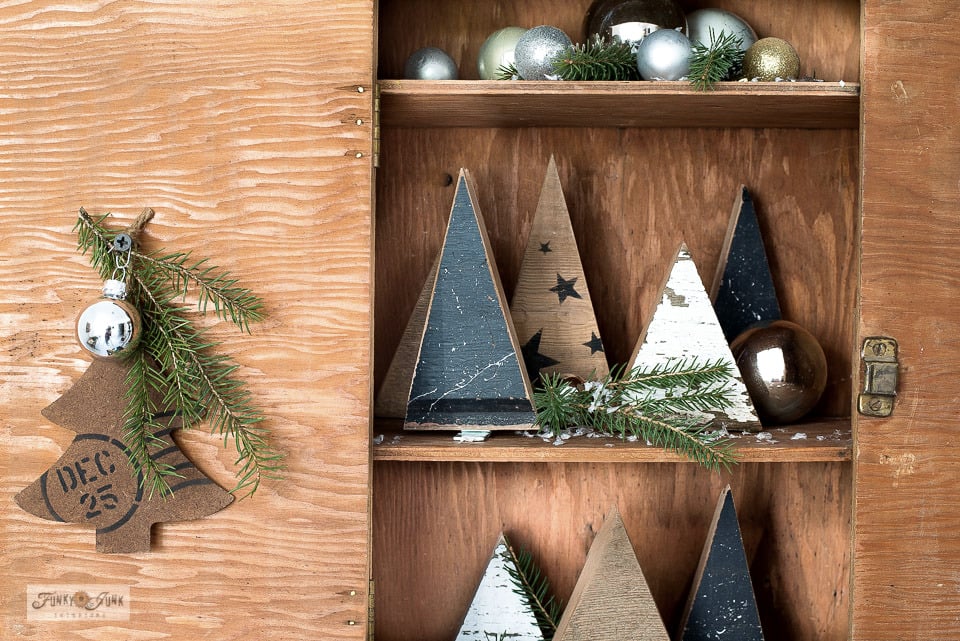
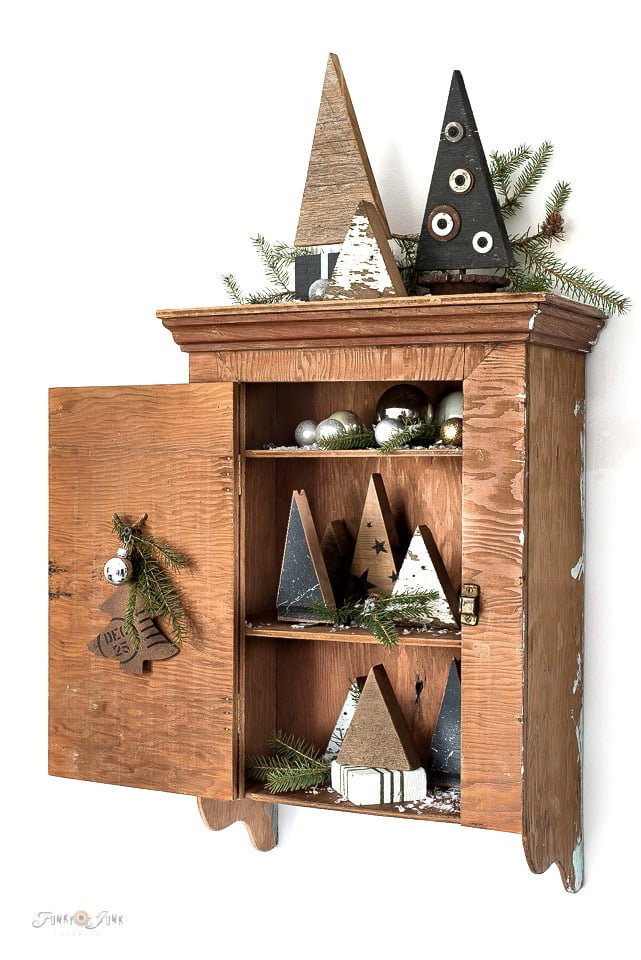
Even the top of the vintage cabinet got its own little Christmas tree vignette.
I really like how the mix of the different styled trees marry each other through their repeating color scheme of bare wood, white chippy wood and black painted wood.
A little dollar store wood chip ornament shaped in a tree was stenciled with this Christmas Crates stencil to achieve this look.
Who needs shelving if you have a little vintage cabinet?! Just leave the door open and you have all the display space desired!
Or if you’re fortunate like Michael, landing a vintage cabinet with a glass door would be pretty epic.
However I’m pretty happy with the new life this little cabinet brought into my Christmas decorating this year.
And with that, this Christmas vignette is complete, ready to be moved wherever desired! If a cabinet was flat on the bottom, it could even sit on a fireplace mantel!
This is a super fun decoration for December, and a craft kids could really enjoy making too!
Could a little vintage cabinet filled with a special collection of your own calling your name this Christmas?
Locate all the DIY wooden Christmas tree tutorials HERE
View many other rustic Christmas DIY projects HERE




Beautiful!
A little vintage cabinet could and is calling my name. My husband brings a lot of wood scraps home from school. The classroom next to him is the wood shop class. It gets my mind going. Today I am going to look through the boxes to see what is waiting to be discovered. Love the rustic designs that decorate the trees you designed.
Love! Love! Love!!!!!!
This is so adorable I just love it. I’m going to share it this Thursday in a Christmas thrifty makeover post!