Create a charming DIY gingerbread village in a crate with this easy tutorial using stencils and MDF houses for the perfect outcome every time! No woodworking tools required… just use paint!

As a Fusion and Amazon Influencer, this post contains affiliate links in which I earn a small percentage from qualifying purchases at no extra cost to you. If you shop Fusion Mineral Paint products through this post, you will get 10% off. Thank-you for helping to support my blog!
Nearing December, I love creating mini moments captured inside a crate for Christmas or winter decor!
Do you remember THIS winter scene in a crate, complete with flickering bonfire?
Or this grouping of wood Christmas trees inside a crate on a wall…
Grouping small decor pieces together creates a bigger presence, but team that up with a crate, and you have yourself a full-out Christmas feature!
View: 3D Gingerbread houses made with 2x4s HERE
So after creating a group of cute and easy Gingerbread houses on 2x4s, I also wanted to try my hand at another Gingerbread house idea, staged in a crate for the full effect… but even easier this time using Gingerbread house MDF Houses with a stand!
Not everyone has access to a workshop, so I felt this option would be a great addition! And boy was I right… this project was effortless to make!
But tucked inside a winter wonderland crate… sounds like a winter celebration to me!
So buckle up your creativity, and read on for the full instructions… this gingerbread house kit is an easy craft for the whole family or for your guests to create with!
DIY Gingerbread Village in a crate:
Easy with stencils and MDF houses!

Supplies you’ll need:
Gingerbread Village stencil and MDF houses with stand)
Fusion Mineral Paint in Casement (get 10% off)
Gingerbread paint colour of choice (I mixed Homestead Blue and Tuscan Orange)
A 2×4 scrap
Fairy lights or battery votive candles

Gingerbread Village stencil and MDF houses with stand
About the Gingerbread Village stencil
The Gingerbread Village stencil is a very versatile stencil which includes 3 house cutouts, 3 gingerbread houses with icing details that fit perfectly, plus house sides and roof pieces so you can paint all the sides of a cut 2×4!
5 ways to use the Gingerbread Village stencils:
- stencil on a flat surface
- designed to fit 2x4s to make wood houses (see mine HERE)
- fits MDF houses with stand to create a standing village
- works with MDF houses with attachable hangers to make ornaments or a banner

Gingerbread Village stencil and MDF houses with stand
Selecting the amount of MDF cutouts
1. Decide if you’ll be layering your gingerbread village.
One set of MDF Gingerbread Houses comes with 3 different houses and 1 stand.
I used two sets to create a layered hilly village look, however I also have some examples of using just one set as well which is equally cute!

Gingerbread paint colour: I mixed Homestead Blue and Tuscan Orange
Create a gingerbread paint colour
2. Select your Gingerbread toned paint.
My last gingerbread village showcased using Fusion’s Chestnut Mare. This round, I decided to attempt to create my own Gingerbread paint colour using Fusion’s Homestead Blue and Tuscan Orange since I had them on hand. It worked great and was very easy to control!
If you don’t have these two paint tones, try attempting to mix a blue with an orange and just play around until you get a tone you like.
How to create a Gingerbread paint tone:
- Place Tuscan Orange on a paint palette.
- Add a little bit of Homestead Blue.
- Mix well.
- Adjust the tone by adding different amounts of each.
- Mix enough so you can paint all your gingerbread houses at once.

Gingerbread Village stencil and MDF houses with stand
Painting the MDF Gingerbread house cutouts
3. Paint the fronts and sides of the MDF houses with the gingerbread toned paint.
If you are painting 2 sets like I am, paint the opposite sides of the next 3 houses to add more variation to your display.
Once dry, you can add flicks of a deeper tone like I did to my Gingerbread Houses on 2x4s HERE. I just decided to keep these simpler this round.

Gingerbread Village stencil and MDF houses with stand
Stenciling the icing details on the houses
4. Position the Gingerbread Village stencils on top of each matching MDF cutout, then with a small stencil brush, stencil the details in white using a very dry brush to avoid paint bleed.
Placement is completely effortless since the stencil templates fit the MDF cutouts perfectly! Each one was stenciled in Fusion’s Casement to mimic white icing.
How to stencil small details with no paint bleed:
- Dip a small dome-tipped stencil brush into paint.
- Remove most paint onto a rag or scrap wood.
- Test the brush on the back of your hand… if it doesn’t leave paint behind, you are ready to stencil.
- Tap paint through the stencil images.
If there’s too much paint on the brush, tap the entire image all over, then double back and fill in any areas that need more coverage. Doing this allows the brush to dry out more so you don’t get paint bleeding under the stencil.

Fusion Mineral Paint in Casement (get 10% off)
Painting the stands white
5. Paint the MDF stand in Casement to mimic snow.

Adding snow texture to the stands
If you’d like to add a snowy texture, you can add Fresco to your paint. This is the perfect application to achieve a textured snow effect, especially nice if you don’t plan to cover the stand up with anything.
It’s very easy to use. Simply mix Fresco with your paint of choice, then just paint it on!
How to use Fresco texturizing powder:
- Add equal amounts of paint and Fresco into a container.
- Stir well.
- Paint as desired.
- To add more texture, add more layers.

I stippled the paint on the stands using a stencil brush for added texture.

I also painted the Fresco mixture on a small 2×4 scrap that will act as a riser for the 2nd set of MDF Gingerbread Village houses.

Gingerbread Village stencil and MDF houses with stand)
6. Position the Gingerbread MDF house slots into the stand holes.
If paint finds its way into the stand slots, scrape the paint out using an exacto blade so the house stands will fit inside.
Aren’t they cute?! And honestly could not have been easier!

View Retro Star Sky stencil HERE
Stencil a night sky
7. Create a night sky with a black piece of paper teamed up with Retro Star Sky stencil.
Desiring a night sky, I decided to use black paper since this is an antique crate I didn’t want to alter forever.
- Measure and cut the black paper to fit inside the crate.
- Positioned Retro Star Sky stencil on the paper, and only stenciled in the smaller stars. This gives the sky a more sparse look that worked well with all the detail on the gingerbread houses.
- Tape the paper inside the crate using masking tape from the underside.

Creating a snow hill with white paper
8. Create a snowy rolling hill using legal sized white printing paper.
- Sketch the shape you desire.
- Cut, then tape it into place.
- Place white paper along the bottom of the crate as well.

Using a 2×4 riser for a hilly 2-village effect
9. If you are using two sets of houses, position the 2×4 along the back of the crate.

Place one set of houses on the 2×4, then another set of houses in front of it, then move the houses into the desired positions.

Creating winter trees from small branches
10. To create standing bare trees, cut some smaller branches from outside, then push the base into a ball of air dry clay or playdough.
I used small wood branches from my honeysuckle bush. They had just the right amount of thickness and positioned branches to suit the Gingerbread village!
Layered Winter Gingerbread Village with twig trees
11. Position the trees where desired, add faux snow and other decorations that chime in, such as snowy pinecones.
And you have yourself the cutest winter-themed Gingerbread Village that can stay up until spring!
I love how the night sky with just the right amount of starbursts makes the warmth of the gingerbread houses pop!
Plus the twiggy trees really add to the winter vibe, don’t you think? If I had cookie trees on hand, I’d have tried those too! (coming soon…)

I also staged my winter Gingerbread Village with props in front of the crate as well. It’s a nice look if you have the spot to do this!

The layered village really makes an interesting impact. This look reminds me of those colourful village puzzles. It’s a fun twist on a standard village!
In hindsight, I think I’d position the snow hill higher when using two sets of houses so it shows up more.

I personally love the stacked gingerbread cookie look, however I also have some examples of just using one set of Gingerbread houses as well…

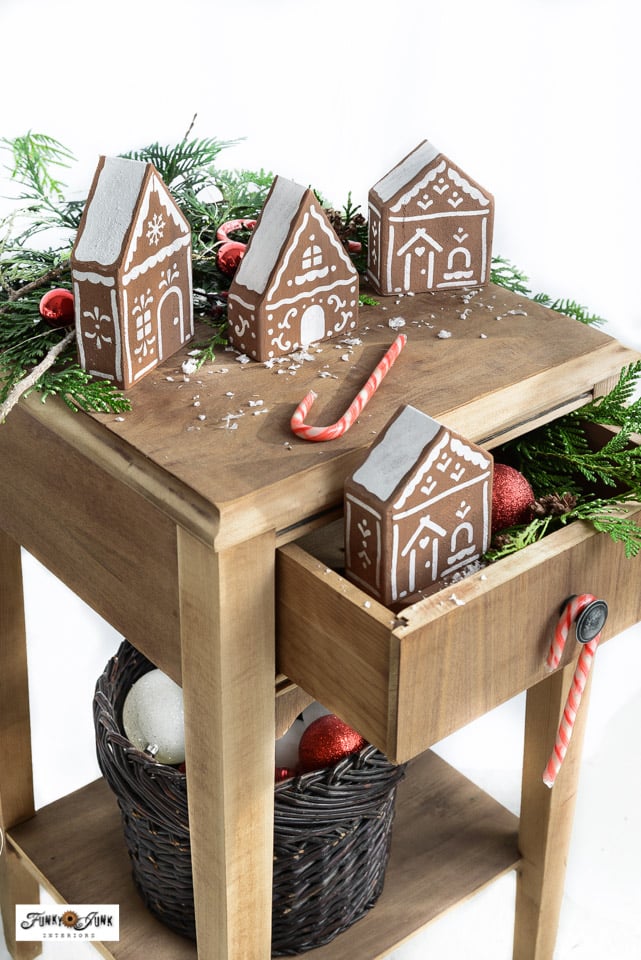
Christmas Gingerbread Village with red ornaments
Here’s a single Christmas Gingerbread Village, using red decorations (or even colourful gumdrops!) to add that special festive quality during the most exciting time of year! I think some types of candy such as a trail of giant candy canes or lollipops would look equally cute and chime in with the theme well!
The single layer of houses really showcases each snow-frosted building since it’s a simpler design. Simply position the high house in the back then work your way towards the front with the shorter houses.
I landed the mini red ornaments at the thrift store today, which proved to be the perfect size for that green bottle brush tree!

That snowy hill behind the village sure creates a nice detail!

I think this is a cute look that chimes in so well for that special holiday accent!
You could even consider making tiny gingerbread men out of clay or cookies to enhance your look!

Winter Gingerbread Village with star ornament in sky
Then come winter, leave your Gingerbread village up, remove the red decorations and add a nice big white starburst ornament to the sky for that perfect winter vibe!
This star ornament is also a recent glittery and colourful thrift store find. A quick spritz of white spray paint and it chimes right in!

With so many options, it’s hard to choose a favorite! However, it was fun to try a few different looks that blended a Gingerbread Village with winter AND Christmas, so you can leave it up much longer than you may have intended!
So whether you’re a retailer, workshop host or making this for yourself, I hope this gives you inspiration to try out new arrangements for your own Christmas or Gingerbread Villages this holiday season! Think Santa would approve?
Video Tutorial – Gingerbread Village in a crate
View a short video tutorial on how the Gingerbread Village in a crate was made above!

View other gingerbread-themed projects to make HERE
Visit all my Christmas decor from one page HERE
DIY Gingerbread Village in a crate: Easy with stencils and MDF houses!
Supplies:
- Gingerbread Village stencil and MDF Houses with stand
- Retro Star Sky stencil
- Fusion Mineral Paint in Casement Casement
- Fusion Mineral Paint Homestead Blue
- Fusion Mineral paint Tuscan Orange
- Dome tip stencil brush
- Fresco for texture
- Faux snow
- Bottle brush trees
- Small wood branches
- Air dry clay
Instructions:
- Paint the MDF houses in a gingerbread paint colour. I mixed mine with Homestead Blue and Tuscan Orange.
- Position each house stencil on top of the applicable MDF houses, then stencil in Casement using a small stencil brush.
- Paint the MDF stand (and a 2x4 scrap if you want a riser) in Casement for a snowy effect. Add Fresco to your paint if you wish to create a snowy texture.
- Stencil a night sky onto black paper with Retro Star Sky stencil in white.
- Secure the black paper to the inside of the crate along the back.
- Cut a snow hill out of white printer paper, and secure it to the back of the crate.
- Cover the bottom of the crate with white paper.
- Position the 2x4 inside the crate, and set 3 houses on it.
- Position another set of houses in front of the 2x4.
- Create winter trees from small branches using air dry clay as a stand.
- Add bottle brush trees, fairy lights, votives, faux snow, decorations as desired.
Notes

I love it! Its gorgeous!
Such a handsome project. Love all of your versions! Your creativity still amazes. Thanks for sharing.
This is so cute! I wish I’d seen it earlier so I could’ve made one for Christmas. Maybe next year!