
Can’t find that perfect ornament color? Here’s how to create your own easy custom painted Christmas ornaments with an easy pouring technique!
My Christmas tree is finally up! But not quite done… so that’s still to come.
As I started to unpack the Christmas ornaments I already had, something was missing…
This post contains some Amazon affiliate links in which I earn a small percentage from qualifying purchases through these links, at no extra cost to you. Thank-you for helping to support my blog!
Visit last Christmas’ flocked Christmas tree with DIY tree crate HERE
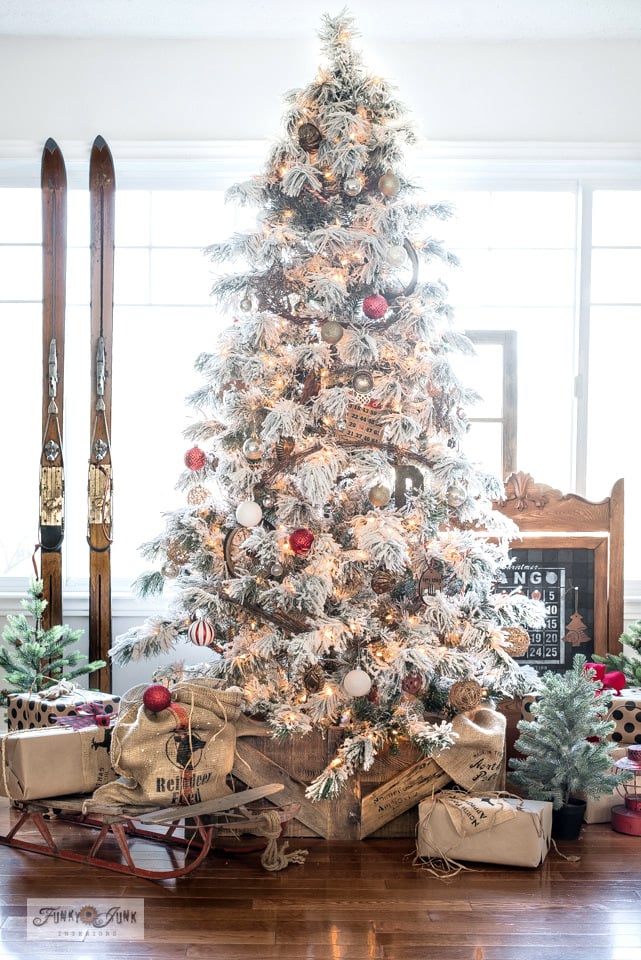
The Christmas tree I put up this year is the white flocked tree (on Amazon HERE) I picked up last year from Hobby Lobby. It’s a beauty!
However this year, I desired Christmas decorations that infused black with sage green. Neither color ornament I had on hand of course!
After doing a little searching locally, I came up empty handed. Neither black nor sage green ornaments were available. So I reasoned, why not paint my own DIY Christmas ornaments instead?
I had been recently inspired by Tess’ own hand painted ornaments in the Facebook group Paint It Beautiful HERE. She was copying a West Elm look and hers turned out so pretty! So I needed in!
So after a run to Michael’s craft store in another nearby town, I picked up two diy ornament kits… a set of 4 plastic larger ornaments, as well as a package of 6 glass ornaments.
I was actually pleasantly surprised how thick the glass was! These are not fragile ornaments!
So once home, it was time to get to work to see if I could manage to paint Christmas ornaments in my chosen custom colors for this Christmas season.
And I’m happy to report, they turned out adorable! I’ll definitely be doing it again!
Here’s the instructions on how I did it:
And be sure to watch the short video below this post to see the process in action!
Easy-to-customize painted Christmas ornaments by pouring paint!
.
Supplies:
.
Homestead House Milk Paint in Bayberry
Search for a local Homestead House Milk Paint retailer from HERE
3″ plain round glass ornaments with removable tops
4″ plain round plastic ornaments with removable tops

Preparing the paint
I was about to pull out Fusion Mineral Paint’s Bayberry when I realized I was out!
So after rummaging through my milk paint stock, lo and behold, there it was… a package of Homestead House Milk Paint’s Bayberry! I was beyond thrilled! So that’s the direction I’m sharing today.
However an additional happy fluke also transpired, which you’ll soon read about in the post!
1. Mix up a batch of Bayberry milk paint into a bowl.
Milk paint comes in powder form. You add equal amounts of water and powder, mix, allow it to sit a few minutes, then use.


Pouring paint into Christmas ornaments
.
2. Place a 3″ glass ornament on top of a small mason jar with the opening facing up.

3. Pour the milk paint into a pourable container with a spout, then pour or spoon the paint into the ornament.
I used a cheap plastic measuring cup now officially deemed for my milk paint adventures!

4. Pick up the paint-filled ornament, then twist and turn it until the ornament is completely covered with paint inside.
5. Turn the ornament upside down, and allow the remaining paint to pour out.

6. Allow each holiday ornament to completely dry without the tops on.
Well that was easy!
So while my beautiful new Bayberry Christmas ornaments cured, I chose a different route for the larger plastic ornaments.

Spray painting Christmas ornaments
.
7. Hang a 4″ large plastic ornament from a short bungee cord hook outdoors.
8. Lightly mist the outside of the ornament with a black matte chalkboard spray paint until full coverage is met.
9. Hang ornaments until completely dry.
I hung mine from large screws attached to a storage cubby indoors.

The finished ornaments!
.
Tadaaaaa! Didn’t both kinds of ornaments turn out spectacular?
However, I did the first trial at night and only did one ornament. The next day I started a new batch when I realized just how low my Bayberry paint was once again. Oh no….
So this round, I watered down the paint a little more, hoping to use it on all the remaining ornaments.
The next day, something rather special happened…

Transparent ornaments
.
The Bayberry Christmas ornaments with the more watered down version of paint were not opaque. Quite the opposite!
They had a wonderfully translucent look with a touch of added elegance that allows the Christmas lights to penetrate through them, highlighting them much more!
They still look sage green, but with a marbled look!

Adding ribbon
It was a happy surprise! They are really cute!
So I tied on 3 different sized black ribbons on the Bayberry ornaments, and called them done!
I love the outcome of the painted Christmas ornaments both ways!
But if you prefer the more opaque look, definitely mix the paint thicker and perhaps even do a 2nd coat of paint if needed.
And here’s how all the painted Christmas ornaments look on the Christmas tree…


The transparent ornaments have a marble-like effect that is pretty cool!

I love them both which just adds more uniqueness to this year’s flocked Christmas tree of Bayberry and Black!
Video
.
.
Click above to watch the paint pouring process!

Opaque ornaments
And here’s a sample of opaque painted Christmas ornaments. If you really want your colors to stand out strong, go this route for certain.

.But I will admit, now I wish I picked up WAY more ornaments of both sizes so I could make many MANY more… this was fun! And I’m anxious to experiment with new colors next Christmas as well!
And wouldn’t painted Christmas ornaments make a perfect gift idea as well? Why yes they would…
So grab a few plain glass ornaments and your favorite paint colors, and pour your own!
Have you ever painted your own ornaments? What colors are you going for this year?
More unique Christmas ornament ideas to make:

Oversized wood round Christmas Sweater ornament

Make these wood scrap ornaments!

Hang up this tree shaped ornament wreath for a front door

Stencil Buffalo Check dollar store wood cut out ornaments (post leads to Buff Check tutorial)
See more Christmas ornament ideas HERE
Visit all my DIY Christmas decorating projects HERE
Those turned out beautiful! Brilliant idea to use those mason jars to support the ornament!
Like your ornaments. Easy project, the kind I like.
WOW!!!! Those are sooooooo neat! I love the watered-down bayberry/sage green ones. I think they’re all so really unique!
I bought 3 Black Star Tree Toppers to put on my 3 Christmas Trees. The rest of my ornaments are antique hanging glass prisms and pine-cones from my yard.
I was thinking…. now I need some Black ornaments too.
I will Paint Some!
Thanks for the great idea!
What a happy accident. You had me with the painted ones and then wowed me with the marble affect. Bravo Donna
Wow, aren’t those happy accident ones just stunning. What would the world be without paint? It solves so many problems.
You are brilliant! Yep! Just love these and really love your colour pallet.
I had just posted recently that my fav Christmas pallet is green, black and white.
I bet it is just stunning on your flocked tree. 🙂
Your “mistake ornaments” turned out beautifully and I might have to try using milk paint. But, if you don’t want that look, after you’ve poured the paint in and turned the ornament so the paint covers all surfaces, set the ornaments with the top down in a small paper cup. The paint will drain out and if there are any areas that haven’t held the paint, just pour in more paint and follow the same steps. This is also the time when you can use a second color of paint if you want a multi-colored marbled look. Happy holidays!
The marbled look of the bayberry green ornaments are stunning with the lights glowing through and around them. Isn’t is amazing what can be done!