Learn how to transform an old window into a simple and affordable cold frame for your plants with this easy DIY tutorial! Extend your growing season with this easy-to-customize project, suitable for any sized garden space.
As a Fusion and Amazon Influencer, this post contains affiliate links in which I earn a small percentage from qualifying purchases at no extra cost to you. If you shop Fusion Mineral Paint products through this post, you will get 10% off. Thank-you for helping to support my blog!
This year I got into gardening more than ever. Not sure where the sudden desire came from, as I’m usually one to resist endless midsummer watering! Yet here I am, improving every flower bed I can thanks to some very generous neighbours offering free plants, while adding some fun features that I’ve been landing and making for free!
I have so much more to share soon! However here’s a few of my favorite garden features I’ve made for free…
Other favorite free garden features:
So when Hometalk challenged me to make a greenhouse of sorts out of an old window, I was like, “Ohh… interesting!”
While I wasn’t able to land 6 windows to make a full little greenhouse, I reached for one larger old window I had in my stash to create a quaint and easy cold frame instead!
So what is a cold frame anyway?
A coldframe is a simple structure built to resemble the effects of a greenhouse. You can enclose young plants to protect them from adverse weather using a transparent material to allow sunlight in, then open the cold frame up once the weather improves to add more ventilation and space. Your plants or vegetables can also be easily hardened off in increments. So handy!
A cold frame could built using a wood frame and clear plastic sheeting, or as in my case today, building a planter box sized to an old window.
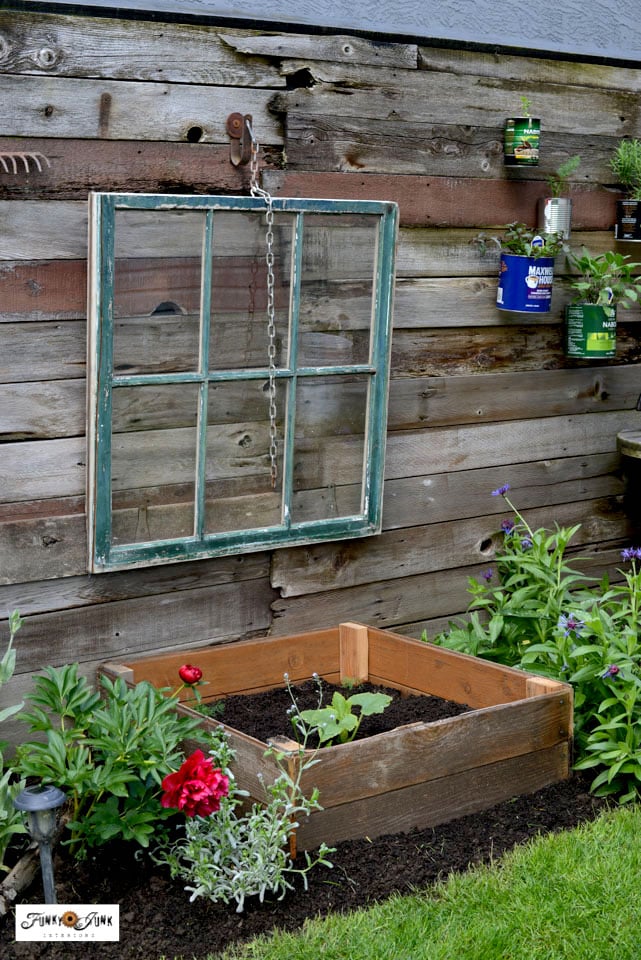
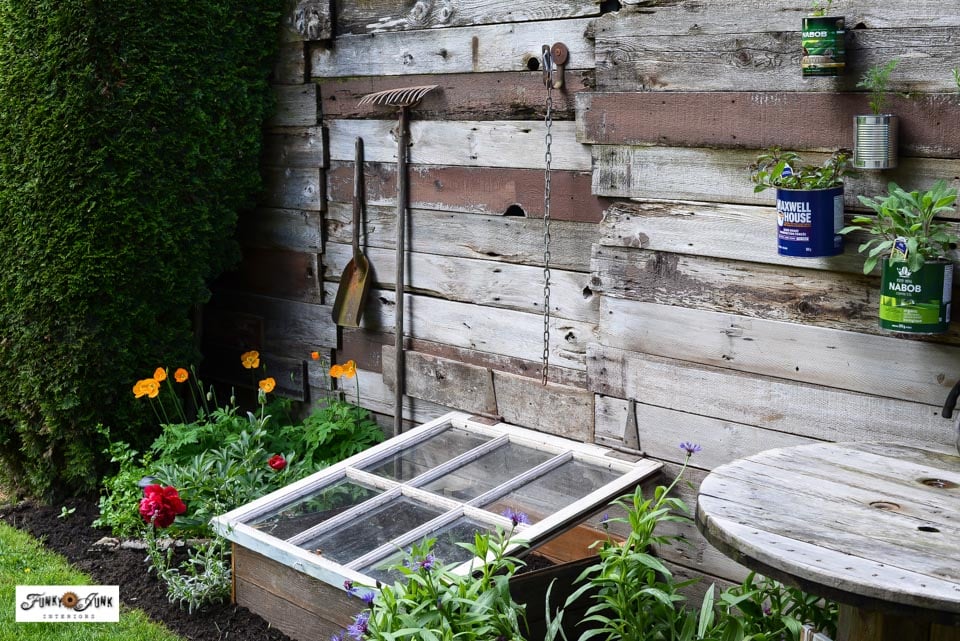
So I decided to use a simple method of building a cold frame by attaching a window to a garden fence, above a DIY raised planter.
Not only was it so easy to make, I’ve used the cold frame several times over to start young plants, only to transplant them later. It’s so useful! And looks super cool as a garden feature too!
While the premise looks and sounds simple enough, I do have a few key tips to share so you can easily and successfully custom build a cold frame to suit your needs too this growing season!
Here’s what I did:
Easy DIY cold frame using an old window! Includes detailed guide.
Supplies you’ll need:
An old window (mine measures 34.5″ wide x 36″ high/deep)
Cedar wood lumber boards (untreated if growing veggies)
4 2×4 chunks (untreated if growing veggies)
Metal chain (links that work with cup hooks)
Food-safe Tung Oil by Fusion (get 10% off) for wood longevity (optional)
Raised planter box garden soil and/or compost
Cordless Drill (I like Makita)
Miter saw (I like Bosch dual bevel glide miter saw to save setup space)
Orbital sander (I like Bosch variable speed)
Read my own DIY must-have tool list with reviews HERE


Building a planter box to fit a window
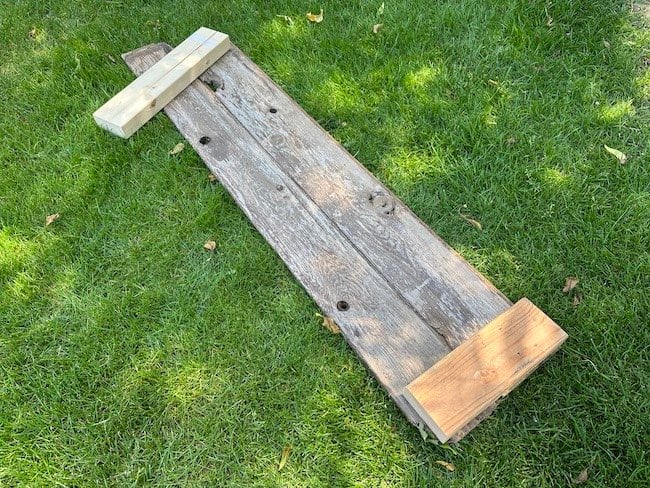
1. Position an old window of choice on your lawn, raising up the back with a board to determine the angle you’d like it to sit.
I have a collection of old windows in storage, so I chose one that was a nice size for my chosen garden bed.
My window measures: 34.5 wide x 36″ high or deep
2. Place four cedar boards around the perimeter of the window, taking note of the depth size (front to back) according to your window angle. More window angle = shorter planter box depth.
Measure the length of the boards to be about an inch or so smaller than the window frame so the window has an attractive overlap once over the box.
3. Cut 4 boards (or 8 if stacked like mine) to the appropriate front/back and side lengths.
- front / back boards: 5″ x 30″ long x 2
- side boards: 5″ x 34″ long x 2
4. Cut 4 2×4 corner support pieces to match the total height of your planter box.
- 2×4 side supports: 10″ tall x 4
Here’s my full dimensions for reference:
- window: 34.5 wide x 36″ high or deep
- finished planter box size: 31″wide x 34″ deep
- front / back boards: 5″ x 30″ long x 2
- side boards: 5″ x 34″ long x 2
- 2×4 side supports: 10″ tall x 4
- Planter box to window gap at back – 10″
- From bottom of planter box to bottom of window hinge on fence – 20″
Assembling the raised planter box sides
5. Assemble one side of the planter box by placing a 2×4 on the left and right side of your side board/s, turning them over, then attaching together with screws.
- I used 2 screws per board.
- If you use reclaimed wood, you may want to predrill holes prior to screwing so the wood doesn’t split.
6. Dry-fit the remaining boards against the assembled boards, forming a rectangle shape. Attach the loose boards to the 2×4 supports on all corners with screws to close up the rectangle.
7. Optional: To further protect the longevity of the boards from the inside, paint on some of Fusion’s Tung Oil ( food-friendly) onto the inside of the boards where the soil will touch, then remove the excess. Allow to dry.
Not all tung oil is food-friendly, so please read the labels if you use another variety!
8. Position the raised planter where desired.

Installing hinges to window and fence
9. Place the window on the planter box, then screw two hinges on the fence side of the window.
- My planter box measures 10″ high.
- The distance between the top of my planter box and hinge on window is 10″.
- Distance from bottom of planter box to hinge on window is 20″.
10. Raise the window along the fence side using a support board to the height desired, then attach the window to the fence through the hinges.
At this point, you’ll be able to shift around the planter box to the exact position that works best.
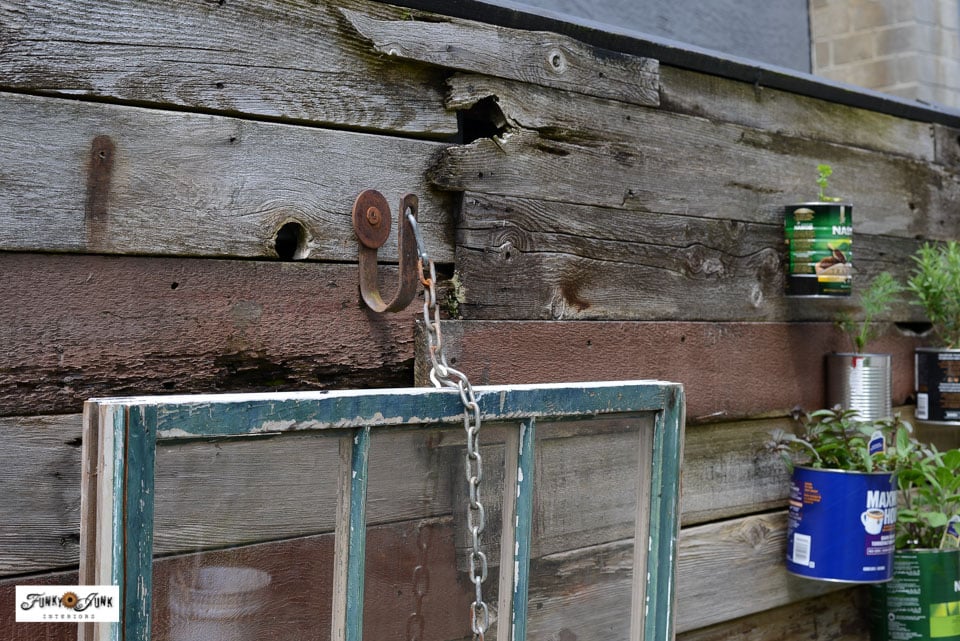
Cold frame open with hooks and chain
11. Add a heavy duty cup hook onto the front of the window frame. Open the window, then add another cup (or different) hook to the fence above. Connect the two hooks with about 2 feet of chain so you have lots of opening options.

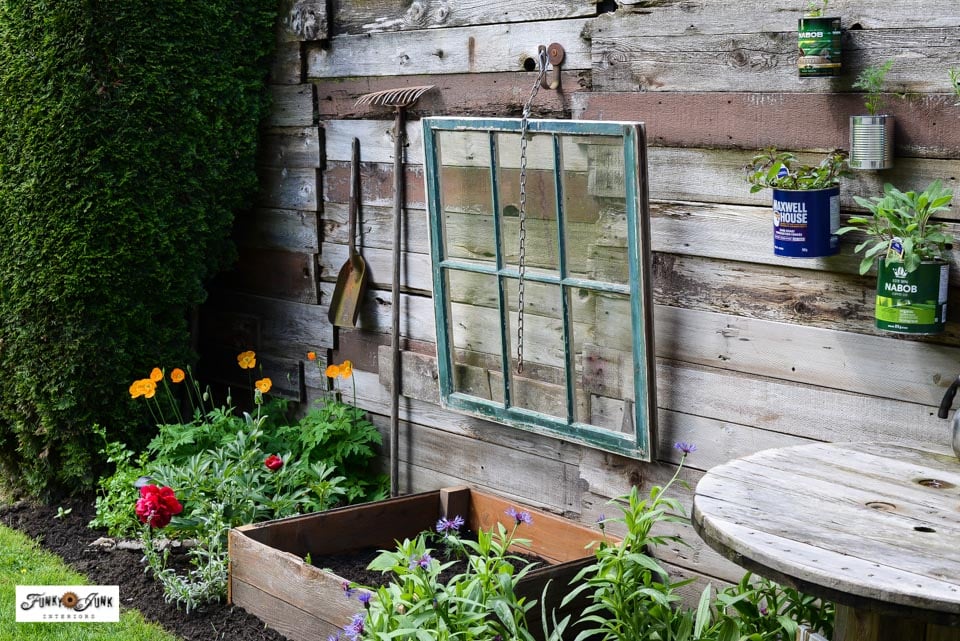
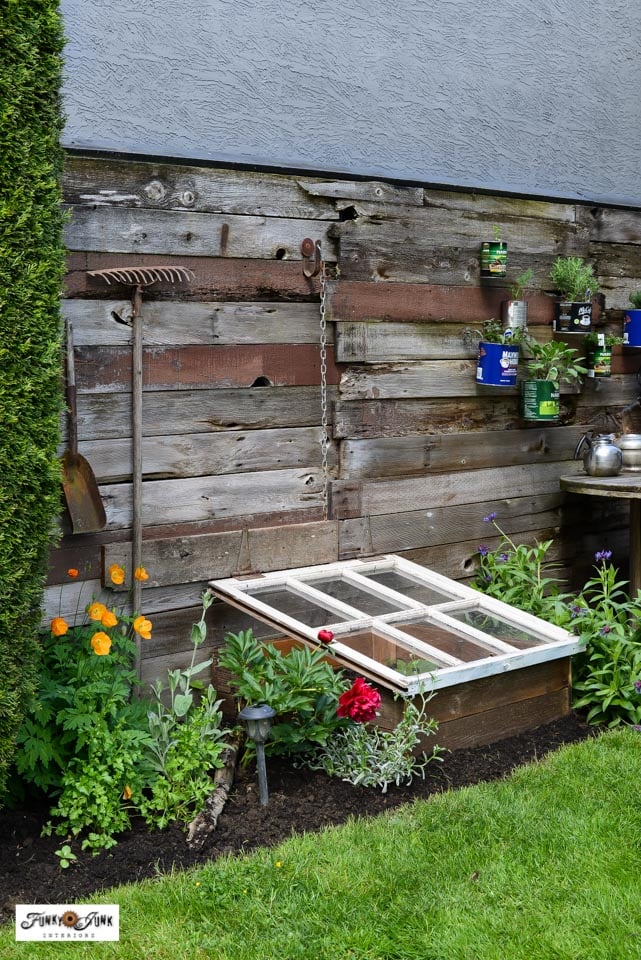
Cold frame closed
I found using a chain the best way to offer every angled option possible! While my plants were young, I had the window partially open during the day, closed during heavy rain storms or at night, or fully open on beautiful days. It works perfectly!
How to fill the planter box
Then fill up your raised planter with at least 12 inches of soil, and plant away!
You can of course pick up some bags of quality soil at most any hardware store.
I chose to purchase bulk planter soil with our truck called GrowZone from Denbow, in Chilliwack, BC, Canada since I was planting a garden elsewhere in the yard as well. Turns out the plants love this soil! I’m thrilled at their growing success.
The ground level planter box with an open bottom allows you to add well-drained soil while utilizing the original soil underneath should your plants require more space to grow. I also find if the plants have access to the ground, they’ll likely require less watering during hot spells. It’s for this reason I would not place any plastic sheet or fabric or cardboard down first, although you could if you added enough soil on top.
Perks of a 2-toned window
I also love the fact that my chosen window is white when closed, yet green when open. It gives the space added interest.
You could of course paint your window any tone you wish, or just leave it bare wood. You’ll just want to ensure it isn’t potentially flaking any lead paint into your garden bed if you are growing food.
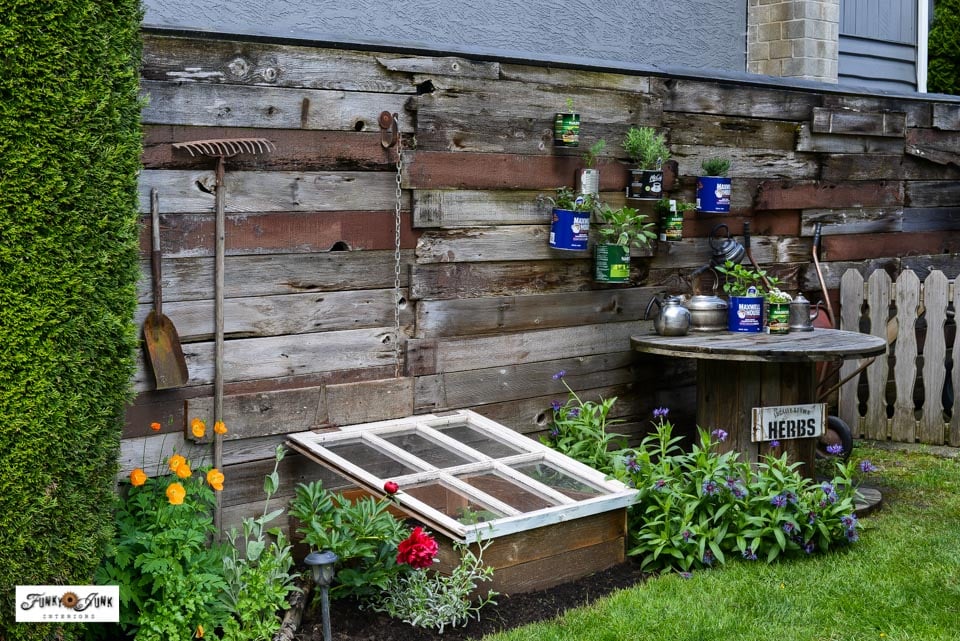
I’m just in LOVE with having this helpful cold frame in my garden now, and love the added vibe it offers the garden, no matter if it’s open or closed! It’s all cute while being a valuable asset to the garden bed.
What to plant inside the cold frame:
- tender veggies such as lettuce and spinach from seeds or seedlings
- herbs
- veggies that like warmer weather such as tomatoes and peppers
- flowers from seed or seedlings
An important consideration: this style of cold frame will always have ventilation since the window angle showcases a gap between the planter box and window. If you didn’t want the gap, you could build the frame on an angle so they can close up tightly together. I have found the added ventilation to be a bonus myself.
Not sure how to use a cold frame? Here’s my suggestions…
When to close the cold frame:
- direct seeding outdoors
- starting new plants or transplants outdoors
- protection from insects
- protect plants from strong winds or other adverse weather conditions
- use as an added heat source to maintain humidity
- protecting plants from wildlife or roaming pets
- start warm-season vegetables earlier
- easy to harden off plants by slightly opening the window more each day
I’ve already started a few young plants in the cold frame and have since transplanted them, so it really did act as a mini greenhouse to help get some young shoots going!

When to open the cold frame:
- to slowly harden off new plants during warm weather in increments
- when plants grow too large for the enclosed space
- so plants can utilize direct sunshine and rain once protection is not required
I now leave the cold frame open since my planted zucchini has taken a good hold. However while it’s small enough, I still have the option to cover it should a heavy rainfall hit.
Honestly? If you have some scrap wood and an old window, what are you waiting for? Give building a DIY gold frame a go! It’s nice to have, but even more fun to look at!
Think you’ll make a cold frame this year too?
Video tutorial:
View video tutorial of Cold Frame being built at Hometalk on Facebook HERE

Other creative ideas to build for the garden:
How to build a front porch on a garden shed
Add an easy and quaint solar fountain to your garden
How to build a reclaimed wood garden fence
Build a garden-themed wooden walkway
View all of our unique outdoor projects HERE
Easy DIY cold frame using an old window
Supplies:
- 1 old window
- 4 (or 8) planter box boards to fit under the angled window
- 4 2x4 side support pieces sized to planter box height
- 2 strong cup hooks
- 2 feet chain links that work with cup hooks
- planter box soil
- plants
- 2 heavy duty hinges
Instructions:
- Position window on lawn, then raise one end up to the angle desired using a piece of wood.
- Surround window with wood boards to determine board lengths required, taking note that the front-to-back length needs to be shorter than the actual window depth, according to your chosen angle.
- Cut boards to create the planter box.
- Cut 4 2x4 corner supports to the height of your planter box.
- Assemble box sides by placing side plank/s down, then attaching two 2x4s on each end. Do this for both sides.
- Position the remaining boards against the assembled boards, creating a rectangle. Assemble loose boards to 2x4 supports with screws.
- Protect inside of planter box with Tung Oil to preserve wood if desired.
- Place planter box into garden.
- Position window on top of planter box. Attach two hinges to the fence side of the window frame.
- Raise the back of the window to the angle desired, supporting it with a piece of wood, then attach the hinges to the fence.
- Attach a cup hook to the front of the window frame, then while open, attach another cup hook directly above it on the fence. Connect both hooks with the chain.
- Fill planter box with soil, then enjoy your new cold frame!
Just love your creations! Your shed is just adorable and you’re always changing it up but it always looks adorable! Have never heard of a cold frame. Learned something new. Thanks for sharing all your creations!