Could your outdoors use more flowers? Enhance your garden shed or home by learning how to build easy DIY window box planters using scrap wood and stencils!

Subscribe ABOVE OR HERE to get inboxed with NEW upcycled projects by Funky Junk!

Welcome summer! Nearly… once our weather cooperates that is.
However with this fine warmer season approaching, that means one main thing in these parts… it’s time to give the garden shed a fresh new look after a long rainy winter!
With a slightly different vision this round.
I’ve kinda let the backyard go where flowerbeds are concerned. You may remember THIS STORY where I removed all the flowerbeds because I just wasn’t keeping up. But I’d like to turn a new leaf… literally. Since I cut way back, my backyard started to resemble an abandoned lot, and that just wasn’t cutting it!
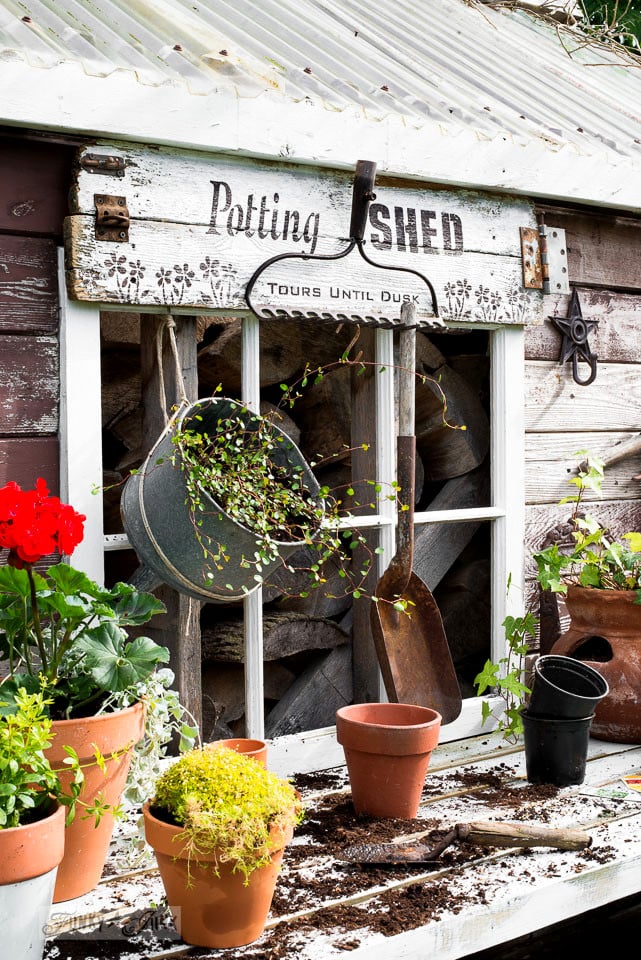
Even if my yard isn’t perfectly maintained, I’d love to add more flowers, fresh herbs, ferns, extra foliage in the corners, and even a new-old potting bench… which I’m currently working on.
So to help with that, my thought was to add flower-filled DIY window planters on the shed… for the first time ever!
Why add window boxes?
I like to think that window planter boxes or container gardens allow you to add colorful flowers in areas that would normally be impossible. Works for me! However that meant it was time to figure out how to build some easy window box planters out of reclaimed wood… so they could be built for free!
There are so many different designs to consider. However I wanted to keep my window boxes looking casual so they married the rustic garden shed well, created custom sizes to create the best window box design possible that would be easy for you to customize as well!
Gathering up a few boards, the end result led to a pretty cute looking garden shed complete with a rustic window box or two!
So if you’ve ever envisioned adding window box flowers to your own shed or even your home to create a pretty focal point with flowers or foliage plants, or perhaps even vegetables, here’s an easy way to build some! For nearly free!
This post contains some affiliate products in which I earn a small percentage from qualifying purchases at no extra cost to you. I only endorse products I love to use. All opinions are my own. Any mention of Fusion Mineral Paint will get you 10% off if you shop through this page.
DIY window flower boxes (on a garden shed)
Supplies you’ll need:
Nails or wood screws (suitable for deck railings)
Heavy gauge greenhouse plastic
Tape measure
Stencils I used: Fresh Cut Flowers & Garden Shop
Fusion Mineral Paint’s Little Lamb (get 10% off Fusion HERE)
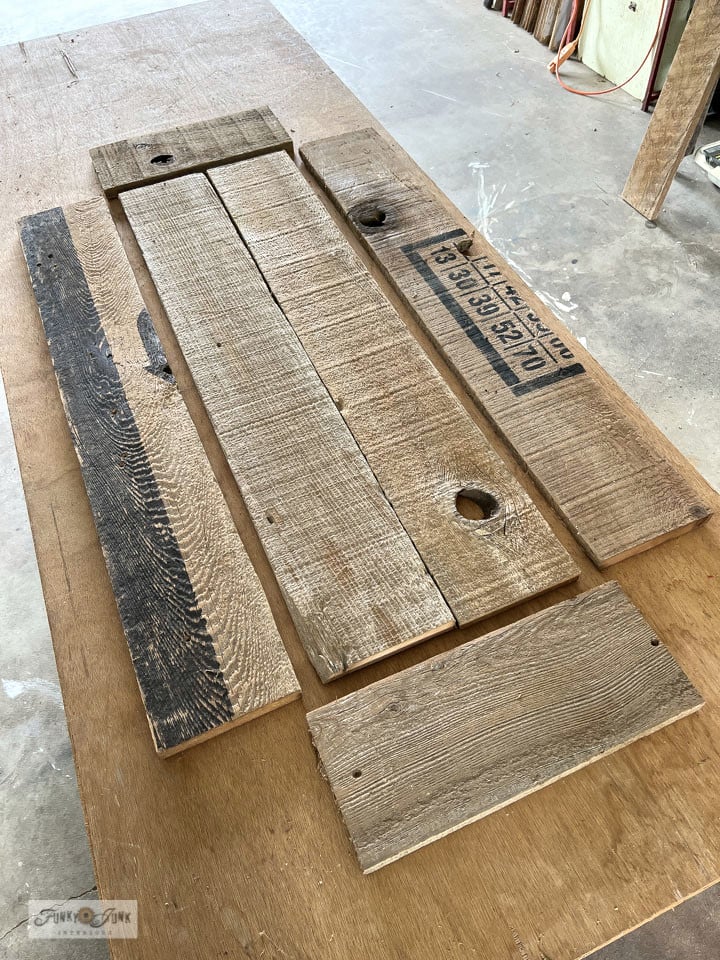
Cutting the wood
There are so many ways to build a basic crate or box. It doesn’t really matter the way you choose. The most important part is making it to the size desired. Measure the width of a window to use that as your length, then cut boards to suit.
Large window box size finished: 41″ long / 15″ deep / 6″ high
Small window box size finished: 23″ long / 13″ deep / 6″ high
Here’s my version…
1. Measure how long you’d like your window box.
2. Cut 4 planks that length. (2 for the bottom and 2 for front and back)
3. Then cut two planks for the left and right side to the depth desired.
I chose by depth by measuring the 2 bottom boards so they would fit and wouldn’t need ripping down.
I used reclaimed cedar fence planks so they’d be durable enough for the weather elements.

Assembling the window box planters
4. Assemble the front and back to the sides with screws.
I like to pre-drill pilot holes, then screws to keep the wood from possibly splitting.

5. Slip in the bottom planks into place.

6. Flip the window box on its side, then attach the bottom to the sides with screws.

Adding bottom supports
So let’s add some mounting hardware! You can visit a local hardware store to see what they have on hand, or try it my way, using scrap wood for free.
7. Attach two small support boards underneath the box.
8. Cut two smaller boards with 45 degree angles on each end.
9. Attach one end of the angled boards to the support boards.
These boards will help support the crate when it’s on the shed, but they also add more rustic detail which I love!

Preparing for plants
10. Mount the crate by holding it against the shed, then attach with screws.
Drive a screw through the bottom supports as well.
11. Line the window boxes with heavy gauge plastic using an electric stapler.
12. Drill drainage holes for proper drainage into the bottom of the window boxes right through the plastic.
13. Cover drain holes with rocks or gravel, then add soil and plant flowers!
I picked a couple of soils that were rich in nutrients so hopefully the flowers thrive.

And here’s a dry fit of the flowers. Really super cute!
But that’s when I felt the window planters could be a little fancier… I had used a LOT of screws and didn’t like the look of them all showing like they did.

Adding decorative wood pieces
This smaller window box actually started as a fall orchard crate! HERE’s how it was made.
For added detail, I decided to cover the window boxes with additional lightweight boards on top. This is actually fire kindling but the pieces are so uniform and nice, I use them to build all sorts of things!
Each piece of wood was positioned, then screwed to the window boxes to give it a patch work design of sorts.

YES! I liked this very much! This extra trim work gave the window boxes more substance too. Isn’t the result adorable?

The extra planks also made the flower boxes look extra woodsy with all those added wood shades!
But, the only thing I didn’t care for is the fact that the newer wood shade didn’t blend well with the faded wood on the shed.
Here’s a few tricks that’ll fix that!

How to age wood with white-washing
Aging new wood in this case was very easy! I mixed Fusion Mineral Paint’s Little Lamb with water to create a paint wash.
How to create a paint wash
- Pour a little paint into a container.
- Add water, and mix.
- Do a test to determine if more water or paint is needed. You should be able to see the wood grain when you paint it on.

Shop Little Lamb grey paint HERE / View all paint choices HERE
Or use discount code: funkyjunkinteriorsfmp in checkout

The entire window box surface was brushed with paint…

… then wiped off with a rag before the paint dried.
The paint wash completely toned down the orange piece of wood, leaving it nearly the identical tone to the shed wood, offering a more delicate look! Perfect.
So let’s add one more detail to really finish these window boxes off right…


Garden stencils for the window boxes
1. Position a stencil of choice onto the window box.
I used the Fresh Cut Flowers stencil.
2. Load the stencil brush with Fusion Mineral Paint’s Coal Black, then remove most onto a rag until the brush feels dry to avoid paint bleed.
3. Tap or swirl paint through the stencil until your image is covered.
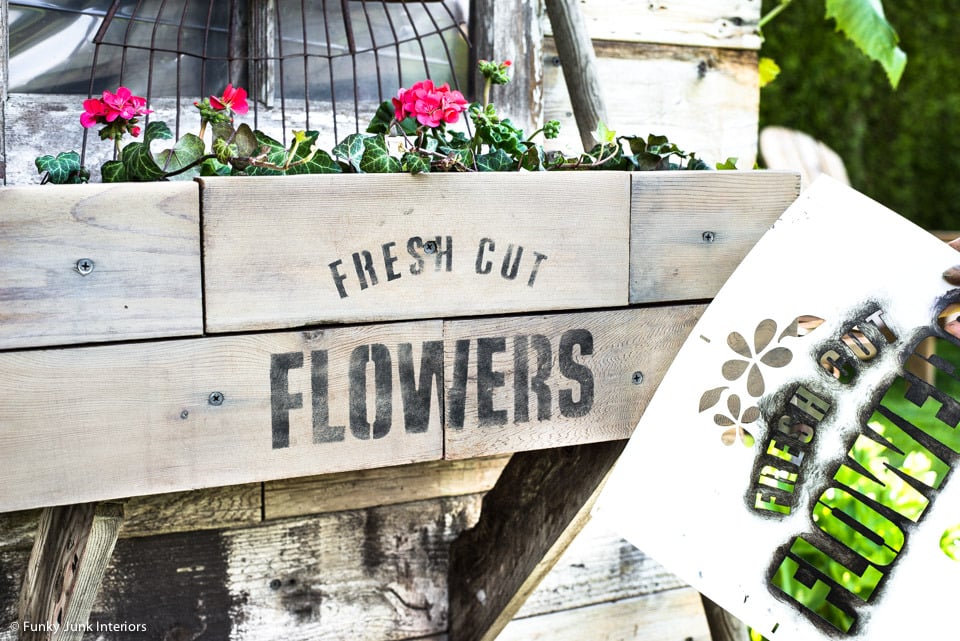
I ensured my brush was extra dry so the letters would look faded. Perfect!
4. To further distress, wait for the paint to dry, then run over the signs with a variable speed orbital sander on a low speed or use a sanding sponge.


The larger box got stenciled with the Garden Shop stencil.
Garden was positioned to the left, Shop to the right, with some space for graphics in the middle. I love to come up with my own designs with existing stencils to make creations even more unique!
And here’s how I went about planting the wooden window boxes with outdoor plants:
How to plant window boxes
Here’s my own window box planting tips to get the best results!
- Select flowers for the amount of sunlight they will get.
- Choose flowers that are thrillers, fillers and spillers for a very full look.
- Cover drainage holes on the bottom of the box with small rocks or broken clay pots for added drainage.
- Fill with fertilizer rich potting soil, meant for outdoor container gardens.
- Water flowers well while still in pots.
- Remove pots, then gently pull apart the roots slightly in both directions.
- Dig small holes in the soil, and plant the flowers.
- Cover, then water well, checking that the window boxes are draining well of excess water.
- Keep window boxes slightly moist.
- Feed plants or flowers when needed, by following the directions on the plant food.
So with nice, new window boxes, two more things were done to improve the shed so it would really shine…

Pressure washing and weeding
The entire shed got pressure washed, along with the removal, weeding, then replacement of the pallet porch.
Pretty neat how dark the shed gets when it’s wet, huh? It’s like a mood ring!

Creating a curved flower bed edge
Then the flower bed border wood was removed, and a natural curved shape cut instead. I’ve wanted to do this forever and now was the time!
How to cut a flowerbed edge tutorial
- Lay a piece of rope in the shape you desire.
- Using a half moon edger slightly on its side, cut into the soil, then keep cutting much like you are cutting a cake.
- Remove the turf, mound then fluff up the soil and you have yourself a pretty edge!
Video – how to edge flowerbeds like a pro
.
View above to learn how to cut flower bed edges leaving you with perfect results every time!
Visit the full post – How to Edge Flowerbeds Like a Pro HERE
Ready to see the final results?!

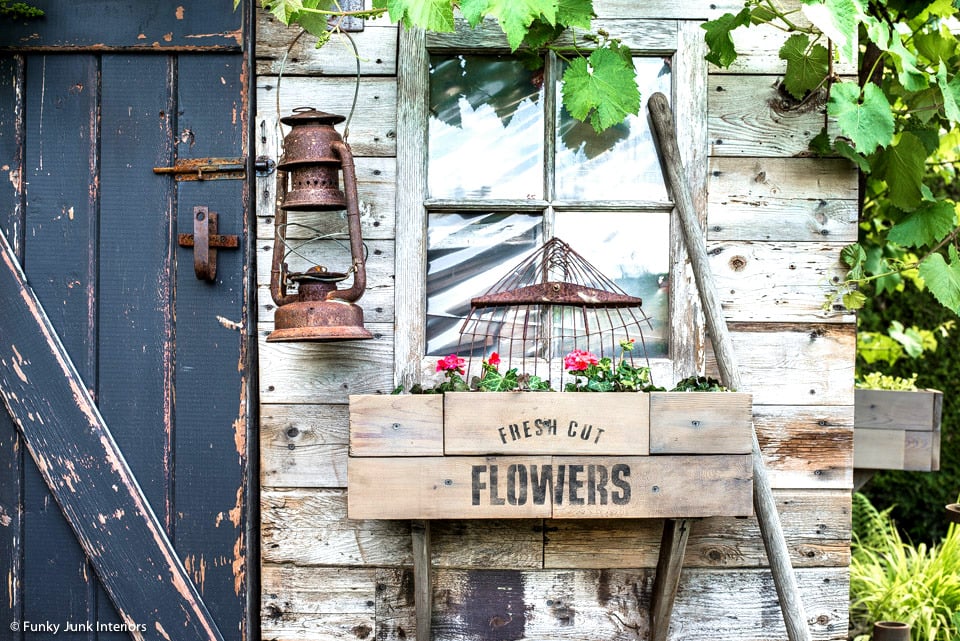
The finished garden shed
Welcome to this year’s summer shed! I call it a woodland planter theme.
It’s super woodsy, and once those flowers take hold, will be super flowery too!
I actually tried some shutters, but ended up taking them down. You can see a past shutters version HERE though!
Let’s take a closer look.

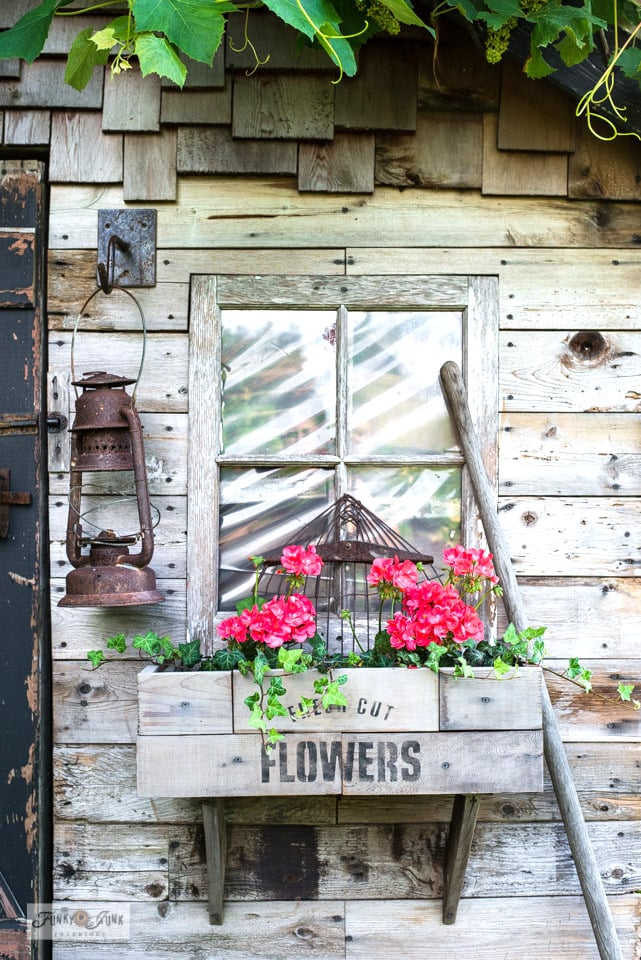
The small DIY window planter box
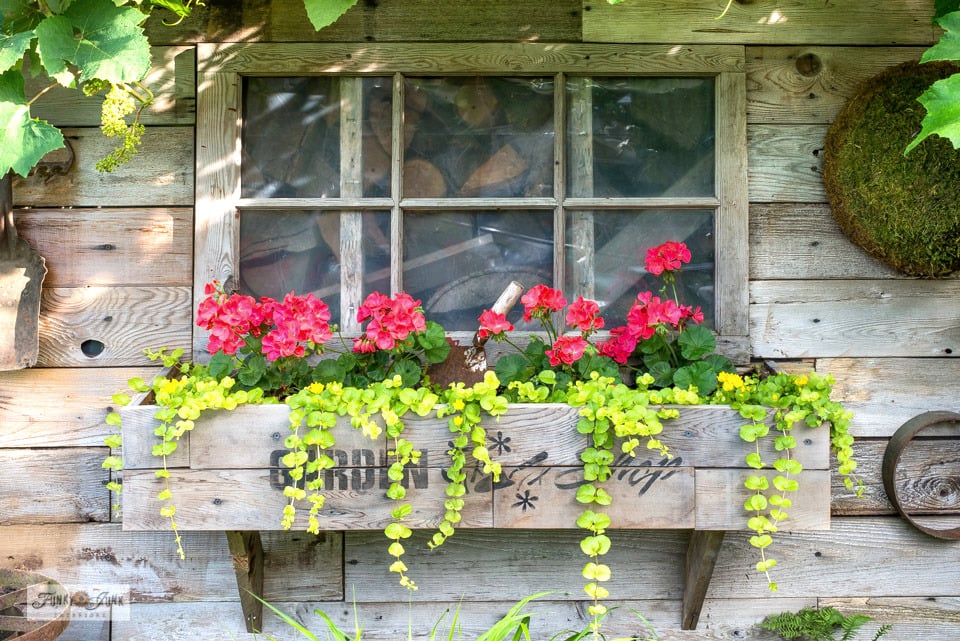
The smaller window box planter offers such a welcoming look to the front of the garden shed!
And as always, the grapevines always seem to add the perfect greenery framework.
Flowers planted
This window box was planted with Multibloom Capri Geraniums in a pretty bright salmon color along with a deep green English Ivy vine which should look very pretty together once filled in!
And a rusty vintage rake looks right at home planted in the middle!
What plants can I put in a window box?
Before you plant flowers, you’ll want to be aware of whether your plants require full sun or partial shade. My recommendations is to visit a garden center and ask their advice (or read the labels well) so your plants will thrive, no matter where you plant them!
Window box planters can hold flowers, plants, herbs or vegetables! You get to choose!
Just make sure the soil has great drainage and there’s a way for your window box to drain.
Can you put potted plants in window boxes?
Absolutely! However I would recommend to remove the pot, spread the roots, then plant, ensuring there’s plenty of root space for continued growth.

On one side of the window box, Plants Bulbs Seeds from the Garden Shop stencil was stenciled to resemble a garden crate. It’s there without being blatant.
Love the quaint, rustic look!
Update: here’s one of the window box planters 1 month later! Wow! Now that’s one colorful window box!

Woodland shed decorating
To the left of the shed door, two wooden planters were hung on the side of the shed, along with a couple of logs I picked up for free from a store that was closing not long ago. Aren’t they perfect?! Love the reclaimed wood cohesive look adding masses of texture.
Some branches from my honeysuckle bush was positioned into the larger crate to resemble parts of a bird nest. If I can find a vacant one, I’ll be sure to add it there!
The smaller crate became a great place to stash a few hand garden tools.
Let’s take a look at the side of the shed next!

The curvy flower bed gave the flowerbed much more presence. Exactly what I had hoped for!

Large window box planters
The larger window box planters on the north-facing windows turned out so cute, really taking advantage of the long shape to create a longer sign of sorts.
To blend in with the other planter box, Multibloom Capri Geraniums were once again planted but this time, alongside Golden Creeping Jenny to blend in with the grass plant below the box.
Doesn’t the paint washed wood blend in so perfectly with the shed wood?! The wood aging worked out so well!
I’ll be adding flower fertilizer every now and then to keep those blooms blooming into fooling you all that I may in fact have a real green thumb!
Update: Here’s the large window box planter 1 month later! Outstanding!
Other things to plant in window box planters:
I also think these window box planters would also be fabulous for a herb garden which I may do next year! Or perhaps filled with easy-care succulents. There’s so many options! Here’s a few other plants to consider:
- oregano
- thyme
- parsley
- mint
- basil
- succulents
- spanish moss
- coleus
- verbena

Decorating with moss plant baskets
To the right of the window box, a few moss hanging baskets and rusty metal rings were hung to decorate the shed. But also handy for planter storage too!

And what timing! The grass, fern and plant along with the grapevine on the roof have really come alive in the last week or so! It was like they knew I’d need it growing for this fun reveal.
Video tutorial – aging window box planters
Click above to watch a short video of the wood washing process!
And now my friends, it’s time to sit in that chair and pour myself something delicious! Because it’s summertime! Join me, bees and butterflies!
Right after it stops raining…
What do you think of the window box additions this year?
This shed has taken a lot of twists and turns over the years! Here’s a few stories you may remember…
Other unique shed additions to make:
Visit garden junk projects HERE / See Potting Shed sign HERE

Building a pallet porch to a shed

Build this scrap wood window box HERE
.
Visit: 20+ easy and unique garden shed ideas to add to yours!
Visit all rustic garden shed posts HERE
Subscribe ABOVE OR HERE to get inboxed with NEW upcycled projects by Funky Junk!
Very cute!! I’m putting up a shed in my backyard this fall. You’ve just given me some great ideas to make it look cozy and comfy while being useful.
Thanks!!!
I’m so envious of your garden shed. This turned out so cute. I’d be tempted to extend the back for storage if there was space behind it and use the front as a she shed.
Mood ring, lol!
Your shed, just get’s prettier and prettier!
You just can’t beat the charm of window boxes.
I love it Donna!
Another stunner with your shed! It is so inviting and rustic and every transpiration of it is always beautiful, quaint and lovely! I wish I had a shed to design. It’s a testament to your creativeness and I love that you use free finds and wood and stencils! Kudos to you! Thanks for always sharing your ideas and talents! Love the grapevine-it’s like hair on a human. It’s the cherry on top of the ice cream, lol.
You have another winner in my book Donna with your newest additions to your shed. I’ve enjoyed the changes it has taken over the years. I love to see your creativity at work with all your projects, and this one is a favorite!
Such a doable and cool wood planter. The supports underneath do give a real rustic addition. The whitewash treatment looks so easy and yet does what you want. I pinned this. Thanks also for posting your preferred tools. I’m going to be looking to replace some and it’s a helpful guide. A question. My drill bits seem to lose their sharpness and effectiveness quickly. Is that my lack of strength as it keeps going until it drives in the screw or some drills more powerful? Thanks Donna. Beautiful job and doable.
Hi Joanne! Thanks for the kudos! Regarding the drill, it can be the drill, battery life left or strength. If you hear the drill kinda grind and slow down, it may not be adjusted correctly for what you are doing (if using the kind where you have to twist to secure the bit), or the battery power is running low. But if all is running at top speed but the bits aren’t cutting, try using more force. Try higher quality bits if you really do feel they lose sharpness quickly. I use bits from a Makita drill bit set. And make sure they are for wood.
My favorite garden shed in all of the blog land keeps getting more and more adorable. I wondered how you managed to build planter boxes with little pieces of scraps. Very clever!
So adorable!! What a pretty vibe you have going on out on your shed!! Lovely pics!