Looking for a simple and affordable way to add a water feature to your garden? Learn how to make an instant solar water fountain using galvanized planters in this step-by-step guide.

This post may contain Amazon plus other affiliate links in which I earn a small percentage from qualifying purchases at no extra cost to you. Thank-you for helping to support this blog!
Happy spring! And if you’re anything like me, you’re already antsy to get outdoors and plant flowers!
I can’t wait to get my shed going to fill those window box planters once again like last summer! Or hang all those ferns up again to create an outdoor jungle.
However on the West coast of BC, it’s still a little too early for new plants. So I’ve been spending lots of time in the yard doing general clean up to get ready for the fun stuff coming soon!
However thanks to a recent project (which I’ll share more of very soon! It’s a GOOD one!), I ordered something I’ve wanted to try for a VERY long time.
I’ve always wanted some kind of water feature in the yard, however I didn’t want to fuss with electricity, water pumps, an electric cord, electrical outlet and the high expense and upkeep that comes with it.
I am still searching for a bird bath in the bird sanctuary area being created, however I’ve always wanted something closer to where I sit. A full-out pond seemed too much. Just a smaller, simpler feature would be nice. Maybe even movable…
Why a solar water fountain?
So when solar energy water fountains became a thing, I’ve been eagerly watching to see if they actually worked! The concept was too good. You simply put a solar powered fountain in water, and it instantly turns on, making having a water fountain anywhere in your yard possible with very little fuss! No need for an increased electric bill nor endless plumbing.
So I purchased a solar water fountain hoping it would work as good as it promised to.
It’s now safe to say, low-cost solar outdoor fountains positively exceeds my expectations! Not only does it work really well, the sounds and sights and movability make it an easy addition and lovely focal point to any sunny garden, sitting space or as an added attractant to a birdbath!
So today, I’m putting this water fountain kit to work in a new backyard arrangement that only took a few minutes to pull together… which cranked up the outdoor ambiance up even higher!
Wish you had a water fountain? Try this… and be sure to check out the video below to see it in action!
Easy and instant solar water fountain in galvanized planters
Supplies I used:
solar water fountain purchased from Amazon
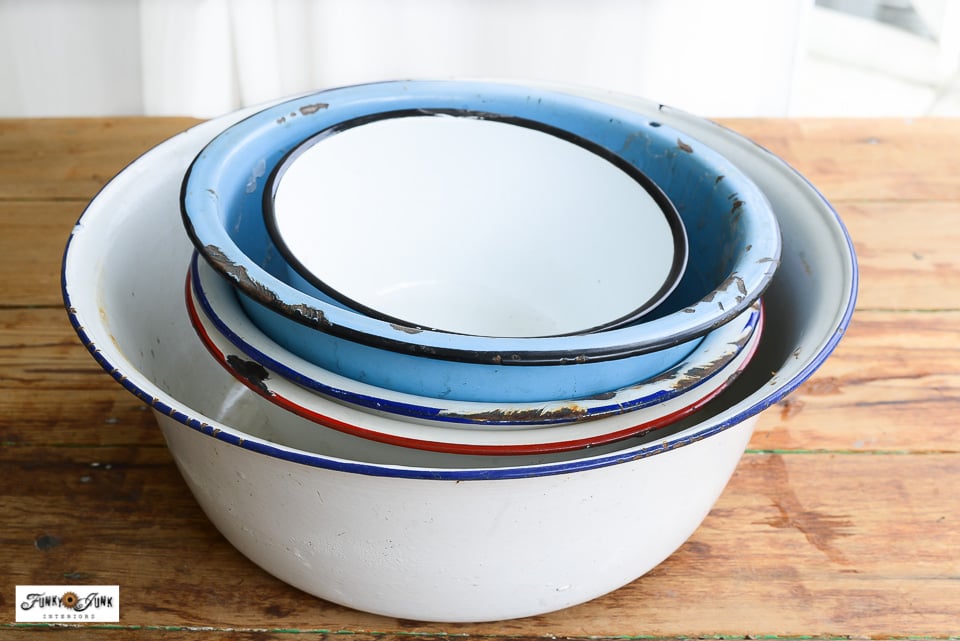
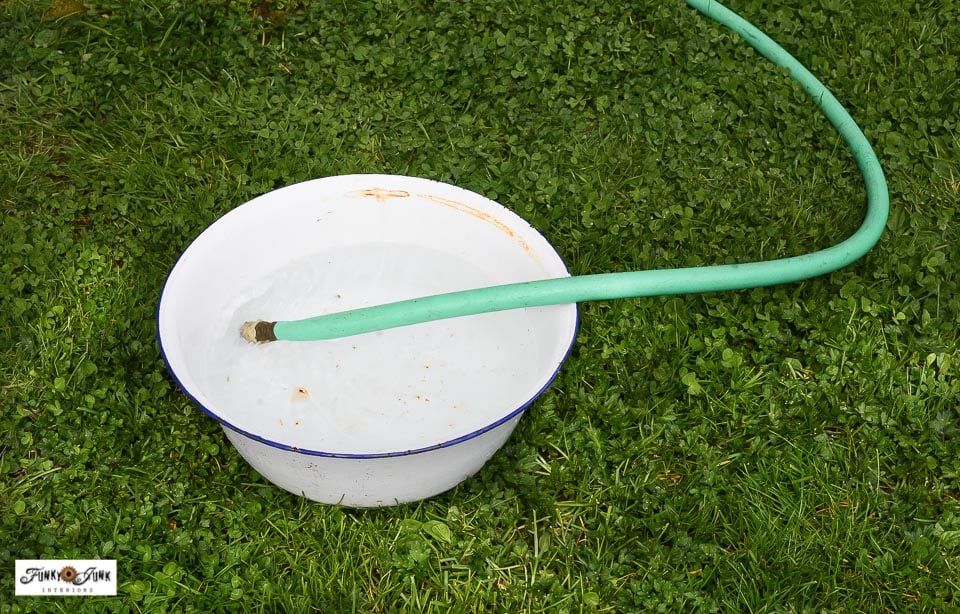
a large enamel waterproof bowl (needed for the fountain)
or see bird bath bowls that would look amazing!
purple flowers
galvanized vintage watering can
Botanical Flowers and Plants stencil
galvanized ring
Choosing a container that holds water
1. Select a waterproof container, bowl, plastic pots, vessel or large planter for the solar water fountain.
You could also choose to plug a pot with drainage holes.
The water bowl can also be any size. However, the wider the bowl, the more water will stay inside vs. splashing out over the sides.
I really found this large enamel bowl to be perfect! HERE are quite a few enamel bowls to check out.
Check out solar water fountains HERE
I chose the largest white enamel bowl I had on had. Plus, it had a violet painted rim which would be ultimately perfect for what I would use it with!
Check out solar water fountains HERE
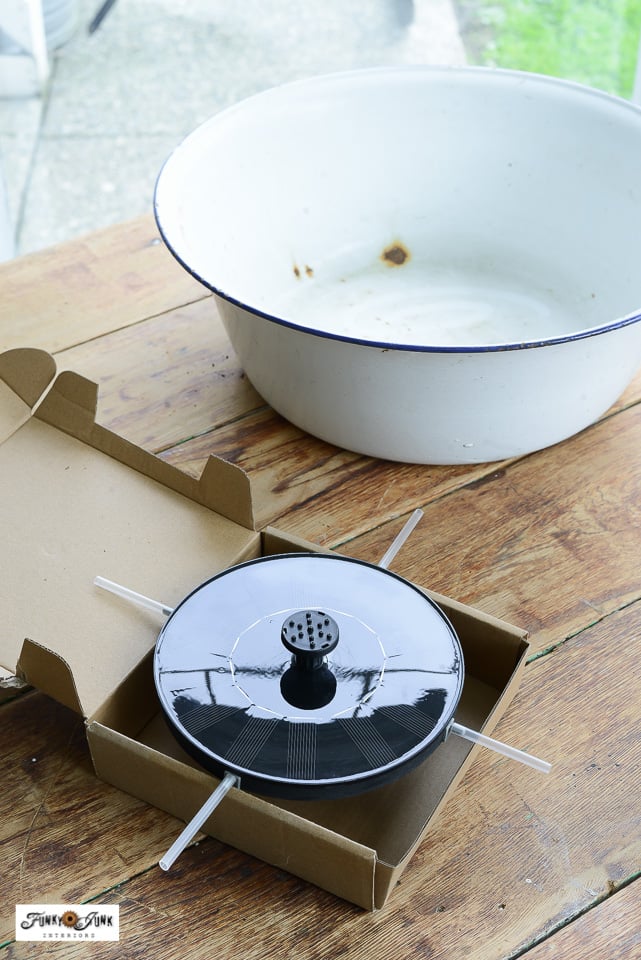
Unpacking a solar water fountain
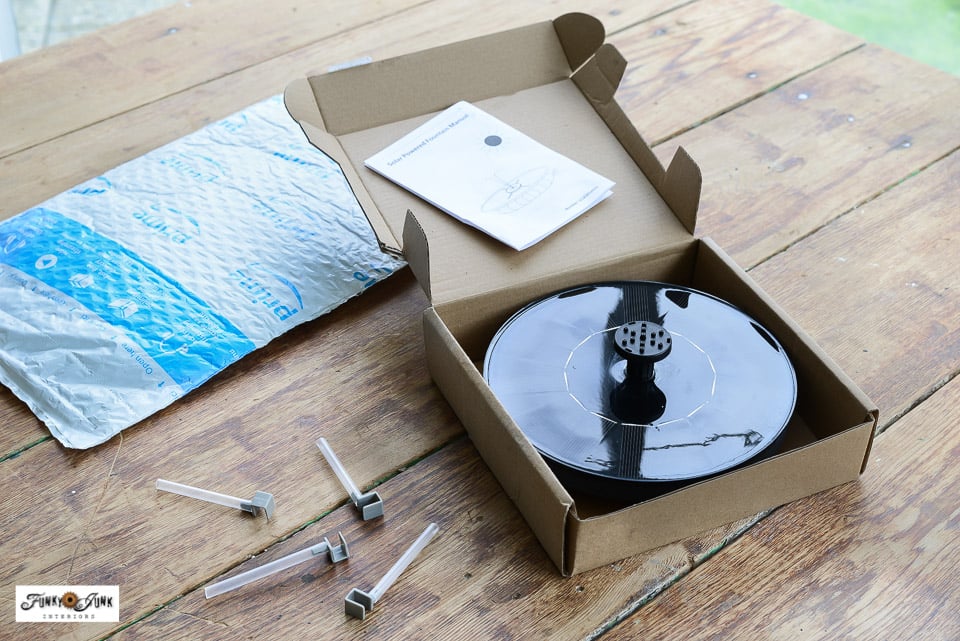
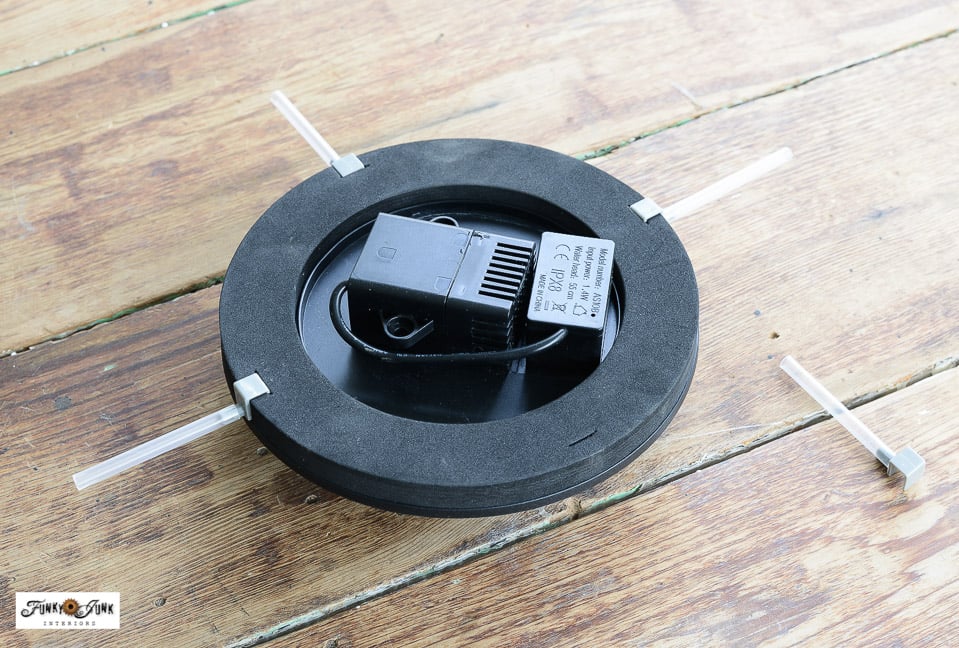
2. Unpack the solar power water fountain.
My solar fountain was purchased from Amazon HERE. It comes side extensions to help keep it centered in your chosen container, as well as different spray nozzles, which I could not find! I guess I put them in a VERY safe place.
I’m not worried though. I tried all the attachments and this wide one provided optimal performance I liked best.
Attaching the fountain extensions
3. Cut the extensions to fit inside your chosen container.
So brand new, you’d turn the water fountain good-side-down, attach the extension in the foam inserts, then cut the tubing with scissors to fit your water container.
Since I used the water fountain for another project, these were already cut. But I found another way to keep it centered that turned out very pretty anyway!
Filling up the water bowl
4. Fill up your container with water.
You may wish to position your water bowl first, in case it becomes too heavy to carry once filled with water.

Transforming a plain planter
So let’s prop the rest of the garden up next!
I have this self watering flower pot which has been tremendous! Since having it, I haven’t had to water these flowers even once! I just top up the bottom spout and leave it be. It’s like magic I tell ya.
So I didn’t wish to lose that feature at all. But rather… let’s hide it so I still get all the function but with a different look!
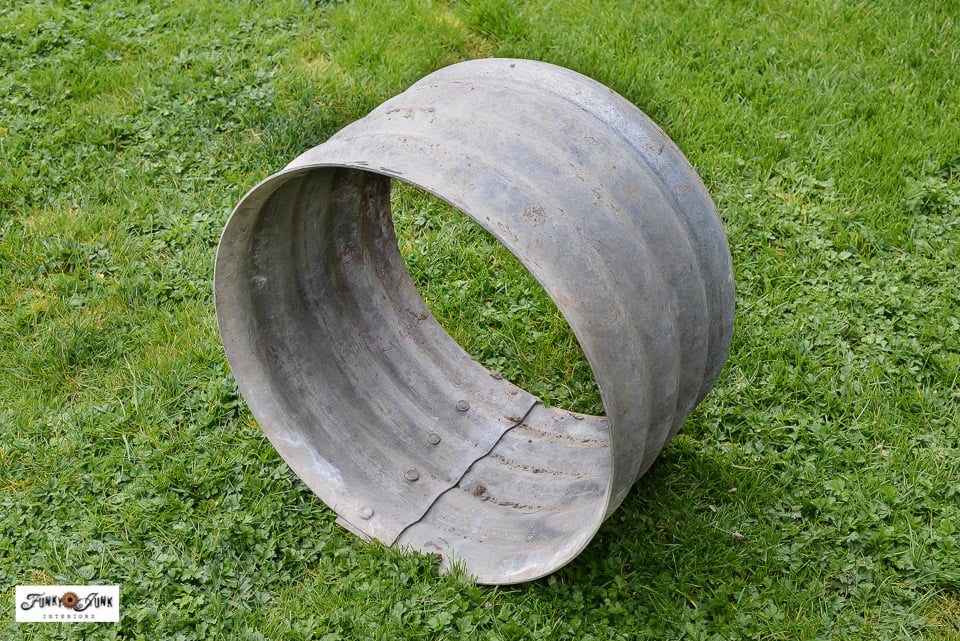
In my stories recently, I shared about landing this round galvanized metal ring from a neighbour. Originally, I had rolled it to my garden shed to surround an upcoming fern, however once again, I’m repurposing a repurpose because… well, I can.
This is why I love to collect lightweight stuff for the garden, so I’m free and clear to change my mind on a whim!

So I wiped down the self watering flower pot, then simply positioned the metal ring over top. It fit perfectly!

Why I’m placing branches in the fountain bowl
5. Position the water bowl somewhere in direct sunlight.
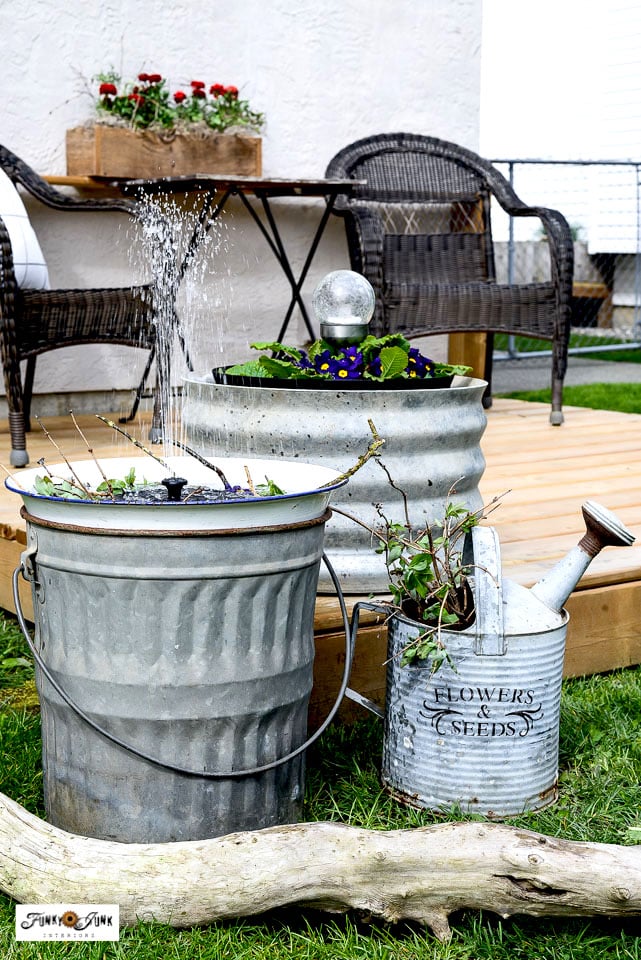
Since I wanted my water feature to be raised above ground level, I placed it on top of a small old galvanized garbage can. A perfect fit! I like THIS tin can look too!
6. Place the solar water fountain inside the water bowl.
The fountain will immediately start to work! The power of the sun is what makes this outdoor fountain work.
The fountain does appear to gurgle under overcast skies, however if you are socked in with complete clouds, the fountain will likely stop. However in full sun, it’s like its own waterfall. AMAZING.
Now let’s personalize it…
7. Place cut branches and deadheaded flowers inside the water bowl, to decorate and help keep the fountain centered.
Just avoid covering the fountain, as it needs all the sunlight on the solar panels.

I pinched off some leafy branches, plain branches and deadheaded the purple flowers to add to the bowl until I liked the look.
It turned a plain water bowl into a lovely water garden or pond-look! Isn’t it gorgeous?! Larger river rocks would be pretty too!
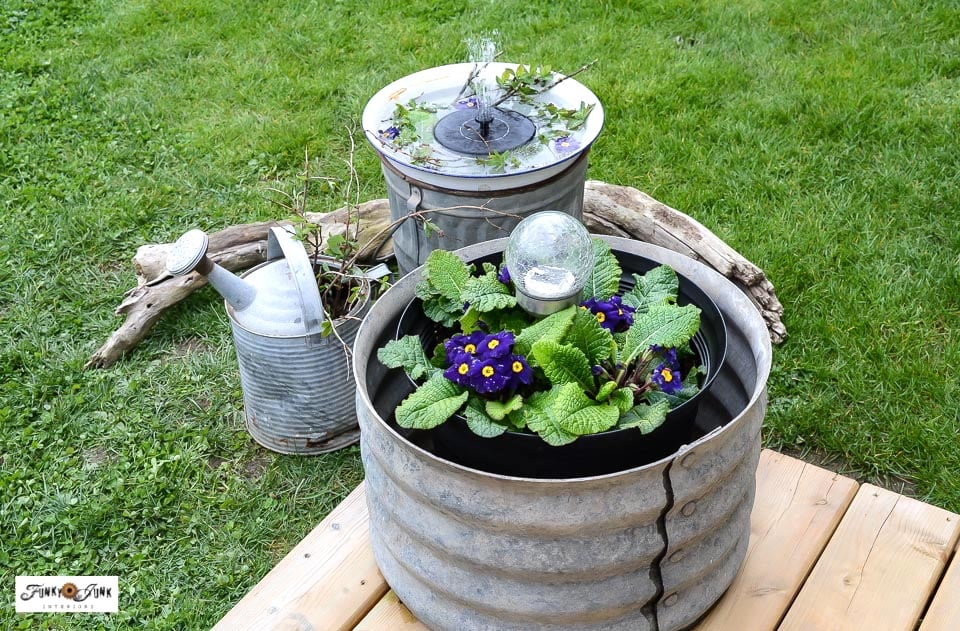
The galvanized flower pots with fountain
And the planters and fountain look just as cute from the backside. This is the view I get when sitting behind them, looking out onto the rest of the yard.
I love hearing the sound of the water. It sounds like a babbling brook!
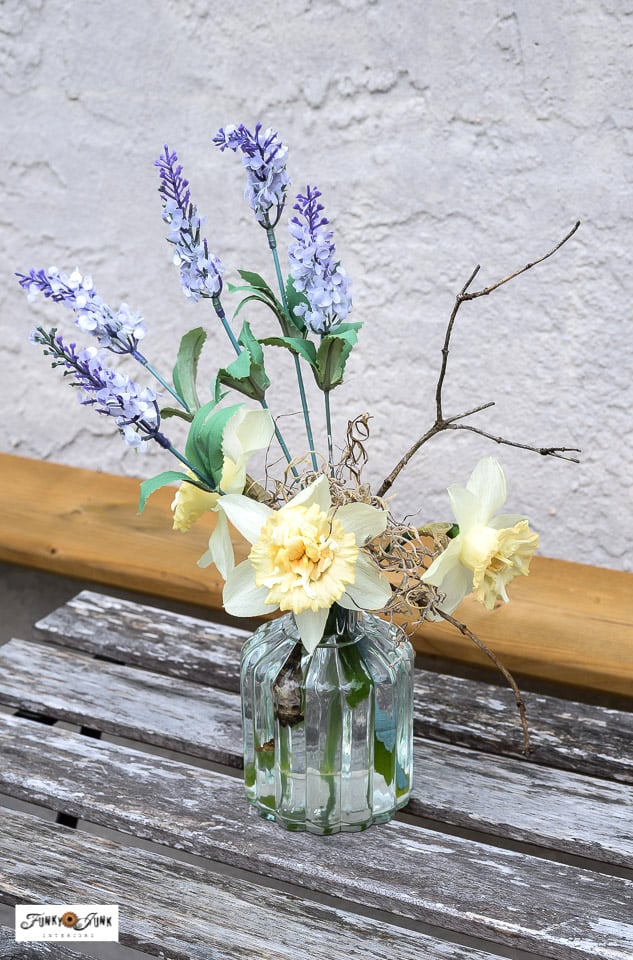
A bud vase filled with flowers to chime in
I even pulled out my new sweet little bud vase that was most recently included in the spring 2024 Jilly Box! The vase is filled with a mix of faux purple flowers, real daffodils and a few twigs and spanish moss.
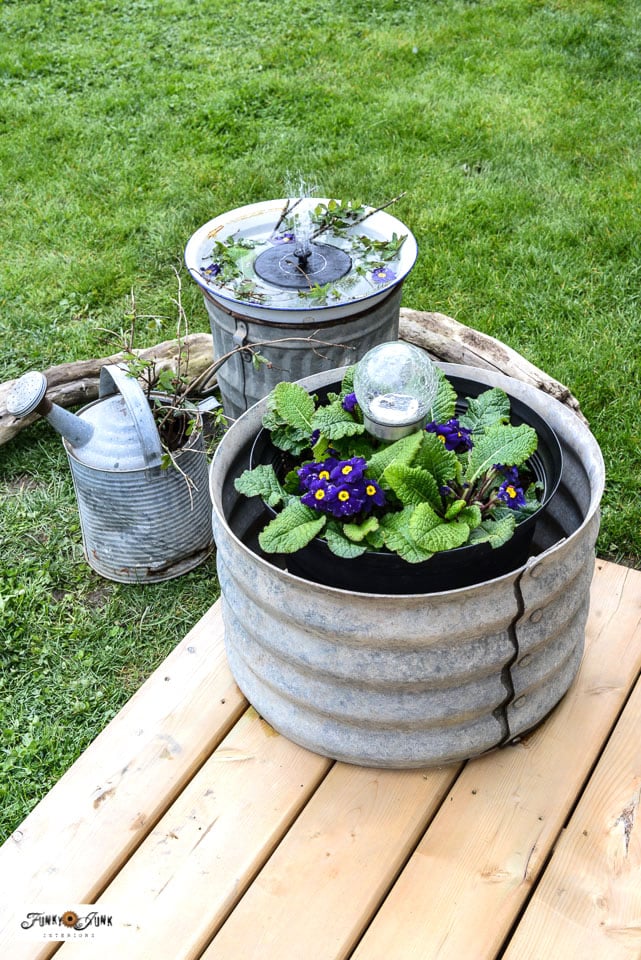
There’s also a crackle glass solar light in the middle of the larger flower pot. It looks so cute at night all lit up!
The water fountain at work
I nearly cut some fresh new flower beds for this post.
However I’m still testing out arrangements so when the hot tub is installed, the garden features don’t get in the way. I’m needing some stepping stones first so I can get a fuller picture of what’s possible. So there will indeed be some future improvements to this area.
Caring for your fountain
So while I’m putzing around in the yard, I allow the water fountain to do its thing.
However I do remove the fountain when I’m not going to be around for the day and also bring it in at night. It’s said to work best if you clean the filter frequently, so I just want to use it when I’m around to enjoy it.
Now if I were to attach another to say, a larger bird bath, I would leave that running. I’d love to try that next!
How a solar water fountain works in full sunshine
And then the sun came out in full swing! See how high the fountain is now?
Just expect the fountain to bubble or stop during cloudy days. I’m still surprised I got the fountain I did on this slightly overcast day. I mean, what would this post have been without it working?! Must have been meant to be.
The watering can was borrowed from the nesting box potting bench that was showcased in THIS post.
The stencil used is called Botanical Plants and Flowers found HERE.

So if you too have a special sunny patio spot or deck you like to sit, perhaps small DIY solar-power fountains could enhance yours too! It’s so simple to install, plus it’s easy to change up as the yard progresses! Can’t beat that!
Video – solar water fountain tutorial
.
Visit above to watch the water fountain in action!
Neat, isn’t it? Have you ever visioned a water feature in your yard? Think a solar water fountain could work for you?
Other unique outdoor projects to make:
Create a whimsical nesting box potting bench
How to make your own DIY window box planters (on a shed)
Visit all outdoor projects HERE
Create An Eco Friendly Solar Water Fountain feature with Galvanized Planters!
Supplies:
- solar water fountain
- waterproof bowl
- a base to elevate the bowl from the ground
- random twigs and flowers for decoration
Instructions:
- Choose an area for your water fountain that is in sunlight all day.
- Fill the waterproof bowl with water, then place the solar water fountain in the center with the extensions attached. Cut extensions to size.
- Select a tip with the spray you like best for your given setup. Be aware if you use a wide tip, you'll likely require a larger bowl to re catch the water.
- Position small twigs and flowers into the bowl to decorate it if desired.
- Refill the water bowl daily on very sunny days as water spills or evaporates.
- When not in use, store the water fountain in a dark place so the solar energy doesn't activate the unit when it's not set in water.
- Try using the solar water fountain in a birdbath for an added attractant too!
I love this so much! I see a fountain in my future.
It sure is fun to dream up options with it! I’m totally searching for some components to whip up a DIY bird bath now for another!
I might have to reconsider a 2nd try at the solar fountain idea. I bought one off Amazon years ago when they first came out and they did not come with the little pokey things to keep it more centered in the container. Mine would move all over the water and spray water outside the container and just make a mess or drain most the water out of the container. Now that they have some guides (or whatever you call them) that would probably work better. We have a lot of trees so it’s hard to find a spot that gets full sun, especially if the wind is blowing the trees! But I like the concept of no wiring or cords so you can put it anywhere. Yours looks lovely.
Thank-you! And I can see that being a dilemma if you have a lot of shade. I was surprised mine did anything at all under overcast skies when I shot for this post! One day it was complete cloud and it didn’t sputter one drop. LOL I do like to bring it out when I’m out there though. I guess it’s sort of like a fire pit… there’s always movement so there’s always something to watch. LOL
Yeah, those guides do help! They were much longer when I first got it, but it’s still possible they may not be long enough if you’re placing it in a really large birdbath or container. I like plants in it though and it seems to work!
My fountain came without those guides. I haven’t yet, but I’m going to try some zip ties to see if they would work.
I need to see if these will ship to our side of the world. Here in South Africa we have daily load shedding (they switch the power off for 2 hours a few times a day) so anything solar is a win. Love how you just threw a few things together to make a little water haven. So lovely.