If you desire a raised garden bed without a big price attached, here’s how to build a free planter box using reclaimed wood! Includes weatherproofing with food-safe tung oil suitable for edible plants.
This post contains affiliate links. As a Fusion and Amazon Influencer, I earn a small percentage from qualifying purchases at no extra cost to you. Thank-you for helping to support my blog!
This was the year I vowed to grow some food in the garden!
Ohhh, I’ve had vegetable gardens in the past, which you can see HERE
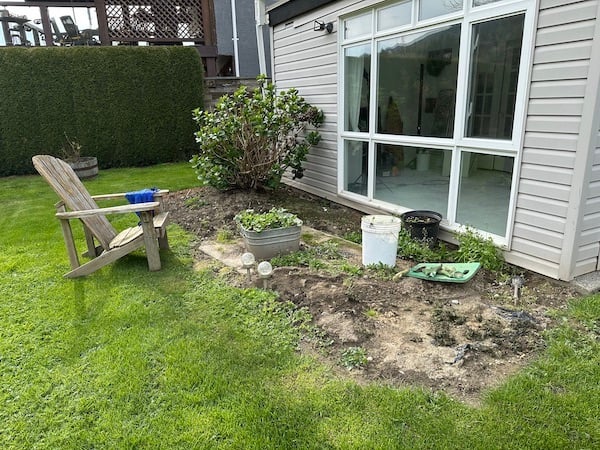
The before
However the situation has always been that the best area to grow a vegetable garden happens to sit on top of concrete septic tank connections making in-ground growing nearly impossible. Lovely, right?!
Thing is, this spot gets sun all day so it’s prime garden area.
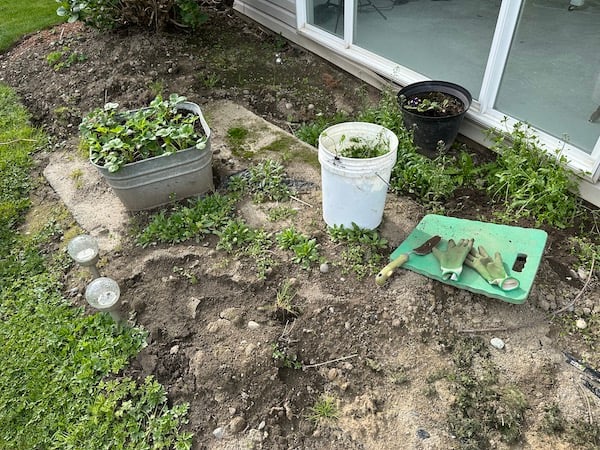
But I had to come up with a solid plan for the septic situation first.
So after much mulling over, I decided to finally clean up this area, flipping it from a weed infested septic tank area to a raised vegetable garden using an easy assembly of unique upcycled planters and such so the roots would have somewhere to grow.
Plus, the upcycled look would chime in really well with my rustic garden shed too!
After laying out what I wanted to grow where, I decided a nice row of tomatoes along the entire front of the picture window would be ideal. This space gets direct sun all day plus it has the bonus of added roof protection overhead from the patio roof and the house behind them. Perfect for fussier tomatoes that are inclined to rot come fall, right?!
But I didn’t want to spend any money. So I gathered up some reclaimed wood I had on hand, figured out a simple build anyone could copy, and I’m now the proud owner of a raised garden bed with thriving tomatoes!
It’s totally customizable for a deck, or any backyard area you wish. Simply change up the sizes or thickness of wood, and make it what you need it to be.
So I think this post will prove, there’s no need for fancy expensive raised planter box purchases if you can’t swing that. If you’ve always wished you had a raised planter, here’s how to make your own with reclaimed wood, for free!
Be sure to also stop in for the finished garden tour below…
Part 2 – Creative Ideas For An Upcycled Container Vegetable Garden
How to build an easy raised garden bed for growing tomatoes
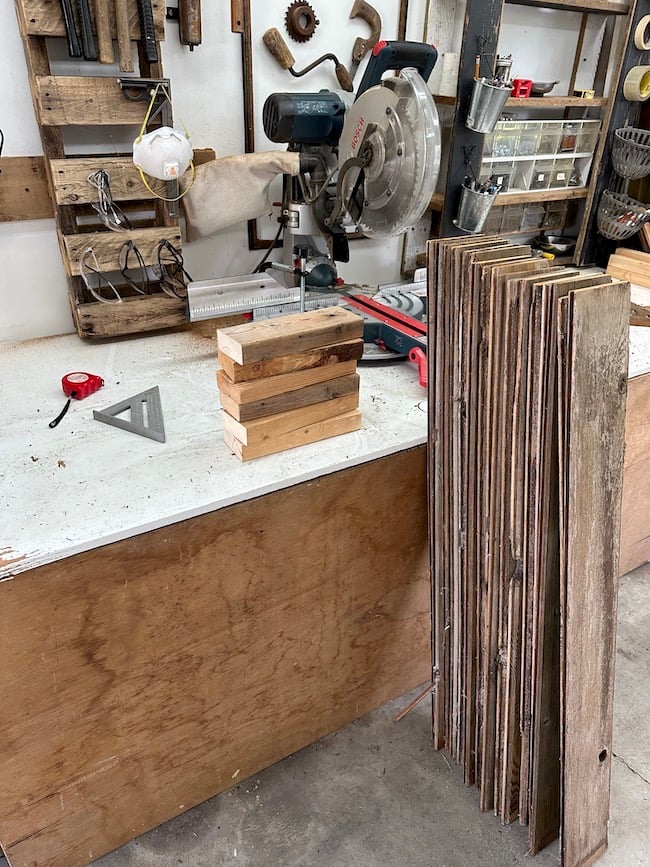
What you’ll need:
Cedar wood
2×4 pieces
Food-safe Tung Oil by Fusion Mineral Paint (get 10% off)
Bosch miter saw (I like the dual bevel glide)
Orbital sander (I like Bosch variable speed for better control)
Cordless drill (I like Makita for their strength and light weight)
Measuring tape (I like construction quality so they hold their shape when using)
Good quality garden soil by bulk
Good retractable watering hose (I’ve yet to show you, but it’s the best hose I have ever had!)
Decide on the size of your raised garden
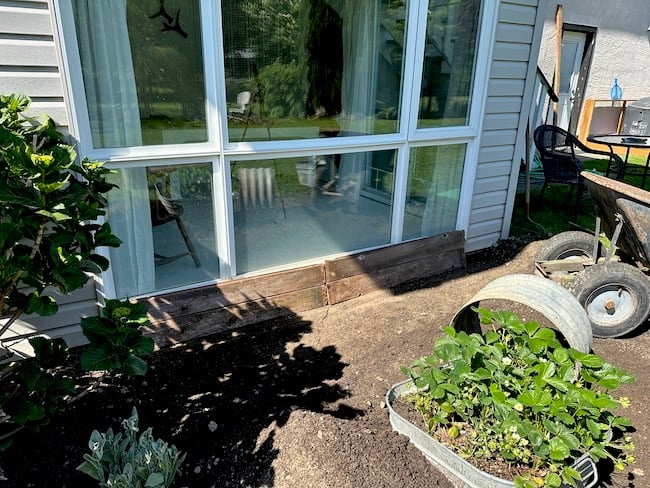
1. Dry-fit some boards where you’d like your raised garden bed to be placed.
I decided to utilize some reclaimed cedar fence planks I had on hand so this project could be free. You could use thicker cedar wood which would be more durable if desired.
I layered two sets of two boards on top of each other, joined together with their tongue and groove edges and ran them along the entire length of the window. A perfect fit!
Cut boards to the desired lengths
2. Cut boards to the desired length using a miter saw.
Since two boards fit under my picture window pretty much perfectly, that’s the final size I went with.
3. Cut 2×4 pieces to the height of the planter box as joining supports.
I also cut 6 2×4 pieces to the height of the planter box. One in each corner, and 2 in the middle that join the side panels.
My cut board dimensions:
Tongue and groove cedar planks:
- 8 – 5″ x 46″ @ (stacked 2 high)
- 4 – 5″ x 19″ (stacked 2 high on each end)
2x4s:
- 6 – 10″ long 2×4 cut offs for supports
- 1 – 19″ long (middle horizontal support so the sides don’t bow out)
Finished raised planter size:
- 10″ high x 93″ long x 19″ deep
Assemble the boards to the supports
4. Place 3 2x4s on the ground, spaced apart to the full length of the planter box, as well as one in the middle.
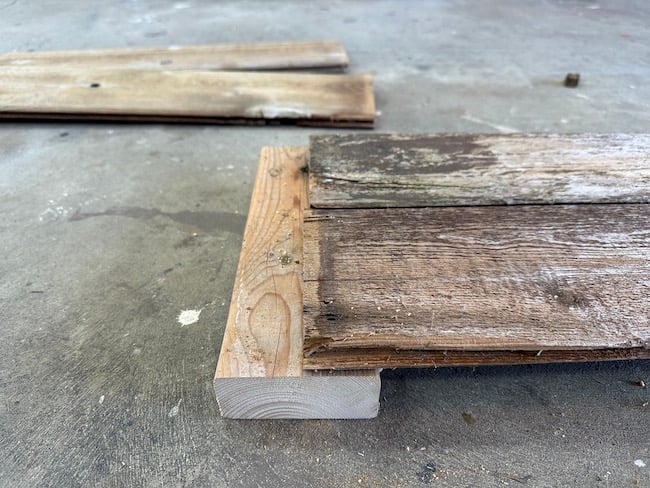
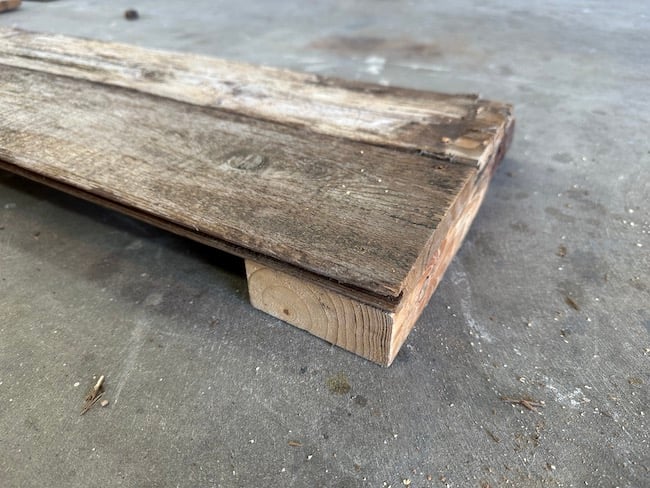
5. Position the boards on top of the 2x4s, with the left and right sides flush.
6. For the middle 2×4, place boards on each side, meeting in the middle of the 2×4 so they can share the same support board.
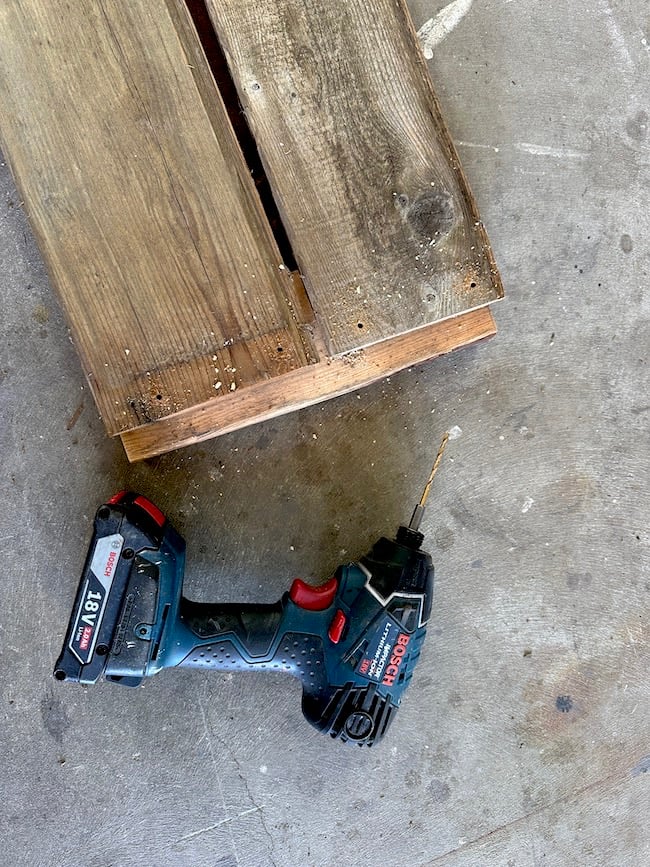
Pre-drill pilot holes before assembling with screws
7. Reposition the 2x4s to sit UNDER the boards, drill pilot holes, then assemble with screws.
I pre-drilled two holes per board. Since reclaimed cedar can be very brittle, I like to predrill holes so the wood doesn’t crack while assembling with screws.
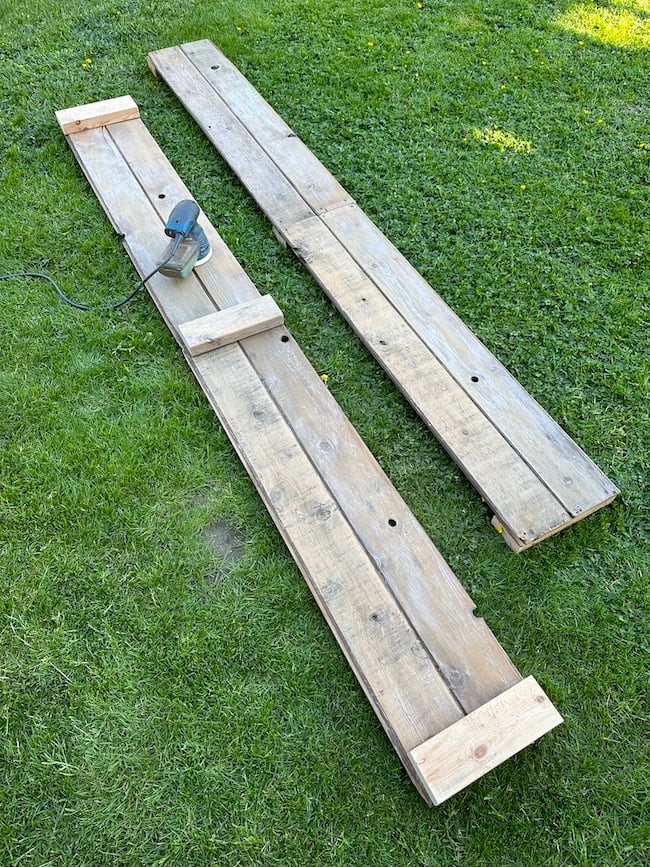
Sand off any previous finishes
8. Sand any previous finishes off the boards to get it down to bare wood again. (if using reclaimed)
- This ensures any previous toxic protectants are removed so they don’t saturate into your vegetables.
Get 10% off Fusion’s Tung Oil HERE
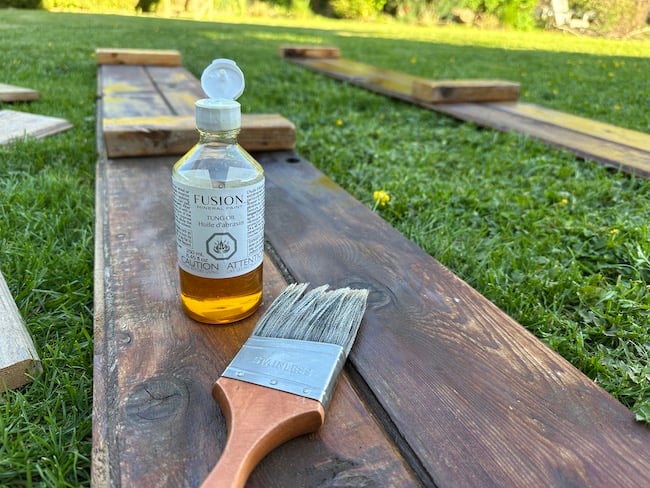
Protect the wood with food-safe tung oil
9. Paint food-safe Tung Oil by Fusion Mineral Paint on the INSIDE of the wooden raised bed, if you wish to further protect the boards from soil erosion.
Instead of risking the plants growing inside reclaimed wood, or adding a liner inside the raised garden bed, I painted on a coat of Fusion’s food-safe Tung Oil instead.
- Fusion’s Tung Oil is a food-safe product, however not all tung oil is, so please be sure to use the appropriate product for food growing.
- The boards were well coated with Tung Oil, then the excess removed with a rag and to dry overnight.
- You can also protect the outside of the planter box as well if desired, however Tung Oil will deepen the wood tone.
- This product is suitable for growing edible plants
Finish planter box assembly
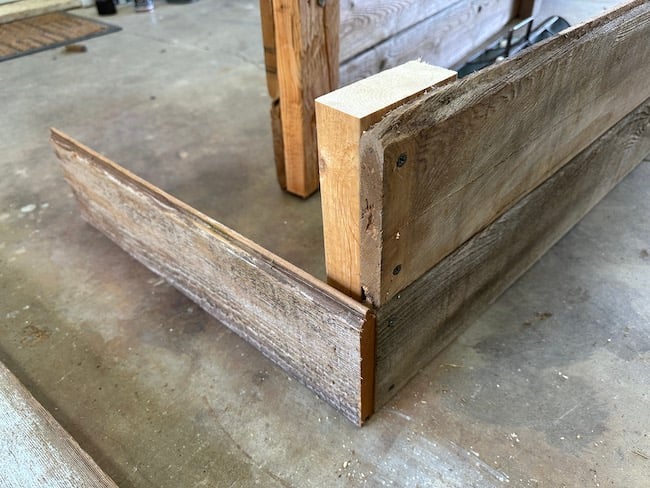
10. Prop one side of the assembled planter box upright, then attach two side boards to the 2×4 support. Do this on both sides.

Fill planter box with soil and tomatoes
11. Position the other side of the long planter box side against the corner pieces, and attach all together, creating a joined rectangle.
I also included one inner horizontal 2×4 support 19″ long so the sides don’t bow outwards from the weight of the soil.
12. Position the planter box where desired, then fill it up with good quality raised garden bed soil.
Since this planter box was on the smaller side, I didn’t really add too much in the way of bulk first. I did throw in a few branches along the bottom of the raised bed to add better drainage, but then just filled the rest with good quality garden soil we purchased in bulk.
Soil we picked up by the truck load:
- 1 yard
- Denbow, in Chilliwack, BC, Canada
- Soil name: GrowZone – I highly recommend! My plants LOVE it!
- Price: it was approximately $65 Canadian
- This mix combines soil and compost organic matter for good water retention yet drains well during heavy rain
I find it much more affordable to purchase bulk soil rather than buying separate bags. 1 yard filled up the entire back of our truck. Go without a truck canopy and they’ll dump it in for you by machine!
Ready to see how cute this turned out?!
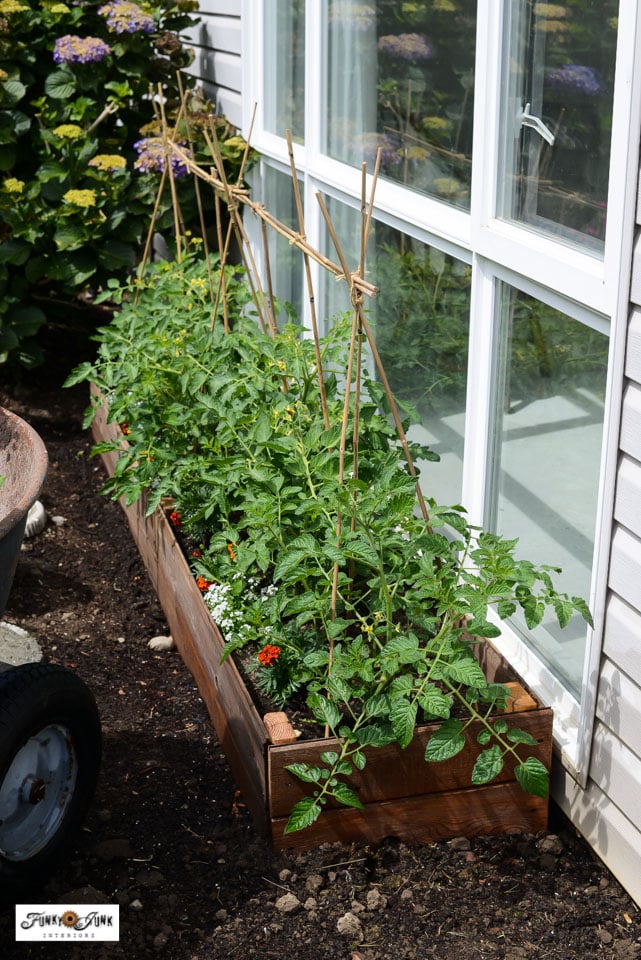
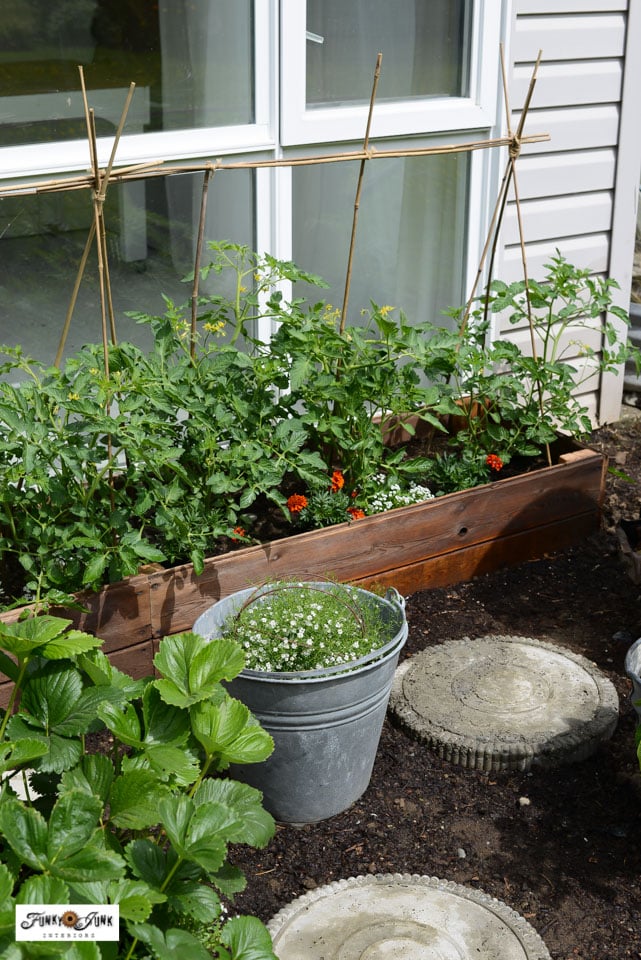
The completed raised garden bed
And here’s my little tomato raised garden bed today! I planted Early Girl tomatoes, trimmed out with marigolds and alyssum along the front edge as companion plants that are said to fend off pests. And it looks pretty too!
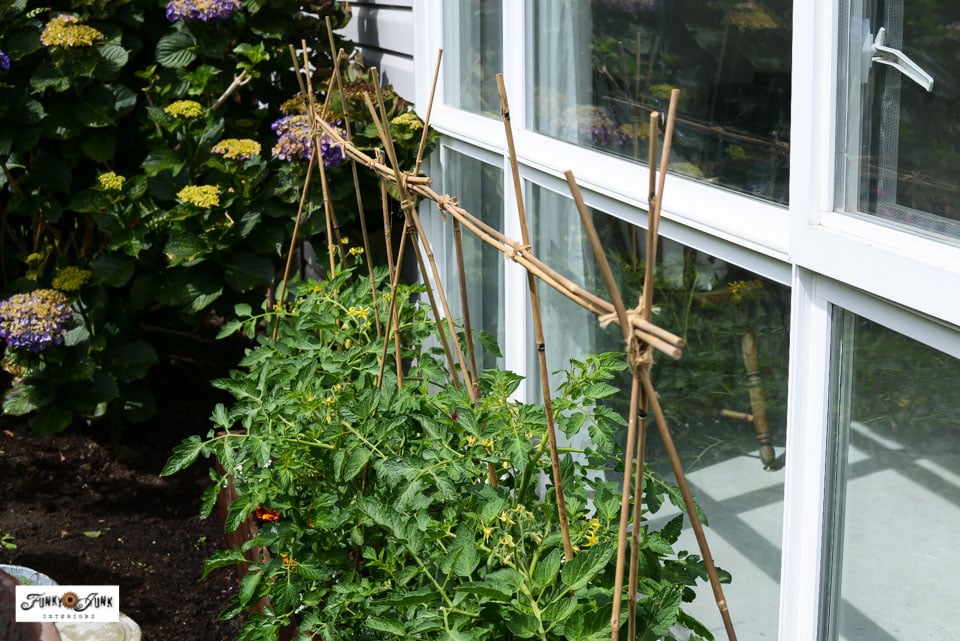
How I staked the tomatoes using bamboo stakes
I staked the tomatoes with a DIY twist using 4′ long bamboo stakes:
- Create a teepee shape with the stakes on the right, middle and left sides of the raised garden bed, above a tomato plant if possible.
- Wrap the stakes with twine where they join near the top.
- Place stakes horizontally along all the tops.
- Poke a vertical stake into the soil for each tomato plant, then tie the vertical stakes to the horizontal stakes.
I purchased a bundle of 4′ long bamboo garden stakes from HERE.
The look is natural, rustic and cute! Plus they’ll help stabilize the tomatoes as they grow taller. I think these stakes resemble branches when tied this way!

I’m so glad I didn’t worry about purchasing any planter box kits this year. Not only did the raised garden bed turn out fabulous, I got to build it to fit my own garden space, plus the tomatoes are positively thriving!
Easy to customize
This raised garden planter would be very easy to customize to larger or smaller sizes. Simply cut the wood to the desired lengths, then attach to 2×4 supports. I plan to use these same plans to build a full size, much larger raised garden bed next summer.
This is not a high-maintenance veggie patch at all either. I water every other day or so, fluff up the soil now and then, and just watch the leafy greens grow! And even with so much sun, the key appears to be to keep them well watered.
Adding drip irrigation is my plan should I expand on the garden next summer. However with the size of this garden, hand watering is very doable and actually quick and simple thanks to my favorite Gardina retractable hose I could NOT live without now!
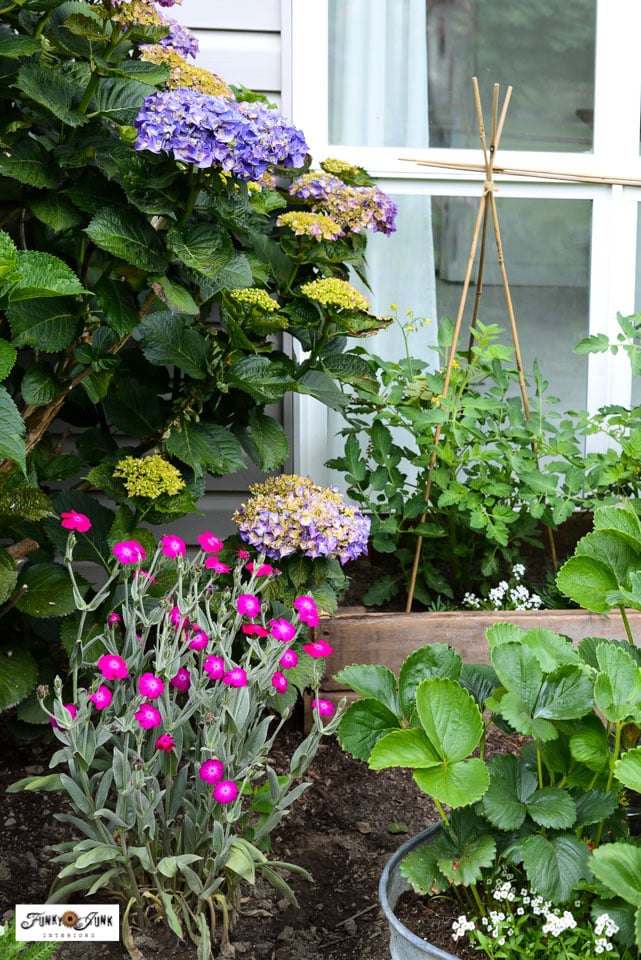
Plus, the entire upcycled vegetable garden turned out darling! I can’t believe how quickly it’s growing! And throw in some flowers and it’s gorgeous… I literally can’t believe this is the same garden area.
And as always, this post ended up far too long to include the full vegetable garden tour, so come on over to Part 2 – Vegetable Garden tour to see all the fun surprises tucked in between all the flowers and veggies! I’m just in AWE. And rather smitten with the DIY stepping stones myself…

Take the full veggie garden tour in Part 2!
Part 2 – Creative Ideas For An Upcycled Container Vegetable Garden
Includes upcycled planter tips, DIY stepping stones, how to edge flowerbeds, plus a full video tour!
Has this post inspired you to try your hand at building your own raised garden bed for a special spot you thought impossible? Can’t get much more trickier than over top a septic tank! LOL
Read the entire vegetable garden series:
Part 1 – Learn how to build a simple raised garden bed for tomatoes (you are here)
Part 2 – Creative Ideas For An Upcycled Container Vegetable Garden
Read ALL upcycled vegetable garden posts to-date HERE
Other creative garden projects to make:
Build your own garden walkway with reclaimed wood
DIY plant labels with cedar strips and stencils
How to make window planter boxes from scratch
Make some cute garden signs using these stencils HERE
Visit many other creative outdoor projects HERE
How to build an easy raised garden bed for growing tomatoes
Supplies:
- Cedar wood planks. My boards measure 5" x 46.5" long each x 16
- 2x4 support pieces. I cut 6 pieces at 10" high.
- Tung Oil by Fusion Mineral Paint (food safe)
- Measuring tape
- Bamboo garden stakes (mine are 4 ft long)
- String or twine
- Retractable garden hose
- Planter box soil
- 1 2x4 center support. I cut mine at 19" long
Instructions:
Raised Garden Bed tutorial - mine is 10" h x 93" long x 19" deep
- Cut the front, back and side boards to the length you desire for your raised garden bed. I cut 16 pieces - 5" x 46.5" (front and back) - 4 pieces - 5" x 19" (2 sides)
- Cut 4 or 6 2x4 pieces (side and middle supports) to the height of your raised garden bed.
- Cut 1 2x4 piece (center support) to the width of your bed. Mine is 19".
- Place the 2x4s on the ground to the full left and right of your planter box size, and 1 in the middle. Do this for the front and back of the box.
- Position wood planks onto the 2x4 supports, then attach with screws.
- Prop the front up, then attach side boards on each side. Then install the back of the planter box to complete your rectangle.
- Optional: Paint Tung Oil into the inside of the planter box, then remove most off with a cloth and allow to cure overnight. This is a food-safe product which will prolong the life of the wood.
- Fill up the raised garden bed with bulky natural items such as branches.
- Top with high quality raised planter garden soil.
- Plant the tomatoes or other plants, staking if needed.
How I staked the tomatoes (I used 4' bamboo stakes)
- Form a teepee shape with the stakes on the far left, right and middle of the planter box. Tie the tops with twine.
- Place bamboo stakes horizontally across the tops, attaching to the teepees with twine.
- Add a vertical stake at each tomato plant, attached with twine to the horizontal stakes.
- Keep well watered leaving the leaves dry if possible, and fertilize when needed.
I loved this tutorial! Because of some health issues I am having to change my methods of gardening. NO more bending and squatting! Will be figuring out how to move my growing area off the ground and onto my deck. Your post gives me lots of ideas about unique containers to use and ways to use planter boxes. I loved the photos in this post showing all the beautiful and rustic touches.
Thanks for sharing your projects.
Very nice. You will certainly be swimming in vegetables soon!
Oooh, I love this! We’re going to be making a raised garden bed at my daughter’s place soon. This is how I imagined the raised planter, too!