Want to grow your own vegetables but don’t have access to a traditional garden plot? Here are some helpful tips for creating a vegetable garden in upcycled containers! Includes building a raised planter box, wheelbarrow planter, DIY stepping stones and more!

This post contains affiliate links. As a Fusion and Amazon Influencer, I earn a small percentage from qualifying purchases at no extra cost to you. Thank-you for helping to support my blog!
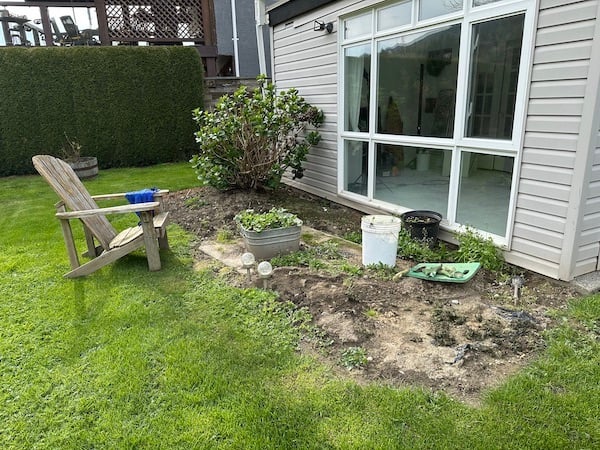
Welcome to a major improvement to my garden space this year! This is my new raised container vegetable garden that is hiding a deep, dark secret! Literally.
After YEARS of battling what to do with this small garden space, I now have a flourishing vegetable garden in my backyard that is as cute as can be!
Here’s what the veggie garden is hiding, and why it’s has been such a challenge…
Covering septic tank connections with a raised garden
I am the proud owner of a septic field in my backyard. For this reason, I’ve struggled on what to do with the area that houses the main connections located smack dab in the middle of a lovely crooked concrete slab. The area requires access, but it’s something you also want to hide! Especially in front of a picture window… heh.
Add to the fact that it’s located in direct sun makes it even more challenging. The area is too hot to sit in during summer, so a small deck was out of the question since I’d never use it.
However the hot, sunny spot sure would be perfect for a garden!
I actually use to have this area as a vegetable garden long ago, however with the concrete slab underneath, it was always a challenge for growing since the roots had to endure shallow conditions.
For some reason, I got way more involved with gardening this year than in previous years, so I made it my mission to beautify this spot while being helpful once and for all.
I decided we’d be best served with growing food. But this time, in a raised garden bed and raised containers! A full-out vegetable container garden if you will.
This way, the plants could be positioned around or moved away the septic connections, plus the plants would have the space they needed to grow.
Bigger garden plans for next summer…
I also made a promise to myself that if I could keep this area up all summer, I’d reward myself with a much larger veggie garden next year. I’d love to add lettuce, snap peas, cucumbers, onions, carrots, broccoli, garlic, pumpkins and sweet corn next year and use a crop rotation method with later cool-season crops. So the challenge is on!
So here’s how I got this mess to look cute as can be, and productive too!
Tips on growing a container vegetable garden – where inground won’t work
Supplies I used:
Reclaimed wood – to build a raised planter box for tomatoes
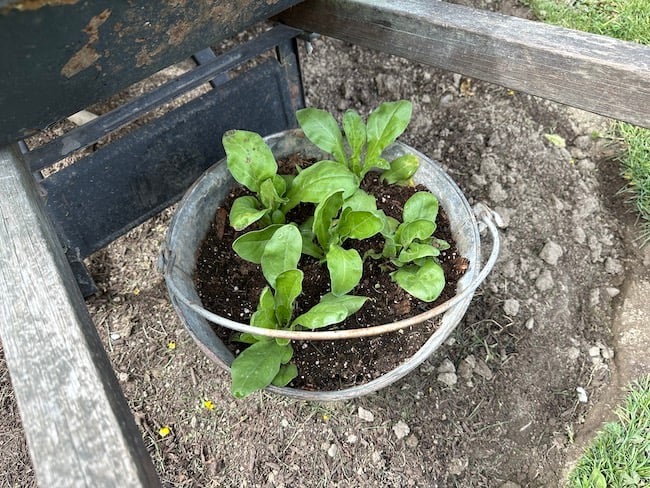
Random galvanized tubs for planters
A deep wheelbarrow for a planter
Good quality garden soil by bulk
Healthy plant starters
Good retractable watering hose (I’ve yet to show you, but it’s the best hose I have ever had!)
Garden labels (or make some DIY garden labels like THESE)
Quality watering wand with different spray functions
Half moon edger for cutting flower bed shape

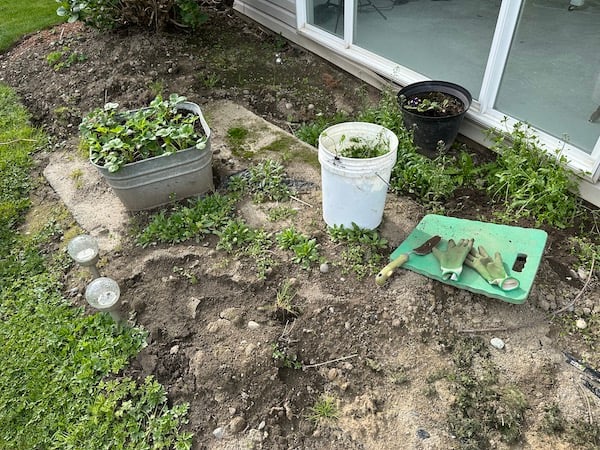
Gather and arrange all your raised containers
1. Lay out raised containers you can grow plants in.
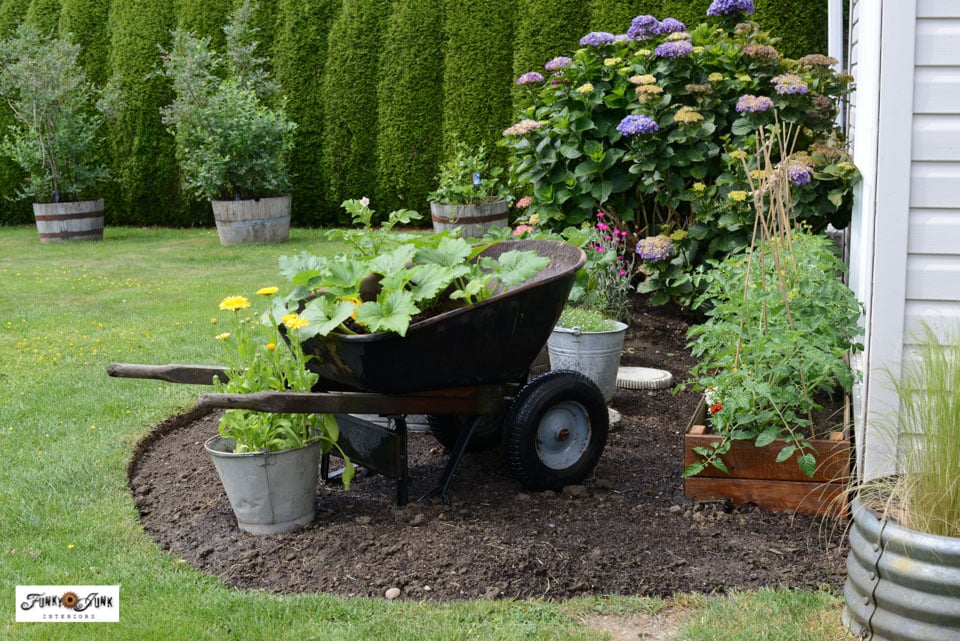
The first step was to gather every container I had, then create a garden plan by laying them out to get a feel for what this vegetable garden would look like. To make the area appear more unified, I pulled together all my raised galvanized planters with the option of an added wheelbarrow.

Part 1 – Learn how to build a simple raised garden bed for tomatoes HERE
Build a raised planter box if needed
2. Build any longer raised planter boxes if your plant if more suitable.
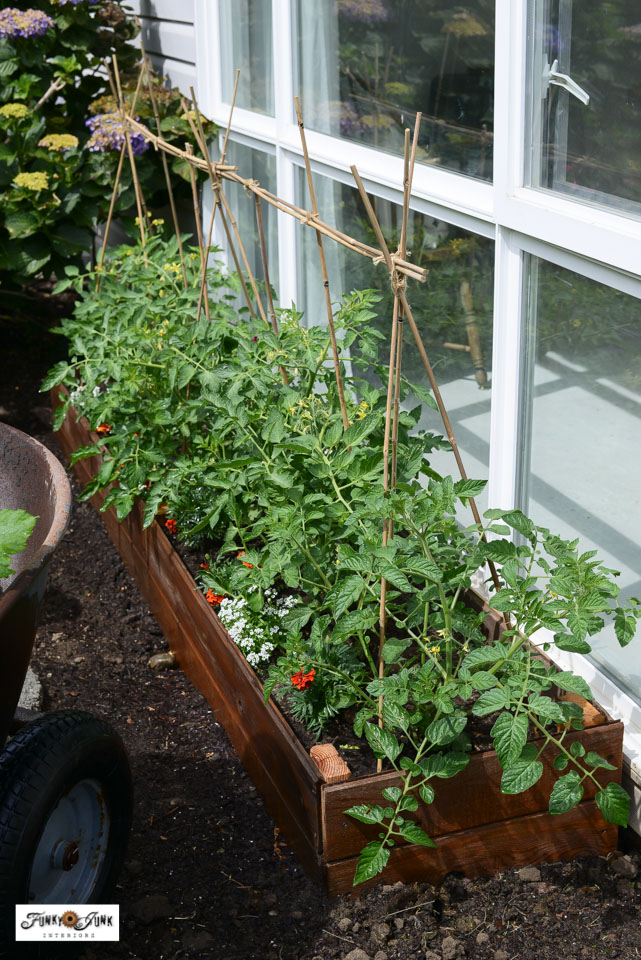
While containers are great, I realized a row of tomatoes planted along the front of the window would utilize the space much better! So I decided to build a raised garden bed to fit the area.
See how nicely it fits?!
This tutorial shares how I built it from scratch for free, as well as adding food-safe weather protection so it hopefully lasts longer!
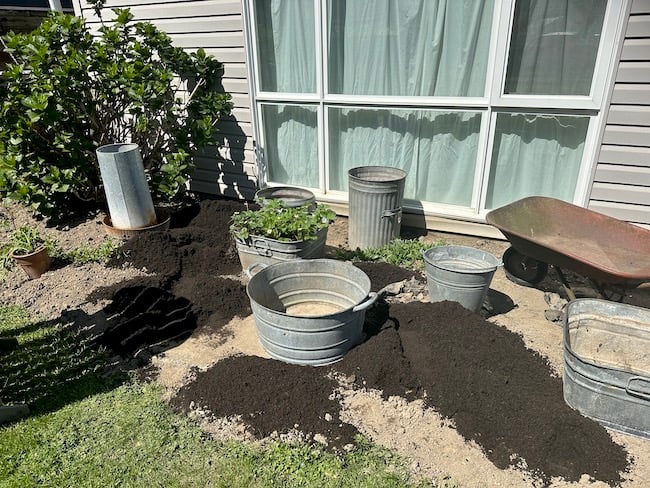
Purchase quality bulk soil
3. Select a suitable soil for your planters.
The next step was to get in new soil with added fertilizer since the original soil was extremely depleted of nutrients. Sometimes you can just add compost to the soil you have, but mine was more like dusty dirt, so it was time to start over.
Soil we picked up by truck load:
- 1 yard
- Denbow, in Chilliwack, BC, Canada
- Soil name: GrowZone – I highly recommend! My plants LOVE it!
- Price: approximately $65 Canadian
- Combines soil and organic matter for plants and vegetable growing
I find it much more affordable to purchase bulk soil rather than buying separate bags. 1 yard filled up the entire back of our truck. If you pick it up with an open backed truck bed, they’ll dump it in for you by machine!
This soil filled all my galvanized planters, wheelbarrow, planter box, while topping up other needed areas such as blueberry barrels and other flower beds. It was the perfect amount.
Prepare containers, then fill with soil
4. Create drain holes in every raised planter by drilling through the bottoms.
I drilled holes by using a metal drill bit on my cordless drill.
5. Top up any drain holes with a shallow layer of rocks for drainage.
6. Fill the containers with soil.
7. Water all plants prior to planting, gently spread their roots, plant, then drench each planter well.
My favorite watering hose of all time is the Gardena retractable 100 foot hose. OH MY GOODNESS. I so highly recommend! You pull out what you need, the hose is effortless to tote around, then retract it with a gentle yank. I use to detest watering a garden and now it’s literally not an issue.
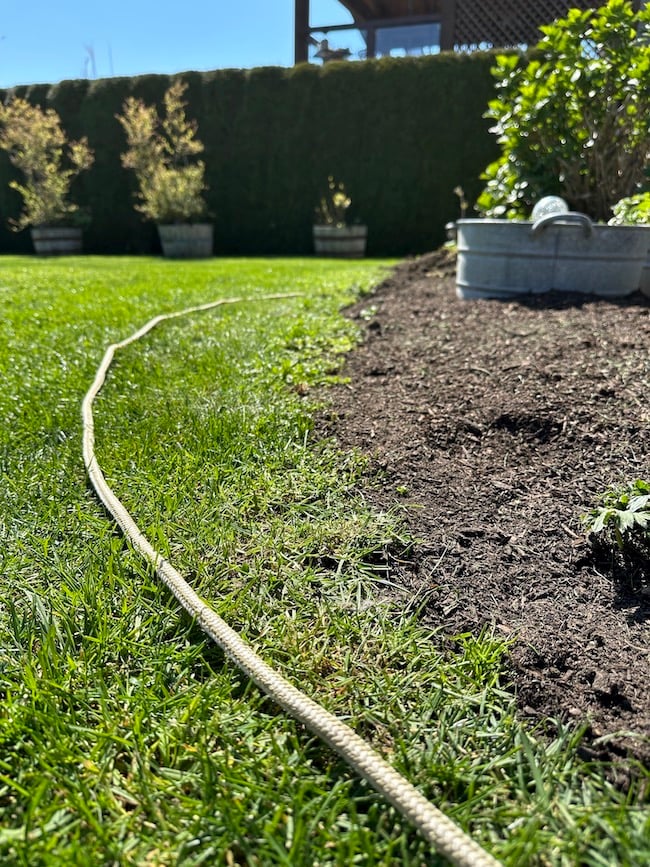
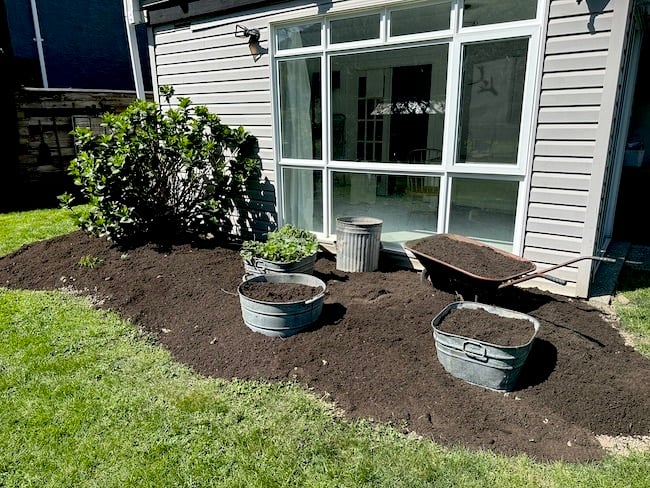
Cut a fresh garden bed edge to sharpen up the look
8. Finish up the bed by cutting a pretty edge to give it shape and dimension.
Nothing cleans up a flower bed more than by cutting a new garden bed edge! The best time to cut fresh edges is after a good rain so the soil is softer to work with, or water well before cutting.
I positioned a thin rope into the shape in a kidney shape, then used a half moon edger to cut a fresh flower bed edge.
Video tutorial: How to edge flowerbeds
.
.
View above to watch a short video on how I create pro-looking flower bed edges with one simple tool!
Read: How to edge flowerbeds like a pro HERE
And now the best part!
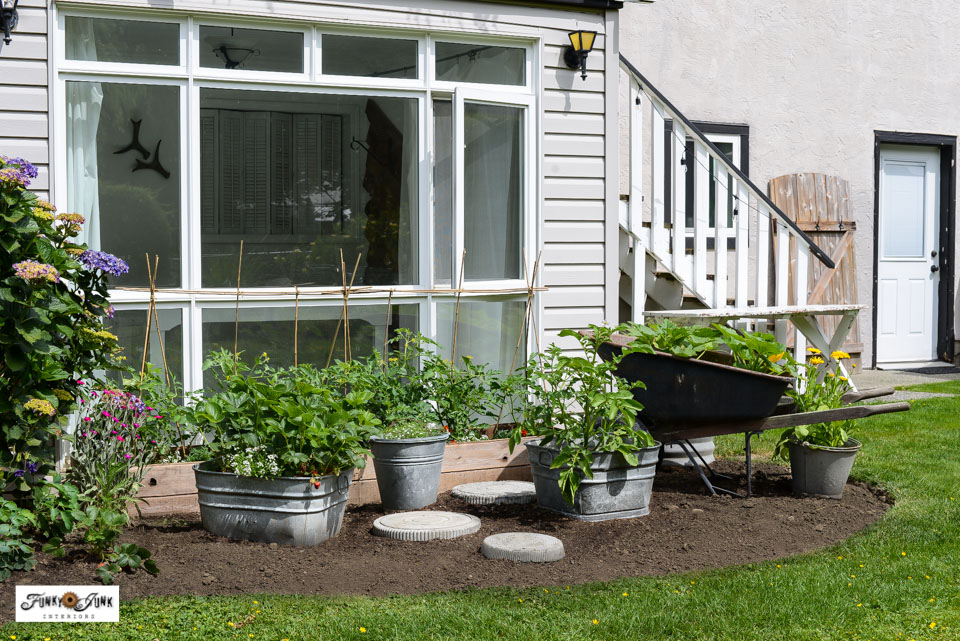
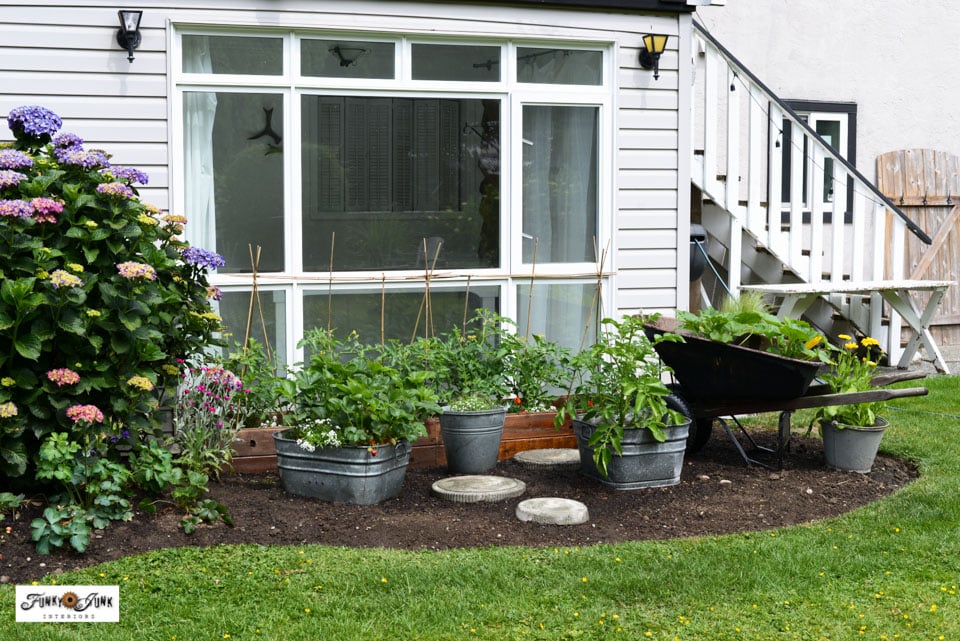
The completed vegetable garden
Welcome to my MUCH prettier vegetable garden space… that you won’t even recognize!
Who knew just how much this little vegetable garden would help beautify the entire backyard? Plus we’re already enjoying the strawberries from it!
So let’s take the full tour up close so I can share all the little added surprises inside… that just may inspire you to build your own garden where you thought it may be impossible!
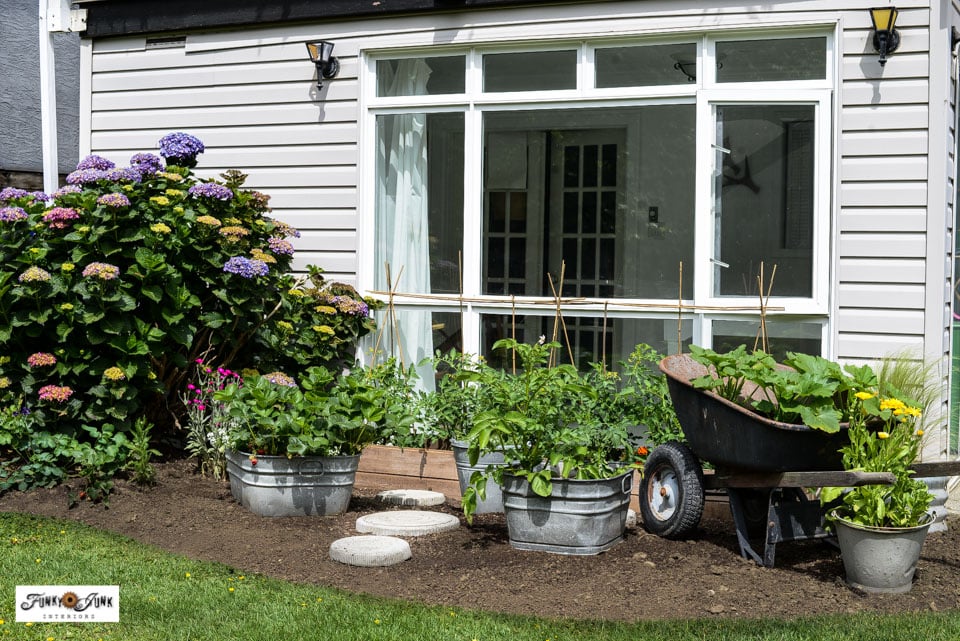
Mix flowers and vegetables for pretty and function
The entire vegetable garden is a mix of flowers and veggies, so you get pretty and productive all in one spot!
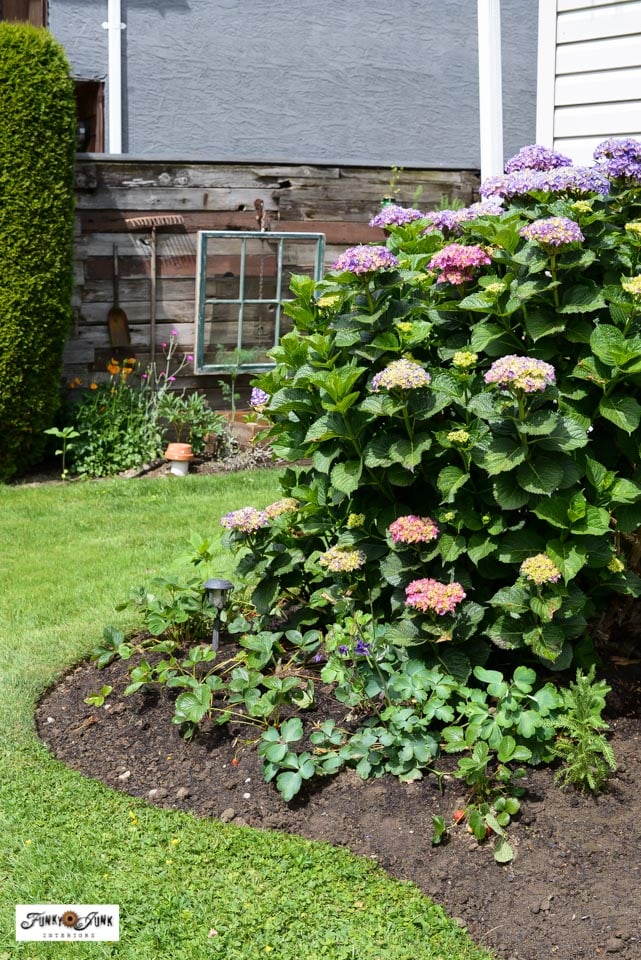
Some perennials are planted around the septic concrete slab where the roots can go deep, while the containers are placed in areas the roots cannot travel.
How to cut a pretty edge your vegetable garden
Since this garden bed has a hydrangea bush next to it, I shaped the entire garden bed edge into a kidney shape to hug both areas as one. It’s shallower around the hydrangea…

Learn how to cut flower bed edges like a pro HERE
… then widens around the vegetable garden side.
To keep mowing effortless, the gentle curves are sized to work with the size of a lawnmower so there’s no need to push your lawnmower back and forth. Straight ahead beside the curves does the trick!
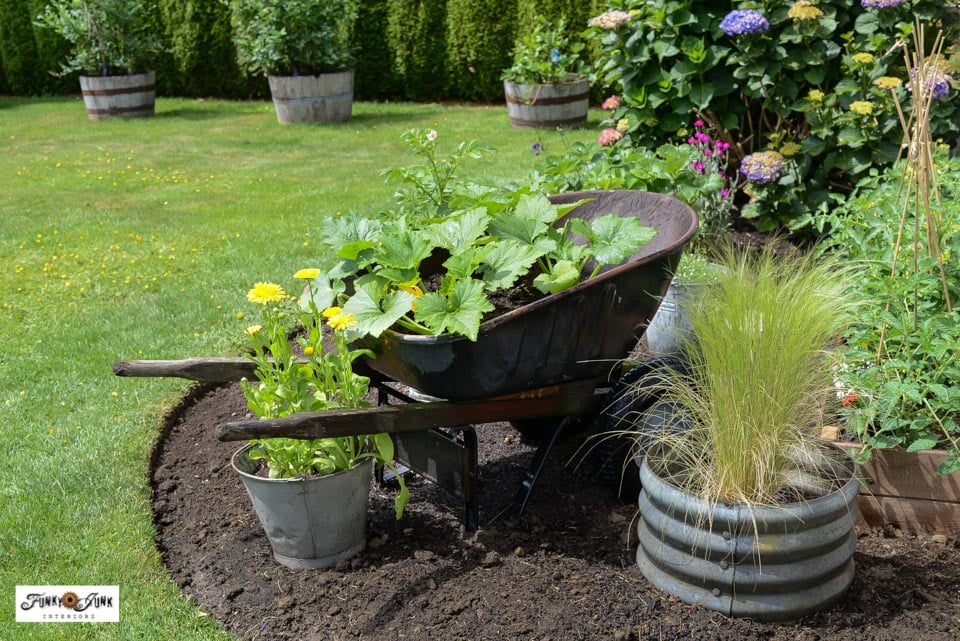
Choose a wheelbarrow that is deep
As luck would have it, I had just landed this old wheelbarrow from a neighbour on the curb. So it became one of the main focal points while being super helpful! The wheelbarrow is super deep, so it holds lots of soil making it a great raised planter!
I have 2 zucchini and 2 squash growing in it so they should eventually spill out over the sides nicely!

Keep costs down by collecting free plants
In front of the wheelbarrow is a bucket of calendula flowers. I managed to land all the starters from a generous neighbour who was giving them away. So I stocked up, and filled a bucket and another flower bed. They are such easy growers and reseed themselves for next year as well!
Trading or looking for free plants that are being gifted is such an affordable way to grow your garden! You’ll need a little more patience for everything to mature, however it sure beats spending a zillion dollars at the greenhouse if you can avoid it.
Oh, and collect perennials too, so you don’t have to keep purchasing more each year!
The grass plant was recently purchased from a neighbour for $5. The rim came free from a generous neighbour that I like to use in various ways. See it the galvanized ring HERE as a solar fountain!
Learn how to build this easy raised garden bed HERE
How to build a simple raised garden bed
Since I desired a row of tomatoes along the picture window, I built a simple raised garden bed for free using reclaimed wood HERE.
This tutorial shares how I built the raised garden bed, plus how to make it more weather-resistant and food-safe for growing vegetables.
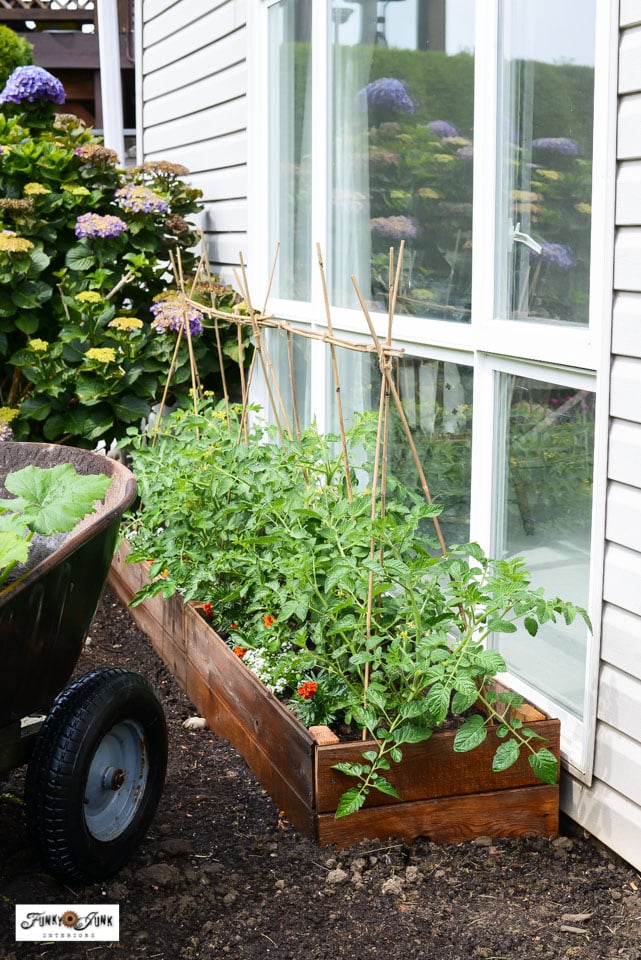
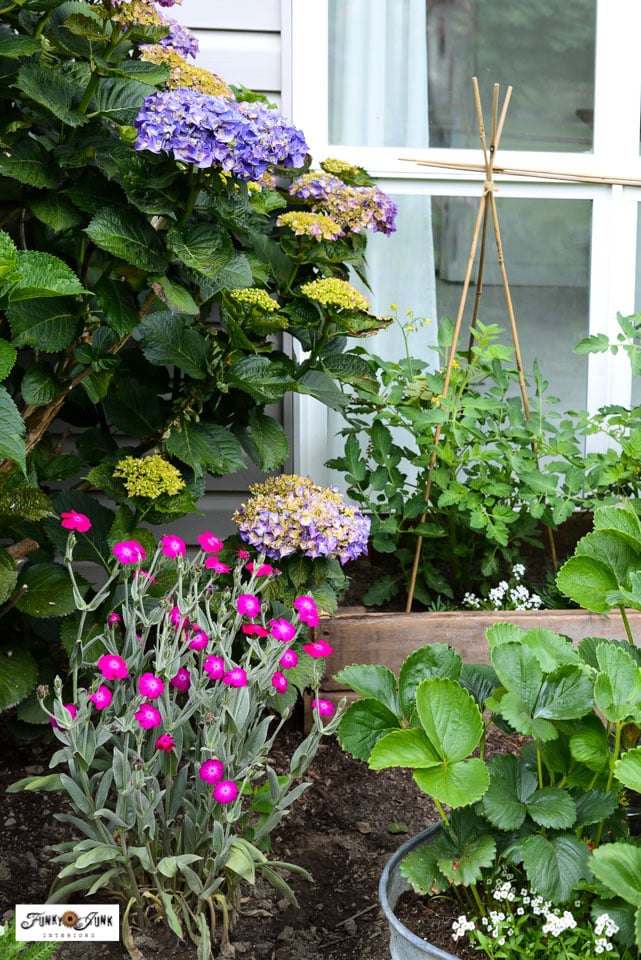
This area is perfect for growing tomato plants since it sits in full sunlight, and is protected overhead with the patio roof, plus house protection behind them. So it’s up to me to keep them watered, as rain doesn’t reach them, which is perfect, since they can suffer from blight during wetter conditions. Cannot wait to harvest our first batch!
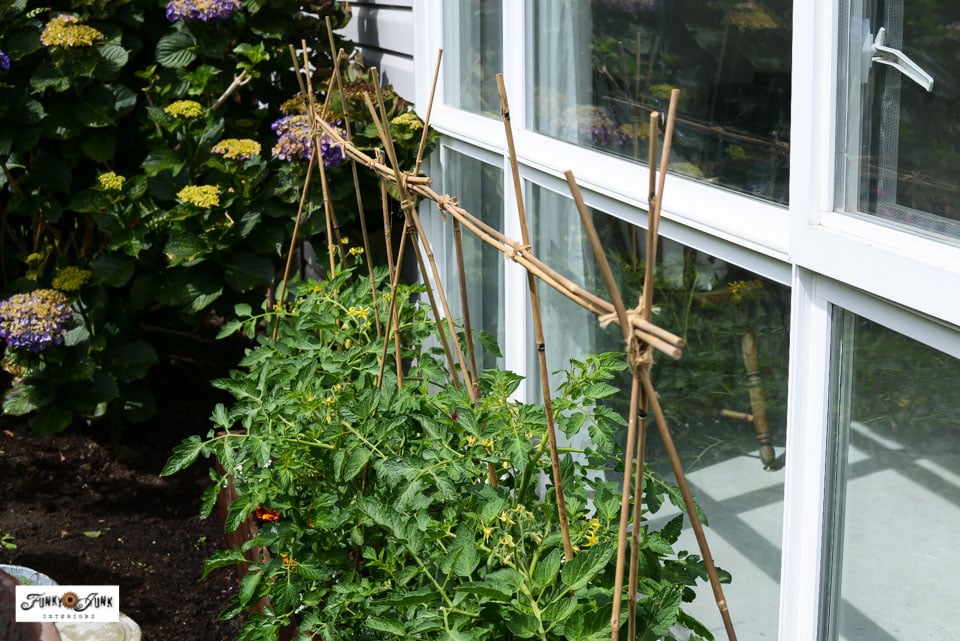

I also hand-tied the bamboo garden stakes as a simple rustic trellis which you can read more about in the planter post HERE
Why companion planting works
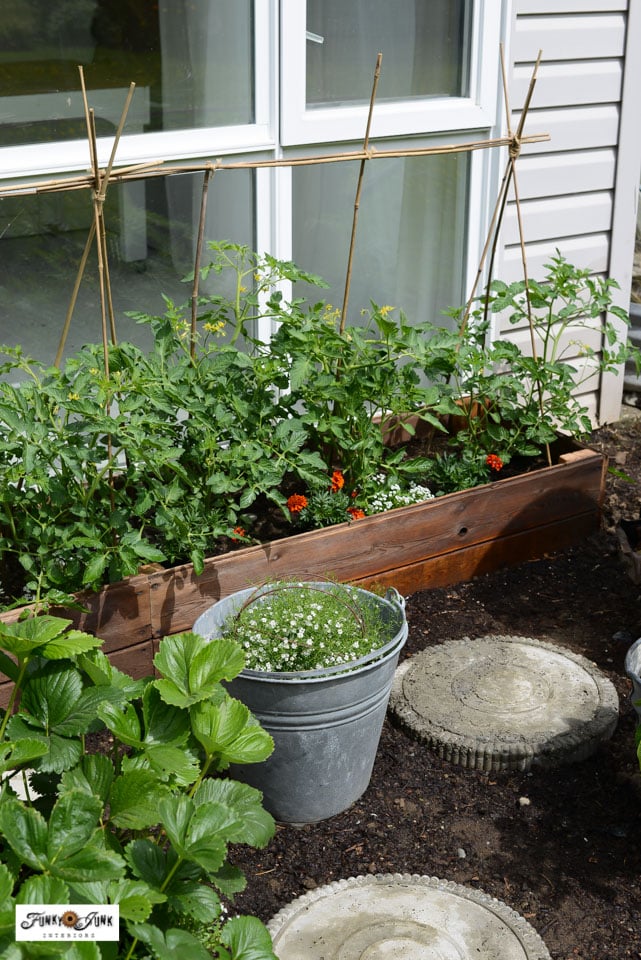
Along the front of the raised tomato planter is a row of marigolds and alyssum.
Marigolds are said to help ward off pests that like to nibble on tomatoes. While the alyssum just smells like sweet honey, exhibiting a fabulous mound-growing ability which will hopefully grow over the edges of the raised garden bed.
Why I like growing flowers in buckets
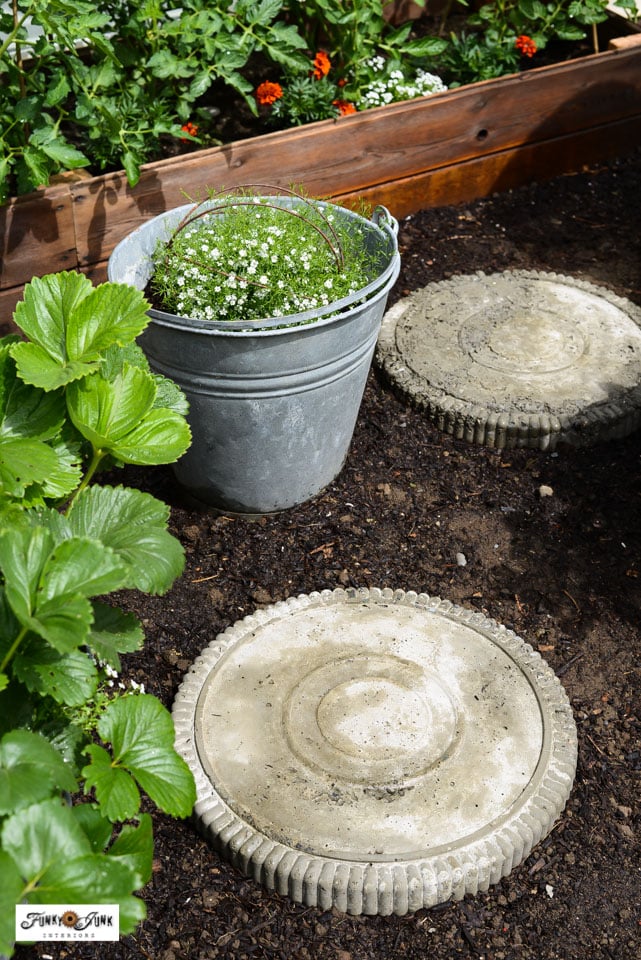
A bucket of baby’s breath growing through a rusty junk garden sphere just brightens up any spot! And the bucket makes it totally movable which comes in very handy for photo shoots or just simply adding accents to other areas if desired.
I recommend choosing large galvanized buckets so plant roots have lots of growing space.
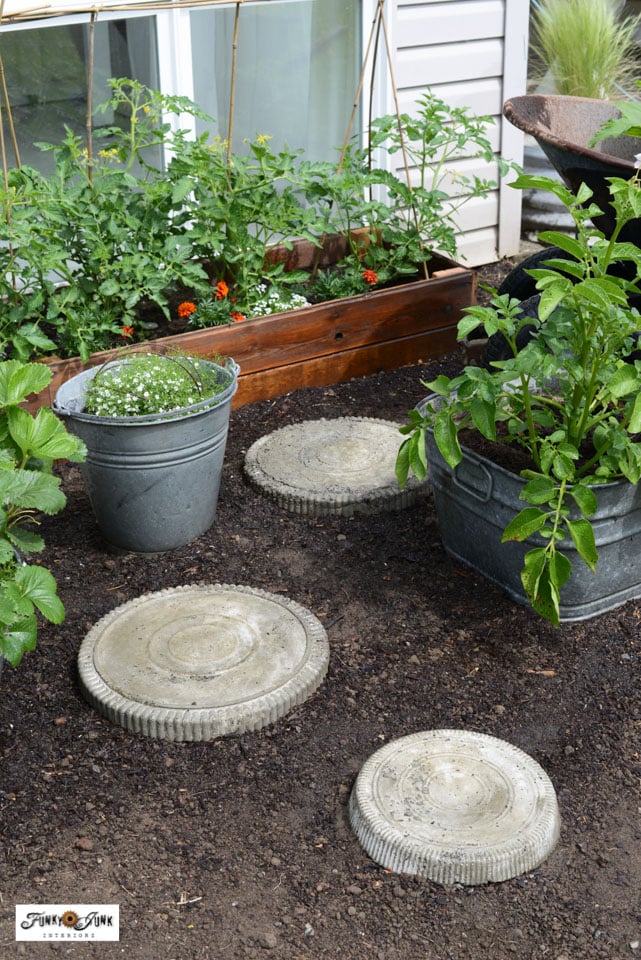
DIY concrete stepping stones garden path
And guess what… I MADE these garden stepping stones from scratch out of concrete! Oh my goodness… I have wanted stepping stones through garden areas forever, however the store bought variety are expensive and so heavy! These are easier to make and less expensive! I’ll share the tutorial with you soon!
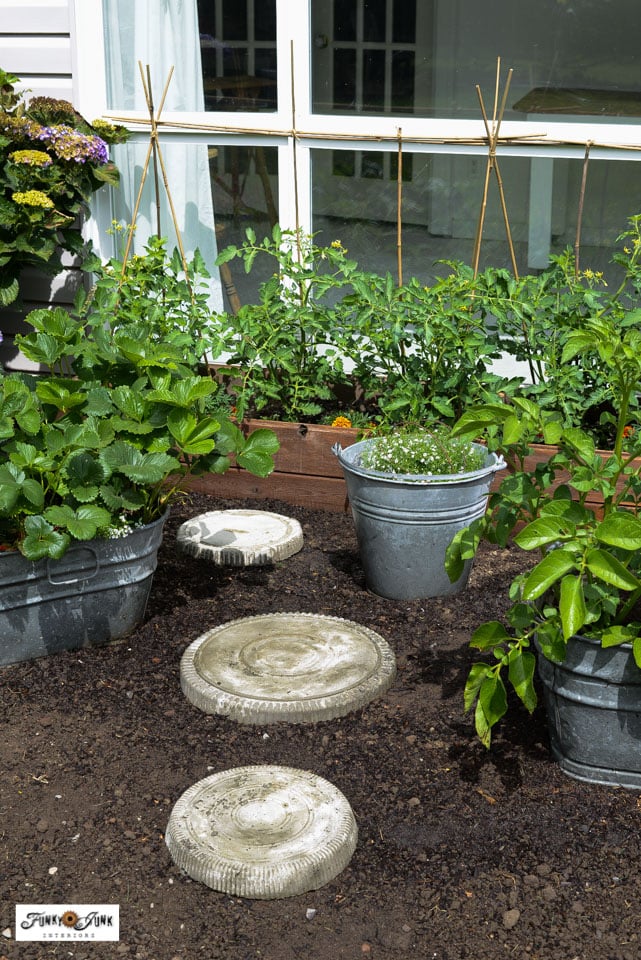
The concrete stepping stones are so helpful, creating a little garden pathway towards the back of the garden so I no longer need to get my bare feet or shoes dirty!
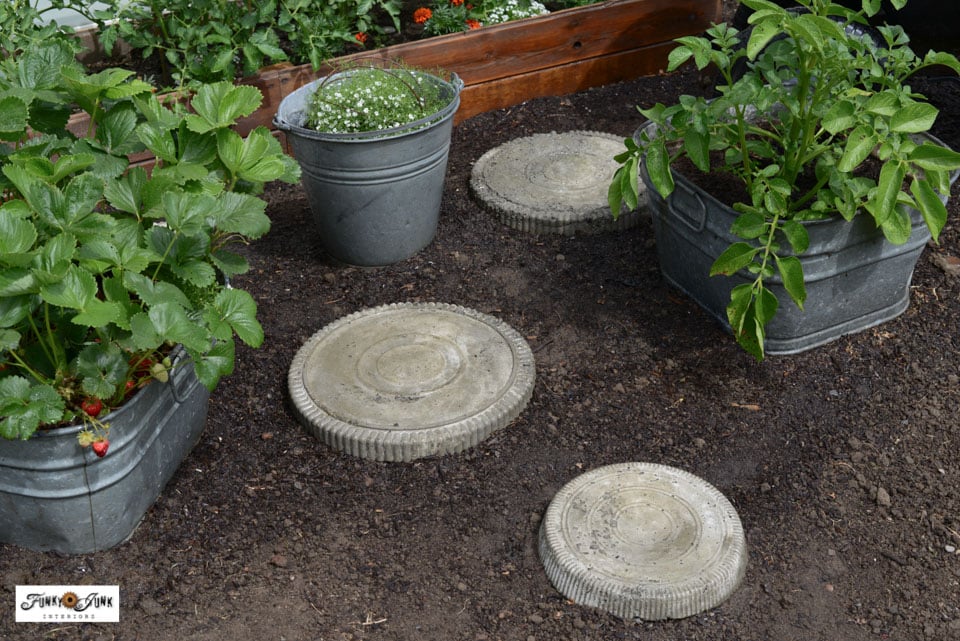
What helps strawberries thrive
Inciently, the strawberries in the galvanized tub are doing FABULOUS, and are so flavorful. Any other strawberries I planted in-ground even with the same soil are not doing as well.
I think it’s all about the raised tub keeping the roots buried deep in high quality soil. Plus, last summer I built a self watering system using milk jugs inside the tub, so that helps keep moisture in the soil moreso.
I may need to replicate that to share it!
I think it goes without saying that I am just so ecstatic to have this little vegetable garden gem in my backyard! It may be small, but it’s mighty cute and is growing our favorite things so well!
My plan is to cover the ground soil with mulch for more of a weed-free experience, however so far weeds have not been an issue at all.
For irrigation, I am hand watering, however I will admit my retractable Gardena hose is making that task rather enjoyable! Get one if you can swing it. It’s the best warm season garden purchase I’ve ever made.

Learn how to make a simple cold frame using an old window HERE
I’m also growing some peppers in a DIY cold frame made from an old window you can check out HERE. They loved the earlier added protection when the window was closed during the night.
Doesn’t even look like the same yard, does it?
Video tour – Upcycled vegetable garden
Visit above for a short video tour of every charming nook and cranny of the completed vegetable garden!
It’s hard to believe all the changes my yard has undertaken this year… just wait until you also see how the two arbors turned out… and my tin can herb garden I’ve yet to share!
Until then, don’t mind me as I strut through my vegetable garden to dote on every little thing like an obsessed plant mom. LOL
What a difference huh?! Do you have an impossible area where you think raised planters could work as well?
Read the entire vegetable garden series:
Part 1 – Learn how to build a simple raised garden bed for tomatoes HERE
Part 2 – Creative Ideas For An Upcycled Container Vegetable Garden (you are here)
Read ALL upcycled vegetable garden posts to-date HERE
Other creative garden projects to make:
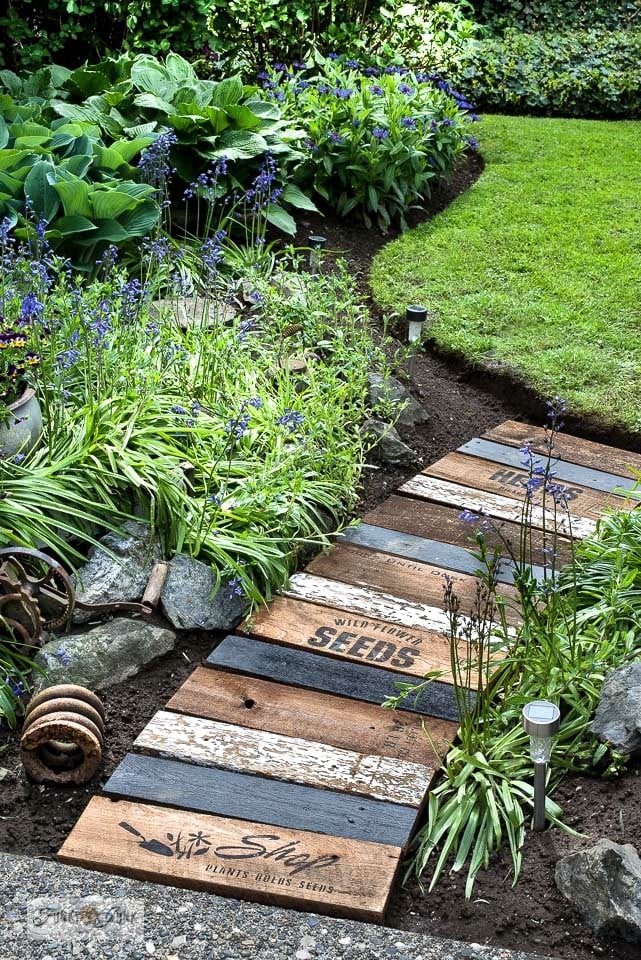
Build your own garden walkway with reclaimed wood
DIY plant labels with cedar strips and stencils
How to make window planter boxes from scratch
Make some cute garden signs using these stencils HERE
Visit many other creative outdoor projects HERE
Creative Ideas For An Upcycled Container Vegetable Garden
Tools:
- half moon edger to cut bed shape
Supplies:
- various containers to plant inside: wheelbarrow, tubs, buckets, rings, DIY planter box, etc.
- good quality raised garden bed soil by bulk
- healthy starter plants
- Bamboo garden stakes
- Quality watering wand
- Retractable watering hose (you will LOVE this!!)
Instructions:
- Lay a rope in the designed shape of your desired garden bed.
- Using a half moon edger, cut the bed shape out, removing the turf.
- Position the raised planters where desired, working around what's already nearby (such as my hydrangea bush). Leave some area for standing.
- Build a DIY planter box if desired like I did for the tomatoes and line the inside with branches for drainage and bulk.
- Add some stepping stones for standing areas if desired.
- Prepare planters by drilling through the bottoms to create drainage holes. Cover holes with rocks.
- Fill the containers with quality soil and spread soil (or mulch) around containers as well.
- Plant the containers, then water really well.
- Check daily for watering, weeding, and pinching requirements for the best bang for your efforts! Feed every so often if needed.
OMG! whats not too like, sooo many ideas
Thanks Carol, I’m thrilled this is in my yard compared to what WAS. Egads… haha
Looks awesome! I’d love the self-watering milk jug tutorial. I have several small containers that I’ve planted on the patio of my apartment building that I could possibly use them in.
Thanks Edna! I’ll keep the milk jug system in mind next time I fill up a tub!
It’s beautiful! You do such awesome work. You should be on HGTV.
Question: What is called the hot pink little flowers that you pictured. So pretty!
Thank-you Suzanne! It’s a perennial called Rose Campion. Such easy growers, they take most anywhere and continue to spread larger each year. They are stunning!
Thank you for the information. I just ordered one from Bluestone Perennials. Just gorgeous. One more question: I am a HUGE fan of Fusion paint, can I order from your site? I live in Virginia. Thanks.
Hi Suzanne! I don’t sell Fusion direct, however if you order through one of my affiliate links I provide in each blog post tutorial, you will receive 10% off if you order from Fusion’s website! Thank-you for asking!
You can save this link to always get 10% off of anything! (affiliate link) or use funkyjunkinteriorsfmp at checkout:
https://shop.fusionmineralpaint.com?sca_ref=1999623.l3iQoY7a2l