

Finding my bathroom window a little boring, simple shelves were installed, which made it possible to create these glitzy silver bling Christmas tree window shelves!


The backlit silver really casts a lovely glow and offers an interesting focal point to an otherwise bare and boring window. It was fun to jazz them up for the season, but I also can’t wait to play with them more after Christmas too!
Here’s how I made them:
Building window shelves

1. Using pallet wood, boards were cut to size to fit just inside the window. Two small supports per shelf from other scrap wood were cut to the same depth.

Tip: Here’s a little cutting trick I learned from Follow Your Heart Woodworking’s Julie.
For the cleanest saw cut possible, place a board behind the one you are cutting. The board behind will get the jagged edge this way, not the one you are wishing to use.

The jagged board to the left was the backer board. The board to the right was the one in front. Clean as a whistle! Neat trick, especially if you’re cutting lots and wish to reduce the amount of sanding.

2. Sand all boards well using a palm sander. Aren’t they pretty?!

3. Paint the boards!
I used an interior / exterior primer, followed by a semi gloss pure white latex that I used for the window trim so it all matches.
4. Thank your cat Skye for not walking all over the table while the boards were wet.

5. Measure and mark where you desire your shelves to sit, predrill holes, then screw in.
Touch up screws with white paint.

Then layer on your silver’s finest, rope with some costume jewellery Christmas garland style, and add a little faux snow for fun

The silver accessories are actually productive, holding bathroom items.


Pallet wood has never looked so pretty in these parts… 🙂
Have you ever tried shelves in a window before? I think I’m going to do this to my kitchen in summer!

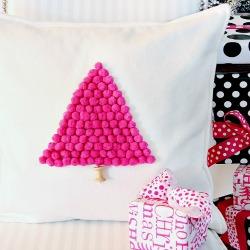
Pom Pom Christmas Tree Pillow – Thistlewood Farms

DIY Photo Stocking Hangers – Shanty 2 Chic

Pumpkin Steamers – Remodelaholic

Gold Leafed Holiday Boxes – Inspired By Charm
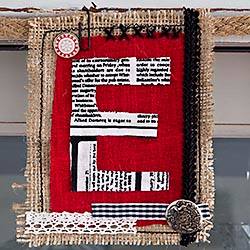
Noel Christmas Banner – Songbird
Visit the official 12 Days of Christmas Pinboard HERE
See you tomorrow for Day 4!
I love the shelves! The silver bling is perfect with the white window!
Hi Donna, Very nice! Except for the gorgeous shutter, your window did look a little bare, what a great way to jazz it up! Love it!
Is this also a link party? I was looking for your linkup for Dec.2nd?
Thanks, Cindy
Sorry about that Cindy! I was working on my post and removed the linkup by accident, so glad you spoke up! It’s back now at:
https://www.funkyjunkinteriors.net/2013/12/christmas-log-candle-centrepiece.html
Love it! I haven’t ever tried shelves in a window, but I will now 🙂
Donna – I LOVE the tree. The shelves are too perfect! I can’t wait to see what you do with them throughout the year.
xo Michael
P
e r
f e c
T
You always have the coolest ideas, Donna. I’d love to do that, but we don’t have deep windows- phooey!
Hi Donna,
You always have the best ideas and this one is a beauty! Love how you used the silver pieces and the costume jewelry garland. Very cool!
Warmest Regards,
Suzanne
Pieced Pastimes
LOVE this idea! Beautiful as always!!!
I liking this idea!! And great idea with stringing the pearls!!
Shelly
I love the window shelves !!!! I am so going to do this in my kitchen window 🙂
I have wanted to do something like this for my kitchen window, but thought it would be too difficult. You’ve shown me that it isn’t at all! I love how yours turned out and you have them decorated so perfectly!
Thanks for showing your how to.
Debbie 🙂
Oh goodness… it was SO easy! I can’t wait to attack my kitchen and create a little mini indoor greenhouse effect! 🙂
What an awesome idea! I’ve never thought of making a Christmas tree in this way and I love it! The silver you used is icing on the cake, too. 🙂
OH this looks lovely and you do silver very well my dear. Wow, Christmas in the bathroom. I have never gone that far, but maybe you inspired me this year.
Donna, I stand in awe of your amazing creativity. What a beautiful, unique Christmas tree and so appropriate for the bathroom. This is why I love you, she said in a totally non-creepy way. 😀
You are the most creative person I have ever come across! I love this idea! And I love that it is low cost 🙂 Simply beautiful!
Oh Donna–you are lucky to have those deep windows! What a lovely display–may have to get my white ironstone creamers out and replicate this somewhere…
Thanks! But they aren’t very deep… I believe the boards are only around 3″ or so… So I have to be careful what I put on them for sure!
Nice Q-tip container….
Who would of thunk it but Donna!
How to decorate the bathroom PLUS be functional?
Great job.
Very cool! I love that the pieces form a tree shape and that they hold essentials.
I love this! I have been thinking about shelves in my kitchen window, but wasn’t sure. These look fantastic. I’m always inspired reading your blog and pinterest boards.
Oh, they are so cool and easy to make! And remove if you change your mind. 🙂
Great little build, Donna, and pretty accessories! Thanks for mentioning me, I clamp a thin piece of plywood on to my mitre saw and it stays there for lots of cuts. This can make a big difference in the neatness of cuts.
Oh girl, you are the master for a reason. I think I need you to come to my place and set me up right!
Donna, you are doing quite fine without my help!!!!!!!!!!