Adjustable shelves are practical and versatile, but they can be expensive to buy. Here’s how to make your own inexpensive adjustable shelves from reclaimed wood which are very easy to customize to any size desired! They look stunning and work even better to store paint, craft supplies, tools and more! Here’s how to build these handy storage shelves from scratch. No expensive brackets required!
In my quest to further enhance the paint studio area downstairs, it was time to tackle building some new adjustable wood paint shelves for extra storage space for all my boutique paint!
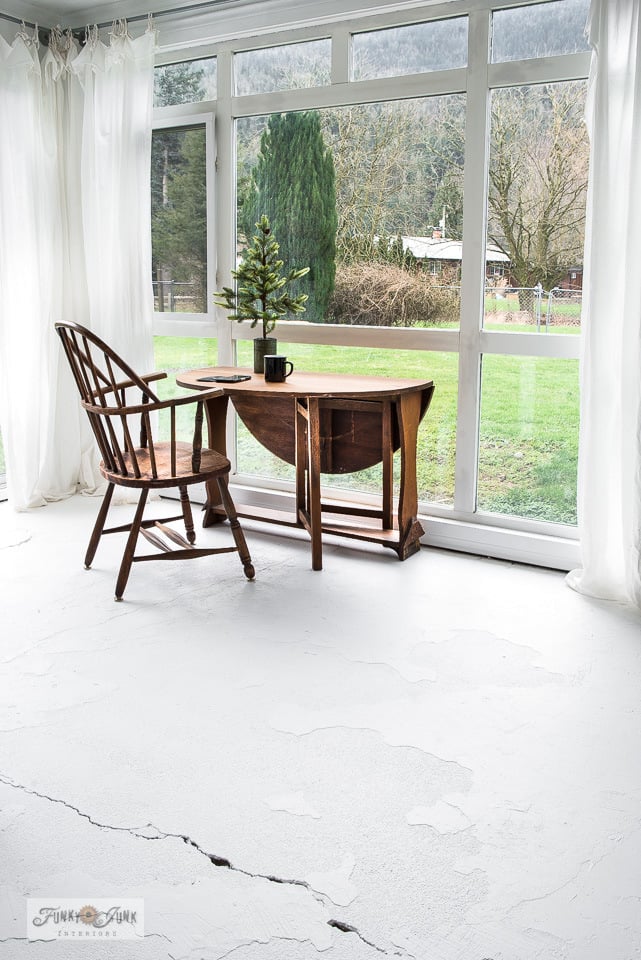
Where we left off: Painting a concrete floor white / Junk Shelves Storage
Tutorials: Wood block shelving / Simple paint shelf
Before
.
The paint shelving I was using was working ok.
However since my paint supply stock has grown, I desired to better unify the storage with a simpler shelf design, while increasing the space to hold more paint supplies. So I decided to streamline the shelves as one big unit. With one more small challenge…
Having adjustable wood paint shelves would be a real perk, so I could add or subtract shelves as stock moved as desired.
Oh, and not spend a dime I might add…
Tall order, right?!
I just feel all these things can be accomplished without spending a bundle. It’s about creativity and resourcefulness around these parts, so the additional shelves challenge was on!

Designing the shelves
.
First up was to design something.
Here’s the first visual I played with. The shelving could have 3 equal areas to house paint, paint supplies and some woodworking tools.
I like how clean this would be and it would offer a ton of storage!

Then I decided to slightly modify it to hide the tools more so since I had the perfect little storage cabinet in mind! This move also gave me more space for the paint and paint supplies, which was needed more anyway.
So grabbing the Organic Coffee cabinet built previously HERE, the idea was set!
You may have spotted a newly painted white concrete floor beneath this area. That is new too! However I’ll be sharing more on that process in a future post when the rest of the floor space is done. But it’s lookin’ mighty fine in my all-white studio spaces and I can’t wait to finish it all off!
So back to the shelves, I just couldn’t be more thrilled with the outcome! You just wait…
Here’s what I did:
This post contains some Amazon affiliate links in which I earn a small percentage from qualifying purchases through these links, at no extra cost to you. Thank-you for helping to support my blog!
Easy and inexpensive DIY adjustable shelves from reclaimed wood!
.
Supplies I used:
.
Reclaimed wood fence planks
Reclaimed wood picket fence planks
Cordless drill and screws

Building cubby-styled shelf supports
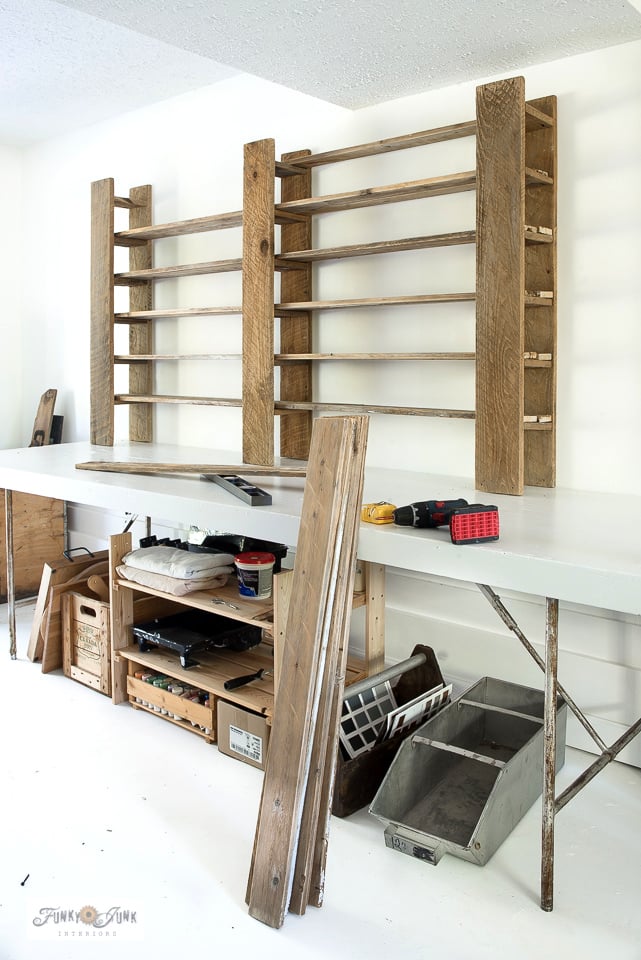
1. First up was to come up with a way to create shelf supports that would offer adjustable shelving.
So after trying a few different ways, the supports were finally built to resemble cubby shelving! And boy do they work great for adjustable shelves!
The spaces were built in increments that would work for small storage items.

Plank measurements
.
Cubby sides: 2 long planks were cut to the desired height of the shelves.
6″wide x 48″ long
Cubby shelves: smaller boards were cut to fit the depth (front to back) of the desired horizontal shelf size.
6″ wide (left to right) x 7.5″ deep (front to back)
Long horizontal shelf planks:
3.5″ wide x 43″ long, doubled up side-by-side to create 1 shelf.

Adding pocket holes
.
2. Pocket holes were drilled on both sides of the smaller planks using a Kreg Jig K4, making the shelving super easy to assemble!
Video tutorial on how to use a pocket hole jig
.
.
Click above to watch a short video on how to use a Kreg Jig. It’s really easy!
Learn all about How to Use a Kreg Jig in THIS POST.

Deciding on the shelf spacing
.
3. The small plank was placed on the long plank to mark the position the first shelf would be mounted. Then repeated until the entire plank was marked.
This measurement happened to work well with the Fusion Mineral Paint pints I was planning to store!
NOTE: If you want your shelf to have bottom boards like I did, be sure to allow for that thickness before marking off all your small shelf placements. See the visual under Adding Bottom Boards step 10 below.


Assembling cubby side supports
.
4. Each shelf plank was placed into position, then assembled with screws through the pocket holes.

5. To 100% ensure each shelf was properly placed on the 2nd long plank, I used a completed cubby to mark the shelf placements.
It’s important that all the shelves are placed identical to each other to ensure the longer shelf planks sit level.

6. The cubby was flipped on top of the 2nd long board, then a carpenter’s square was used to keep things square as each shelf was attached with screws.
I found screwing the pocket holes at an exaggerated angle was needed due to the upper board’s positioning.

Installing plank shelving
.
7. Each cubby shelf support was positioned on top of the work table, spaced out where desired, then attached to the wall with screws.
Sure makes for an easy installation!

8. Long planks were cut to the desired length then sanded to create horizontal shelves.
I used two smaller boards for each shelf since that’s what I had on hand. But it ended up being a perk, giving you more shelf variations!
9. Place the long shelf boards into the cubby supports.
I left the boards loose so they could be easily adjusted, however you could further secure them with screws if desired.
Pretty, right?!
This is about here where I stood back and gasped, ‘This is gonna work!”
It’s always an adventure trying something new…

Adding bottom board shelves
.
10. Loose planks were placed at the bottom of the shelf, resting on the table.
This is an optional step, but it adds a nice finishing touch. Just be sure to add the bottom board thickness before marking off all the cubby shelf spacing if you want them all even.

The installed adjustable shelving
.
I mean, hello?! Don’t these simple adjustable wood paint shelves look amazing?!
So let’s have some fun and stock them next!

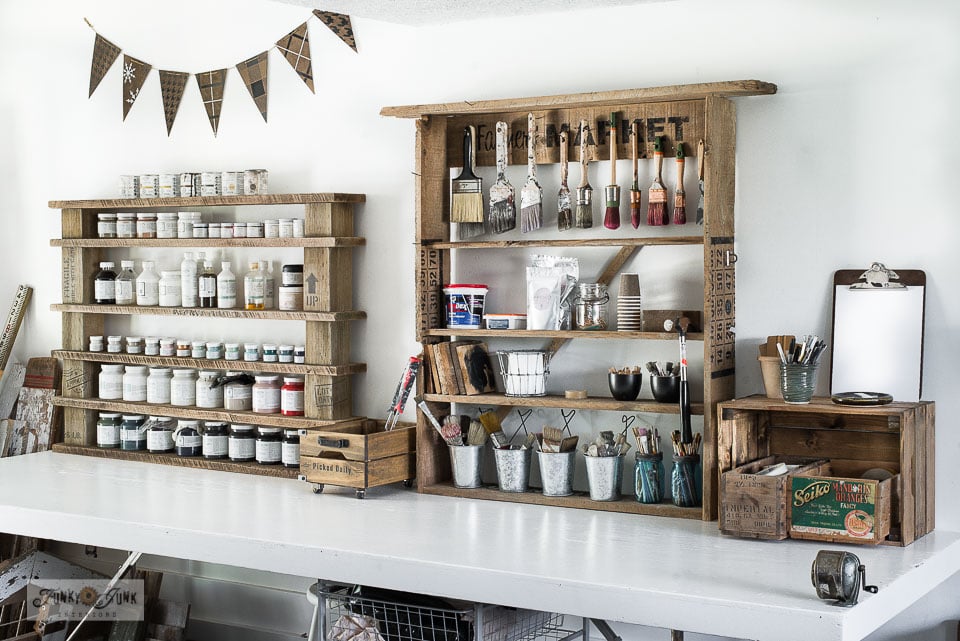
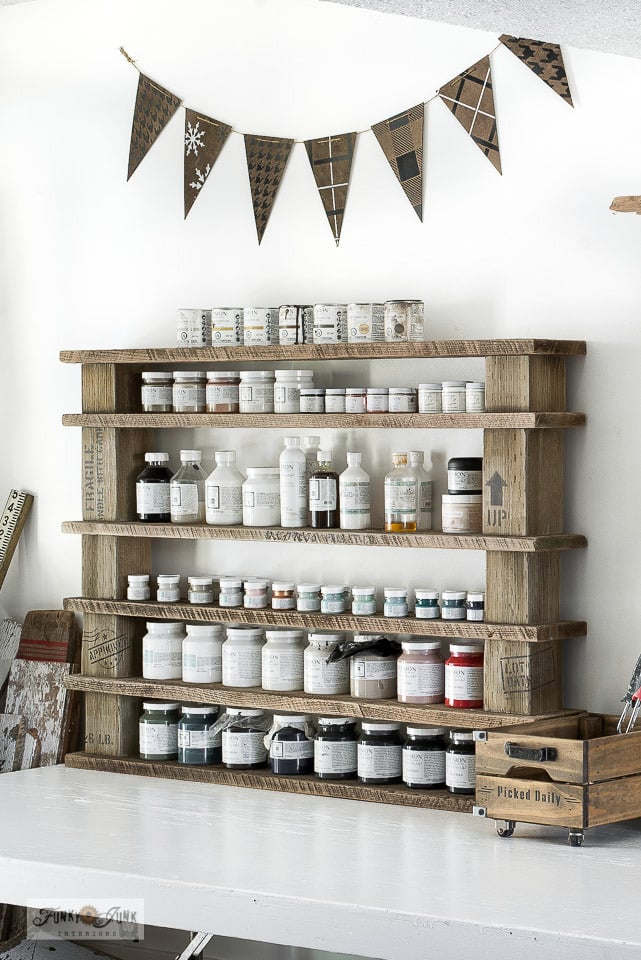
Adjustable shelves stocked with paint supplies
.
Welcome to the newly designed paint, paint supplies and tool station in the new and improved paint studio!
The work table got a fresh coat of white semi gloss trim paint, as well as a new coat of white paint on the ceiling, walls and cement floor, so this space got a total new start!
So let’s take a closer tour…

Fusion Mineral Paint on Amazon / Milk Paint by Fusion review post
Locate a local Fusion Mineral Paint merchant HERE
Paint shelving
.
This section of shelving houses all my favorite Fusion Mineral Paint supplies. With space to spare!
The shelf supports are so beefy, they became a great spot for hanging masking tape, paint brushes, etc.
All the horizontal shelves were used in this section.
However, that’s easy to change… as you’ll see what happens next!


Paint accessories shelving
.
The paint supplies section houses paint brushes, rollers, waxes, sanding paper and more.
In this section, some shelves were removed to accommodate the larger crate filled with paint brushes.
And did you notice the hanging brushes?

Ikea garden crates how-to / Wild Flower Seeds stencil / Vintage Crock Numbers stencil
Staalmeester paint brushes sold by Fusion Mineral Paint
One shelf plank was flipped on its side, then mounted to the cubby supports with screws to create the perfect place to hang a long row of paint brushes of any size!
And a couple of 1-plank shelves offer the perfect narrower spot to house sanding sponges, wax, cleaning supplies, tack clothes, etc.
I just love how easy this shelf design adapts to different heights and needs so effortlessly!
Let’s move over to the tool storage section next!

Organic Coffee cabinet how-to / Organic Coffee Stencil
Tool storage cabinet and station
.
The tool section features an Organic Coffee cabinet which was actually built to house a small amount of tools in my kitchen. Oops… I have other plans in the kitchen now, which allowed the shelf to live in this very spot!
And it’s perfect!

Inside the storage cabinet fits a drill, hammer, and a collection of tool bits with room to spare.
The bulk of my tools are stored in my workshop garages HERE, however I like having a small tool assembly inside the house so they’re convenient to grab from indoors.

Simple reclaimed wood shelf
.
One of my fav parts is the above simple reclaimed wood shelf which is built to the perfect width to store the red galvanized cubby filled with screws.
HERE is a galvanized caddy very similar to mine.
It also adds a little top shelf to stash a few things that make then easy to grab, such as measuring tapes and exacto knives.

Before… while I was moving everything out. Note the dark carpet…

… and after! BOOM!
Light, bright and paint supplies easy to find. This little paint studio has come a long way and I’m now super excited to see the entire room completed!
So stay tuned for more soon!
What do you think of the new and improved shelving and all-white space?
Other workshop projects:
Visit the first dramatic paint studio before and after. It’s good for a laugh!
Many other unique shelving projects to build
How I painted the concrete floors white
Junk shelving with white floors
Visit all Paint Studio posts HERE
Love, love, love it!! The “BOOM” picture needs to be published in a wood working/painting/organizing magazine! Great work Donna.
Oh gosh Donna! Love it and the banner above. The shelves are sturdy and using the level everything looks square. I am learning about myself that things have to look level and square or it drives me crazy. Recently we were at a cottage on the Chesapeake Bay and I was interested and admired the plain, sturdy and narrow shelves built in the kitchen for spices and can goods. The shelves fit into narrow spaces and did the duty they were designed for. Makes me realize all the unused potential there is in my home. Also have decided to make my paintbrushes and other items used for crafting displayed out in the open like they belong. Why hide them. I liked seeing your brushes hanging up. Great building and thanks for sharing.
I love it! Everything in it’s place! Someday – I’m going have my craft work room organized!!!
Question – why do you store the little paint jars upside down? (in one picture they are upside down)
Thanks for your posts, they are inspirational!
Waynell
Hi Waynell! The little paint jars are upside down so I can view the colours easier. I do this with craft paints in bottles as well! And thanks for the kudos, this shelf design works SO well!
Amazing! I love it. Wish I had a space like that for myself. One day…
I’ve been wondering what you’ve been up to 😀 The shelves look amazing, Donna. You must be the only person I know who can make a workshop studio look like it came straight out of a glossy magazine.
Fantastic job! ❤️
It’s All beautiful, Donna. Oh, to find 6 inch boards like that. White is most definitely right! Another great job! Thx for sharing.
I love it! And I want you to know I had some Staal brush envy and specifically read every single word making sure you attached it to the wall. I had a vision of someone finding you among the shelves with paint dripping off your head, sort of like an I Love Lucy episode.