How to build a rustic wood Organic Coffee bar cabinet with hidden bulletin board! Stylish storage for anything that hides all the clutter!

When I recently cleaned the kitchen, the same challenge kept creeping up. Where can I store some woodworking tools upstairs without actually seeing them?
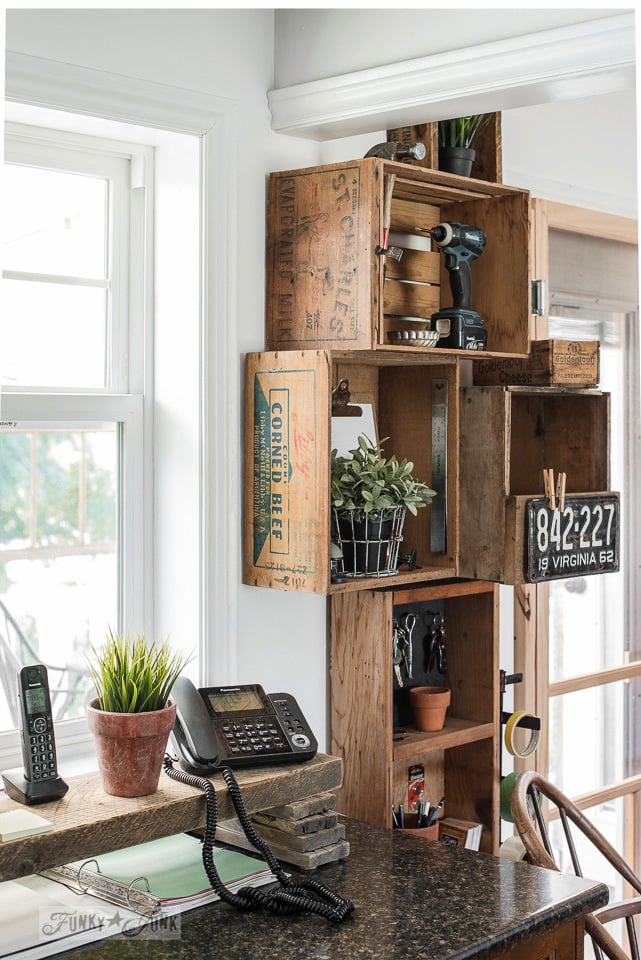
Crates on a wall kitchen storage
I LOVE having THESE vintage crates as open storage shelves on the kitchen wall! They are cool to look at, and help organize phone station supplies, office paperwork, and you got it… some tools as well.
However I was thinking more along the lines of hidden storage for tools and office supplies this round.
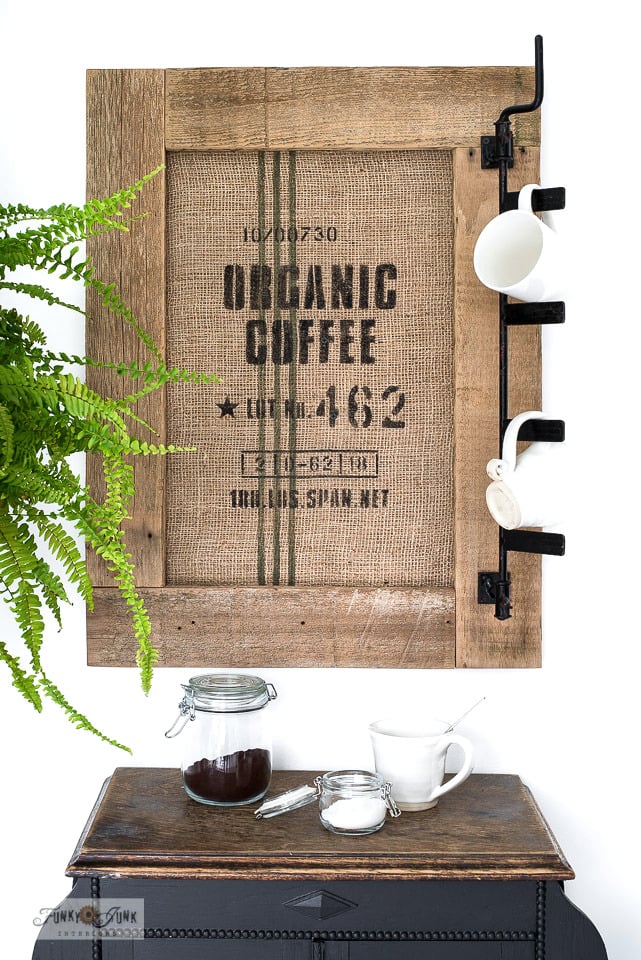
Organic Coffee bean sack bulletin board sign
And that’s when my thoughts drifted back to this Organic coffee burlap sack bulletin board sign.
I love this farmhouse coffee bar setup! And boy would it make the perfect spot to house my coffee supplies in this!
As it stands, I store my coffee accessories in this coffee-themed appliance garage HERE because my small kitchen lacks wall space. But if YOU have wall space, this one’s for you!
So back to kitchen coffee bars…
This home coffee bar idea to house coffee essentials is a perfect compliment to a kitchen oriented space, no matter what you store in it!
Regardless, I had this perfect cabinet door start that would ultimately become SO much more. So let’s turn this into a decadent coffee bar cabinet that can actually store anything you wish!
Here’s how to make one:
This post contains some Amazon affiliate links in which I earn a small percentage from qualifying purchases through these links, at no extra cost to you. Thank-you for helping to support my blog!
DIY wood coffee bar cabinet with door – to store anything!
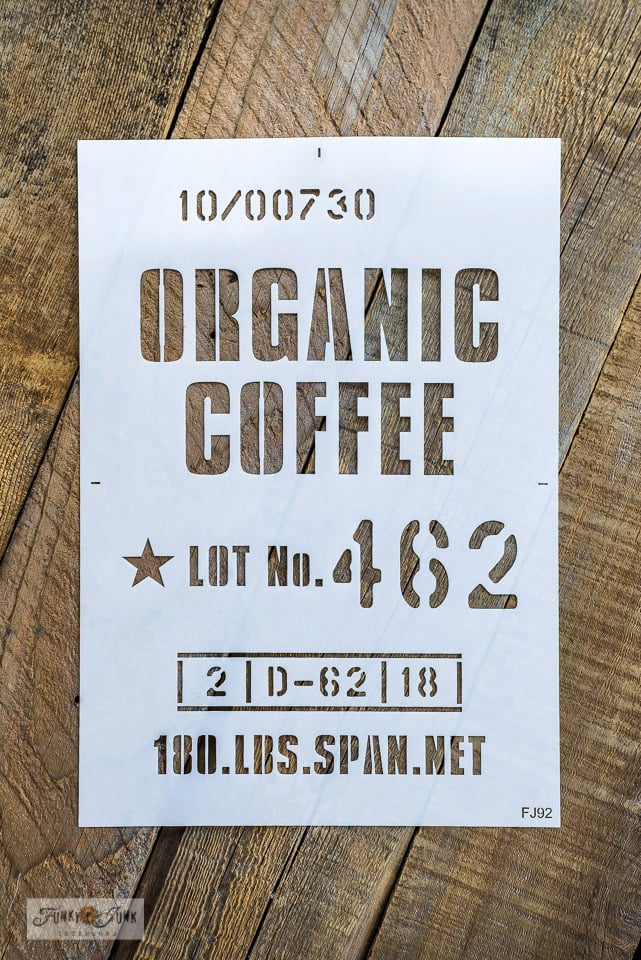
View Organic Coffee stencil HERE
Supplies I used:
.
Organic Coffee stencil (learn how to make the burlap sign HERE)
bulletin board (my cut piece measured 22″ x 29″)
cordless drill and screws
Learn how to make this Organic Coffee bean sack bulletin board sign HERE
Make or choose a cabinet door
.
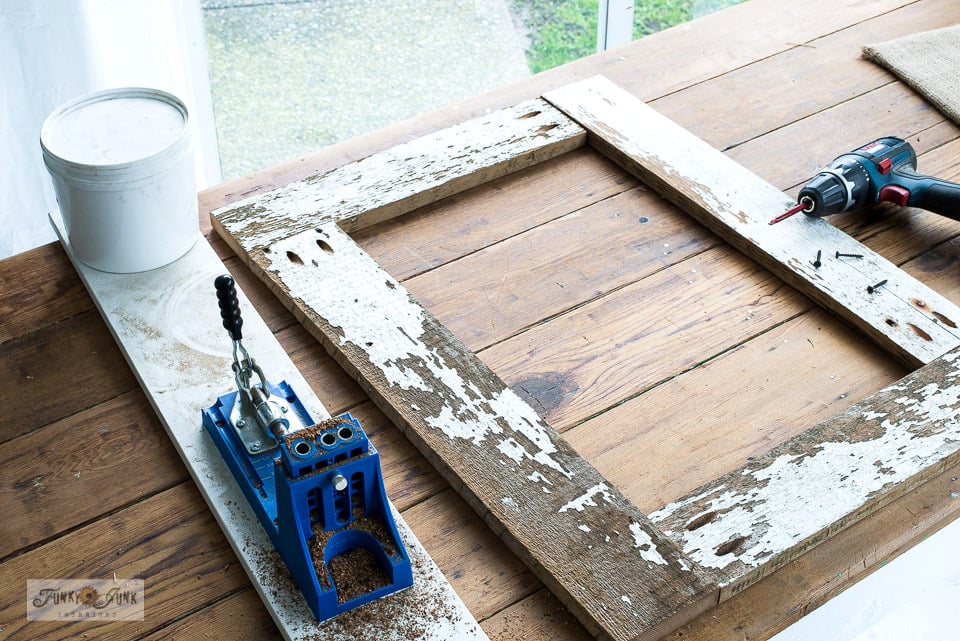
1. Choose cabinet door of choice.
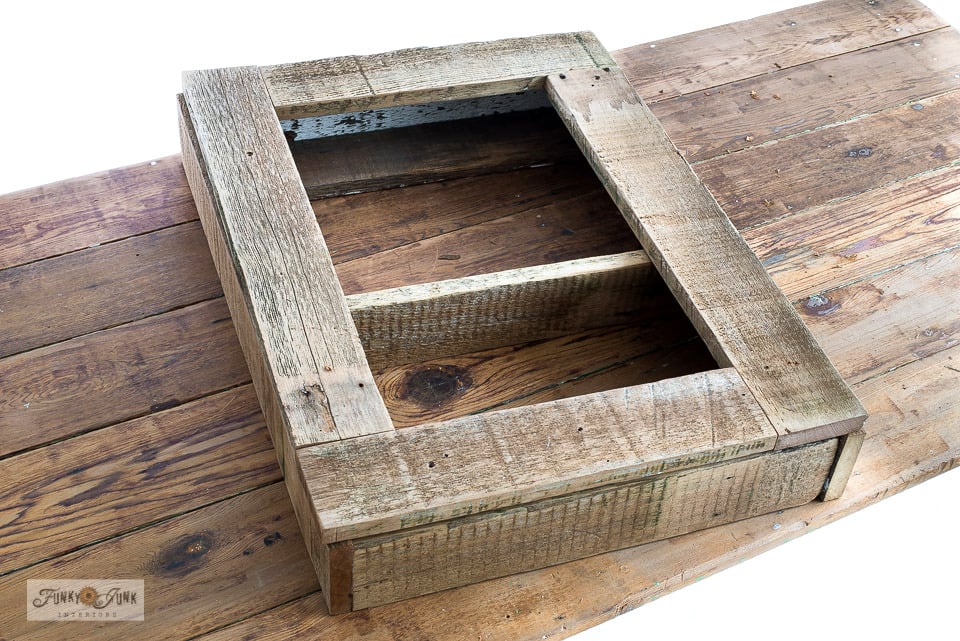
The first thing you’ll need is either a door to work with, or make your own door frame built like a picture frame like I did HERE.
This overall cabinet door size measures: 22″ wide x 29″h
My 4″ boards ended up measuring:
- top and bottom – 4″ x 18″
- sides – 4″ x 25″
- finished door frame: 22″ x 29″
Making a door is fun! If you use this in your kitchen, think of what would look best with your kitchen cabinets, countertop or coffee bar table, or any coffee bar furniture you are using, then go for it! Your own decor styles will be all that matters.
I personally like taking rustic departures from other newer looking surfaces to give the space a farmhouse style vibe.
Creating the cabinet frame
.
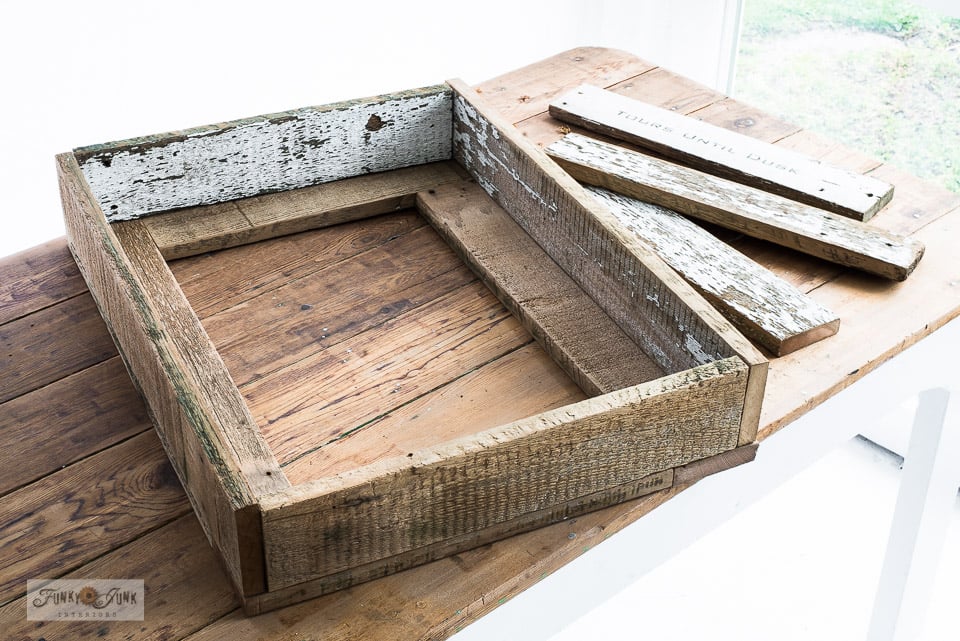
2. Create a boxed frame to match the size of your given door frame.
Using the same sized reclaimed wood, it was measured then cut to the exact finished size of the door frame.
The size of the inside cabinet measures: 22″ x 29″
Adding shelves
.
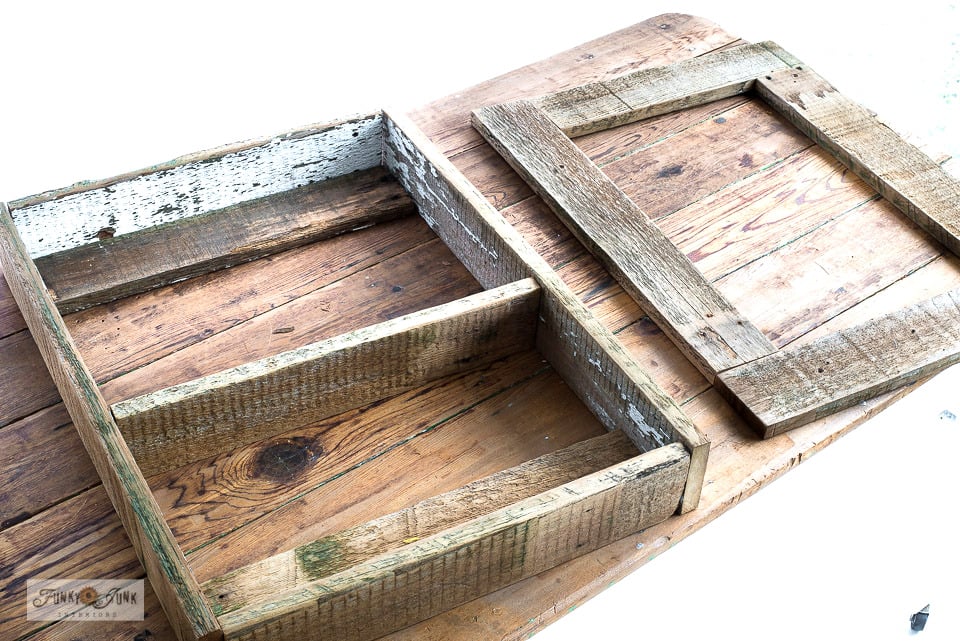
3. Cut some additional boards for shelves and cabinet supports.
2 additional boards were cut to the same length as the top and bottom to create shelves.
Then 2 more boards cut at the same length, to be used at the top and bottom of the cabinet as support boards, making it easy to attach the cabinet to the wall.
All board sizes
.
- top and bottom – 4″ x 18″
- sides – 4″ x 25″
- shelves – 4″ x 18″
- inside support boards – 4″ x 18″
- finished cabinet size: 22″ x 29″
This look gives the accent cabinet an open shelving vibe which makes it easy for guests to help themselves too! But this one’s about hiding what’s inside this round… with a cool coffee vibe, so let’s continue!
4. Lightly sand the boards.
Assembling the storage cabinet with door
.
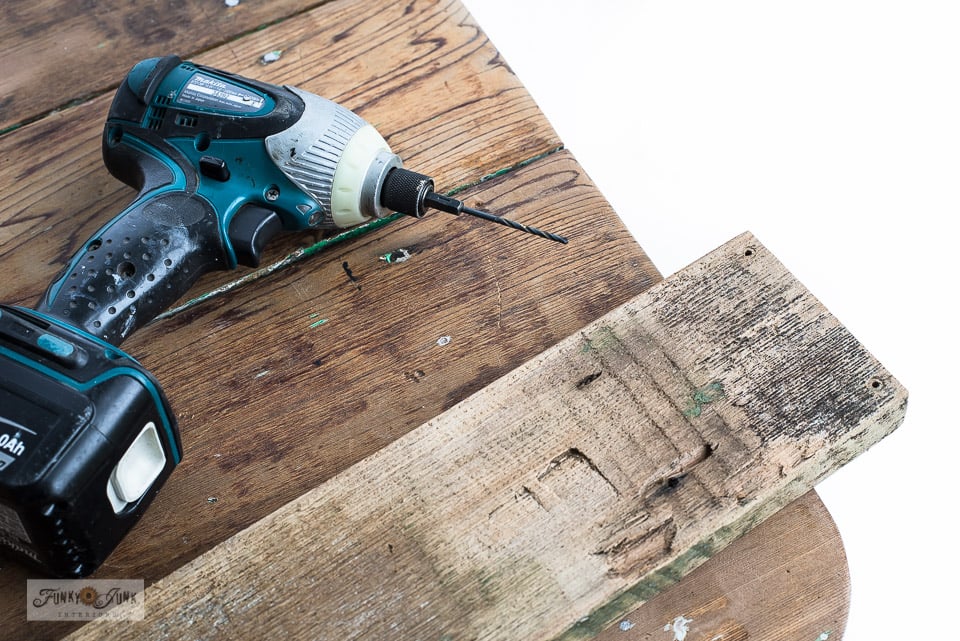
5. Pre-drill pilot holes on the two long side boards.
Pre-drilling holes helped prevent the old reclaimed wood from splitting.
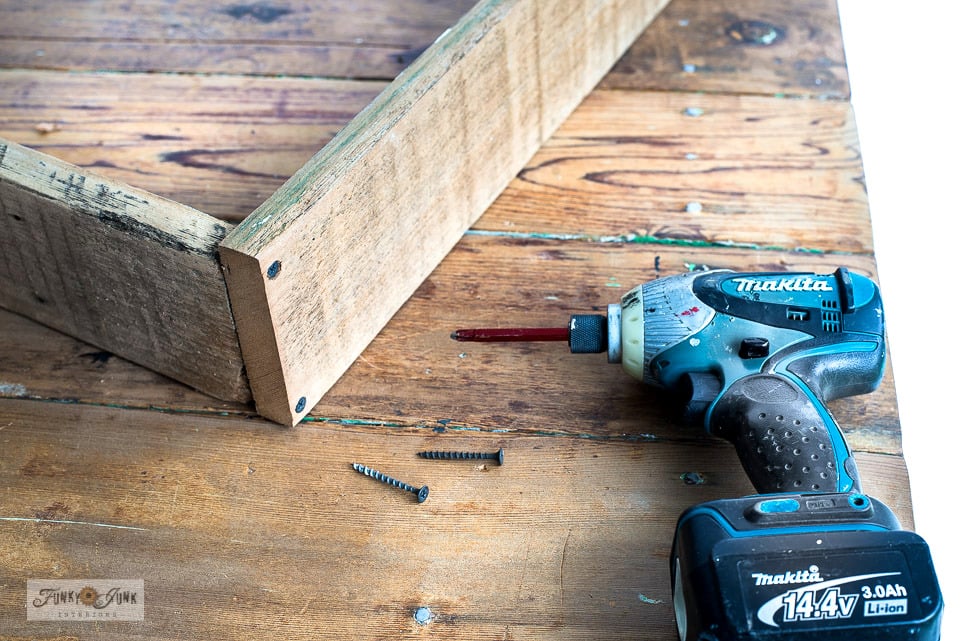
6. Attach the cabinet sides to the top and bottom with screws.


Pretty nifty, right?!
This home coffee station companion is well on its way!
A large rusty junk door handle was dry-fit at this time, but not attached yet.

Adding a bulletin board to the door
.
If you are using a ready-made cabinet door, you can skip #7!
However if you are building a custom door like I did or would like to turn your cabinet door into a super handy bulletin board, here’s what I did:
7. Cut a bulletin board to just under the same size as the cabinet door frame.
I collect bulletin boards from thrift stores, so I had this large board on hand, and cut it down to my desired size using a heavy exacto knife.

Stenciling a coffee grain sack sign
.
8. Staple stenciled burlap onto the front of the bulletin board.
The above shares the burlap sandbag I turned into an Organic Coffee bean sack sign you can copy HERE
The burlap sandbag was then stapled onto the bulletin board along all four edges with a staple gun.

9. Attach the bulletin board to the cabinet door frame from the back.
Flip the cabinet door frame good-side-down, then the bulletin board good-side-down on top.
Attach the frame and bulletin board together with screws inserted along the edges.

Installing door hinges
.
10. Add two door hinges to attach the cabinet door to the frame.
I screwed on two metal door hinges I had on hand. They didn’t even match!
Attaching the hinges proved to be a little fiddly! But here’s what I did:
I placed the door on top of the cabinet, then slipped the hinges into position. The hinges were screwed to the cabinet first. Then the hinges were attached to the back of the door last.
You may need to fiddle and adjust hinge placement until you can close the cabinet door perfectly.

Adding a door pull
.
11. Attach door pull.
Fun, right?!
This rusty old door pull proved to be the perfect size and esthetic! What a match!
And all that’s left to do is hang it up and put it to work!

The finished coffee bar cabinet
.
Isn’t this wood storage cabinet with door a beauty?!
The accent cabinet oozes rustic coffee shop charm, thanks to the Organic Coffee bean sack design made with THIS STENCIL.
And while rustic sign decor is nice, the best is yet to come…

Because once you open up that storage cabinet door?

Loads of storage to hide anything desired! But especially fabulous to house coffee beans, hanging coffee cups or mugs, or anything desired.
And in my case, kitchen tools!
But I will admit, the bulletin board door is rather awesome. You can pin up and hide notes inside the coffee bar cabinet to hide the additional paperwork clutter. So yes, office supply storage is another great idea!
So what makes this particular storage cabinet with door so special?
Perks:
- Shallow shelves offer easy access
- Full bulletin board covered door for tons of messy paperwork storage
- Additional boards with screws added for hanging storage potential
- Can store anything desired
- Custom design to any size to fit where you have the space
And… it looks cool!

Attaching the cabinet to the wall
.
The cabinet is attached direct to the wall with screws through the back support boards. It’s best to attempt to attach through a wall stud if possible for added weight support.
If you aren’t lucky enough to hit a wall stud, install wall anchors prior and you’ll be good to go.

Two more wood boards were added to the inside of the storage cabinet to become the perfect backer for added hanging storage! Perfect for string, hammer, masking tape, scissors, etc!
Everything is hung from screws or nails. No fancy hooks are needed this round since the storage is hidden.

Position your small storage cabinet over a bar cart, counters or small table that houses a coffee machine and you are done!
The coffee grain sack look is the perfect addition to farmhouse kitchens, don’t you think?
But open up that cabinet door…

And it turns into one epic storage cabinet to hide your gear! Whether it’s coffee equipment or otherwise.

How would you use this coffee bar cabinet?
And now I want a coffee…

DIY wood coffee bar cabinet with door - to store anything!
Supplies:
- Organic Coffee stencil
- Grain Sack Stripes stencil
- burlap
- Fusion Mineral Paint Coal Black
- Fusion Mineral Paint Bayberry
- 2 door hinges
- 1 door pull
- staple gun and short staples
- bulletin board
- reclaimed wood boards to suit
- dome tip stencil brush
Instructions:
- Build a rectangle cabinet door frame to start.
- Cut a bulletin board to fit.
- Outfit burlap overtop of the bulletin board.
- Stencil the bulletin board with grain sack stripes in green first, then the Organic Coffee design overtop in black.Organic Coffee stencil, Grain Sack Stripes stencil
- Attach the bulletin board to the door frame.
- Build a cabinet box the same size as the door frame.
- Add shelves for extra storage and support boards inside the cabinet walls across the back (flush with cabinet sides) so it's easy to hang onto a wall.
- Screw everything together.
- Attach the door to the cabinet with 2 door hinges.
- Add a door pull.
- Hang on a wall, attempting to screw into wall studs, or use wall anchors to help brace in place.
Notes
I personally love designing farmhouse coffee bar ideas! So here’s a few more to inspire you with!
Other coffee bar ideas:

Build a compact coffee-themed sign shelf!

Make this easy 3-plank coffee sign with mug hooks

Create a coffee-themed appliance garage that hides kitchen clutter!
Visit more coffee-themed projects HERE
Check out many other unique shelving projects HERE
Love all the clever organizing projects you make. Makes me smile…perfect spot for all those items you need close at hand and so much better than digging into a junk drawer for what you need.
Thanks Eloise! This was a fun one for sure!
Another amazing project Donna! I love this one so much!!
Thanks Kim! The entire vibe is way more fun than looking at clutter I say!
Its gorgeous and I’m so envious. I miss having a workshop so much!!!
Thanks Zefi! The best part of this project is it’s meant for non-workshop spaces!
Love it, Donna. So perfect for a small space and no one would ever guess what was hiding inside. Although with that being said, I swear you are the only person I know who can make a hammer and a glass jar of drill bits look amazing 😀
LOVE that idea! I have the same problem now that we had to have our kitchen completely redone because of a water leak. Just nowhere to put a few pens and index cards, rubber bands and wood clothespins (to hold packages closed), etc. Great idea!
This is excellent Donna! I am always trying to find ways to store all the little tools and small pieces so they’re handy and close by but hidden. I’m going to try and give it a go. Your simple, direct, easy directions make me feel like anything is possible. I love wood.