Transform an old painted dresser into a stunning woodsy piece of furniture with this easy DIY technique using paint that looks like wood! No paint stripper required.
I think most that frequent over my way already know how much I LOVE woodgrain on anything! The warmth of rustic wood is undeniably warm, cozy, and of course, rustically charming thanks to its aged look!
Some fun rustic wood samples on furniture:
This crazy-cool side table, pallet-style
TV tray with an old crate look makeover
Crate-looking adirondack chairs makeover
However, there are those times when you come across a painted piece you wish was woodgrain. There’s of course the option of paint stripping, but sometimes that task is just too tedious to be worthwhile.
And such was the case with this little red dresser I had in my stash…

I landed this dresser on the curb some time ago and used it to store office supplies in a downstairs office. It’s perfect for that since there’s lots of shallow drawers, making it easy to separate lots of paperwork and loose supplies all while hidden away behind closed drawers.
The dresser obviously needed a makeover of some type since I’m not a little boy who collects cars and puts car transfers on furniture… so I just held onto it as is until a good brainstorm came my way. I attempted to remove the paint at one point, but it was bullet proof, so I knew I’d need to wait for a paint technique I could get on board with one day.
Then Hometalk asked me to create a faux woodgrain effect on something.
BINGO!
So I pulled this little guy out of storage and got right to work! And the final outcome is rustic, cute, with no messy fumes nor intense sanding grunt work required to remove even a fleck of paint!
Oh, and not only did I get a beautiful faux wood dresser makeover out of it, I couldn’t move it back into the room until the room itself got a makeover too! You just wait!
Have an old finish that’s that’s caked with paint or varnish that you can’t be bothered to grind it down to bare wood either? Try this trick instead!
Easy DIY Dresser Makeover Using Paint That Looks Like Wood!
Supplies you’ll need:
Algonquin by Fusion Mineral Paint (get 10% off)
Coal Black by Fusion Mineral Paint (get 10% off)
Fusion’s Stain and Finishing Oil in Cappuccino (get 10% off)
stiff paint brush or whisk broom to create texture
How to prep before painting
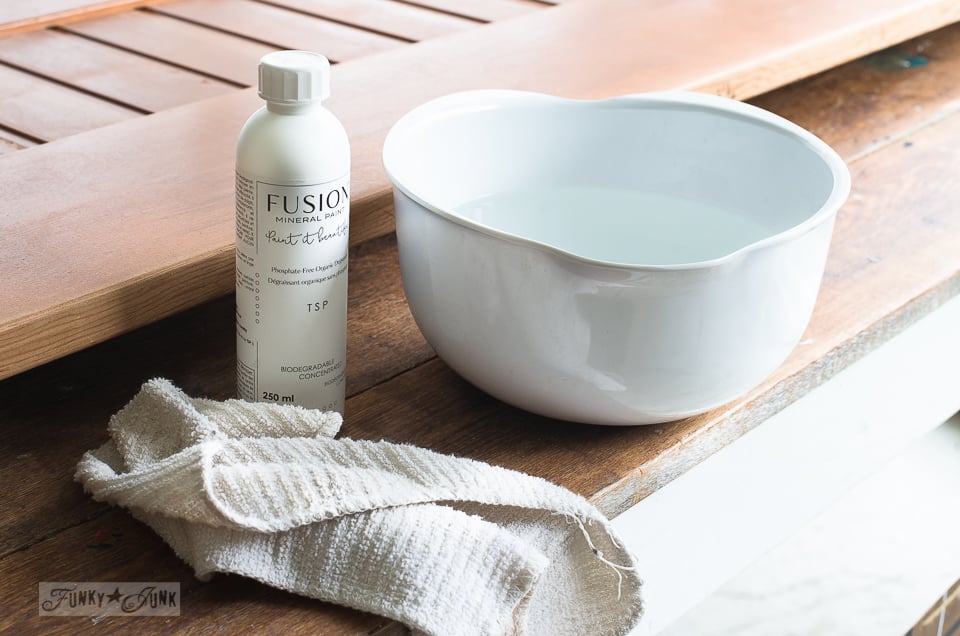
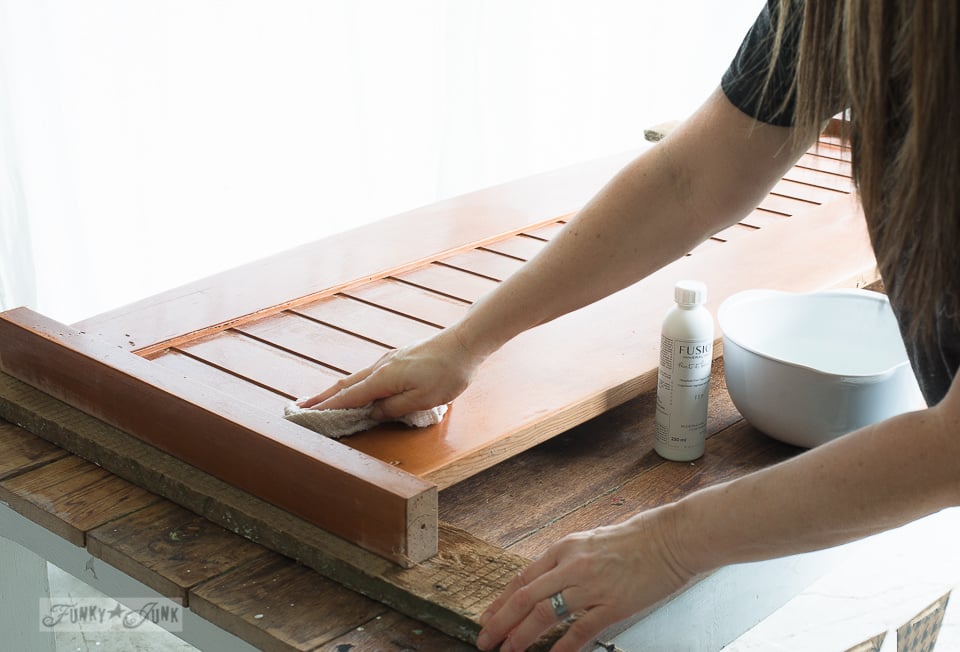
1. Clean the piece.
I like to use Fusion Mineral Paint’s TSP alternative. It’s a non toxic way to prep furniture for paint, plus you don’t even have to rinse it off!
I pour a little TSP in a bowl of water, then wipe my piece clean with a soft rag and allow to dry.
2. Sand the entire piece to ensure it’s smooth to the touch.
Sanding is always a good idea if you plan to paint a piece. This roughs up the texture a little so the paint has something to adhere to.
This is also a good time to crack fill or mend any problem areas to strengthen your piece if needed. I embraced the imperfections of this dresser since the look I was going for was rustic wood anyway.
3. Remove the drawer pulls.
Once the hardware was removed, I used a hammer to knock off the knobs, since the painted dresser had a LOT of build-up!

Creating a faux wood grain effect with paint
Since the dresser is already complete, here’s the same technique I used on a sample board. A smooth surface will provide more of a truer test, vs one filled with rough wood grain texture.
Paint on a base coat of choice
4. Paint the drawers and the body of the dresser with a base coat of Algonquin.
This paint tone ended up giving me a mid-tone wood look. A darker or lighter base will drastically change the effect so it pays to play.
The fronts of the drawers and the sides of the dresser were painted with a velour roller for a nice smooth and quick finish.
For any of the other trim areas, I used a paint brush.

Brush on a stain tone of choice
5. Once paint is dry, paint on Fusion’s Stain and Finishing Oil in Cappuccino.
Since Cappuccino is quite a deep tone, I ended up with a mid tone wood look. So if you change up your stain to an oak or walnut tone, you’ll achieve different results.
Even strokes don’t count here. Just apply it for quick coverage.
Other stain alternatives
If you don’t have the color stain you want on hand, you could also achieve a similar look of wood grain using a glaze mixtures, gel stain or even experimenting with latex paint washes to create a faux stain. However if you use a glaze, a top coat clear coat of some kind is recommended.

Remove the stain unevenly with a rag
6. Start removing the wood stain with a lint-free cloth, but not too evenly. Allow lots of streaks to show you only pulled part of the stain off. This ratio helps creates a mixture of layers, shades and depth to achieve grain details you like.


Add more texture with a whisk broom
7. Use a course paint brush, broom or whisk broom to use a long stroke motion to swipe across the entire surface to create long scratches, or ‘faux wood grain’.
Just keep working the area until you like the results with some swipe gestures added for good measure. The more you work the surface, the more variation you achieve. It’s wonderfully fun! I used a combo of the rag, stiff dry brush and the whisk to get this effect.

Here’s a side-by-side comparison of a board completely painted, and one stained with wood scratches. It’s nothing fancy at all is it? But when you add it all together, the end result becomes quite a statement!
8. Stain and scratch all the drawer fronts and dresser body. Then allow to dry for several days.
Traditional Stain and Finishing Oil applications dry overnight. However, since this method intentionally leaves on more product than it really needs, the product takes longer to dry. I waited about 3 days or so in a warm room with a fan blowing on it.
9. Paint the knobs Fusion’s Coal Black.

View: Grain Sack Stripe stencils HERE
Detailing the dresser with a classic grain sack stripe
10. Stencil on a thick grain sack stripe down the middle of the dresser with Fusion’s Coal Black.
I selected G1L from the Grain Sack Stripe stencils in order to really make an impact!
- Remove all the drawers.
- Tape the stencil into place in front of the dresser.
- Stencil the image where possible.
- Replace the drawers.
- Line up the stencil with the other stenciled areas.
- Stencil the front of each drawer until complete.
How to stencil with no paint bleed:
- Tape stencil into place using masking tape.
- Load stencil brush with paint, then remove most onto a cloth until brush feels dry.
- Hold hand across the middle of the stripes near where you plan to stencil.
- Tap, swipe or swirl brush for desired effect, taking great care to not move any of the stencil stripes around.
Video tutorial: stencil a grain sack stripe
View above to see a short video on how to achieve an effortless grain sack effect! Tapping the brush will create a stronger toned stripe, while swiping will give a more transparent effect.

The finished faux wood dresser makeover!
And the end result is a moody dresser with a sophisticated rustic wood grain vibe!

I love how the texture left really resembles a soft wood grain! And the black accents really make those features stand out in just the right way. Isn’t it fun?!
The nice part about painting a faux wood grain is the fact that you can tone the wood to anything you wish! This combination ended up being midtone, which works well in my home. I recommend trying different colour samples on scrap boards to see what outcome you like best!
ie: a whiter background plus lighter stain = more of a restoration hardware finish
And since the dresser is so cute now, I couldn’t bear the thought of moving the piece back into my messy office!

The red dresser use to sit in the back corner buried with dust and other furniture! I’ve since deleted the photo from my phone, so you’ll have to take my word for it this round.

Downstairs office makeover HERE
So that’s when I started ripping up carpet, painting the floor, dismantling and rebuilding the desk, painted the walls walls and restocked all the storage shelves for this light and bright and oh-so-clean awesome outcome!

Stylish dresser that stores office supplies
Lookit you dresser, peeking from the corner of the pretty room. You’re there, but not blatant. You are not reminding me of all the office work I should be doing. Oh no! You discreetly hide all my supplies while looking silent and dignified and so tidy.
Thank-you.
I just thanked a dresser… do I need a vacay?
Shop the above look: faux small olive tree, rustic wicker baskets, metal mesh lamp, faux grass plant.

Shop the above look: cement planter, faux round plant, black wood coat rack, buffalo check blanket, jute mat, faux boxwood wreath.
Now just imagine a coffee table, kitchen table, chairs, trunks, a garage door, a front door, or really, any DIY project you wish!
I’m still a huge fan of real wood grain. But how fun to get to pick and choose to either coat a furniture piece with a solid coat of paint or a stained wood look with just a small amount of paint!
I’ll take that option over paint stripper any day.
Video tutorial on Hometalk
And HERE is the video tutorial posted on Hometalk’s Facebook page.
Have a painted piece you can try this technique out on?
Check out other creative dresser makeovers HERE
View many other unique furniture makeovers HERE
Paint that looks like wood on a dresser makeover
Supplies:
Instructions:
- Clean the piece with TSP Alternative.
- Give the furniture a scuff sand all over or use an orbital sander.
- Paint the drawer fronts and the rest of the dresser in Algonquin.
- Apply stain to all the painted areas, then remove most starting with a rag while leaving intentional streaks.
- Swipe the surfaces with a rough paint brush or whisk to create more woodsy texture.
- Allow to dry for several days.
- Paint the drawer pulls in Coal Black.
- Remove drawers, and stencil a thick grain sack stripe down the center of the dresser.
- Insert the drawers, and align stencil to existing stripe to stencil over drawers to match it all up.

This is such a great technique Donna, I have done similar with chalky paint and dark wax. I love the depth you achieved, and the strokes of the stiff broom!
Thanks Cindy! And it’s so easy too! I’m actually curious to try lighter tones next round to see how it turns out!
Can I do this over a melamine -white laminate- dresser?
And how would the steps differ? Thanks, this is very cool.
Thank you, Darlene! You first need to put something on the melamine so paint would stick to it. Fusion‘s ultra grip would work. Then paint and stain.
I’ve seen similar techniques to create a faux wood grain, I think your dresser turned out really cute! I’m looking for the perfect piece to try this out on.
Thanks Tania! I’m anxious to try some different tones now that I have the hang of it! Good alternative to endless paint stripping at the very least.
Yup you need a vacation, but OMW that dresser looks so good!!! We have a mustardy, yellow one that’s hiding in our garage, and I can’t wait to try out your technique. But I’m not tidying the garage. That will take me a month of Sundays, and no one’s got time for that.
Hahaha oh come on Michelle, I challenge you to do the garage as well! I did mine about 3 years ago and ever since I made sure to leave space for parking, I’ve managed to keep it up! If you CAN’T store stuff, you just don’t. The process took me several months, so there’s that. LOL
I’m going to watch for your dresser rendition because now I have expectations here… 😉
Challenge accepted—the dresser part, not the garage bit 😁