
With the upcycled dollhouse project officially behind me, it’s time to start dreaming up new creations and gathering finds for the Olde Farmhouse Vintage Market at the end of May.
Yikes! There isn’t much time. I’m not stocked up like a store, so I’ll really have to hustle.
I really want to put a good chunk of that reclaimed old fence wood to work, so today I came up with such a cute, quick and simple idea anyone can make in minutes!
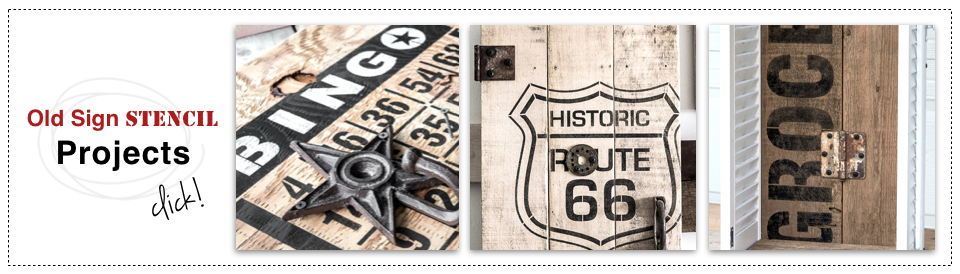
I call this one the Route 66 reclaimed wood puzzle coasters.

Mr. Lake is going to guide me today.
Right after he ensures the killer birds stay at bay outdoors.
Don’t know what I’d do without this fella.

1. Cut four square pieces of wood.
2. Alternate the wood grain, then fit together.
Using the natural width of a fence board, 4 pieces were cut so they’d be square.
Then the wood grain was turned on every other one, to give them more variation.
Gotta love those worm holes!

3. Place stencil of choice on top of wood.
4. Stencil with a very dry brush.
(Learn how to stencil for exceptional results HERE)
The 10″ Route 66 stencil was then placed in the centre of all the wood.
Using a VERY dry brush, the image was tapped on with black acrylic craft paint.
No glue adhesive was used under the stencil. Because I’m improving! Whoop! 🙂
But if you’re just starting with stencils, do use spray adhesive. Your lines will be much sharper.
 5. Coat with a wood wax for ultimate protection.
Sing it with me..”You aaaare… so beautiful… to meeeee.”
I LOVE how rustic and rugged these look!
Just a light coat of a wood wax of your choice for protection, and you’re done!
I’d suggest Miss Mustard Seed Furniture Wax (affiliate link) if you wish for the wood to return to its natural patina. It’s perfect!
6. Go grab a coffee to test run them.
Cute, right? Just like a puzzle!

7. Admire how cute they are.
8. Then make yourself a set if you’re giving these away as a gift. Because they make awesome hostess gifts!
I love how each piece chimes in with the same style, but is different.
I’m one of those people that prefer random over symmetry, so this design does it for me.

And here is one set, all wrapped up and ready for the show.
But first? Coffee time!
Blame it on the coasters…
 You can find the Route 66 stencil design HERE.
Visit more reclaimed wood coasters HERE
I love these Donna, so simpel but look amazing! Good luck stocking up!
Dual purpose, super cool gift idea, Route #66… love these!!!
These are beyond cute and clever and I know you’ll sell every set you create! Oh my, a must try.
Those are awesome Donna! Hope you’re making lots because I’m sure they will sell very quickly.
Love this! Puzzle coasters! Brilliant!
Oh my goodness, these are so cute. I JUST (like minutes ago) finished up some my write up on some coasters for a bonus scraps chapter in my book. Mine are plain–love the stencil on them!!
WOW…ever clever and cute-as-can-be! These are going to be a hit at your booth, Donna! And it looks like a project I might be able to handle as long as someone cuts the wood to size for me. I can especially handle #6…hehe! Does the MMS furniture wax need to be re-applied every so often due to the type of usage coasters see?
They turned out fabulous, Donna! I love them!
Happy Easter!
Julia
Love these! What a great idea!
great coaster, love your style
Hello Donna, I’m so happy I came across this website. Really, I’ve seen a lot of people with great idea’s but when I saw this site I thought these projects are unique. I love it!! Right off the bat I had wood scraps that I could get started on two projects and so I did. I made Route 66 coasters and the Ruler coasters. They came out SO GOOD and I thought I wasn’t a good ”stenciler” I told my friends about FUNKY JUNK INTERIORS they love it!!! They were anxious to see my projects. When I finished I got a OMG they are amazing!! and.. A THOSE r to cute!! We all decided to get together, have lunch and each of us is working on the project of there Choice. Brillian!! Ideas and great gifts! Thank you had lots of fun making them and very easy to make