Transform an old file cabinet into clever, space-saving garden tool storage that keeps your outdoor essentials tidy and easily accessible! A creative DIY project that is affordable and useful by combining recycling with functionality for every gardening enthusiast.
As a Fusion and Amazon Influencer, this post contains affiliate links in which I earn a small percentage from qualifying purchases at no extra cost to you. If you shop Fusion Mineral Paint products through this post, you will get 10% off. Thank-you for helping to support my blog!
Is there ever enough floor space for garden tool storage possible?! I think not! With so many moving parts, loose garden tools in the wild are challenging to keep organized.
I have an old shed out back, but it’s always too jam packed to reach anything. Plus it’s just not really all that accessible where I like to grab for the tools, which is near the front of the house.
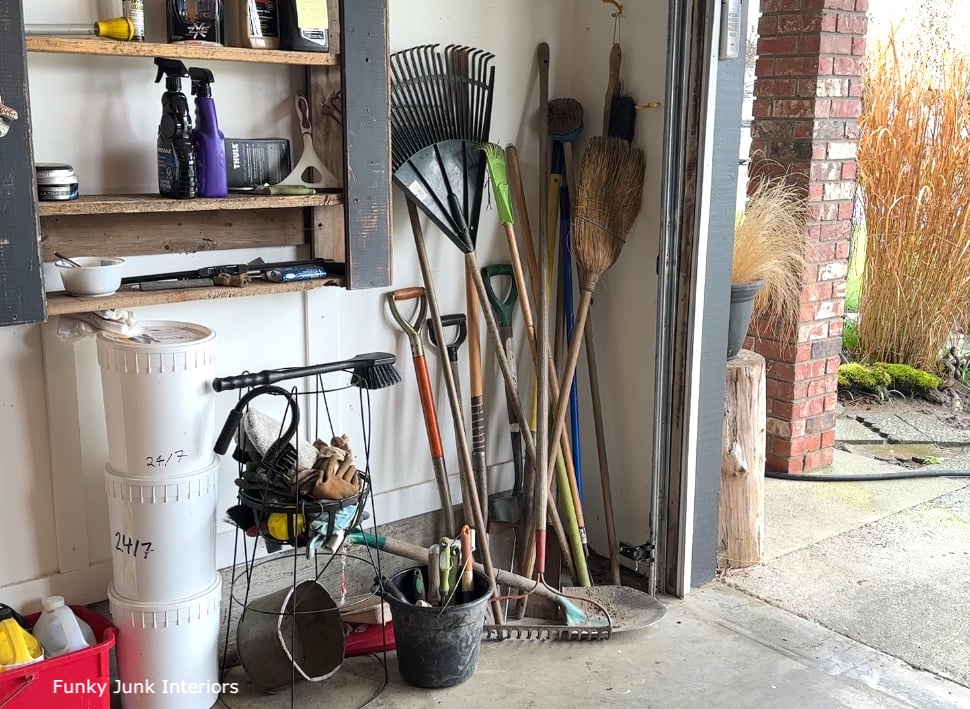
So here’s what generally happens to our long handled garden tools and hand garden tools. Bunched up in this corner, half falling over, and hard to grab what you want without the works coming down on you. You get the idea.
Not to mention, if I only want a few hand garden tools, I have to dump the whole bucket to find my favs. Not great. I clearly needed some kind of decent garden tool organizer!
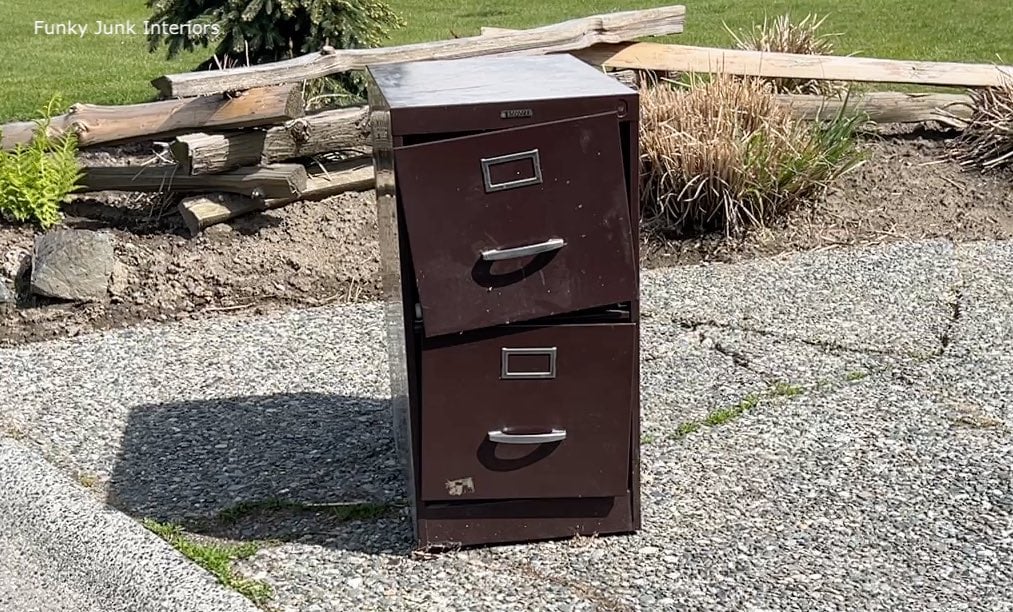
Old file cabinet yard tool organizer?
Enter an old file cabinet found on the curb. It isn’t much to look at now, but the fact that this is metal and won’t rot was enough for me to work with!
After measuring the file cabinet, I knew it would work to store my yard tools. So after removing the file cabinet drawers, I put my little file cabinet garden tool storage idea to work!
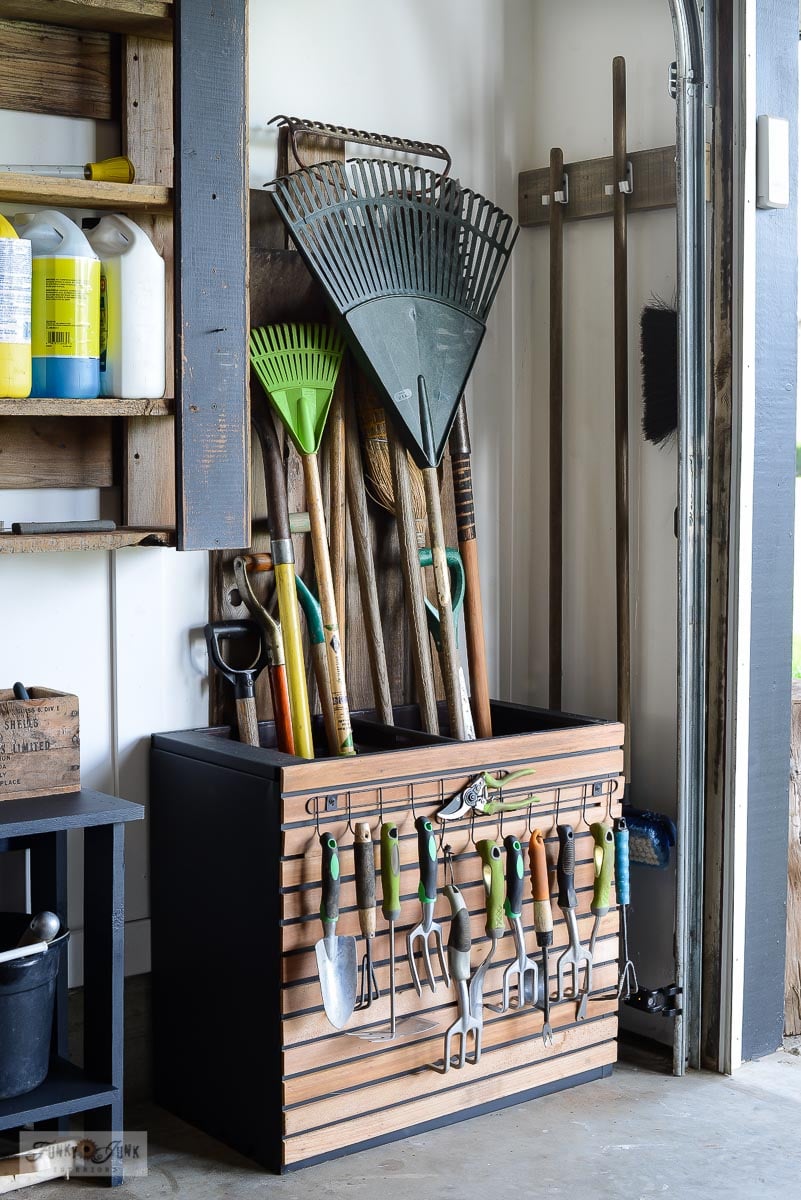
And the result? Not only is this DIY garden tool storage idea easy to make, it looks like a million bucks too! The cabinet can store a ton of both smaller and larger garden tools that are separated and easy to grab, which makes it perfect for smaller, compacted spaces!
Want a garden tool organizer too? Here’s the inspiration to make your own!
Space-Saving DIY Garden Tool Storage With An Old File Cabinet
Supplies I used
Fusion Mineral Paint in Ash (get 10% off)
Heavy duty glue sticks meant for wood
Cordless drill (I like Bosch and Makita) and very short screws
Row of black metal hooks (or Dollar Tree hooks spray painted black)
Fusion Mineral Paint in Ash (get 10% off)
Painting the file cabinet
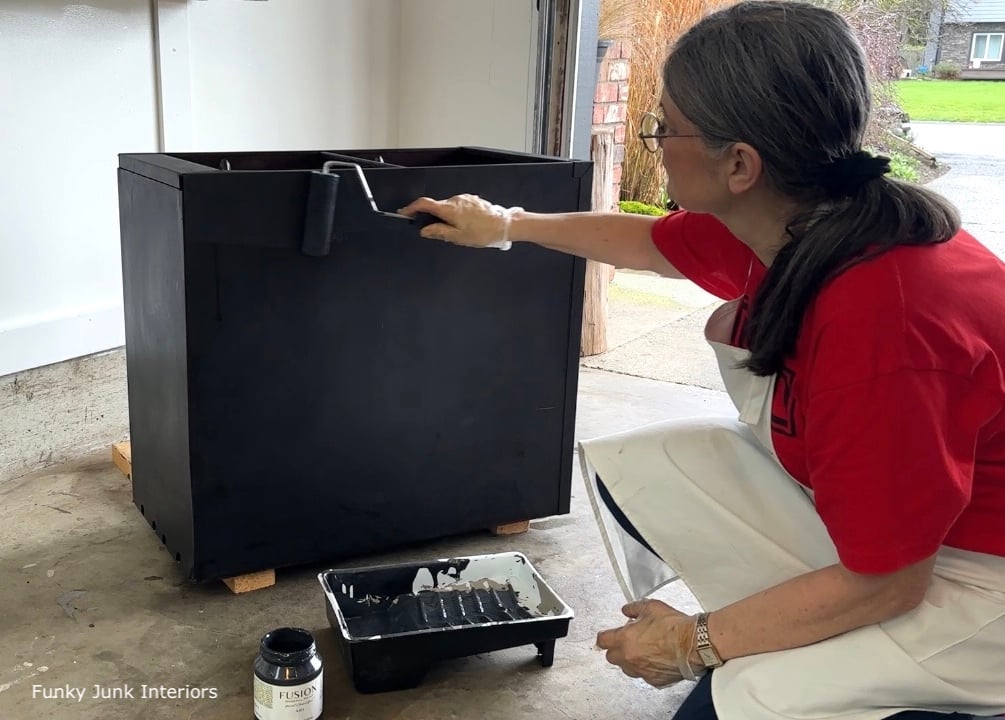
1. Remove the file cabinet drawers, and clean well.
I used a spray hose, then hot soapy water to clean the cabinet inside and out and allowed it to dry.
The metal drawers were brought to the metal recycling at the dump since I didn’t have a need for them. But in hindsight, they could have made some neat non-rotting small planters. Ah well.
2. Paint the outside of the cabinet in colour of choice.
Propping the file cabinet onto two wood blocks, I rolled on Fusion Mineral Paint in Ash, using a velour roller and a small paint tray.
The roller makes coverage quick and easy, while leaving absolutely no brush strokes to the painted finish!
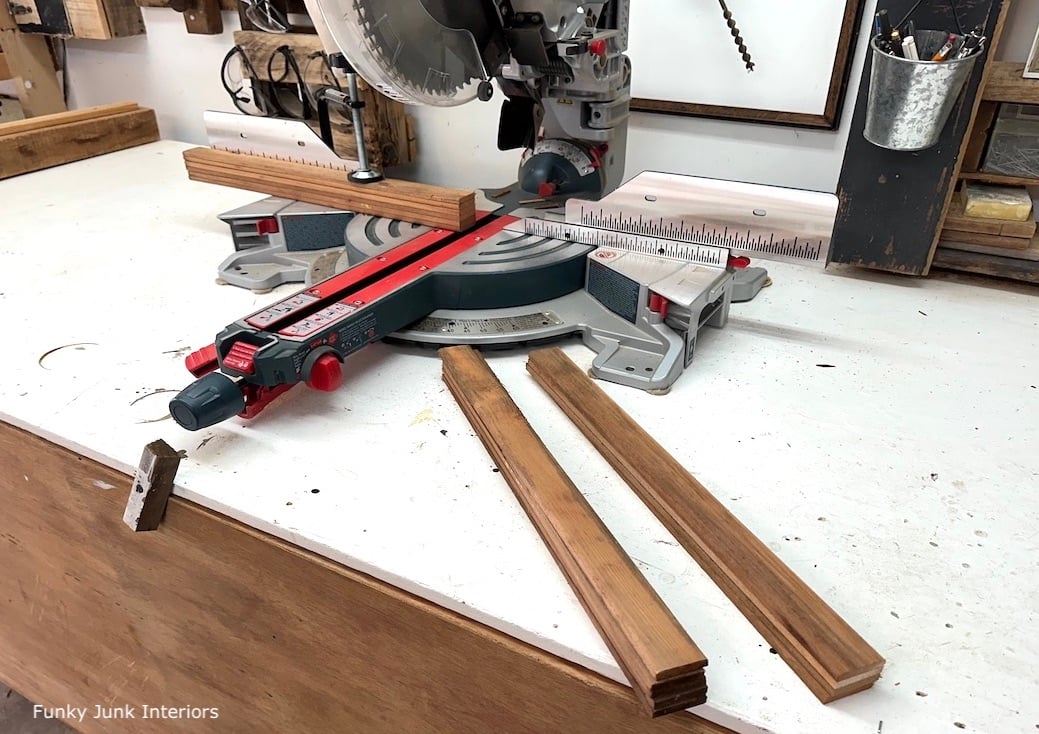
Cutting cedar strips to size
3. Measure the file cabinet width, then cut 1.5″ cedar strips to that length. Then lightly sand with a sanding sponge.
I chose to cover the front of the file cabinet with cedar strips to give it an upscale, woodsy look!
I bundled up the cedar strips, cut one end clean to start, then measured and cut the other end, creating 3 piles which was enough to cover the entire front of the file cabinet.
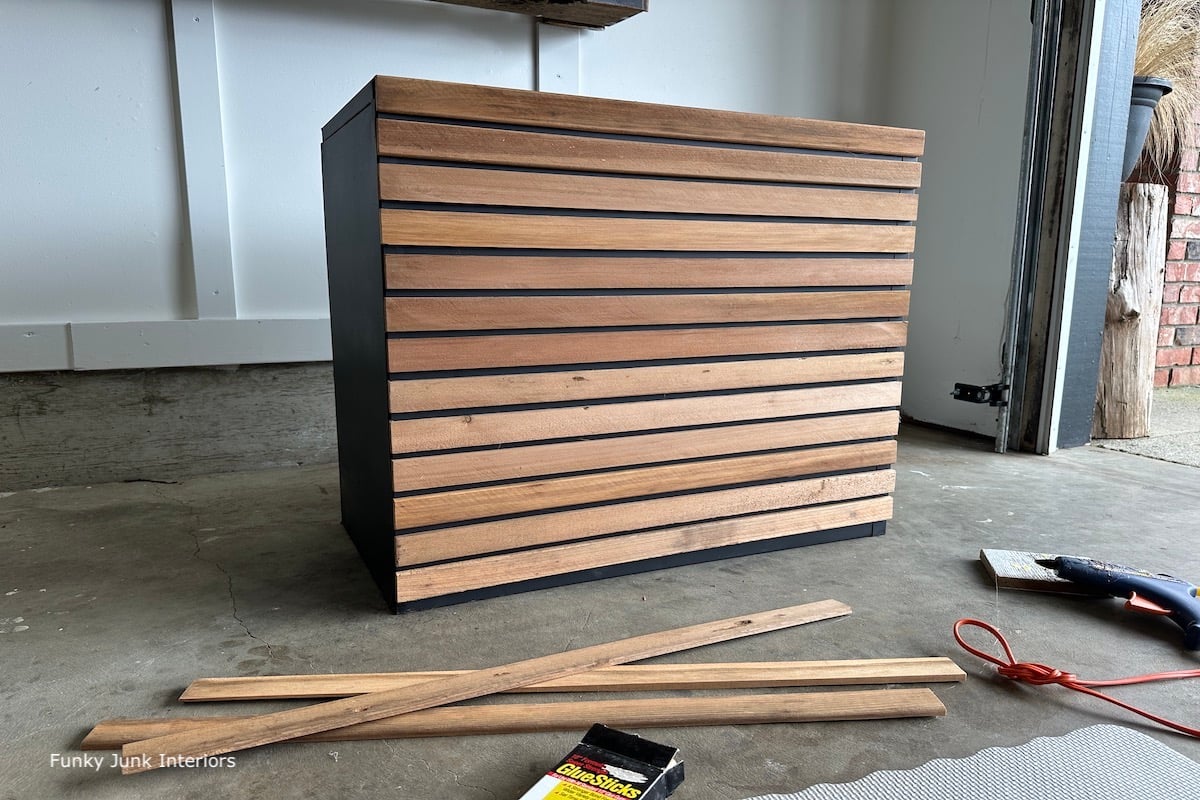
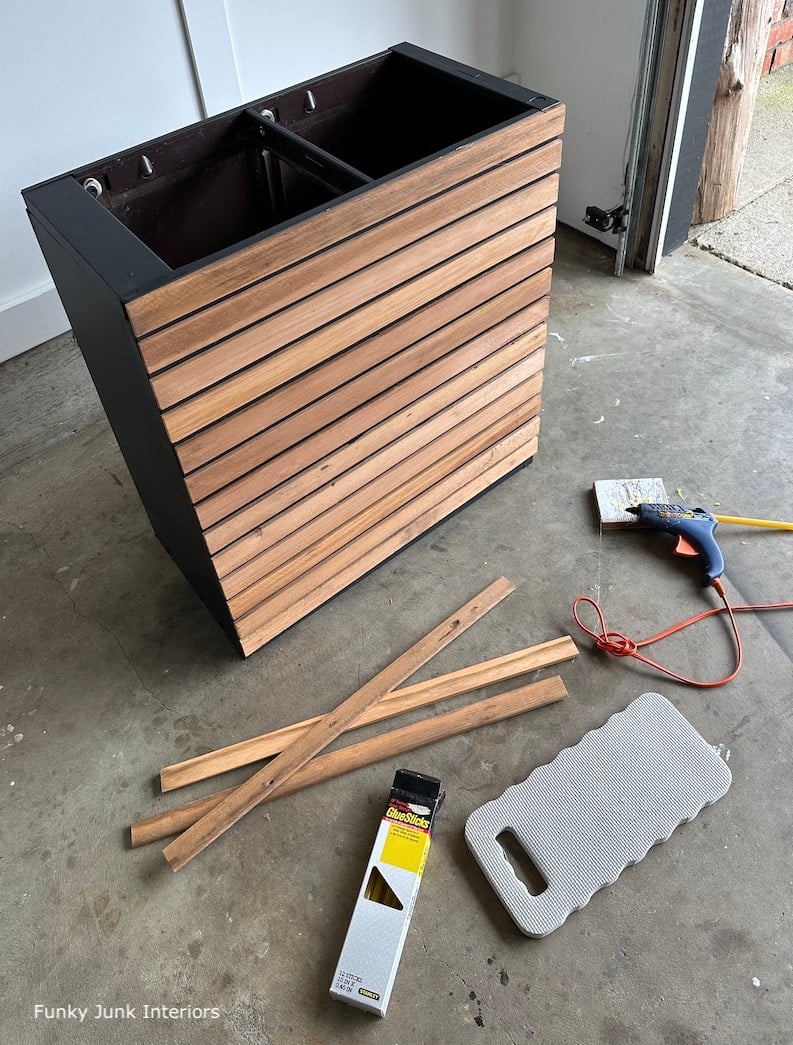
Gluing cedar strips to the front of the file cabinet
4. Hot glue the cedar strips to the front of the cabinet from left to right, while leaving a small space in between each strip.
I used a super heavy duty glue stick meant for woodworking. I applied glue to the underside of each strip, then positioned it into place, holding it for a moment until the glue took.
The entire front of the cabinet was covered, while leaving a small metal gap along the bottom should the garage floor ever get wet.
Heavy duty glue sticks meant for wood
I found these glue sticks to be VERY aggressive, so you only have one shot at positioning them while working quickly before the glue cooled off.
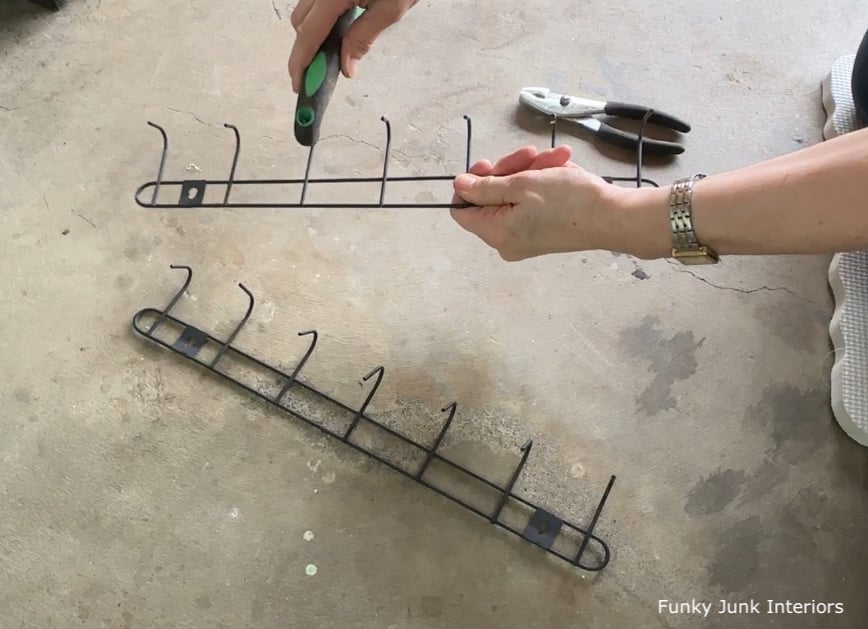
Preparing a row of hooks to hang hand garden tools
5. Select a row of hooks that will be long enough to cover the entire width of the file cabinet front.
I selected these two rows of hooks from the dollar store, then spray painted them in black grill paint, which made them very durable!
Since the hooks were a little too curved for most hand garden tools, I used a wrench to bend the curve to more of a straight shape along the bottoms. This worked out perfectly.
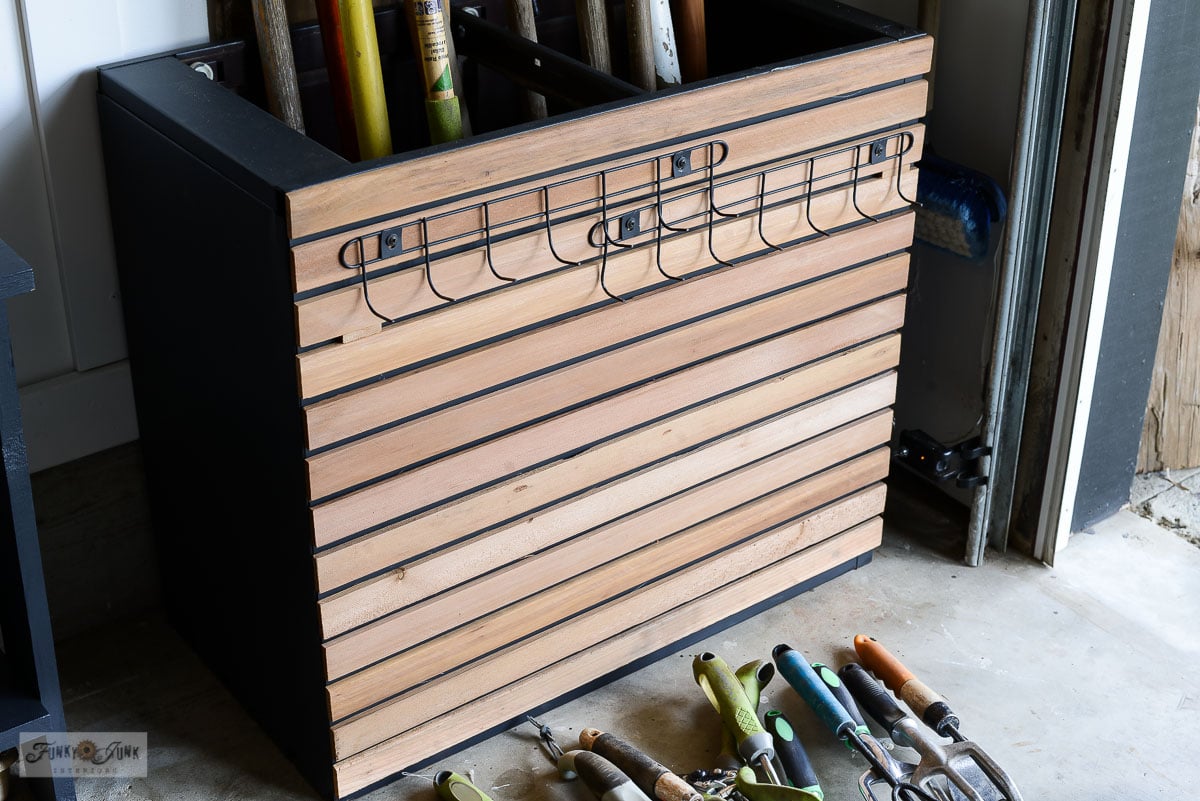
6. Install the hooks across the width of the file cabinet, attaching them to the wood strips with screws.
Since the hooks overlapped the width of the cabinet, I layered one under the other which worked out fine.
Very short wood screws were used to attach the hooks to the wood strips.
Tip: My screws were a little too long, which pushed the wood strips off the cabinet! So use very, very short screws, or metal screws that can penetrate through the cabinet, or just try very strong hot glue to hang the hooks.
Since one strip fell, I helped support it by cutting a tiny piece of wood to fit inside the space of the cedar strip that supports the bottom row of hooks.

Creating wall protection barrier behind file cabinet
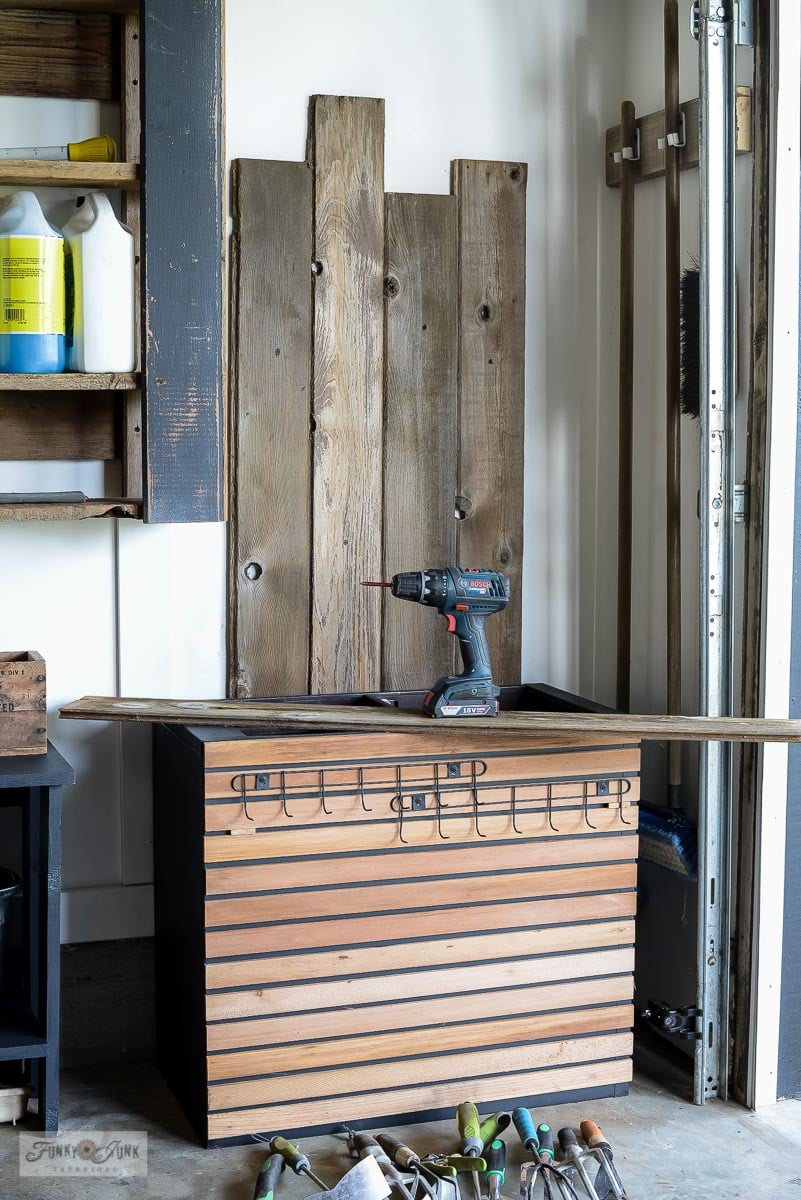
7. To protect the wall behind the cabinet from garden tool damage, consider covering it with something.
Using long reclaimed wood planks, I screwed them to the wall behind the cabinet with a random alignment. It was quick and easy and did the trick! There was no need to hit wall studs since these boards won’t hold any amount of weight.
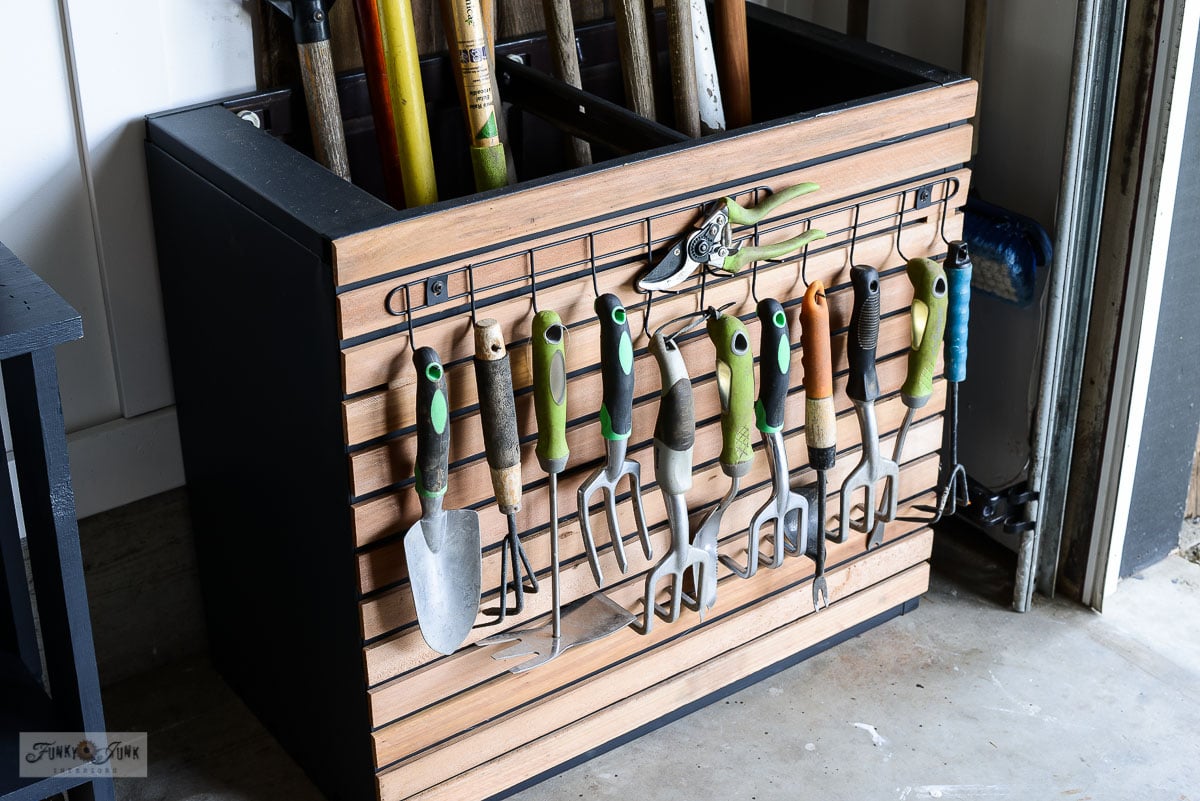
Hanging up hand garden tools on hooks
8. Load up hand garden tools along the hooks.
Well now, this was fun! Not only did pretty much all fit, I even had a special place for my hand pruners right where both row of hooks joined!
Amazing, right? So easy to spot which hand garden tool you wish to use while leaving the rest neatly organized!
Loading the long handled garden tools
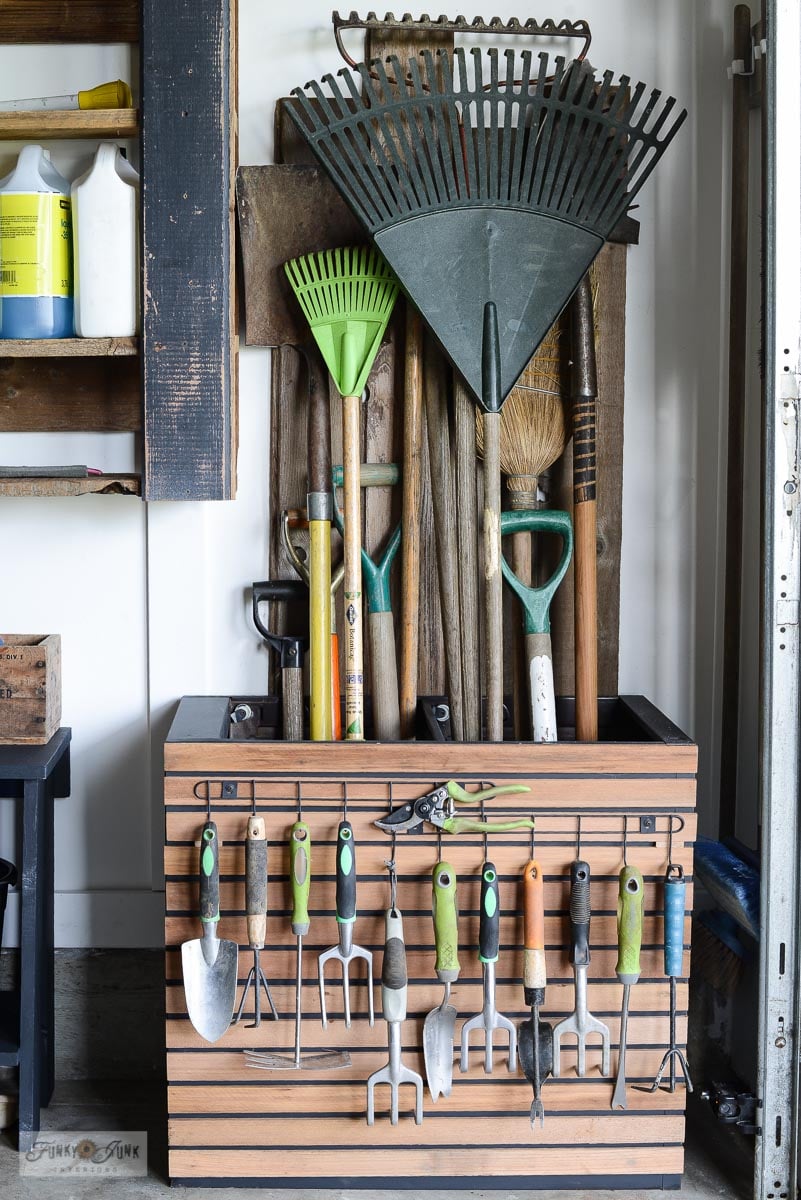
9. Load up the file cabinet with the longer garden tools.
I stacked the taller tools first, then added the shorter ones in front, leaving the largest plastic rake for the very last.
Since I couldn’t decide if the handle should be up or buried in the cabinet, I did a mix of both. As long as I can find the tool I’m after, this is good enough for me!
I mean, look at all those tools! So neatly in their place, and they can’t fall over since the height of the file cabinet is absolute perfection for this!
And since the cabinet is metal, it won’t rot. It could rust, but not likely if your area remains dry.
Completed DIY garden tool storage with an old file cabinet
Regardless, this DIY garden tool storage from an old file cabinet is not only super productive, it’s actually gorgeous to look at too, don’t you think?! I’m so pleased with the results, and so glad I gave that old file cabinet a chance!
Will you be giving an old file cabinet a 2nd glance to give this garden tool storage idea a try?
Other unique garden projects to make:
Old window turned cold frame for the garden
Upcycled container vegetable garden for areas you can’t dig
DIY stepping stones made with food containers
See many other unique garden projects HERE
Sign up HERE to receive our newest posts via email!
DIY garden tool storage with an old file cabinet
Tools:
Supplies:
Instructions:
- Choose a file cabinet that fits the space you wish to use it in.
- Remove the drawers, then wash it down well. Allow to fully dry.
- Paint the outside of the file cabinet. I used Fusion's Ash using a velour roller for exceptional and durable results.
- With file cabinet positioned on its back, measure and cut cedar strips to the width of the cabinet until you have enough to cover the entire front.
- Using strong wood glue sticks, attach cedar strips to the front of the cabinet starting at the top, while leaving small gaps in between the strips.
- Attach a row of hooks to a higher front wood stripa to hang smaller garden tools. Take care to use very short screws, or longer metal screws that penetrate into the cabinet.
- Protect the wall behind the cabinet by attaching some vertical reclaimed wood boards with screws.
- Load the file cabinet bin with long handled garden tools, and hang shorter hand garden tools on the hooks. And enjoy your newly organized garden storage space!
I love this idea! Thanks for posting!!
Thanks Susan! I’m even diligently washing off my tools now because they have such a pretty home. haha!
Thank you so much for sharing!! I did something like this with an old file cabinet, but yours is so much nicer! Inside of the file cabinet I put PVC pipe(various sizes) cut to size so they don’t stick out. Helps to hold up the tools and not get tangled. I love the wood front with the hooks for small tools! Think mine will be getting a little make over……
Thanks Vera! I love that you tried something similar, especially separating the tools! Good though! I’m so happy with this setup… it feels so fancy. LOL
Great idea! I made one several years ago to hold my wood scraps. It’s yellow with pegboard on one end.
Thanks Tania! Love the sound of your setup, I’m intrigued!
I always enjoy seeing what you create out of curb items and reclaimed wood. I love your style and creativity! Maybe some day I can try this one out.