Looking for a creative and functional way to store your produce? Try making your own hanging wall baskets! This DIY project is easy and will add a unique touch to your kitchen.

The decorator in me has always dreamed of having a large enough kitchen with a place for every little thing, all spread out roomy-style. Home decor with elegant placements, if you will.
I’ve managed to come up with some unique storage ideas, like these kitchen crates on a wall with the stacked scrap wood phone shelf (tutorial HERE) working out well!
However in reality, my kitchen is actually fairly small. So I have to become creative where a decorative piece comes into play, especially for my coffee addition, pantry goods and produce!
So lately when Hometalk challenged me to create a video tutorial of hanging wall baskets for produce, I was all over it! Why didn’t I think of that?!
It may have a little to do with having no wall space available… heh. Then again, I have an antique phone hanging in my kitchen storing charging cords, so who am I to say I don’t have space again?! Hmm…
Regardless, I couldn’t wait to come up with my own version of farmhouse-style wall storage baskets that could hold fruit, produce, snacks or any small items desired!
The end result is not only super helpful, it’s rustically cool to look at too! So if you too are tight for space, consider going UP with this affordable version using simple scrap wood and dollar store baskets!
Rustic DIY hanging wall baskets for produce storage
Supplies you’ll need
Wood planks
Cedar strips for supports
Coal Black DIY paint by Fusion Mineral Paint (get 10% off)
Cordless drill and screws
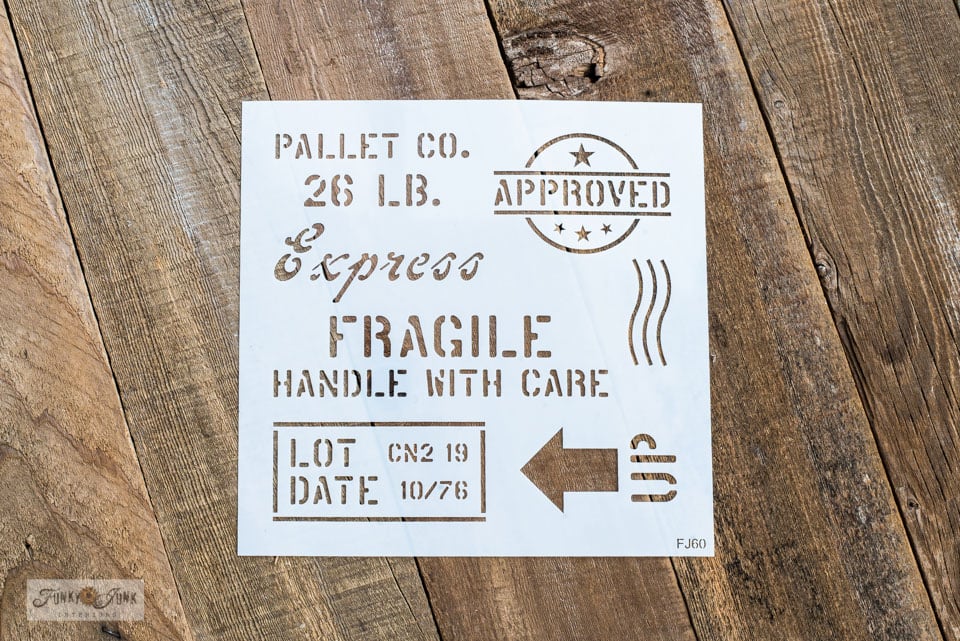
Stencils: Pallet Stamps and Shipping Crate Stamps
Various sized woven organizing baskets (similar to these!)
Black cup hooks (I spray painted mine black)

Choose your storage baskets
1. Select storage baskets.
I landed these woven black ribbon baskets at a local dollar store. (HERE are some very similar black woven baskets!) It was an extra perk that they came in various sizes, so there are more choices for both small and large items.
I felt the texture was interesting, plus the flat edge helps to hang them up easier too!
However, most any small storage basket can work by hanging from a handle or curved woven loop somehow.
![]()
(the above image is borrowed from Chevron Christmas Tree HERE)
Dry-fit boards with baskets on top to determine size
2. Dry-fit planks side-by-side, with two cedar strips for horizontal supports. Then arrange the baskets on top to determine the size of the wood background desired.
I sized my hanging wall baskets based on the baskets I gathered up.
My basket sizes:
- largest
- smallest
Board sizes:
- 3 boards at 5.5″ x approx 42″ long
- 2 cedar strips: 16″ long
Overall finished size:
- 16″ wide x 50″h (with jagged edges)
I also jogged the boards side-by-side randomly so they weren’t perfectly aligned straight along the top and bottom just for something different.
This is a good time to decide how you’d like to stencil the boards as well if desired!
![]()
(the above image is borrowed from Chevron Christmas Tree HERE)
Assemble the main boards together with cedar strips
3. Cut the cedar strips to measure the width of your boards.
- Place the 2 cedar strips across the boards horizontally.
- Mark two pencil holes over top of each board, then predrill holes so the wood doesn’t split when assembling, as cedar can be very brittle.
- Position the cedar strip back on top of the boards, then slowly pump the drill while inserting the screws so the wood doesn’t split.
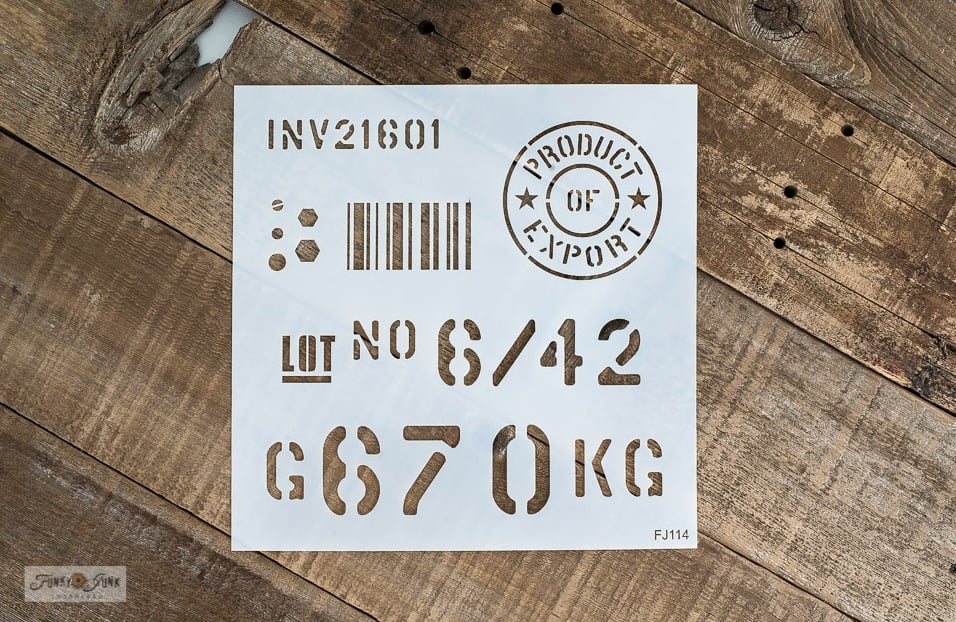
View Pallet Stamps stencil HERE
View Shipping Crate Stencil HERE
Check out ALL the crate-style stencils HERE
Crate-styled stencils to theme the project
Now for the fun part!
Since I was going for a super rustic look, I reached for two of my favorite stencils since they both have a rustic crate vibe called Pallet Stamps and Shipping Crate Stamps.

Stencil crate images on boards before mounting the baskets
4. Position where you want to mount the baskets.
5. Before installing the baskets, stencil parts of the crate sayings onto the wood where desired, in Fusion’s Coal Black for an authentic crate-stamped look.
How to stencil with no paint-bleed for flawless results:
- Dip dome-tip stencil brush into paint
- Remove most paint from brush with a rag until the brush ‘feels’ dry.
- Tap or swirl paint through the stencil until desired coverage is met.
View more tips and tricks on how to stencil with exceptional results in THIS POST.
Video tutorials: stenciling crate images on wood
View full tutorial: Crate side table with log storage
See full tutorial: Wooden crate dresser for paint storage

Immediately, the whole vibe of the project changed! Funny how a few discreet words can elevate plain wood!
Hang the board background onto a wall for easy leveling
6. Mount the assembled boards onto a wall, then level each component while installing them using a carpenter’s level.
I like wall mounting so I can use the level to make sure everything is straight, rather than endless measuring.


Install hooks to hang baskets with
7. Install two cup hooks for each basket where desired, then hang each basket.
- Since the cup hooks I used were gold, I spray painted them black.
- I ran a level across the top of each basket ensuring it was hung straight. Worked great!

The completed hanging wall baskets
9. Then fill up your new produce baskets to your heart’s content!
Isn’t it cute?! The hanging wall baskets for produce are not only super functional, it’s rustically charming as well, adding instant added ambiance to your kitchen or pantry spaces!
What is it about the natural beauty and warmth of produce anyway? I love seeing the natural fibers rather than always being hidden!
Plus, I think these baskets add a special elegance to store things thought to be so standard. This indeed pleases the designer in me!

The DIY hanging wall baskets are compact enough to hang on a wall most anywhere, even over an existing table or countertop!
I’ve always said if you are short on horizontal space, don’t forget the vertical option, and I think this project proves that theory nicely.

Size basket size with produce
And I love how each individual basket can be filled depending on their size. Smaller produce for the smaller baskets such as apples, all the way to onions or potatoes for the larger baskets, providing you use them up fairly quickly, as some of these items like living in the dark longer-term.
Another option is to use covered baskets (or make covers for them) for prolonged storage.
As for the hanging paper tags, I stenciled numbers on them to reflect produce dates. Can YOU remember when you purchased something?! I sure can’t! haha
Regardless, I think this is a super helpful and fun piece that can be used for so many other things!
Other ways to use these wall baskets:
- workshop
- office
- paint studio supplies
- sewing essentials
- toy storage
- office storage
- phone station storage
- front entry for keys, etc.
- bathrooms for essentials
- wall planters for herbs, flowers or plants for a touch of nature
…or anywhere else you can think of! Simply size the baskets to your needs, then hang it up.
Glad I was challenged to create these hanging wall baskets! It clearly shows there are no limitations to what a little scrap wood and a few handy storage baskets can do… wouldn’t you agree?
Video tutorial on these storage baskets
View the video tutorial for these wall storage baskets on Hometalk’s Facebook page HERE
How would you use these wall mounted storage baskets?

Other unique ways to organize things:
Wooden crates dresser makeover for storing paint
Pallet stenciled side table with log storage
View many other creative storage ideas HERE
Rustic DIY hanging wall baskets for produce storage
Supplies:
Instructions:
- Select baskets of choice.
- Lay out wood planks, then arrange baskets as desired.
- Cut planks to the desired length and width, and position side-by-side.
- Measure, cut and paint two cedar strips for horizontal supports.
- Attach the cedar strips to the boards with screws.
- Stencil random crate images in between where the baskets will be hung.
- Install assembled wood planks onto a wall for ease of leveling if desired.
- Insert two cup hooks per basket, then hang baskets up, leveling or measuring each one to ensure it's level.
Very cool! I usually hate that style of basket, but they look really great paired with your signature rustic wood and stenciling style!
Haha Tania! Thanks! I wouldn’t typically grab those baskets as a first choice either, but they ended up being perfect for this project, thanks to the flat sides!
I love the whole look of this, but especially the black on wood. Such a great combo. Good job!
Thank-you! I love the outcome as well!