Looking for a fun and budget-friendly fall decor craft? Learn how to make adorable fabric pumpkins out of socks with this easy no-sew DIY tutorial. Perfect for autumn home decor! We’ve embellished ours with real leaves and tendrils for a natural vibe! Then display them grouped or as single shelf sitters!
As a Fusion and Amazon Influencer, this post contains affiliate links in which I earn a small percentage from qualifying purchases at no extra cost to you. If you shop Fusion Mineral Paint products through this post, you will get 10% off. Thank-you for helping to support my blog!
I love a good DIY pumpkin project when fall rolls around!
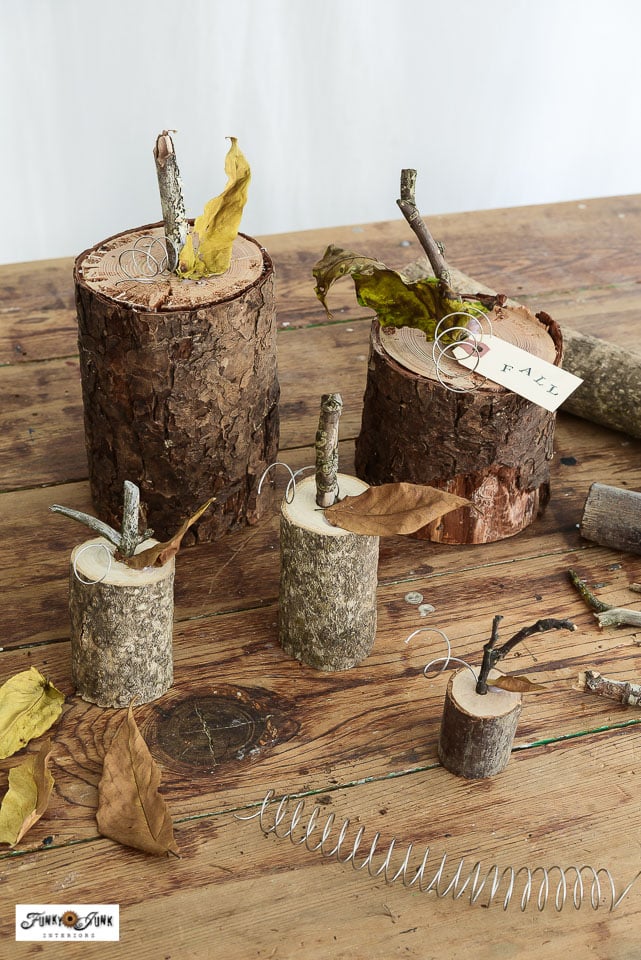
While I generally make DIY pumpkins out of wood like the examples below:
Other DIY wooden pumpkins
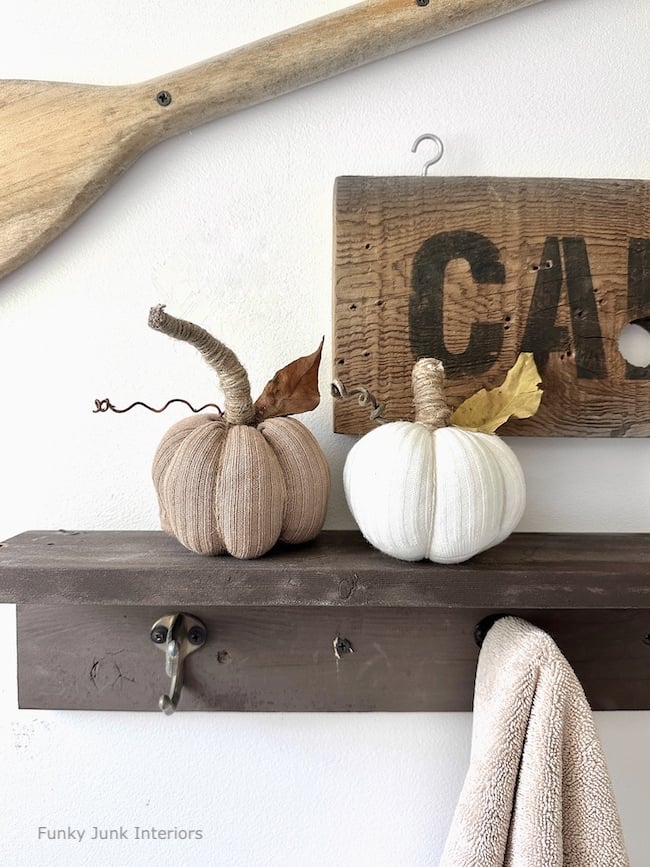
Rustic wood block pumpkins with Pumpkin Patch Sign
Wooden jack-o-lantern pumpkins made with 2x4s
I’ve been curious about sock pumpkins in particular!
My main inspiration for fabric pumpkins is thanks to my friend Deb at Homeward Found Decor, who actually invented what she calls sweet sweater pumpkins she’s modified in different ways many times over!
Using socks appealed to me since they were basically already sewn, and I love the size they tend to end up at! You can use socks that you already have, or in my case, our kind of socks are sports and not the vibe I was after. So 1 price-efficient purchase of new socks from Amazon landed me all the sock colours I desired!
Sock pumpkins are not new to the internet. If you do a search, and you’ll see a sea of different ways to make them! However, I wanted to try my own interpretation with a dash of nature added… so here’s the instructions on how to make a funky junk version of fabric pumpkins made out of socks… with a rustic, natural twist! No sewing stitches needed.
No-sew fabric pumpkins made from socks: with a natural twist!
Supplies I used:
One package of 6 neutral socks I purchased from Amazon HERE
(or use any new or used sock or scraps you wish!)
Outdoor leaves (find faux fall leaves HERE)
Grapevine tendrils once dried
Choosing the right socks
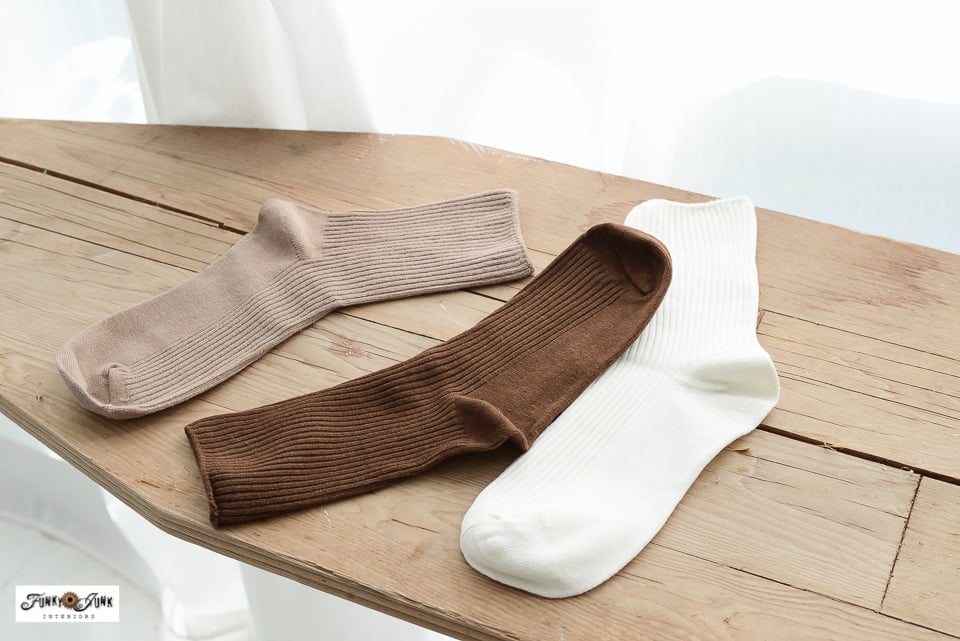
1. Select the socks you’d like to make your pumpkins out of.
I chose a package of 6 pairs of brand new neutral socks since I was going for a certain, neutral look in a variety of colours. Plus, they look like a new craft!
However any used socks in good, clean condition can also be used. I’d suggest solid colour socks for the cleanest look.
Preparing the sock
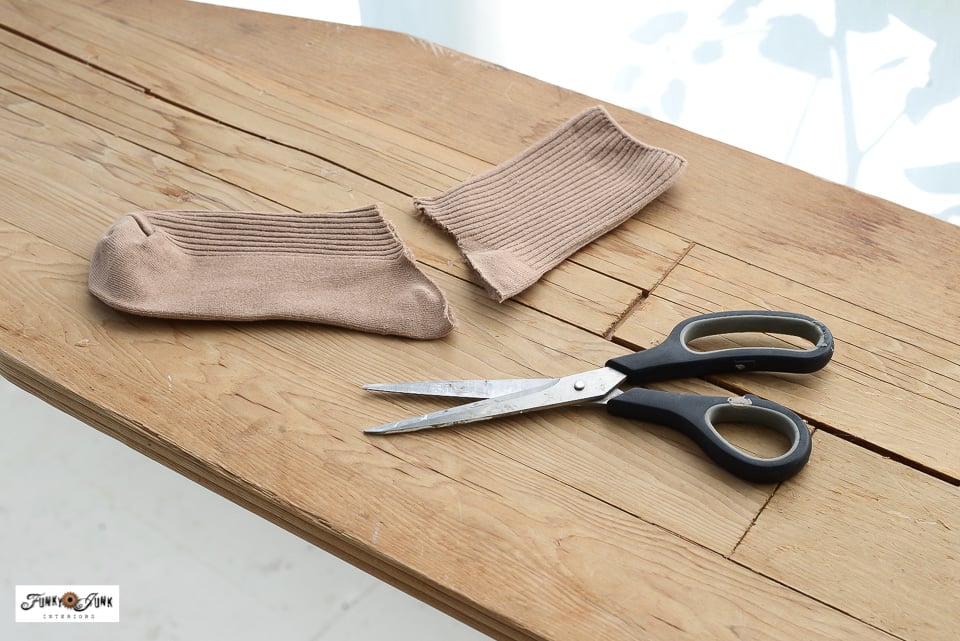
2. Cut a sock at the heel mark, then straight through on an angle.
The only template you need is this cut sock. LOL However you can also experiment with more of an angled cut, straighter, shorter or longer for different results. Don’t be afraid to play!
Stuffing the sock
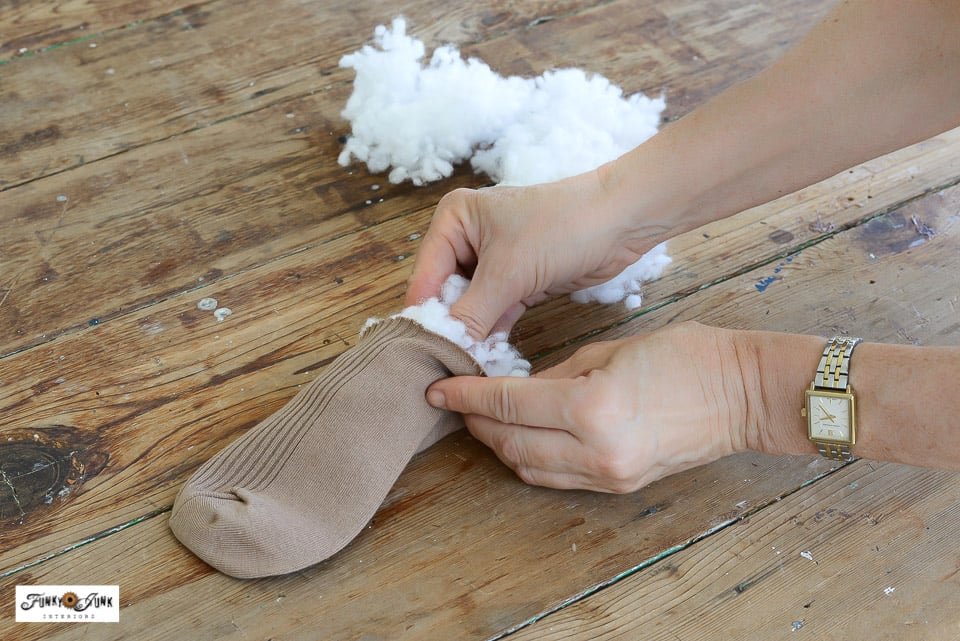
3. Stuff the sock with pillow stuffing, leaving some space at the top of the sock.
I borrowed stuffing from an old couch cushion I had on hand, however any kind of stuffing that creates a good squishy spring to it like a pillow will work.
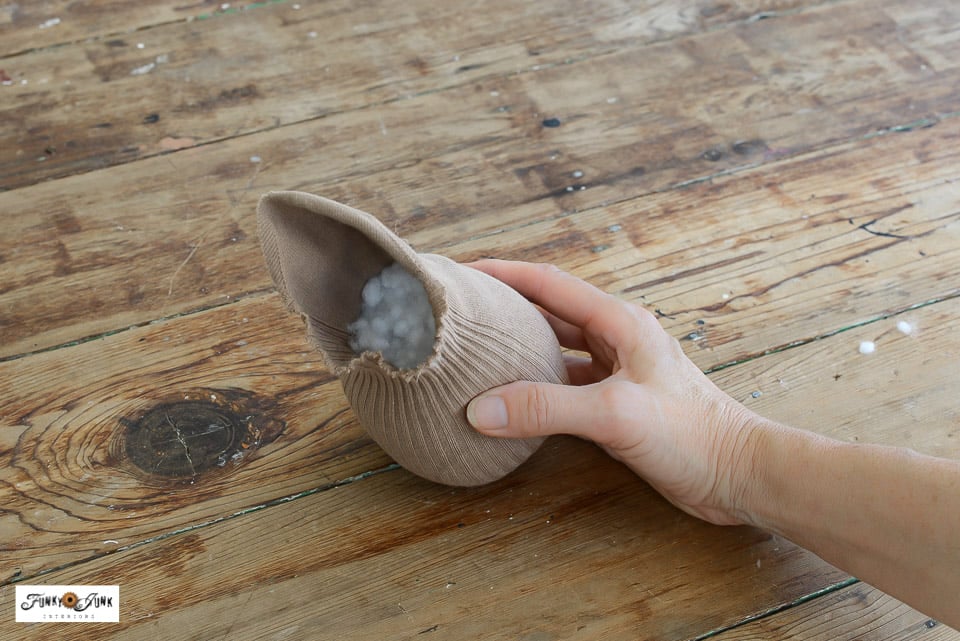
The stuffing was compacted down into the bottom of the sock, allowing for some extra fabric up above so the sock can be tied shut.
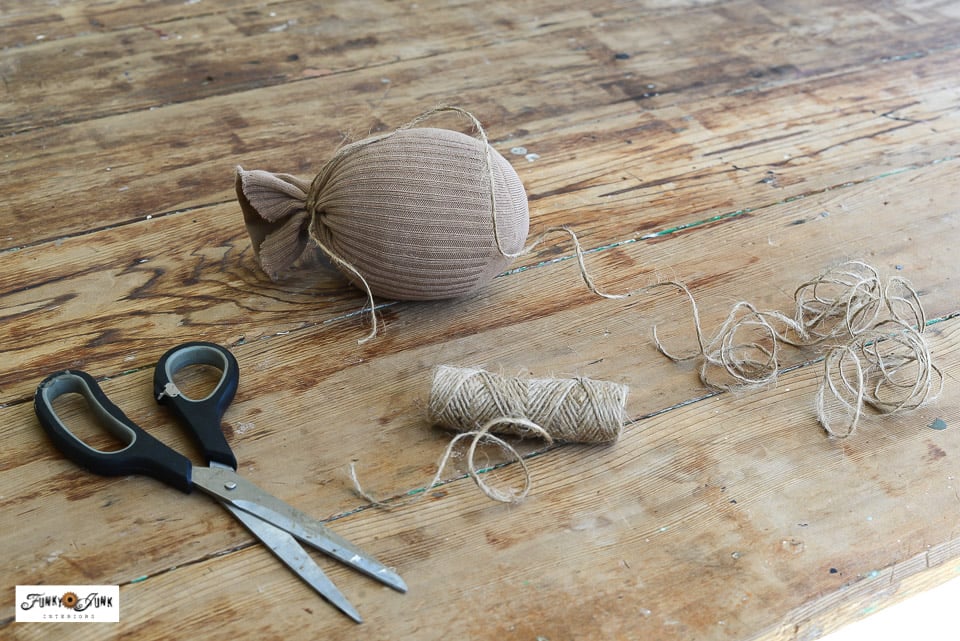
Closing the sock with twine
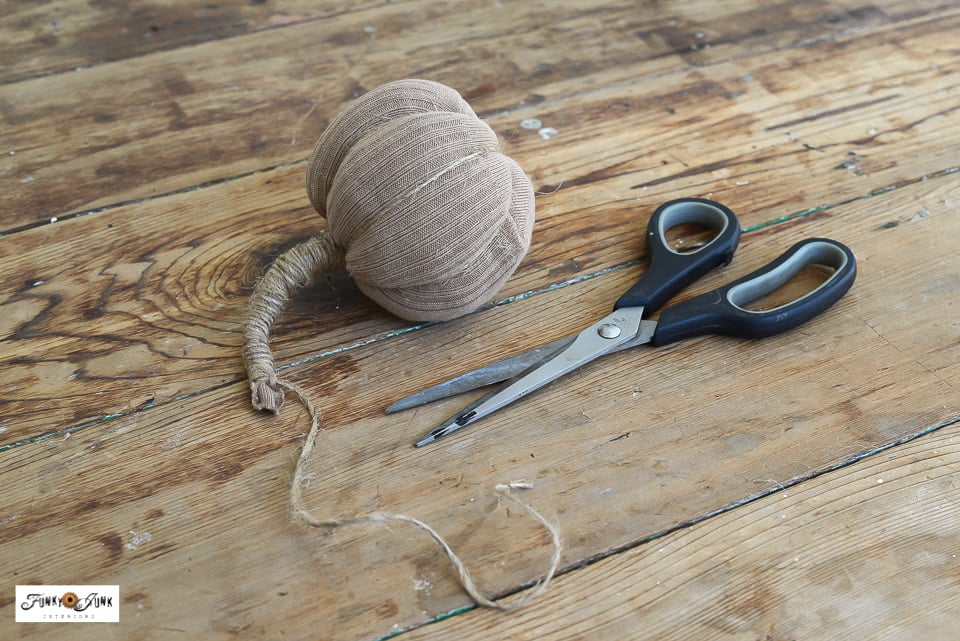
4. Using about 3 arm’s length of thin twine, twist the sock to close the top, then tie the gathered area shut with twine, leaving one end short, and the other end with the rest of the twine long.
Other wrapping options
I used thin twine that was coloured close to the sock shade. However you can team up lighter socks with white string so the lines disappear moreso. You can also colour-coordinate socks to applicable embroidery thread or different tones of yarn to suit.
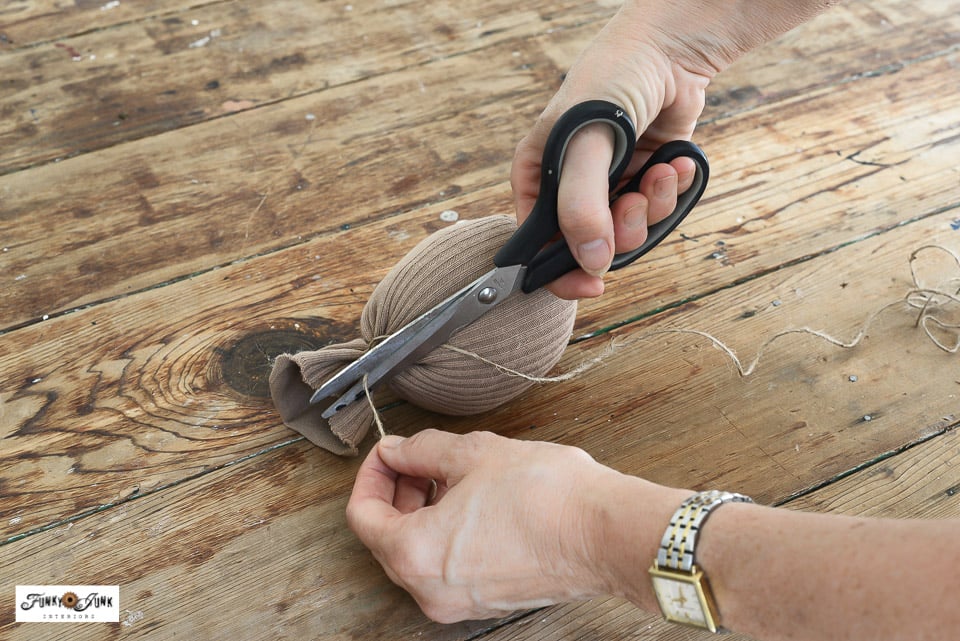
5. Cut off the short end of the twine right to the edge of the fabric with scissors.

Wrapping the sock to achieve pumpkin details
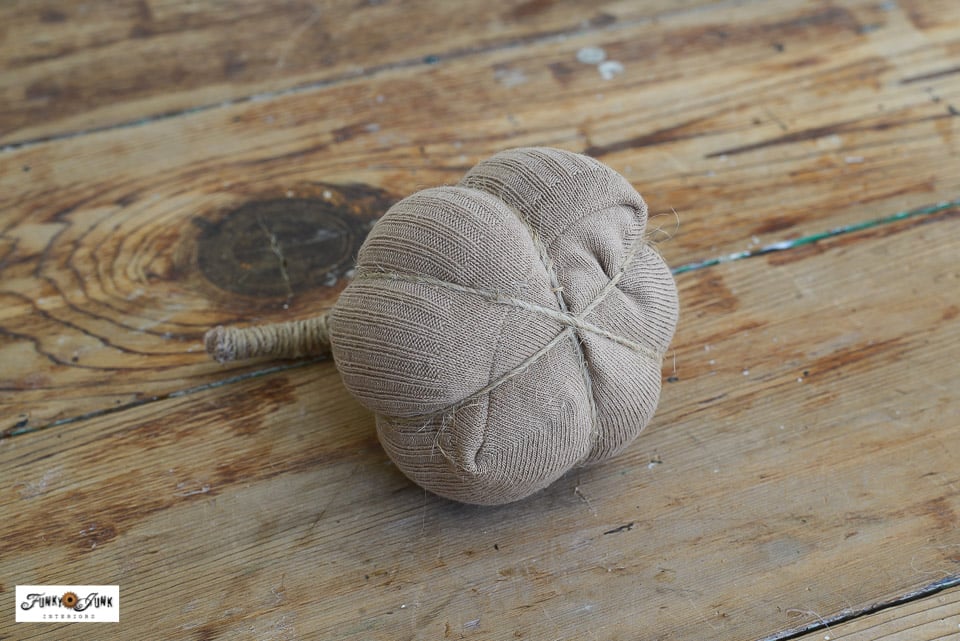
6. With the open end of the sock facing you, and the sock weave facing, up, hold the stuffed sock in one hand, then pull the twine tightly forward following the sock weave design.
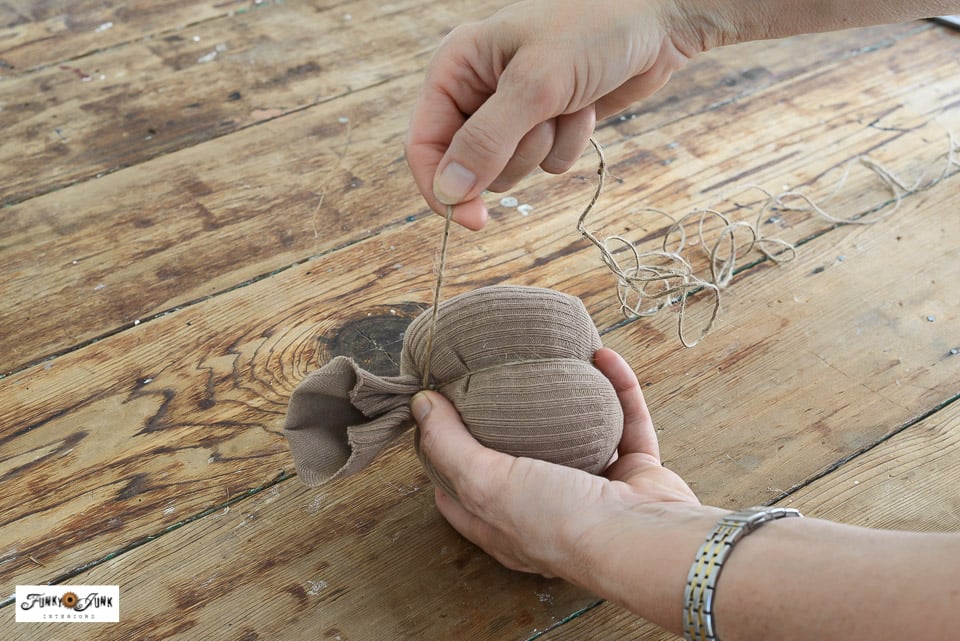
7. While pulling tight, loop the twine around the entire outside of the pumpkin bringing the twine back to the stem.
You want a noticeable dent into the pumpkin from the twine.

8. Rotate the pumpkin slightly, then wrap again and twist, then wrap and twist one more time, taking care to space all 3 wrappings evenly when viewed from all sides.
Creating a pumpkin stem with twine
9. Wind the remaining twine strands around the fabric at the top, until you achieve the stem length you desire.
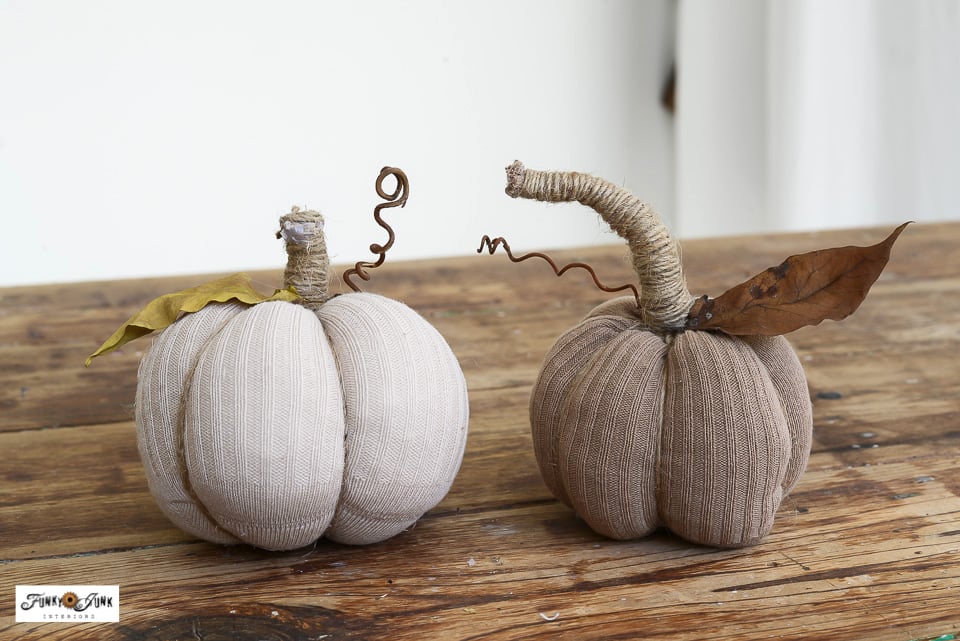
I tried this longer stem on this pumpkin for fun! The other pumpkin stems were quite a bit shorter. You will get fancier as you make more… Ha!
10. To end the stem, cut the twine, then use hot glue to secure the end.
11. Cut across the stem to trim off any fabric left.
If the top of your stem is thick, add a little hot glue, then spiral an additional piece of twine over the tip until it’s completely covered. Or attempt to end the tip of the stem in one large knot from the twine if you can.
Adjust pumpkin string and shape
12. Flip the pumpkin upside down, then adjust any twine along the bottom of the pumpkin or fluff up the pumpkin shape as desired.
It’s very easy to adjust, so don’t worry if you don’t get the wrapping perfect the first time! My best pumpkin was the last one which is this one! Ha!
Adding pumpkin details
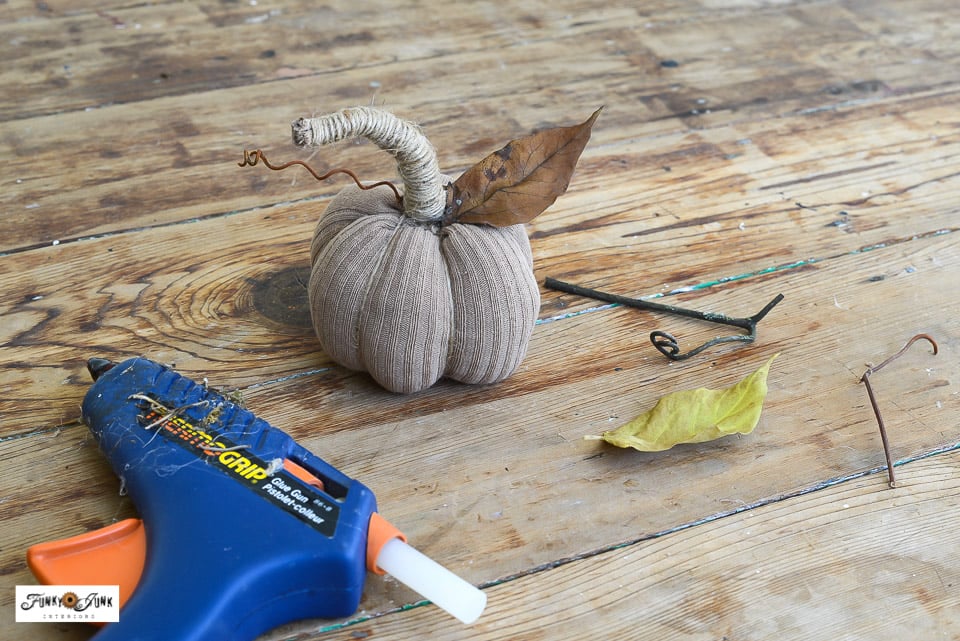
13. Detail the pumpkin by hot gluing real dried leaves onto each pumpkin, along with dried grapevine tendrils.
I love using nature whenever possible for a realistic effect! However, you can also use faux leaves, cut leaves out of green scrap fabric, or make/buy pumpkin tendrils in so many different ways!
Other pumpkin tendril ideas:
- shape florists wire around a pencil
- twist thin twine around a pencil, drench it with hairspray and allow to dry
- Make some wire tendrils clipped from small spiral books like I did to these BRANCH PUMPKINS HERE
Other ways to embellish the pumpkins would be to consider using ribbon, small faux or dried flowers, nest them in spanish moss, or team them up with a mini Pumpkin Patch sign like I made with these wood pumpkins HERE.
Make your own mini Pumpkin Patch sign with THIS STENCIL KIT
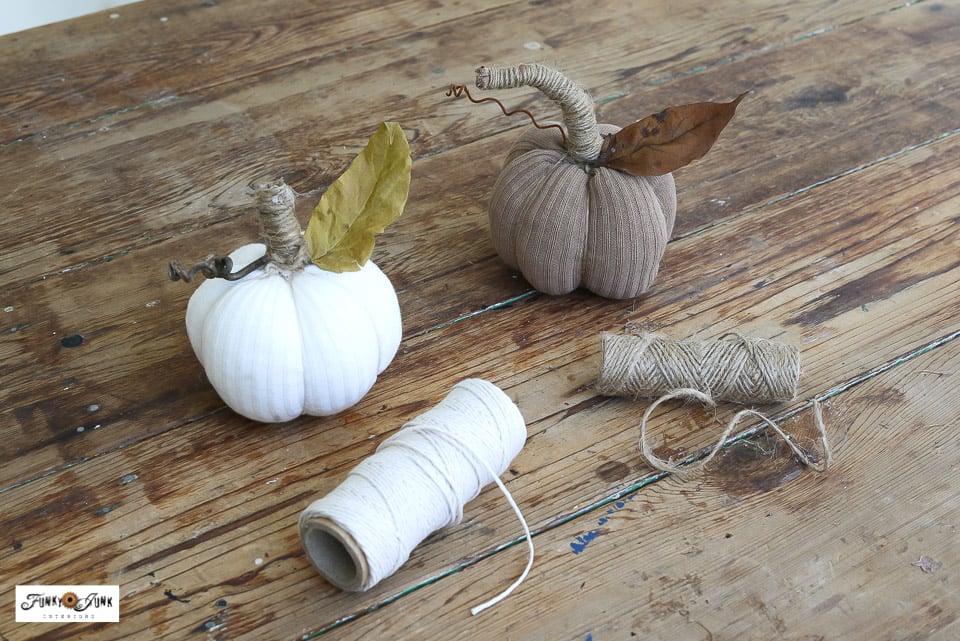
Teaming string colours with sock choices
With white sock pumpkins, I used white string to tie the body, then switched to twine for the stem.
For the darker pumpkins, I used the same twine piece for the entire pumpkin.
You could also experiment with different twine or string colours to contrast different socks!
How to size the sock pumpkins
If you’d like larger pumpkins, simply add more stuffing. For smaller, add less stuffing. Varying the amounts of stuffing creates an interesting mix!
Aren’t they just the cutest?! And from just socks!
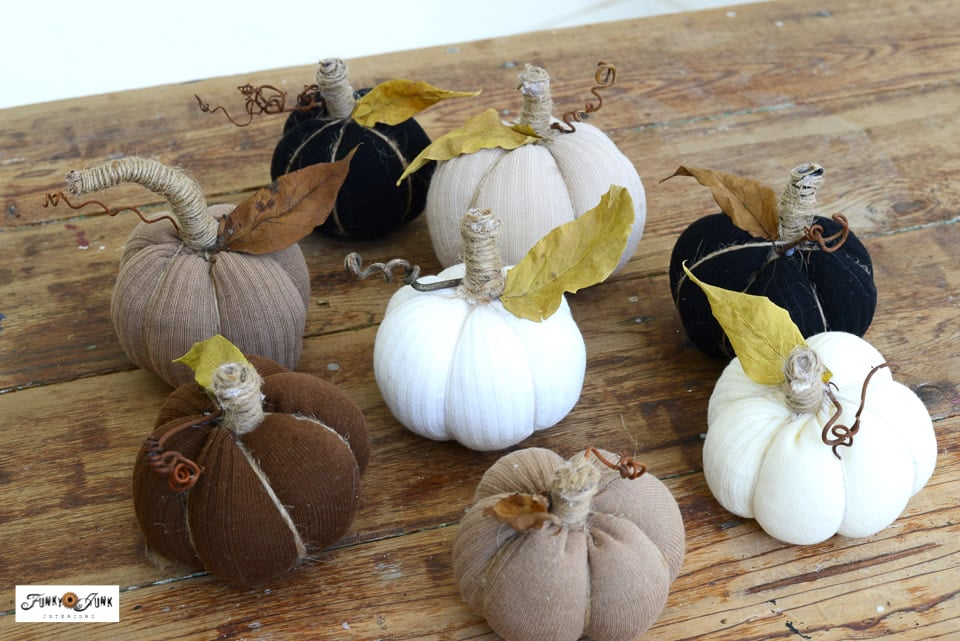
Decide on a colour theme, then go full tilt!
I loved the idea of lots of different neutral tones, so I purchased one new pack of socks that had all these colours. The mix is fabulous, and gives you lots of interesting combinations to display with!

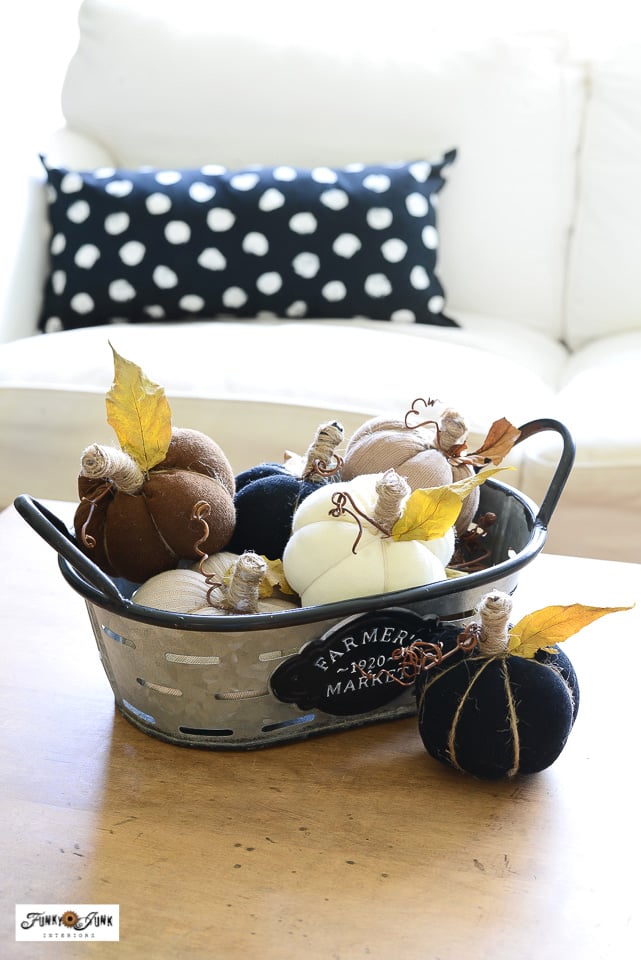
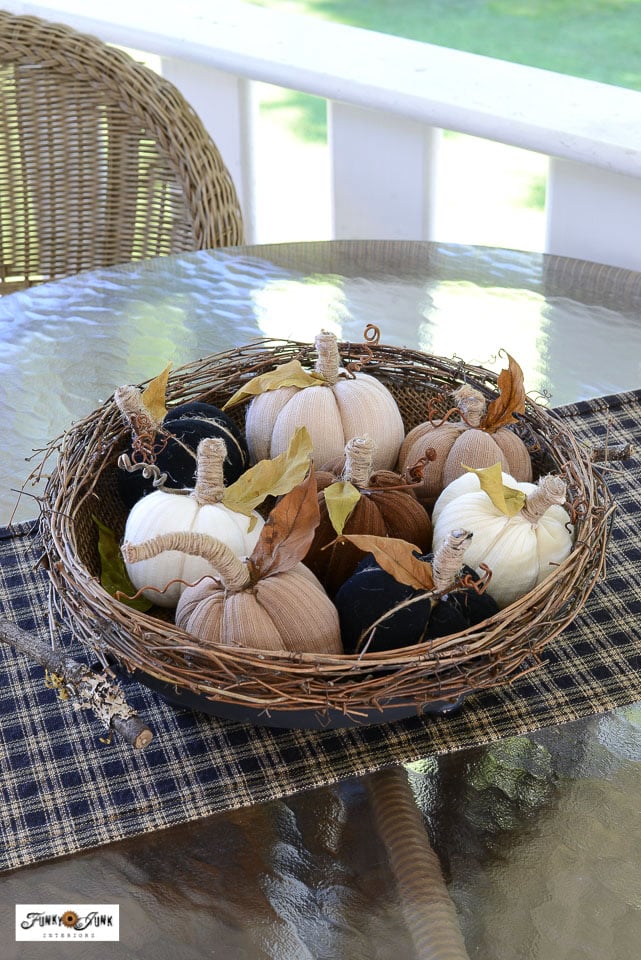
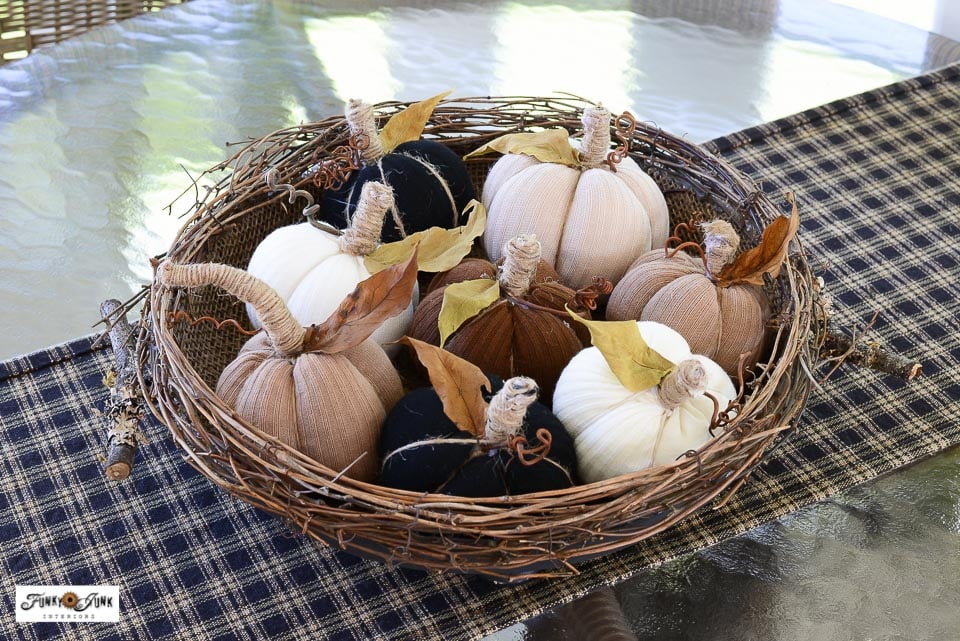
I couldn’t wait to see what these fabric pumpkins from socks would look like grouped in my DIY fry pan tray. TOO cute! Now I really need to make this tray for the blog! It’s become a staple in my home.
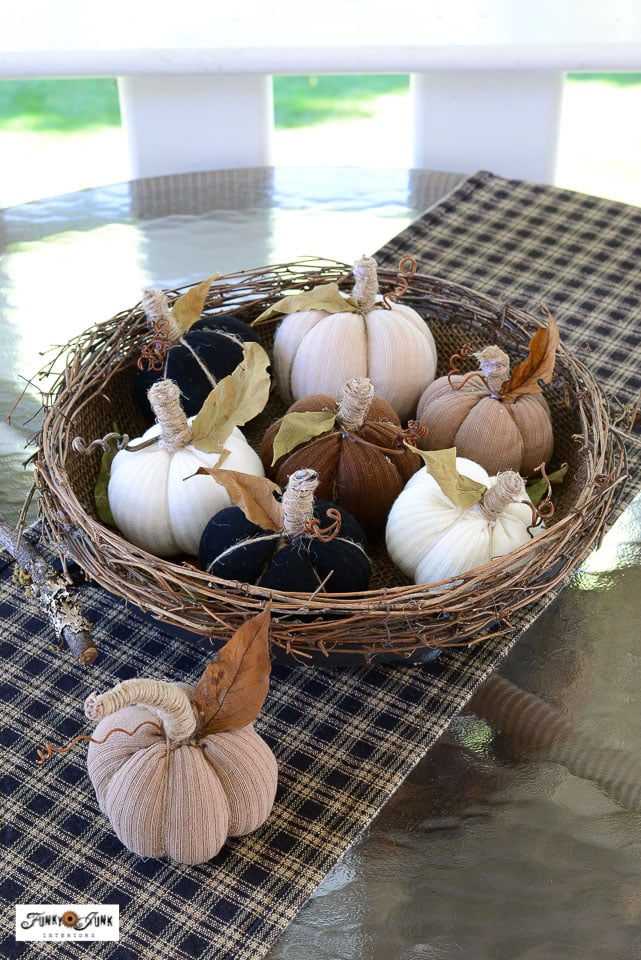
Fabric pumpkins with socks in a rustic bowl
While these sock pumpkins are compact in size, they certainly make a statement when grouped all together, don’t you think?
Where else can I put them? Hmm…
How is it possible to make something fabric that is so cute, without the need of a sewing machine or even a needle and thread?! Someone out there was thinking.
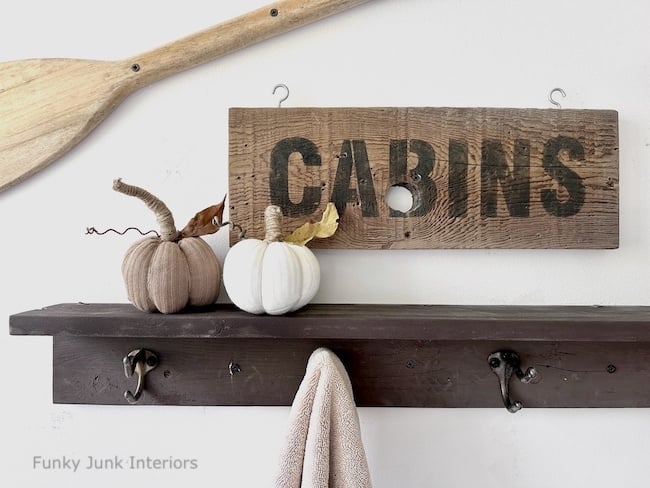
Staging sock pumpkins on a shelf
And while they look great all in one spot.. they sure are cute displayed in other areas separately as well! They are so compact they fit nearly anywhere you desire! I love that, which makes them easy to store as well.
View some similar black and tan table runners like the one above HERE
I also have one by my bedroom TV, and plan to bring one inside my truck. LOL
Video tutorial – fabric pumpkins made with socks
View short video tutorial above to see how to wrap the pumpkins with twine!

View some mini galvanized tubs similar to the above HERE
My goodness, I love these sock pumpkins anywhere! They would also make wonderful fall hostess gifts or a fun kid’s craft or workshop idea with friends since they are really effortless and affordable to make in quantity!
Think you may pick up a few pairs of socks to whip up some fabric pumpkins of your own?
View all our unique pumpkin projects HERE
Check out our entire fall projects HERE
No-sew fabric pumpkins made from socks: with a natural twist!
Supplies:
- 1 pack of 6 neutral socks
- String or twine
- Pillow stuffing
- Faux fall leaves
- Grapevine tendrils (I used real)
- Fabric scissors
- Glue gun
Instructions:
- Cut one sock starting at the heel, then straight across.
- Stuff sock with pillow stuffing until nearly full, leaving some fabric at the top. More stuffing will create larger pumpkins, so be sure to vary the sizes if making multiples.
- Cut about 3 arm's length of twine, then tie the top of the pumpkin closed. Leave most of the rest of the twine to one side of the pumpkin. Trim off the short end.
- Wrap the twine around the pumpkin, while pulling the twine tight so it leaves a good indent.
- After one wrap, turn the pumpkin 2 more times, and wrap 2 more times until you achieve even wrap spacing, resembling a pumpkin shape.
- Wind the twine around the top opening, then up the fabric on top to create stem. Glue the twine to secure.
- Snip the fabric across the top of the stem, then glue twine to the very top to fill it in.
- Embellish pumpkins with tendrils, faux or real leaves, or whatever you wish!
Donna
These are adorable! I have got to go get some socks now!
I love the colors you chose.
Xo Lisa
Thanks Lisa! Just a warning though… it’s hard to stop making these once you get the hang of it. (get lots of socks haha!)
I wish we could use emojis in our comments here because you’d see a few lines of clapping hands! I’m giving you a standing ovation, my friend – these are absolutely ADORABLE! Your tutorial is so perfect, esp since you mentioned the need for the twine to be pulled tightly enough to make a ‘dent’ and create each pumpkin section… that’s the secret to success 😉
I love the addition of the real leaves and vine tendrils – SO up your alley. Which is the fun part of making our own decor, right? We can choose our fave colors and materials, and style them to be exactly what we want. Bravo!
Thanks Deb! I thought of your sweet sweater pumpkins the entire time I made these. NOW I know why you keep revamping your own pumpkins… they are positively addicting to make!
Oh my goodness! these are just adorable and it looks like something I want to do! thank you for sharing!
Thanks Jamie! I hope you give them a try! They are so fun to make! I plan to hit up the thrift store and pick up some houndstooth patterned socks I found last week… how cute would those turn out?!
Love these Donna! I haven’t made any yet, but I think I might thrift some plaid shirts & complimentary color socks! Wouldn’t they be cute as well. Thanks for the tutorial & the ideas! Love the no-sew idea!
Ohhh plaid shirts would be adorable! I tried them with houndstooth patterned socks as well and they turned out pretty cool too!
Oh, these are great! I really like how the stem is made by wrapping it with the twine. That’s clever and gives it some character. I have some orphaned socks that are perfect for this. Thanks!
I hope you try it Deb! Your orphaned sock will be so proudly displayed in short order! haha!