This tutorial shows you how to take apart a pallet using a simple tool you can make yourself. It’ll save time, effort, and cost you nothing!
If I’ve ever needed to move to a bigger place to store this enormous wood haul, that would be yesterday.

A recent reclaimed wood haul
.
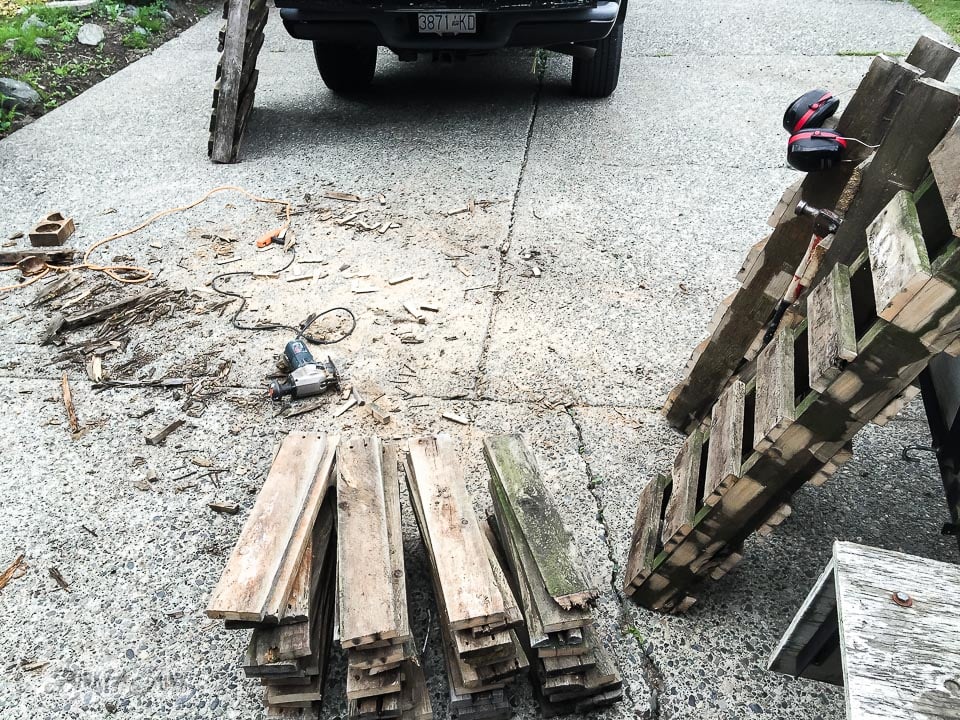
Welcome to my front driveway!
And if the neighbours don’t fire me NOW… I’d gift them with some old wood. 🙂
Don’t mind the plastic blue kiddie pool… it’s there for a splash of colour for the photos. Egads…

One of my neighbours came by, giving me a heads up of a fence having just been taken down. I didn’t waste any time and head on over there to see what was what.
I liked what I saw! So, I brought the wood home. ALL OF IT.
Just don’t ask how much my strong, wood luggin’ son appreciates a junker mom right about now.
“It’s ROTTEN!”
“I’m paying you less if you complain…”

And please don’t ask me where I’m putting it. Or what I’m doing with it. Because my answer would be as blank as a white plank.
Or 80,000.
I justify this pile as ‘stock’. You can’t just BUY this. You have to FIND it. It’s like a free, outdoor Costco for those into lumber and woodworking.
But there was one thing that made taking apart this fence a whole lot easier… all thanks to a recent garage sale and a kind farmer who showed me his own trick for taking apart a pallet!
However, after making this DIY tool, it took apart these fence panels in a flash as well!
Because his method worked so well, I wanted to share it with you so you can make one too!
Tools such as hammers, crowbar, a jigsaw and fancy pallet dismantling tools can work too. However I felt this idea so slick and cheap, I think it’s better!
So here’s the instructions on how to take apart a pallet or fence with a tool you can make yourself… in just a few minutes!
This post contains some Amazon affiliate links in which I earn a small percentage from qualifying purchases through these links, at no extra cost to you. Thank-you for helping to support my blog!
How to take apart a pallet with a simple tool you can make yourself!

The secret tool
.
When I was visiting a garage sale at a local farm, the very generous farmer offered me a stack of pallets for free. I mean, free wood is great! However when I stalled and explained how difficult it was for me to dismantle pallets, he claimed he had a fix for that.
The farmer handed me this box of wooden wedges, and proceeded to show me how he took apart pallets with them.
One by one, each board flew off using his technique.
My mouth dried out as my jaw hung open. It was that easy.
Those simple wooden wedges one can make themselves out of scrap wood are worth gold!
Here’s how to make your own manual pallet buster tool!
Note: I didn’t have any pallets on hand to demo this technique, but it works exactly the same on these fence boards. So I’ll be demonstrating on these.

Supplies you’ll need:
.
Wood wedges
A hammer
Safety glasses
My son used a pry bar and rubber mallet. But my way was better…

Insert the wedge into place
.
1. Tap a wood wedge in between a plank and support board with a hammer, as shown above.
2. Once in place.. hammer HARD.

Tap the wedge
.
3. Tap the wood wedge with the hammer until the pieces of wood pull apart.
The wedge provides a surface to pound, so you don’t tear the (rotten?) wood planks.
Because of the wedge shape, it eases the nailed boards apart.
These fence planks were flying off with little effort!
How to make nail removing wood wedges
The wood wedges gifted to me were all hand made. The farmer told me he cut them by hand, so I’m assuming that means by free cutting a large board with possibly a circular saw or jig saw.
If I ever need more wedges, I would use a miter saw.
- place a 2×6 into the miter saw
- position the angle desired
- make 1 cut
- flip over the board
- make another cut
And you’ll have yourself a wedge. Keep going and you’ll end up with an entire box of them.
Now with boards dismantled, let’s clean them up so they’re safe to store and build with next to avoid injury or splinters.

Tips on removing nails
.
4. Flip the board over, then hammer down on the tips of the old nails.
Some pallet nails are twisted which can make them more difficult to hammer out. In those cases, I’ve used a grinder to just saw the sharp tips off, then pound what’s left back into the wood.

5. Turn the board right side up, and pull the long nails out by grabbing the nail heads. You could also use a nail puller if you have one.
Remove nails before storage
Nails left in boards are a true safety hazard, so please remove nails from boards as soon as you can. Especially before storing them for the long term.
I make myself take care of this by not putting the boards into storage until this step is complete.
Nails are easier to remove when wood is wet
But here’s another lucky fluke! As you can imagine, removing nails out of this amount of boards can take awhile, so one day I was removing them while they were wet from the rain, and wouldn’t you know, the nails slipped out easily! The next day once the wood dried, it was much more difficult to work with.
So.. if you leave your wood out in the rain, even better!
You are most welcome, dear neighbours…
Now that the wood is safe to store, let’s clean it up so the wood is ready for DIY projects anytime.

Pressure wash the boards
.
6. Lightly pressure wash each side of each plank, then allow to dry before storing.
These reclaimed wood fence planks aren’t pressure washed yet, but they will be.
I will be going over them with a light touch, so the white paint stays intact as much as possible.
You could also scrub them down with a stiff brush and soapy water, or diluted bleach to remove the mildew. But it’s a LOT more work. I prefer to pressure wash on a low pressure setting. A smaller electric pressure washer does the trick beautifully.
Learn the full steps on how I clean, prep and store reclaimed wood after a good haul HERE
Stack outdoors to dry
.
7. Stack pressure washed boards upright on concrete to dry.
Standing the boards on concrete offers a way for the boards to completely dry. If you place them on lawn, the boards will warp. Ask me how I know.

This fence wood was quite a haul. But I’m so glad I learned how to take apart a pallet and fence planks with no fancy tools because this technique is a total WIN!

How to take apart a pallet with a jigsaw
Don’t have the means to make wood wedges or struggle with removing the nails? It is fairly labour intensive. So here’s some different methods on pallet deconstruction.
If you only need shorter pallet slat boards, consider cutting the pallet slats straight off the pallet with power tools, such as a jigsaw, sawzall tool / reciprocating saw, hacksaw or small circular saw.
The whole point is to remove the boards without splitting the pallet planks by using a saw blade of some kind.
- wear protective work gloves and safety goggles
- lay the pallet on a flat surface
- using a jigsaw, cut along both sides of the support boards or pallet blocks, missing all the nailed sections
I’ve built tons of DIY projects using small pallet strips of wood. So every little bit of pallet boards you can save is always worthwhile. You can get a fair bit of smaller planks out of an entire pallet!
There are other ways to take pallets apart using power tools or hand tools. I’ve always wanted to try a pallet buster type of tool to see if it truly was easier, but of course, there’s more cost doing it that way as well.
But the best tool of all?
I find the wood wedges and if need be, a jigsaw are really all I need to dismantle pallets in record time. And offers some convenience over not having to stock fancier, more expensive tools.
Test different wooden pallets
And the type of pallets you tackle also makes a difference. I’ve found aged pallets a little easier to work with rather than a newer, good pallet. Collect both and test the wood wedge method out.
Just be watchful for chemicals. Learn how to choose safe pallets at:
Everything you’ve always wanted to know about pallets HERE

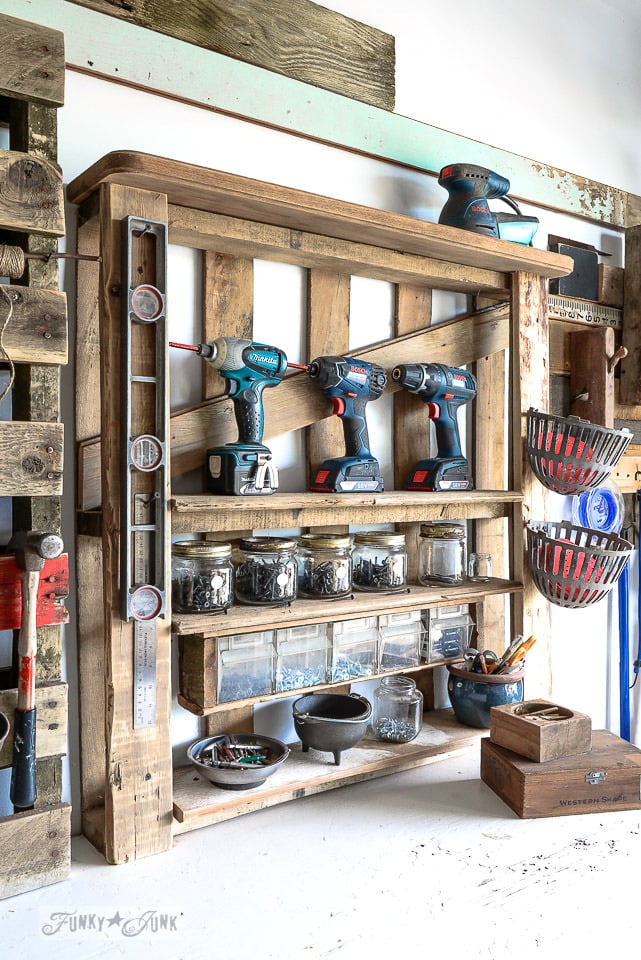
And don’t trash the larger cut sections! Here’s how I used one of those long, skinny pallet sections, using it for a hammer organizer in my workshop!
Official tutorial for the hammer organizer is HERE
And just for fun, here’s another last fence haul I brought home.
These wood wedges are certainly coming in mighty handy lately…
How do you take pallets or fences apart? Think you’ll give this idea a go?
Other helpful pallet wood tips
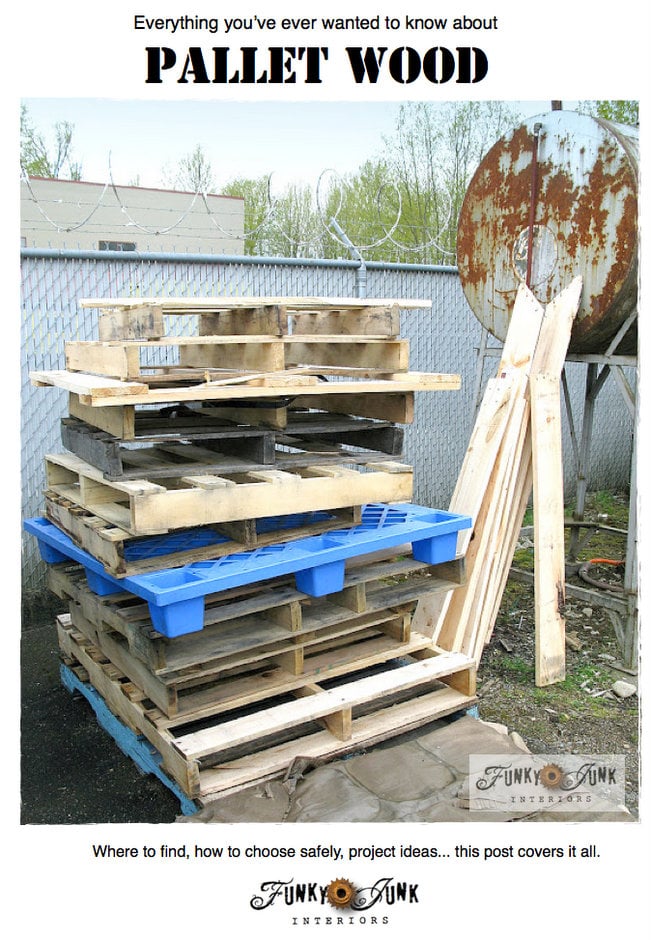
Is pallet wood safe? Read how to choose it wisely HERE
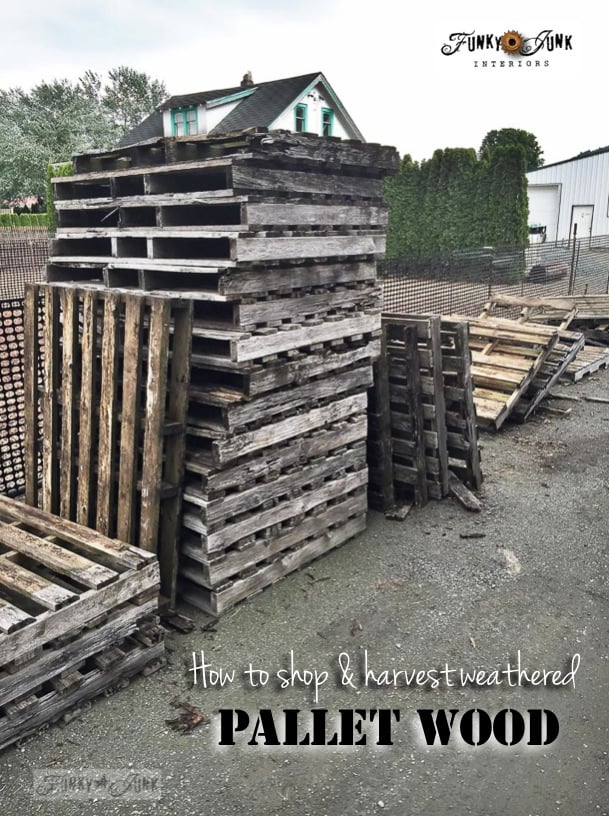
How to shop and harvest weathered pallet wood
Pallet projects to make:

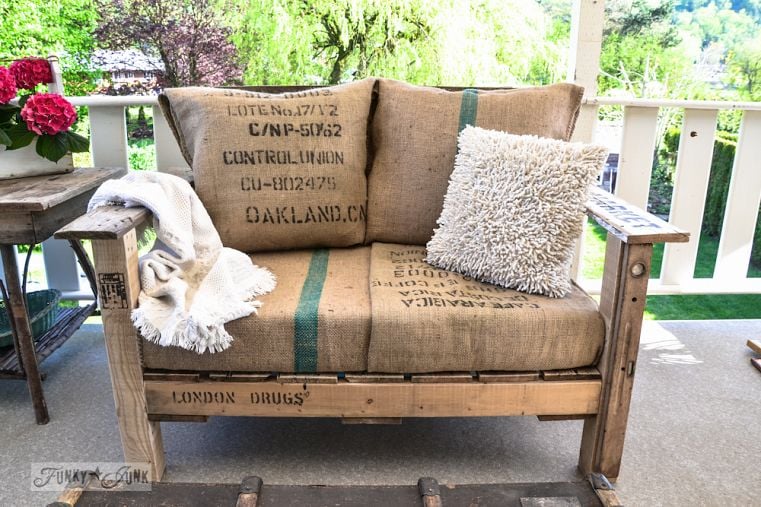
How to build a pallet wood sofa
Create an easy pallet wood chair using 2 pallets!
Build this enhanced pallet tool organizer
Visit many other pallet wood projects HERE
And loads more reclaimed wood projects HERE
oooh I need a pile of wood like that… great sign material ! (think stencils) 🙂
I am forever grateful for this hack. Separating pallets has been the bane of my existence. You’re the best for sharing!
Wow! Gotta try that! I have several pallets that need to be taken apart.
Thanks for the tip!
Drooling! That is one fantastic haul! And thanks for the tip about the wood wedge, we’ve definitely gotta try it! I can’t wait to see what gorgeousness you make with these perfectly rustic boards!
Oh my goodness! White chippy, my favorite!!!! Yay! I know you will come up with some amazing projects! Thank you for sharing the farmers tip for taking those apart. I can’t wait to try it out!
That is such a great find! I think it looks like a wall or ceiling needs to be planked! So jealous…
Thank you, thank you, thank you…taking apart pallets has been so hard…and sometimes disastrous! Best tip I’ve seen in ages 🙂
LOTS of wood! Have fun being creative–for a long, long time it looks!
Wow, you could start your own salvage yard with all that fabulous weathered wood! I see signs, lots of signs. Never, ever pass up a load of old wood, you just never know when you’re going to need it!! Thanks for the removal tips, Donna.
Great post! I have been reluctant to “get into” pallet wood…but these steps make it seem less daunting!! Can’t wait to see what projects you dream up!
Some pallets are terribly hard to take apart because of the twisted nails. These were straight, so I got lucky! 🙂
Oh, that explains it! All the ones I tried had screw nails and neither a wooden wedge or a steel wedge would work.
If you use some WD40 or liquid detergent on the nail. then use a shallow wedge followed by a larger wedge the spiral nails will release a bit better. Shallow metal wedges are lifesavers for pallets. One other trick for those who live in really cold country, is to leave them out in hard freezes and snap the nails. Of course this means you are working outside in really cold temps too.
SUPER great tip, Kel, thank you! Will try next time!
Thanks for the how-to! Anything that makes a project easier is always welcome!
Donna
This is a stroke of genius. I hope this works on our pallets.
In Oz, most of our pallets are from overseas via sea (Malaysia, Indo + SriLanka) so they not only have screw-nails but they’re also treated (sprayed) for our strict quarantine laws and this also makes the wood swell slightly (around those pesky screw-nails!).
I am going to give this tip a good workout tomorrow.
Fingers crossed for me.
<3
Pia
I feel so much better about my junk filled yard…your driveway made me smile! I agree with everyone that they’ll be ideal for signs. I would also keep a section for a photo backdrop.
Such a fantastic score…these drool-worthy white-chippy-weathered planks couldn’t have come to a better home…I can’t wait to see what you choose to do with them!
Thanks to sharing your new secret-weapon for pulling pallets apart, I may just give it a try myself! Now I just need to find some pallets or fences! 😉
Well, I think is about time to give those pesky pallets a try! 🙂 Thanks for the tips. What a great haul you got. I can see lots of signs and hey even furniture out of them!
I love this idea, i have a metal wedge for splitting firewood gonna try that. But the white fence boards you have , reminding me of an outdoor christmas tree yard decoration I saw at a craft show one time! Oh the ideas!!
haha, I love that, “I’ll pay you less if you complain.” So using that with my kiddos. It would be a shame to leave all that wood. I’m sure you’ll find something amazing to do with it. Great tip using the wedge and mallet, I’ll have to try that out on my next pallet.
Oh hoarder of Spectacular Crap, thank you for that wonderful tip!!
My husband told me about that way but I just ignored him. How could that prehistoric thing work? If I tell him he was right I’ll have to hear him reminding me all my life! Ughh
Great wedge tip Donna!
Two tips for you about de-nailing. Although you probably do the first, it’s not shown in Picture 5 and some people may not know about it…
1. When de-nailing, engage the nail with the hammer claw, and then slip a scrap piece of wood (like a broken piece of pallet) at right angles to the pallet wood you’re de-nailing and under the centre of the hammer (i.e., directly under the handle, mid-way between the face and the claw). For nail heads close to the pallet wood use a piece about half to one inch thick. It increases the leverage and requires less strength to remove the nail. Using thicker blocks of wood in this way is also useful for nail heads that have been hammered a long way out (but are still firmly fixed).
2. A piece of metal pipe twice as long as your hammer handle and the inside diameter of which is just bigger than the handle’s diameter, will increase the leverage, too. Slip the pipe over the handle. This effectively turns your hammer into a pry bar and I have used long (6 foot) pipes to get some big nails out of sleepers (combined with method 1), not that I recommend this for pallets. A short pipe will just make the job easier, especially on twister nails.
Note, both methods (especially when used together!) generate a lot of force, so beware flying nails and wear appropriate safety equipment – glasses especially. Also, the last method is going to put a lot of stress on your hammer handle. Make sure it’s up to it before you begin!
Thank you so much for chiming in Steve!
I didn’t know your tips, but you can be sure I’m going to try them out! Fabulous!
I’m going to try this tomorrow. I’ve been pulling my hair out trying to get slats off a fence without destroying the wood. We rent. Our fence is 8′ cedar. It butts right up to the neighbor’s 8′ chain link fence. Unknown to us, 3 years of weeds had grown 5 feet high between the fences. It’s infested with fleas. I need to take our fence apart to get all the weeds ripped out, lay down diatomaceous earth, then plastic and gravel so the fleas die and the weeds don’t come back. Then I have to replace the slats. The wood is dried out, untreated or treated years and years ago. My landlady should be doing this, but she’s hopeless and it’s got to be done (Oh & the nails are 3″ & embedded deeply). So tomorrow I start with your idea. Everyone cross your fingers. I’m desperate.
Hi, you said you used those wedges for dismantling pallets. Then you demonstrated on soft fence wood. That would not work well,if at all, on machine nailed pallets……regards…Shaen.
Hi Shaen, the farmer that showed me this tip demonstrated it on a well made pallet. It takes more pounding, but it did work. I tried it right after him. Pallets with a little more weathering are indeed easier to work with.
I too love reusing and working with wood. I enjoy seeing and reading what you are doing. keep up the good work.
This is the best tip I’ve seen in a long time. Kudos to the farmer for sharing.
hi donna….my jaw too is hanging open! what kind of wood do you think the wedges are? did they split after some time? i notice the grain is lengthwise.thxs michele
Hi Michele, I’m unsure what the wood wedges were made from, but they certainly were not anything fancy! They do get beat up after time, but you get lots out of them before that happens. Hope you try it out!
Hey! I did them same thing…came across a whole old white chippy fence in the trash and brought as much home as my family could tolerate. I didn’t know what I would do with it, but things keep coming to me. So glad I picked it up because when I don’t bring junk home I just have so many creative ideas later of what I would have done with it. Making usable stuff from junk is so much fun. Thanks for this helpful post on the pallets. All of your ideas are great ideas!!
Hi, great tip! Question: what do you do about ll the bugs that crawl out as you take apart fences? I was just going to spray bug killer and let it sit overnight, then sand, but maybe you a better way? (Can’t believe my mom wants to throw out all this wood just because the bottom touching the ground is rotten- hello circular saw)
Hi Cricket! In our region we don’t really have an extreme bug issue. I collect the wood, pressure wash it, then store it in the garage until I desire to use it for a project. Maybe I’ve washed all the bugs off prior? I’ve never seen one yet! 🙂
I have tried many ways to get oak pallets apart which is different than a fence…a lot different. Wish I could find an old fence, it would make things a lot easier.
You certainly have a nice “stash” there for many creations. Have fun.
Barb
Barb, you bet it is. This method doesn’t work for all pallets I find, but the majority of them that are weathered, not an issue. Hoping this method may come to mind if you land stuff where it may work! It’s such an easy fix.
Wow, an amazing find of free wood! Thanks for the tip on using the wedge to take apart the pallet/fence. Great idea and thanks for sharing!
I love your candle holders, only you don’t show how to remove the chunks of wood in the pallet, please do so.
Hi Rachie!
Can you please send me a picture or link to the project you are referring to? I didn’t write about candles in this particular post so I am unsure which project you’re referring to. Thanks!
Email – donna@funkyjunkinteriors.net
Hi! I like your creativity. Can you tell me if the size of the wedge matters–hard to tell exactly in the photo. (length and width, please)?
Also, what type of wood does the wedge need to be–guessing hardwood?
Thank you so much! I just got some pallets from a project here. This will be the first time I’m trying to use pallets for anything. Was also thinking of using for a fence–just using as-is because I didn’t want to
take them apart but now I’m wondering–maybe I could cut it? I think that would be hard to do–I have a sawzall.
Is it okay if I keep the pallets outside in the winter, in case I don’t get to them?
Thank you so much! You’re after my own heart.
Hi Arlene! My apologies for not including the measurements in the post!
The wedges are 1.75″ wide (left to right) and 1.25″ deep (front to back).
I’d think pallets are fine outside because that’s where they’ve resided all this time anyway! I personally like when pallet wood gets a little more aged. But I would store them on concrete or gravel as on soil can have them rotting much quicker.
And yes, you can cut pallets with a sawzall! I’ve cut many up before I learned about this wedge technique and it works great, you just end up with a little less wood.
Have fun with your project!
Thank you! I actually just bought some oil based stain at 75% off, very close to my house color. So, I’ll try to get some of them treated before winter. Might only use 1 T-stake per fence section, so I can open each section, if I want.
Also, I’m trying to secure my yard some–I’m on a pretty heavily trafficked albeit country type road.
It’s a large (acre) property but pretty open by the road so thinking maybe a few evergreens of some sort at an angle to the road, and the “fencing” closer to the house. Trying to do this without incurring too much cost. I’m moving about (5) l’ tall junipers that just starting growing in my driveway to do some screening from the road.
Thoughts?
Oh, and to clarify–I’m thinking of just leaving the pallets together (I have about 10 of them) and putting them over the T-stakes, unless you have an easier or better idea. Trying to do this without too much work, but I want it to look nice.
Thanks again.
I love the idea of working with the pallets whole! I’d try that too!
This sounds amazing Arlene! I love the direction you’re heading with evergreens and rustic wood. I think they chime in really well together! Have fun!
My last pile is now a headboard. Always love your posts!