How to create a festive and easy Joy Christmas sign with a cozy Buffalo Check ornament easily with stencils! Perfect for a Christmas porch!

With Christmas decorating pretty much in full swing everywhere, I’m attempting to stay the course. I have LOTS of plans and things are coming along! A new tree was purchased from Hobby Lobby a couple weeks ago, and I’m finally starting to feel a theme coming on! I can’t wait to share!
So I’m making smaller festive projects to tie in with the bigger picture.
Remember last week when I shared my rustic vertical JOY porch sign?
After that suuuuuper simple version with the large snowflake replacing the O, I glanced over at the Large Ornament stencil and knew I had to do it. HAD TO. I had a vision you see…
So today, I’m sharing how I stenciled this charming easy Joy Christmas Sign complete with a unique Buffalo Check ornament that replaces the O in Joy! It’s festive with an unexpected rustic touch, that really brings home a cozy Christmas look!
This Joy sign Christmas decoration is little more involved than the first Joy sign, but really is easy once you see how all the pieces were designed to work together!
So if you’re into home decorations you can make yourself for your own home decor, or to offer as a Christmas gift, this one’s worth making!
Be sure to click the short video at the bottom of this post which shows the easy DIY joy sign in motion!
This post contains some affiliate links in which I earn a small percentage from qualifying purchases through these links, at no extra cost to you. Thank-you for helping to support my blog!
Joy Christmas sign with Buffalo Check Ornament
Supplies you’ll need:
Reclaimed wood or new wood – consider old barn wood or cedar fence planks
Stencils:
- FJ47L Joy Large – Vertical
- FJ48L_2 Large Ornament
- FJ48L_1 Large Ornament Accessories
- FJ31M Buffalo Check – Medium
Stencil brush (for Buffalo Check)
Larger paint brushes (for the boards, letters and ornament)
Measuring tape
Fusion Mineral Paint (get 10% off Fusion you purchase online HERE)
- Coal Black
- Fort York Red
- Casement
.
Preparing the wood
.
1. Prepare two wood boards by lightly sanding the rough edges. This were reclaimed cedar boards I got from an old fence.
THIS POST SHARES HOW I collect reclaimed wood.
Each board I used measures 5 ¾” x 41.5″, however as long as the Joy stencil fits, you’re good to go!
The total size of the Joy – Large Vertical stencil measures: 7″ wide x 32.6″h.
How to attach the two boards together:
- Cut two smaller support boards just under the max width of your two boards measured together.
- Flip the two main boards good-side-down.
- Position a support board near the top and bottom, then attach with screws from the back using a cordless drill.

Find all these stencils from HERE
Painting the boards
2. Paint boards in white.
I painted the boards with Fusion Mineral Paint’s Casement (10% off), which is a nice, bright white. Perfect!
JOY Christmas stencils used
.
3. 4 stencils were used for this DIY Joy sign from Funky Junk’s Old Sign Stencils.
Large Ornament Accessories FJ48L_1

Wax to easily distress
.
4. Position stencils into place with masking tape.
5. Rub a wax puck over each letter.
Because I desired to lightly distress the sign after painting, I ran a wax puck by Miss Mustard Seed’s Milk Paint where I would paint the letters.
You can also use Fusion’s Bees Wax Distressing Block.
The wax works as a paint resist. As a result, once you paint over the wax, distressing with a light sand will become effortless.

How to stencil the letters
.
6. Stencil the large letters J and Y in black.
Because the letters were so large, I bypassed a stencil brush and used a wide chip brush to brush on Fusion Mineral Paint’s Coal Black on the J and Y.
The paint was brushed from the letter edges towards the middle of each letter to avoid paint bleed underneath the stencil.

Stencil: Large Ornament Accessories HERE
Adding The Ornament
.
7. Since I desired to hang the ornament from the J with the ribbon, positioning needed to be perfect.
Here’s how I did that…
a) Hang the ribbon from Large Ornament Accessories HERE from the middle of the J, then pencil in the bottom curved part. Remove the ribbon stencil.

b) Position the ornament ring ON TOP OF THE CURVED LINE. Tape stencil into place.

Adding a Buffalo Check pattern
Creating a Buffalo Check look is a timeless cozy trend that will never go out of style! So if these decor ideas are part of your preferences, here’s how to do it:
c) Stencil the ornament in red first.
Since the ornament is so large, a paint brush was used to paint the ornament from the outside in to avoid paint bleed under the stencil.
The ornament was painted in Fusion Mineral Paint’s Fort York Red.

Stencil: Buffalo Check medium HERE
d) For a Buffalo Checked Ornament, place the Buffalo Check stencil on top of the ornament stencil.
e) Stencil Buffalo Check in Coal Black.
f) Remove the Buffalo Check stencil, then paint the ornament ring in Coal Black.
g) Remove all the stencils, then position the ribbon stencil into place, and paint in Fort York Red.
The ribbon may require several coats to cover the black ring.
h) If distressing is desired, run a sanding block over the letters (where they were waxed).

Bracing the sign together
.
8. You can use the two support boards method I mentioned earlier in this post or, try this to connect the two planks together.
The boards were braced together by screwing two reclaimed hinges along the top and bottom on the front of the sign, then this L brace on the back. It worked great!
The hinges on the front of the sign came from my junk bin. I spray painted them white, then screwed them to the front of the sign. (shown further down this post)
A flat L bracket any hardware store carries was then added to the middle of the back of the sign for extra stability.
Find the flat L brackets on AMAZON HERE

Ornament decorating ideas
.
9. Add evergreen branches by screwing them into place, with a ribbon on top.
And now the fun part! With the sign fully assembled and lightly distressed (because I like my signs lookin’ old!), I played around with several Christmas decorating options…
Decorating the ornament is one! I screwed a few evergreen branches into place, however you could also use hot glue if desired.
Pick up some faux evergreen branches HERE

Bow, evergreen branches and hinges
.
Then screwed on a pre-made Buffalo Check bow. It looked really cute!
I love adding 3D elements to an otherwise flat Christmas sign. They really help things pop.
The hinges were just stuff I had in my stash. You can find them in most any hardware store or shop a few thrift stores or salvage yards to see what they have.
Shop for buffalo checked bows HERE

Buffalo Check bow
.
And here’s the Joy sign with just the Buffalo Checked bow! That’s cute too if you have lots of greens around the sign already.
Shop for some mini faux Christmas trees HERE
Get some faux cranberry garland similar to the above shown HERE
Or make your own cranberry garland shown in THIS POST
Shop for faux snow HERE

Just ornament
.
And finally, no bow and no greens!
The Buffalo Checked stenciled ornament really stands alone well if there’s lots going on around the sign already.
It’s so cute each way!
To better understand the process, click below to watch the videos.
Joy sign video how-to:
.
.
Click above to watch a shortened video (music only) on how to stencil the ornament. (under 2 minutes)
.
.
Click above to watch the FULL tutorial video, power packed with easy, valuable stencil tips via voice. (5 minutes)
Music: Acoustic Breeze by www.bensound.com

Well, it’s a good thing you’re the designer of your own Joy Buffalo Check Christmas sign… because you get to decide how to decorate yours!
In all honesty, all options looked pretty adorable if I do say so myself… suitable for a Christmas front porch, Christmas living room, porch sign, mantel sign or more!
Which way would you decorate your JOY Christmas sign? Where would you place yours for the holiday season?
![]()
Find
All stencils used for this Joy Sign
- FJ47L Joy Large – Vertical
- FJ48L_2 Large Ornament
- FJ48L_1 Large Ornament Accessories
- FJ31M Buffalo Check – Medium
View all the Christmas stencils HERE
.
Other Christmas signs to make:

Rustic vertical JOY sign on shiplap

Create a vertical Noel Christmas sign, gift tag style!

Tall Christmas Tree sign with 3D crate
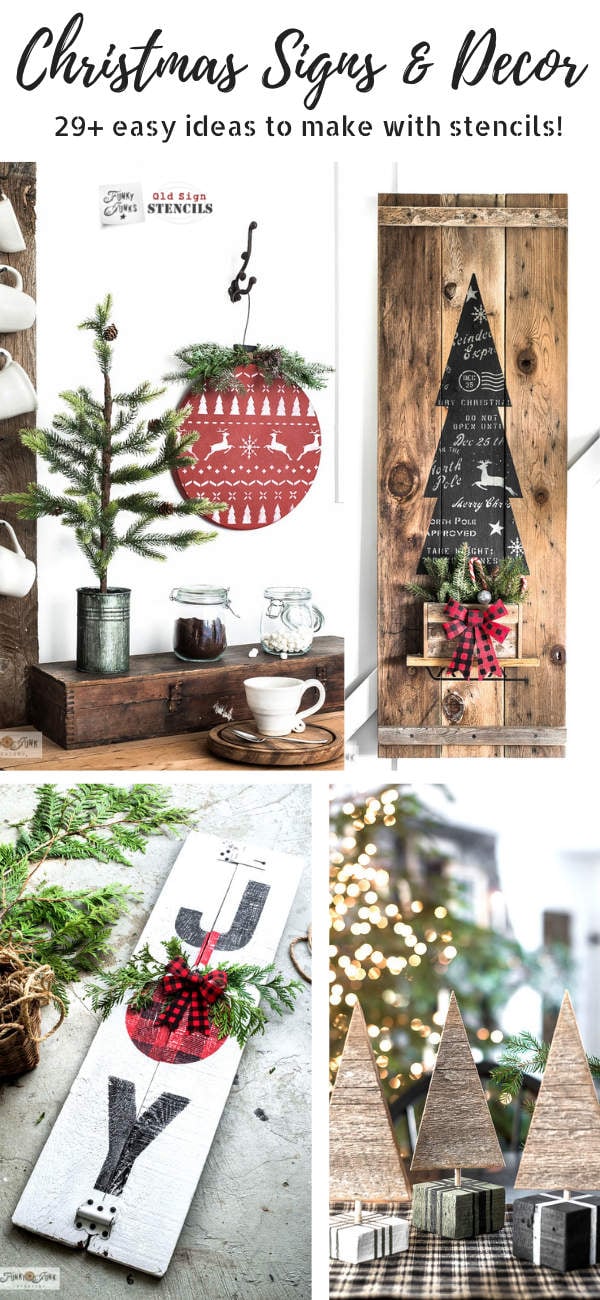
Make 29+ easy Christmas Signs and Decor with stencils
Visit all my other Christmas projects from one page HERE
Oh my gosh now I want that stencil too! That looks amazing! I love the way you put the 2 boards together, it looks great! 🙂
Thanks Susan! I know you get my mad (bad?) building skills… haha Whatever works I say!
I love it! I did not know the secret of the puck.
Thanks Bliss! Yep, the secret to my puck has nothing to do with Canadian hockey this round… LOL just don’t tell my sister! They have one of those lights that go off when they score a goal. So funny!
What can I say….love love, love it! Oh Donna, you are a JOY!
Awww shucks Sandy… I know you get me. 😀 I’m planting my beloved snowshoes in different places this year, it’s my fav accessory thanks to your generosity!
Love it, will be making this. Thanks for the inspiration!
Thank you June! I truly hope you share your results around Facebook!
You’ve done it again, another darling holiday project! I just love it and am so amazed with your creative ideas. Well done !
Aww thank-you Sharon! I enjoyed this one… lots of moving parts but the end result made it fun!
So stinkin’ cute!!!!!
Thanks Linda! I love the fact that I can change out the decor around the ornament myself!
Love, love, love the JOY sign!! It looked great all ways you displayed it and you are right, it really stood out without the bow and greenery! But, I did love the bow and greenery, too!! Yeah, I’d have trouble deciding!! lol!!