Learn how to design a beautiful, budget-friendly flower garden with bench as the centerpiece. Get tips on choosing affordable flowers plus fixing up an old bench to create a stunning focal point to your outdoor space!
This post contains affiliate links. As a Fusion and Amazon Influencer, I earn from qualifying purchases at no extra cost to you. Thank-you for helping to support my blog!
This year is turning out to be quite a transformative garden enhancing summer!
From covering a septic system with a flower and vegetable garden using upcycled planters, a herb garden on a fence, DIY stepping stones from upcycled party trays, how I built a raised planter box for tomatoes, and a couple of garden arbours I have not yet shown you in their full summer glory yet, the entire yard esthetic is being quickly enhanced!
And now here’s one more exciting garden feature, thanks to landing a rickety old bench that had seen MUCH better days… that I’m making all for FREE!
Landing a free bench
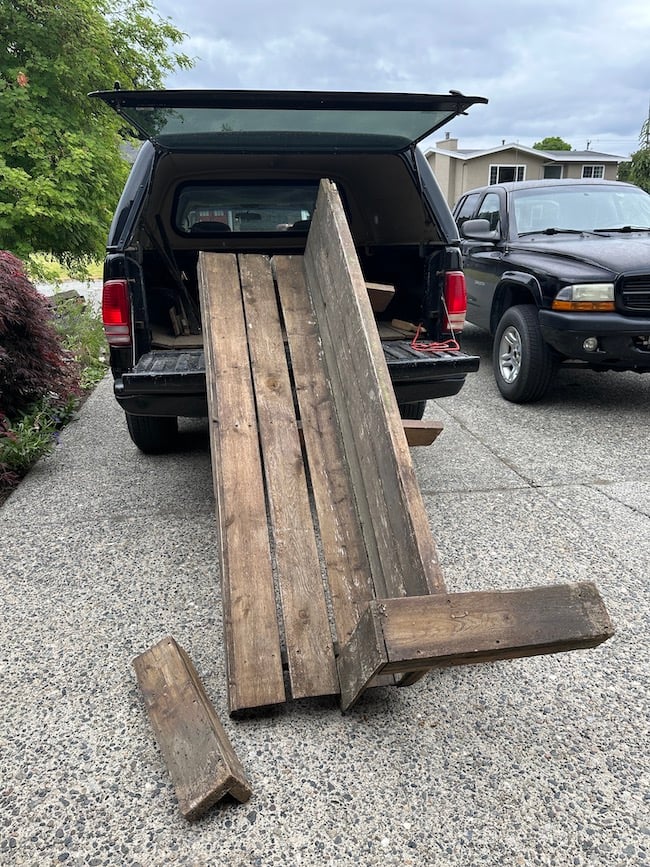
I found a pile of wood rubble offered for free on Facebook. Curious, I took a drive out to see if there was anything I could use.
To my complete surprise, a wooden bench on its side was among the boards. It was fairly rickety, but I felt it was worth a shot to see if I could fix the bench and turn it into an additional yard feature!
If this doesn’t prove it’s dangerous to own a truck, nothing will… heh.
Now where to put it…
Landing free full grown blueberry plants!
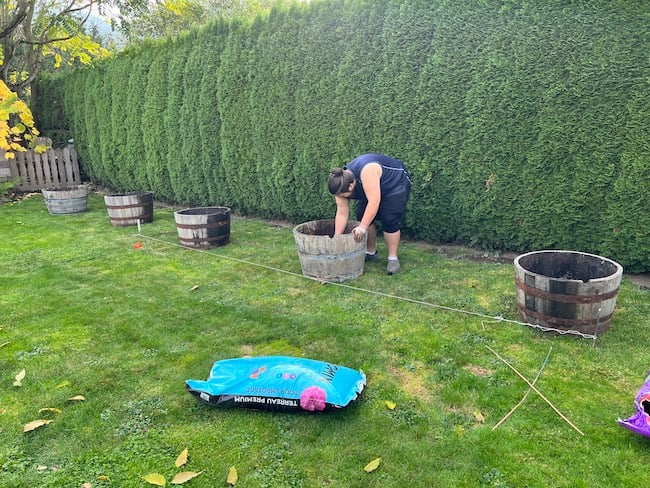
Two years ago, we were gifted some full grown blueberry bushes that all came with their own barrel planters! I know!! I haven’t even blogged about this adventure yet, so one day I’ll do an installment on just the blueberries! Because, what. a. haul.
So we positioned them along a row of hedges, dreaming that this would somehow ultimately tie into a larger gardening area.
Designing the bench area
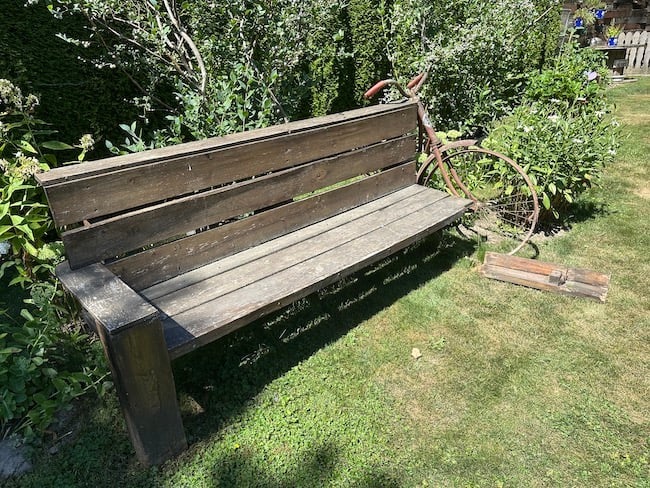
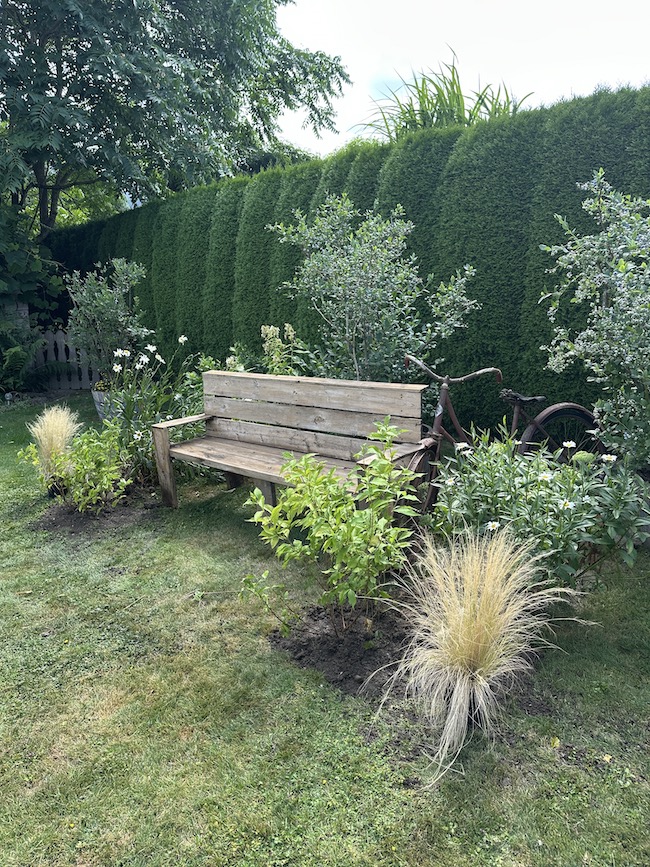
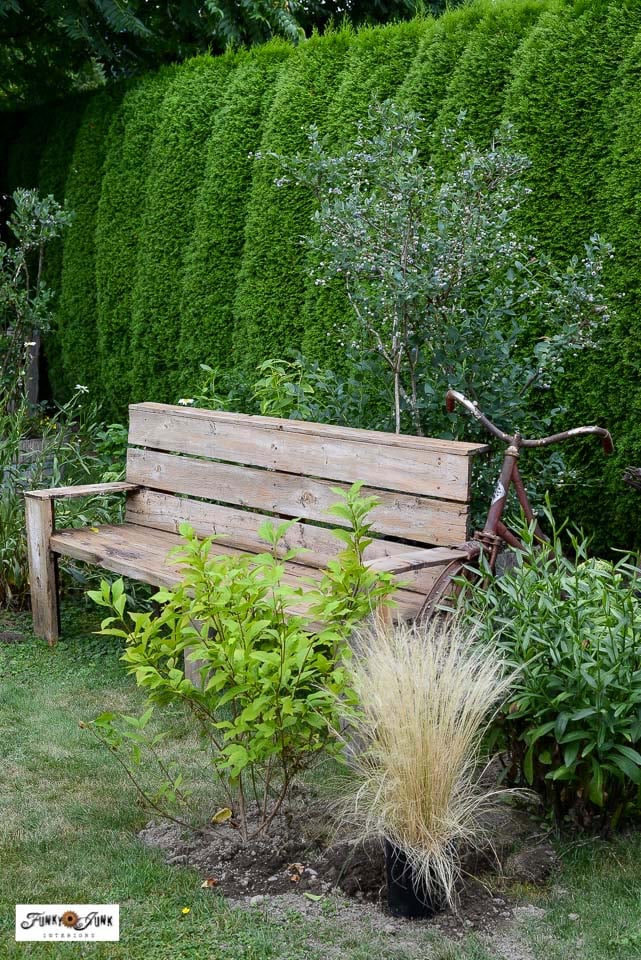
So I propped up the hopeful garden bench where I felt it would look good, (part shade is always a bonus as well) nestled against the row of blueberries.
Missing the leg of course. But the old bike prop still makes it look fancy, no?!
No, not yet. But this is how I go about building a dream. By adding features like a puzzle, of one rusty junk bike or rickety bench at a time.
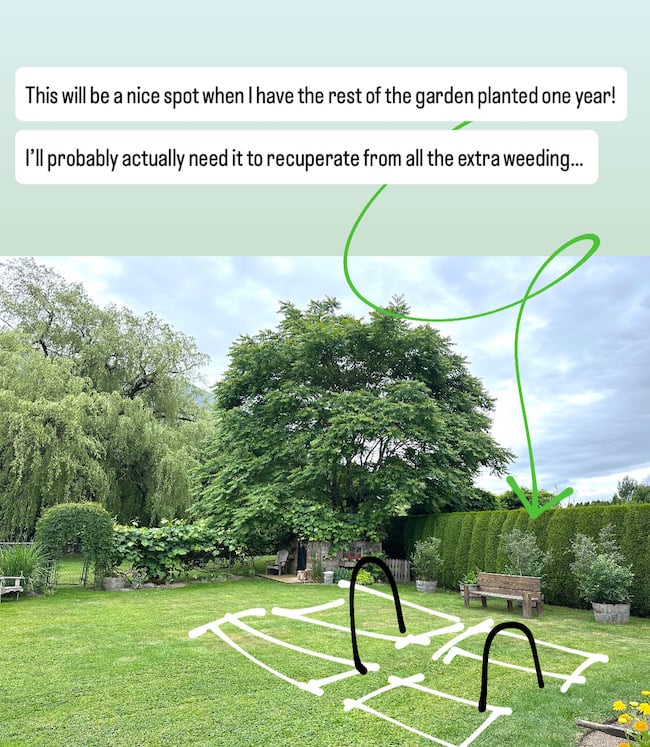
My reasoning was, one day if I create the raised vegetable beds in my dreams, this bench area provide a nice place to sit (and regain my composure after a big weeding event!)
But even more than that, the bench focal point carves out the suggestion of using it as a starting point to further soften it with a few flowerbeds creating a pretty garden feature.
My goal is more flowerbeds to fill up a somewhat bare backyard, so the plants marry the scale of space that’s available. One day.

Adding plants one-at-a-time
Before the bench was even fixed, I landed a large bush of daisies in full bloom that went promptly beside the bench, quickly turning this area into my ‘bench garden’.
But I didn’t even cut a big flowerbed. I just dug a hole in the ground, added a little enriched soil to enhance it, then plunked in the flowers and watered very well over the coming days.

Landing a truck load of plants!
Then I came across a truck load of full grown plants that needed to be planted right away! Seems my garden bed was expanding quicker than my bench redo…
So it was time to fix that bench pronto, so my new bench garden bed area could start to shine! And so I could actually use the bench… heh.
And while the proposed finished look has a little ways to go, I decided to share what’s been done so far so you can fully appreciate that all great things need layers of building, since this isn’t your local HGTV channel on fast forward.
So let’s now tackle that bench, before even more plants arrive leaving no space for the bench at all!
Whether you build a bench from scratch or land one that needs work, it’s my hope that by sharing the early beginnings of this total DIY garden bed complete with fixing an old bench all for free, will inspire you to keep searching for those special components to create a dream garden feature of your own… one piece at a time!
Creating A Cost Effective Flower Garden With Bench For A Pretty Focal Point
Supplies you’ll need:
Scrap wood lumber if fixing a bench
Cordless Drill (I like Makita)
Orbital sander (I like Bosch variable speed)
Pressure washer (I used my light duty plug-in variety)
Various plants (landing larger results in a fuller look sooner)
Garden hose to water with (I LOVE my retractable hose!)
How to fix a broken bench
Fixing the bench was first on the list, even before cleaning it, because if it can’t be fixed, why bother to scrub future firewood?
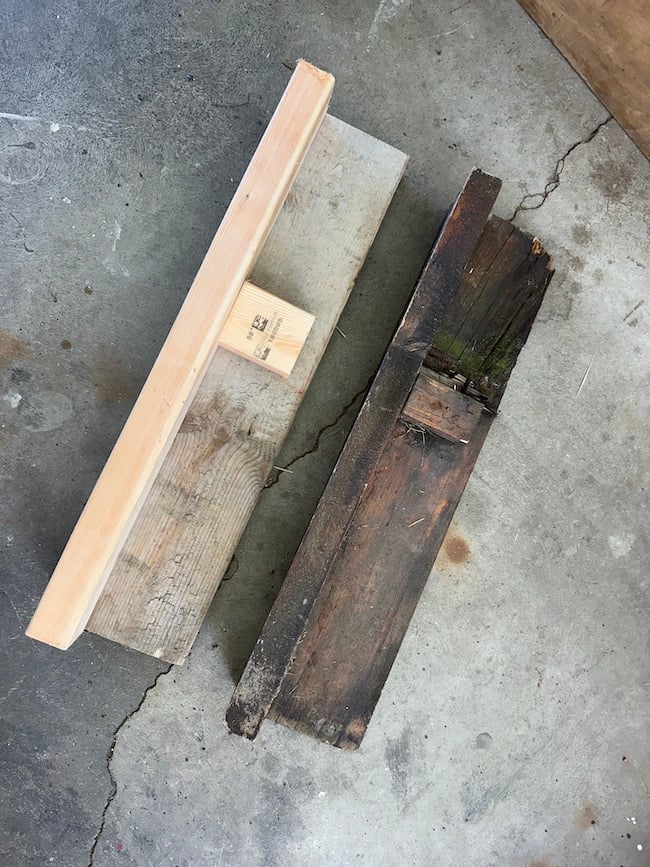
1. Rebuild broken pieces by copying the original with like-minded wood.
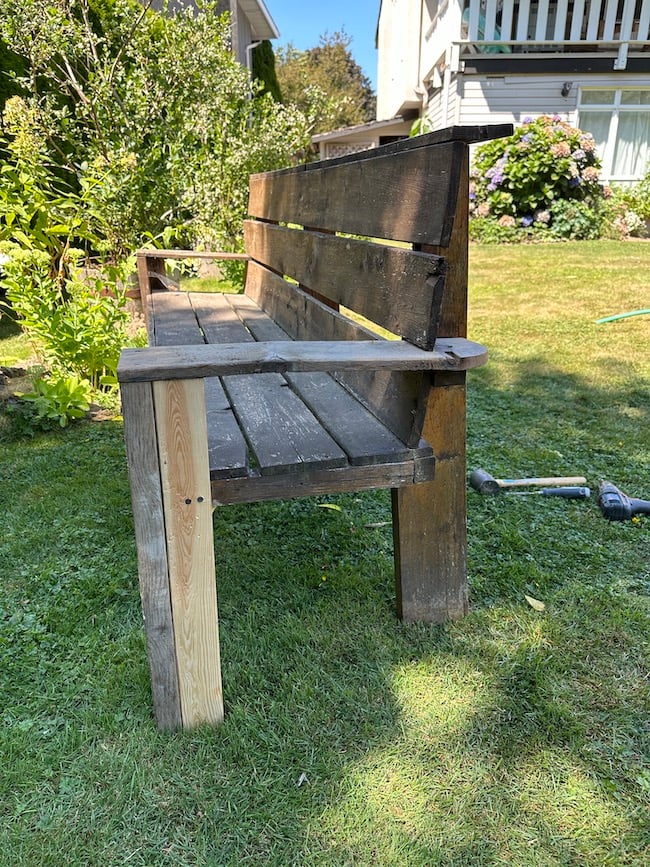
After carefully examining the broken leg and arm, I decided it was better to rebuild the broken leg using newer wood measuring the same sizes as the original pieces.
It’s fun to fix things, because you already have the blueprint to work from! Plus you get to learn new ways to build things.
Creating an arm rest
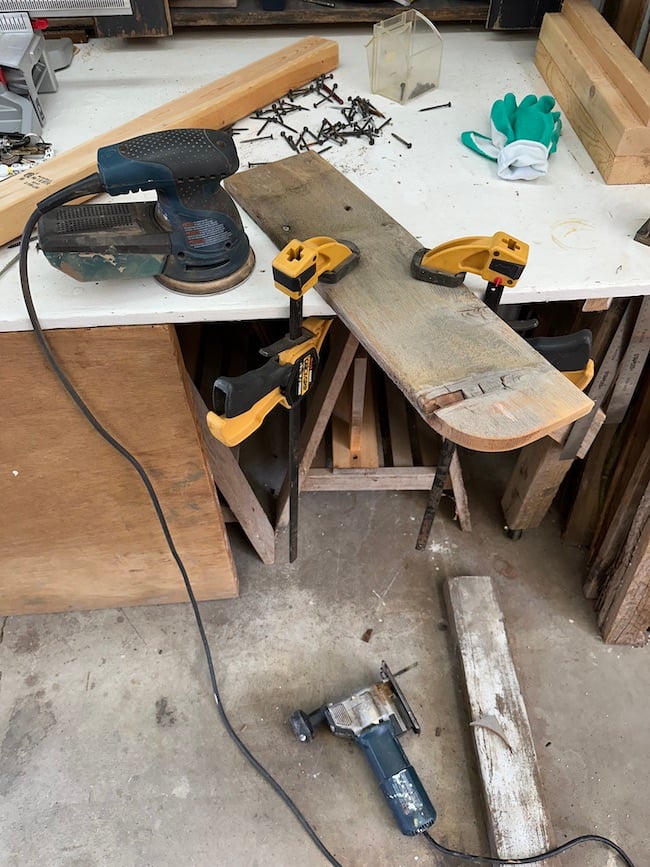
2. Rebuild missing pieces, such as this arm rest.
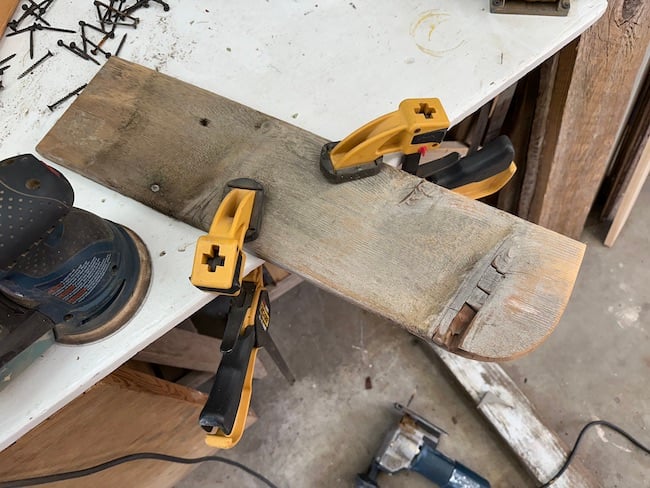
Next was to create a new armrest since one of them was completely missing. I liked the style of the original, so I measured a like-minded piece of wood, cut it to the right length, then drew a radius corner around one side, shaping it freehand using a jigsaw.
The wood was tightly clamped to a work table first, so I could have two free hands to shape the wood.
Installing the leg and armrest
3. Assemble the rebuilt pieces to the bench, using the other side of the bench as a guideline.
The leg was then attached, along with the armrest on top next.
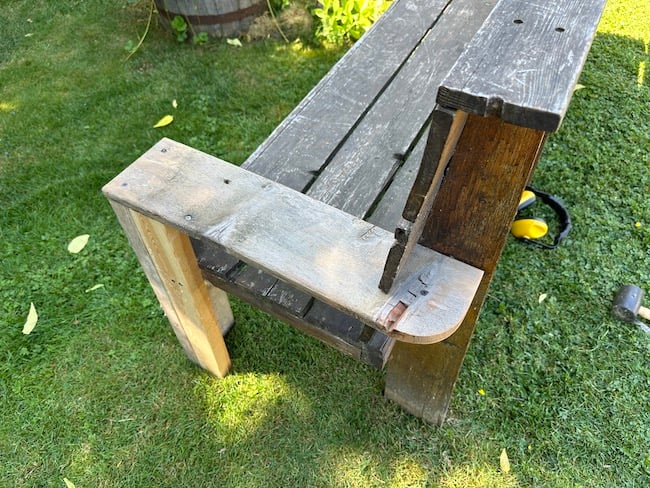
A perfect fit!
4. Strengthen any weak joints
This is also a good time to scan the entire bench for any weak areas that could use beefing up. A good wiggle can quickly show where it needs additional support in some way.
So I added a few additional screws in wobbly areas, plus an additional middle leg along the front of the bench for added sitting support, since the seat had a bit of a dip in it.
To add an additional leg:
- flip bench upside down
- measure how long to make an additional leg
- cut the new leg out of a board the same size as an existing leg, so it looks like it belongs
- brace it to a sturdy area of the bench
- test it out to ensure the bench doesn’t rock from a leg too long in the middle (I did need to reduce the length just a little)
Cleaning up the bench
5. Using a light duty pressure washer with a gentle pressure washing tip, clean the entire wood in long, even strokes so you don’t see stop and start marks. Make several passes if needed, taking care not to gouge the wood surface.
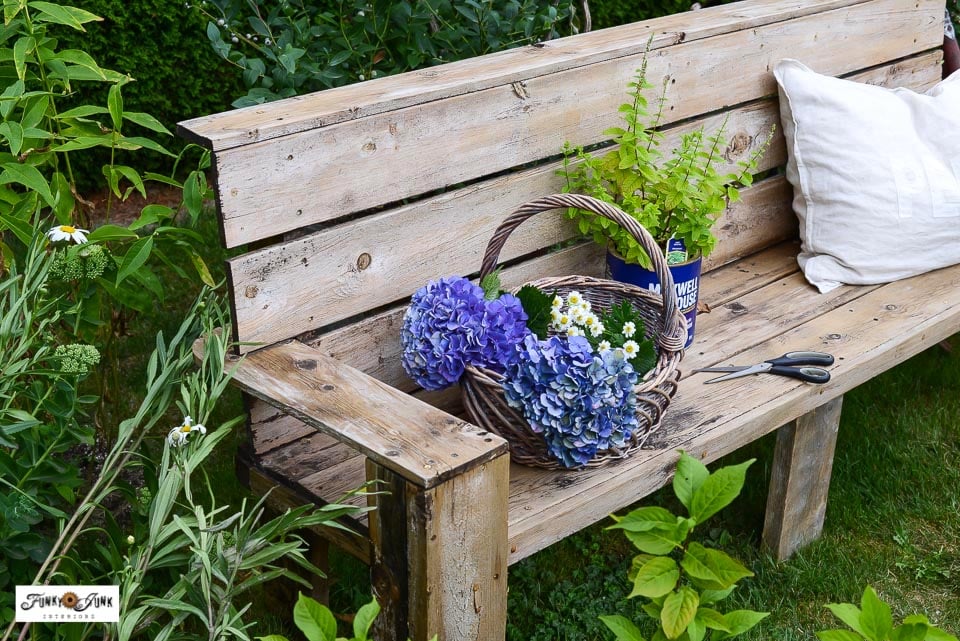
Now that the bench was sound, it was time to see what was underneath all that mould! After a gentle pressure wash using my plug in electric pressure washer, a couple of passes revealed a very pretty and much lighter toned wood than I imagined!
I thought the bench wore a dark stain, and it may have. But the pressure washing removed it all, along with the grime, leaving a wonderfully light natural finish to the entire piece!
The bench was better than I even imagined.
6. Sand and protect the wood if desired.
After a good drying, this would be a good time to sand down the bench and protect it for outdoor longevity. I’m still deciding how I want to finish it if at all, so for now, the bench is currently in its natural state.

Plant flowers around the bench
7. Position desired plants around the bench, then plant one-at-a-time, or dig a shaped large flower bed first, then plant inside.
With bench fixed and in place, my goal was to plant flowers on both sides as if the bench had been there for a long time with slightly overgrown flowers surrounding it. Full grown flowers gifted by neighbours certainly speeds up that planting process!
I ended up landing another daisy plant from the same neighbour, plus two other bushes I can’t remember the name of, so I was able to achieve a symmetrical look to this flower bed after all!
Since the weather was very hot and dry, it was too difficult to cut a flower bed first. So I just dug a hole, enhanced the soil, then planted each bush or flowers into that one spot to get the plants in the ground as quickly as possible.
Annnd then the daisies decided to end their seasonal stint before the final photos were taken.
Plus, then I ended up with a back injury, thanks to digging in these plants into rock hard soil. Next time I’ll water more first!
Video tutorial: How to edge a flower bed
.
Visit above to learn how to cut a pretty flower bed shape!
Read the full blog post tutorial at: How to edge flowerbeds like a pro HERE
So even though not all the flowers are planted that I want, and no pretty flower bed shape was yet cut, I’m going to share the bench as it is right now anyway!
There’s something to be said for Instagram perfect gardens. But if we only share the very best minus all the realistic layers of work that go into something, you miss out on how much longer the process can be on projects.
But isn’t it a wonderful start?! The area is filled with lush soft edges, blending the bench right into the landscape!
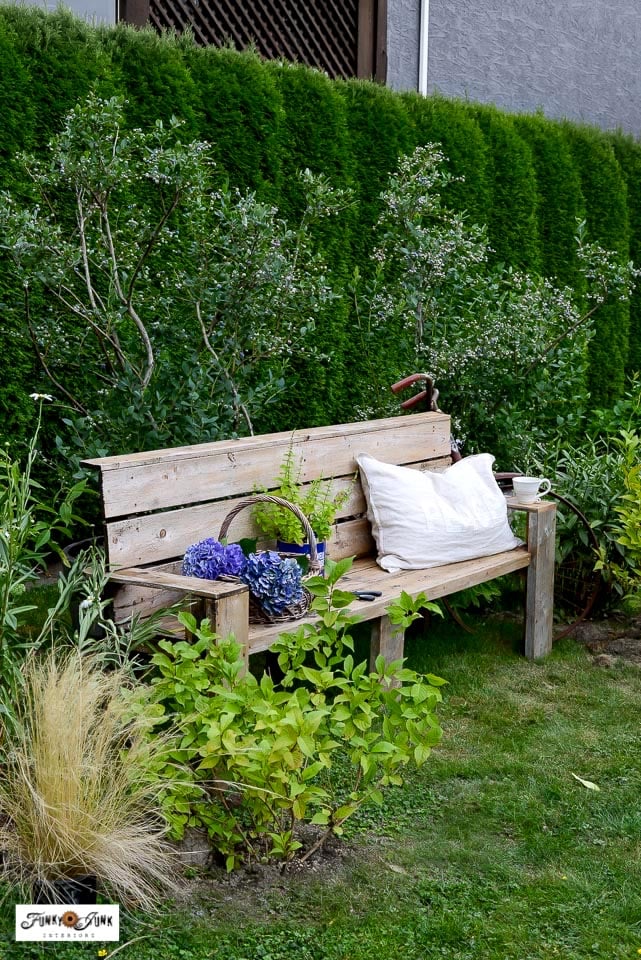
I also couldn’t resist dressing up the bench just a little, so here’s what I’m considering the main reveal for as it stands today…
Welcome to my new outdoor benches patio sitting area of sorts! A lush garden with bench, that is now a pretty focal point, as well as productive, ready to take the edge off after a long hard gardening spell.
What a difference both the space and the bench seat have transitioned into… love the added depth a few plants make!
A fresh repair job plus wash on that rickety old bench has it looking like a wonderful, well kept sturdy piece that is standing the test of time very well.

Plus the addition of the rusty junk bike makes the suggestion of a halted bike ride in order to take in beautiful surroundings of a secret garden escape.
before

after
And this enticing garden space is only going to get prettier with time!
Other garden bench ideas
More plants and maybe a vine on a trellis will be added, pretty flower bed edges will be cut, perhaps adding a few scattered DIY stepping stones like THESE, making this simple wooden bench flip into a major pretty garden feature that is also productive too! Easy dinners anyone? Maybe adding a small table… and perhaps a trickling solar water fountain… must get on that! And all right beside the entertaining bird feeder on the shed… ohhhh, I may have finally found a nice fire pit area… now I just need visitors!
All for the price of a little creativity, some luck and the energy to gitter done of course… thanks to a quick chiro visit.
Would you have taken a chance on this bench, trying to fix it too?
Other unique outdoor projects to make:
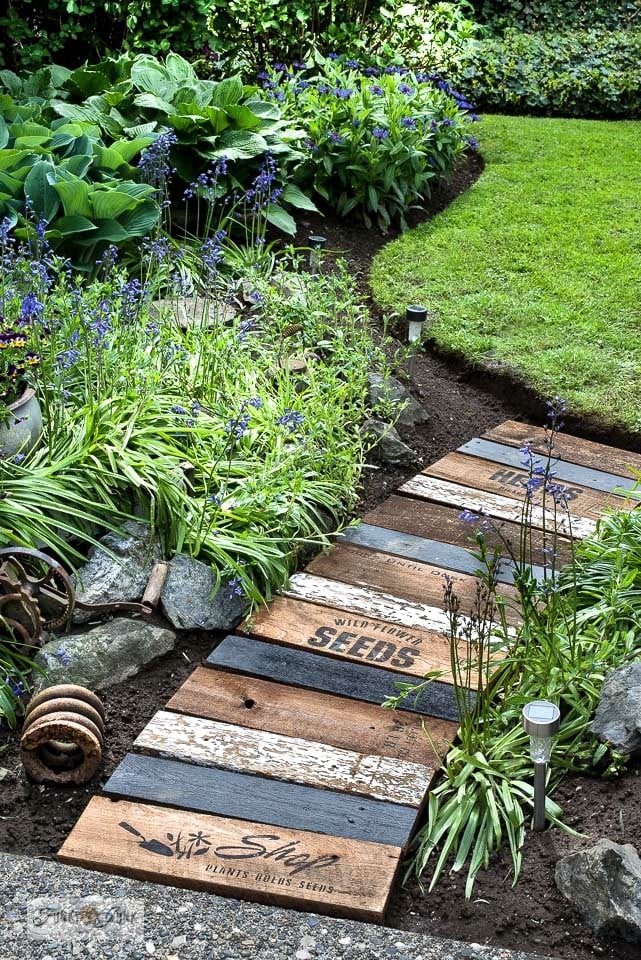
Build a garden-themed walkway with scrap wood
How to build a simple deck without cutting any wood!
Build a DIY screen door from scratch
Visit all our creative outdoor projects HERE
Create A Cost Effective Flower Garden With Bench For A Pretty Focal Point
Supplies:
- wood bench
- random lumber if repairing something
- half moon edger for flower bed cutting
- long handle spade shovel for planting
- plants and flowers
Instructions:
Bench
- Buy, build or repair an old found bench.
- Place bench feet on concrete bricks or stepping stones then level, for added longevity.
- If repairing, remove any broken pieces, then recut fresh wood to replace.
- Give the bed a good push to address other instability issues.
Flower beds
- Position the bench in a desired location in the garden.
- Choose taller plants behind the bench, and shorter along the sides. Choose varieties that bloom at different times of the year for an interesting variation.
- Arrange the plants as desired, dig holes, enhance soil, then plant each bush or flower. Leave room for expanding beds as you land more plants.
- Once all plant placements are established, use a half moon edger to cut pretty flower bed shapes around the plants leaving a nice space between plant and lawn for a clean look.
I would have saved that bench too, it’s so unique! Your garden is going to look so nice. I have an old rickety bench that I picked up at a dump once. It’s still rickety and just acts as a cool decoration in the yard!
Your garden is gorgeous… as is your entire home!!! Well done.