Add some cozy charm to your home with these easy-to-make reversible DIY buffalo check cabin decor throw pillows. Perfect for both fall and Christmas!
This tutorial teaches how to add a buffalo check pattern to any stencil design, turning into an instantly cozy look!

As a Fusion and Amazon Influencer, this post contains affiliate links in which I earn a small percentage from qualifying purchases at no extra cost to you. If you shop Fusion Mineral Paint products through this post, you will get 10% off. Thank-you for helping to support my blog!
Whether you’re decorating a cabin, lodge or your main home with rustic decor charm, imagine ALL your all season home decor items having the ability to magically morph into Christmas decor with the snap of your fingers. Without making or buying anything more.
Wouldn’t it be amazing to get rid of the big boxes of Christmas decorations we only use 1 month out of the entire year? And rather, just use things we use every day instead?
Why yes it would.
Well, it’s kinda sorda possible. You saw it here first with the interchangeable coffee / hot cocoa TV tray… oh… and also that wire hanger coat shelf…
And now with a reversible fall – Christmas pillow concept…
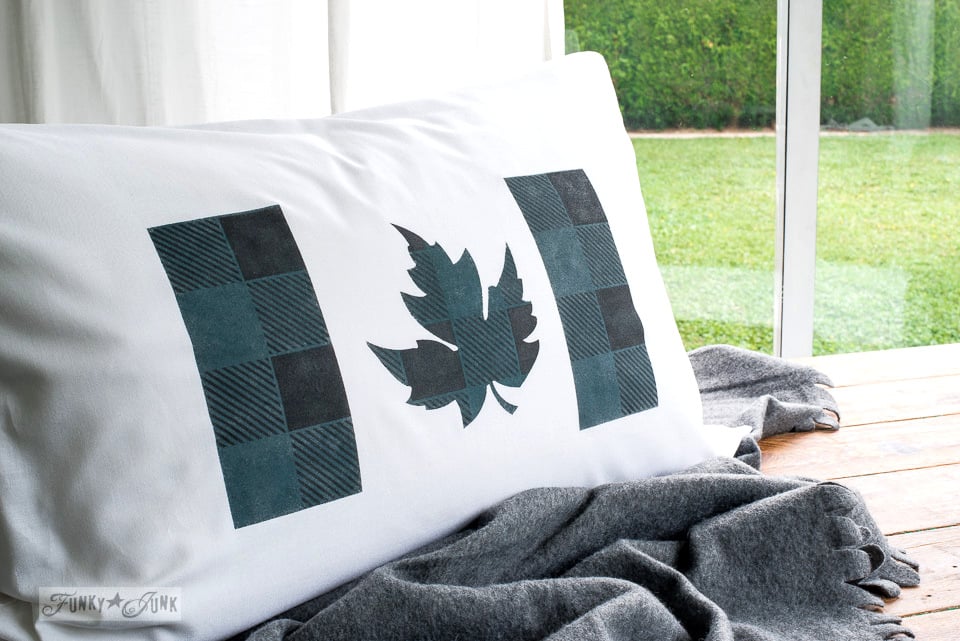
The above pillow? Happy Fall! Or everyday.

Then flip it around and it’s now a more-festive Merry Christmas!
Love the oh-so-cozy Cabin Resort look of both these pillows, along with that irresistible Buffalo Check pattern? It’s very easy to do!
But no need to worry if you don’t live in a log cabin. I don’t either. I just like to pretend I do, thanks to just the right fabrics and accessories… then relax and enjoy!
Here’s how… then welcome to a photo shoot of rustic cabin decor tour for both fall and Christmas, with other interchangeable ideas so you only need to do most of your decorating once!

Reversible Buffalo ChReversible Buffalo CheReversible Buffalo Check cabin decor pillows for fall and Christmas

Supplies I used:
.
Stencils:
- Buffalo Check – Medium stencil
- Getaway Collection – Cabin Resort
- Trees – Christmas Blend Hot Cocoa
- Welcome To My Garden – Tours Until Dusk.
Fusion Mineral Paint in: / Coal Black / Algonquin – tan / Fort York Red
White pillow covers – these are IKEA 20″ x 20″ HERE
Pillow stencil tip – create a cardboard template

Before stenciling your pillow cover, slip something inside so the paint doesn’t bleed through.
I created a cardboard template I can use over and over. Plastic wrap or a bag, tin foil or a board will also work.
How to stencil a pattern onto another stencil design
Creating a pattern inside another stencil design is very easy to do! Here’s how:
1. Stencil your main stencil design in a desired colour first.
2. Leave the stencil in place, and allow the paint to dry.
3. Position the Buffalo Check stencil over the top of the first stencil, then stencil in black.
See the full steps in pictures on this Canadian Flag pillow HERE
How to create the neutral Cabin Resort pillow

For this pillow, I used different stencils showcasing some colours patterned and some plain. It takes a little more planning, however the results are so much more custom! Just remember to tape off sections of each stencil to avoid accidentally stencilling more images than desired.
1. Stencil trees in tan first. Leave stencil in place.
2. Once dry, stencil Buffalo Check in black over top. Remove all stencils.
3. Stencil Cabin in black. Remove the stencil.

4. Stencil RESORT in Algonquin. Leave the stencil.
5. Once dry, place Buffalo Check on top of Resort, and stencil in Coal Black.

And that is how I achieved this neutral Cabin Resort pillow, with a cozy Buffalo Check pattern!
I love these neutral everyday tones that chime in well for a softer tone-on-tone vibe.
So let’s now turn this same design into one you’ll proudly display during Christmas!

How to create the Christmas Cabin Resort Pillow
Flip the pillow around, then stencil the trees and Resort in red and Cabin in black.
Lay the Buffalo Check stencil on top of the red trees and resort, then stencil in black.

And now your custom Cabin Resort throw pillow is looking super festive, perfect for the holiday season! So. Adorable.
Plus… no need to tuck this pillow design away come January! Simply spin it around and enjoy your cabin decor pillow all year around!
About the Buffalo Check stencil

Above is the stencil called Buffalo Check – Medium, along with a trim piece called Fringe, so you can add a fringe effect along the edges of the main pattern.
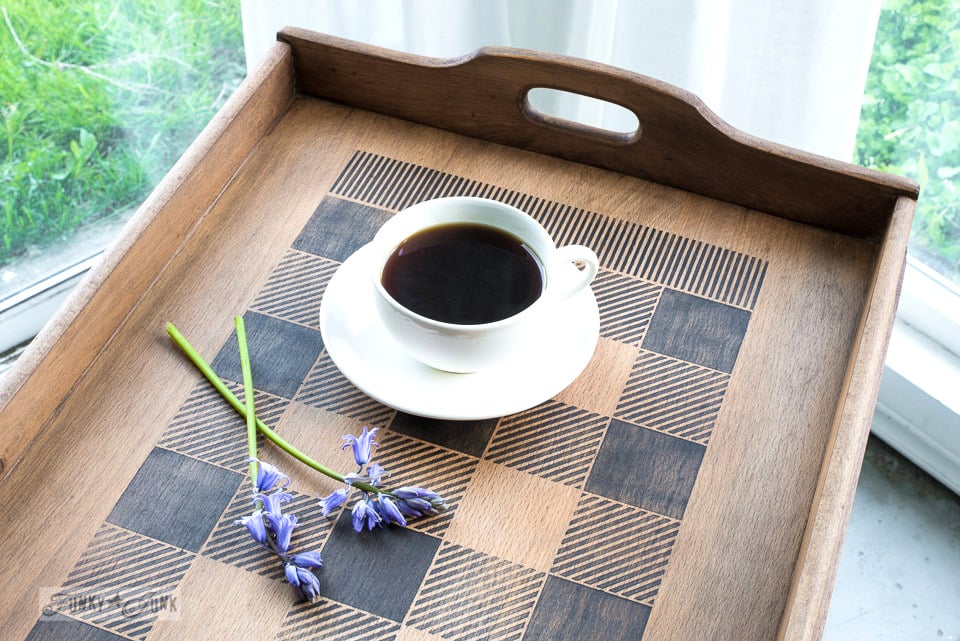
An example of Buffalo Check and Fringe together on a serving tray HERE. Isn’t it cute?!

Because the Buffalo Check stencil is so detailed, HERE is post with video to show you how to use Buffalo Check on any surface!
And now… bring on the picture firestorm!
For fall… and Christmas. Yep! Both!

Rustic fall decorating
Happy Fall!
Fall to me is about the warmth of cozy wood accessories, a roaring hot fire, along with a cup of fresh hot coffee.
The white, wood, metals and black really let the natural branches on the fireplace mantel stand out.

The tone Algonquin is so neutral, while adding a special warmth! It sort of has a canvas appeal to it when used this way.

And this little corner is all ready for fall.
A few tutorials you may remember:
Pottery Barn inspired rusty junk lamp
Wooden old gate window screens
Walls – are white-white right outta the can. Really.

Fall mantel decor with Mountain Ash branches in white pitchers
The mantel didn’t change much from last Christmas!
The soil sifters are still in place, with one simple twiggy wreath.
You’d think for a decorator type I’d go a little more whole hog… but, nope. Not if I don’t have to.

Because I didn’t have a pumpkin in sight at the time, I raided the Mountain Ash tree out front.
Their colourful orange berry explosion provided the perfect pumpkin splash! Without spending a dime.
The white pitchers bring out the whites in the rest of the room, and add a sense of a collected theme.

Rustic Christmas decorating ideas
Ready for Christmas? I sure am! Note how little I actually changed…
With the flick of the wrist, the pillow was turned around, a buffalo checked crate brought in, and the tree branches changed out to evergreen branches.
Guess it’s time to wrap presents… (riiiight…)

Love your Christmas outfit, pillow… wish I had mine! The irresistible Fort York Red is the perfect Christmas tone! And also makes an outstanding traditional Buffalo Check pattern when teamed up with Coal Black I might add!
The Tours Until Dusk was added to this side for a touch of sign whimsy.
The pillow covers and inserts were both originally from Ikea.

Does this little buffalo checked toolbox look familiar? It’s the first thing I tried the Buffalo Check stencil on! And later turned it into a warming Hummingbird feeding station for winter.

The grouping of pitchers makes such a versatile statement! They can be filled with anything you wish! I like to use real evergreen branches during Christmas if possible since they make the house smell like you’re walking through a tree farm!
Then a couple of books brought a little more colour and height to the arrangement so all the jugs staggered a bit.

And that’s a fall, Christmas AND all-season cabin decor wrap! All that’s missing is some extra cozy comforters and an antler or 3.

And here’s the post about the interchangeable all season – Christmas TV trays.
Ho ho ho… Stick around here long enough and I’ll have you cheating with everything you make…
What do you think of the reversible 2-season cabin decor pillow idea? Think you’ll try it?

Visit many other unique Christmas pillows you can make HERE
See all my pillow designs to make HERE
hey girl
love the pillow! and the big buffalo check!
but my FAVE part in this post is that lamp!!
OH my word. I am drooling all over my keyboard!
be blessed
Barb
Haha… the lamp gets a wee bit of attention when someone comes into the house. As in, I get completely ignored! Hrumph… ; )
That is soooo cute! And what a clever idea!
I love how you decorate with what you have instead of spending loads of money on what’s in the stores. It’s what most of us do. And I love, love that Canadian flag…be still my homesick heart!
The pillow is beautiful, Donna! Both sides! Happy Fall to you!
I love this great job keep it up
Great idea! I’m all about “less is more”. I find as you get older, you really do want to simplify!
????
Wow, Amazing ideas. You are one clever gal. I love the simplicity of your decor. The orange berries are a great touch, really, no pumpkin needed.
Thanks for your creative sharing.
How do you keep stenciling paint from bleeding around the dteailed edges of the stencil? I have been cautious to try stenciling as I feel I would muck it up with bleeds.
Any advice welcome!
Maureen
Hi Maureen! Thank-you for the kind words!
The secret to a non bleeding stencil period is to keep the tip of the paint loaded brush dry to the touch. It takes a little practice, however once you get it, you’ve got it for good! This especially applies to Buffalo Check because of the high level of detail in the stencil. I suggest get a BIG stencil brush so there’s more paint surface, which also greatly helps.
Fabulous, I love it all. Wow!