Need a little extra storage space? This wooden wall shelf is easy to customize, and can double your storage in the tightest spaces! This one’s styled as a compact coffee station with hooks to hang your mugs.
This post contains some Amazon affiliate links in which I earn a small percentage from qualifying purchases through these links, at no extra cost to you. Thank-you for helping to support my blog!
I’m not sure which I love more… making rustic reclaimed wooden shelves or coffee. So whenever I have an opportunity to mix both, I’m all over it!
I’ll make a wood shelf any chance I get. In fact, HERE is a post with 34+ of my favorites wooden shelves!
As for coffee projects, I have a few of those too. Here’s a couple of my favs:
Simple Organic coffee sign with mug hooks
But since a new stencil was designed to be more compact than its original, I decided to create the perfect little wooden wall shelf coffee station using it!


View National Brewers Coffee stencils HERE
About the coffee stencil
.
National Brewers Coffee is a crate-styled coffee stencil that comes in 2 sizes.
The smaller size is being showcased today, which is perfect for smaller projects.
And I couldn’t wait to put it to work!
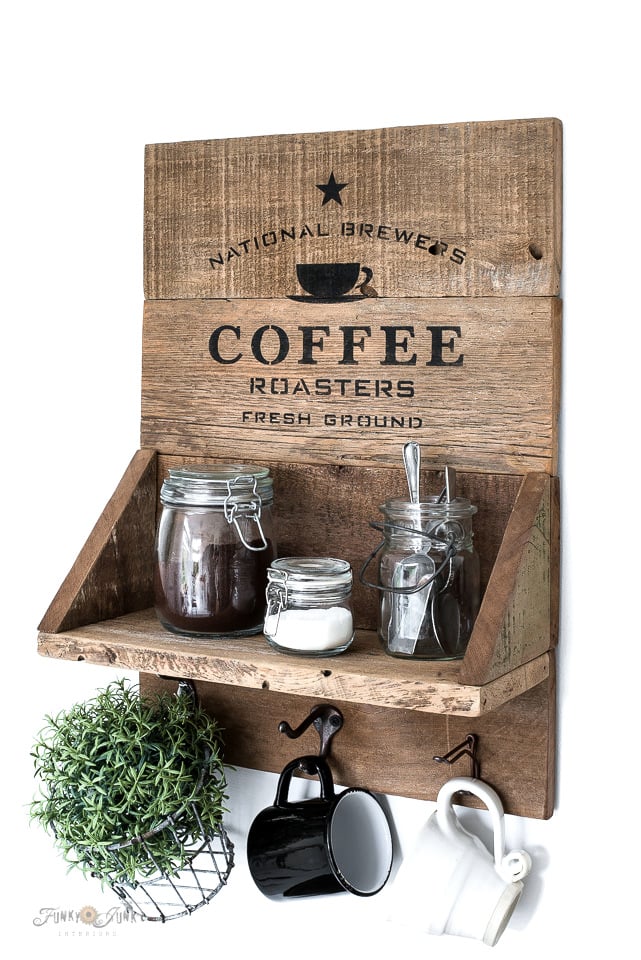
So here’s the wood coffee station sign shelf I ended up making with it! Which turned out the cutest!
Wooden wall shelf coffee station
Supplies I used:
.
National Brewers Coffee-small stencil
Fusion Mineral Paint in Coal Black
dome-tipped stencil brush (my fav kind!)
reclaimed cedar wood planks (mine measures 5.75″ wide)
Cordless drill and drywall screws

Cutting the wood planks
.
1. Cut 5 cedar planks to the desired length, with 2 triangles for shelf supports.
My planks measure: 5.75″ wide x 16″ long
The overall sign shelf measures: 16″ wide x 22.75″ long.
However your planks can be any size desired, depending how large you wish to make your sign shelf!
I love using reclaimed wood for this project. The knots give it character, and the natural materials feel weathered with natural imperfections, making the wooden shelves feel like it’s been around for a very long time. Love that vibe!
How to cut shelf supports
No need for any metal brackets this round! This little shelving unit is all made with just wood.
- Place the same sized plank in your miter saw, and set the angle to 45 degrees.
- Cut straight down to start.
- Make your 2nd cut by setting the saw to 45 degrees, then slide the plank until the cut will ultimately become the perfect triangle.
- Reposition the board so a straight down cut will result in another triangle.
- Repeat for another support.
It works great, and is a very price efficient way to create shelf supports!
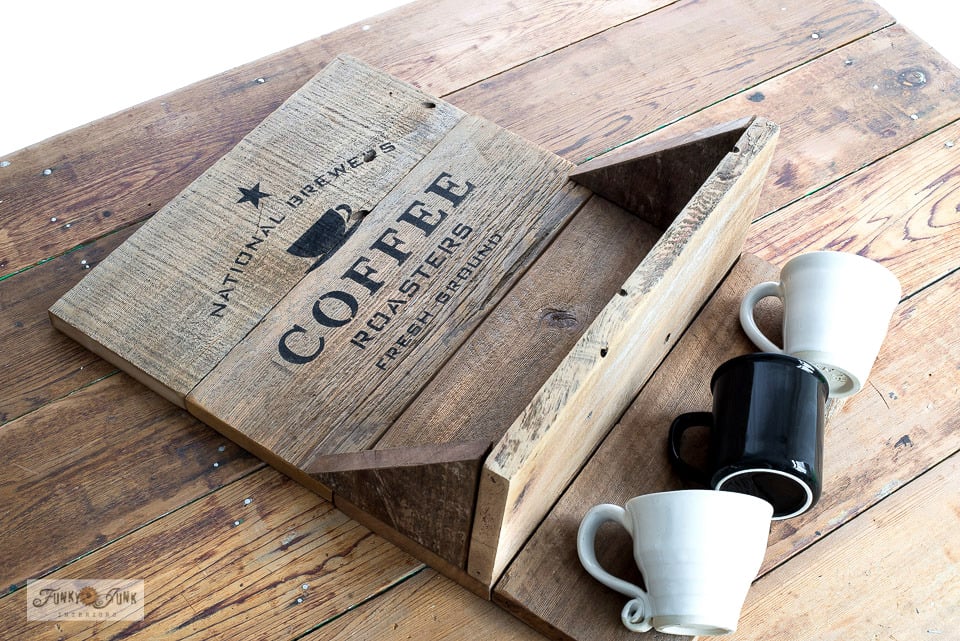
Dry-fitting the shelf
2. Dry-fit all the planks to ensure everything fits.
- Align the 4 main planks.
- Position one plank standing up on its edge on top of the 3rd plank down to create the large shelf.
- Slip the triangle supports above the shelf plank. (as shown above)
Also ensure your desired mugs fit by placing them on the bottom plank.
Stenciling the coffee sign
.
3. Stencil your image.
- Position stencil into place on the first two planks.
- Load stencil brush with Fusion’s Coal Black.
- Off-load most paint onto a rag to create a dry brush feel.
- Tap or swirl paint through the stencil to create the effect desired.
I like to swirl using a dome-tipped stencil brush myself. It allows you to ‘swirl’ on the paint easier.
Learn more about how to stencil from THIS POST or visit how-to stencil videos HERE

Assemble the wooden wall shelf
.
4. Join all 4 wood planks.
I used a Kreg Jig to join mine which tooks minutes!
- Place a plank horizontally into the jig.
- Drill 3 separate pocket holes into 3 of the boards. 1 hole near each edge, and 1 in the middle.
- Attach all the boards with screws through the pocket holes.
Video – how to use a Kreg Jig
.
Click short video above to learn how to use a Kreg Jig! It’s very easy.
I have the Kreg Jig K4 model HERE. I like how it clamps the wood in place.
Read How to use a Pocket Hole Jig in THIS POST.
Visit other projects I’ve made with a Kreg Jig HERE

How to attach wooden wall shelf boards with no jig
.
If you don’t use a jig, you can create 2 cedar strip supports to attach to the back of the planks to hold them together like the above pictures shares on this Christmas NOEL sign.
But I do recommend to get a jig! You’ll likely find you use it constantly!

Attaching the shelf
.
6. Attach the shelf board to the sign board with screws from the back of the sign.
Pre-drilling holes is a good idea so the wood doesn’t split.
Get a tool bit kit like THIS one and you’ll have everything you need!
7. Attach the two triangle shelf supports:
- position the 2 triangles on each top edge of the shelf board
- attaching them with screws underneath the shelf and behind the sign

The finished wooden wall shelf coffee station!
.
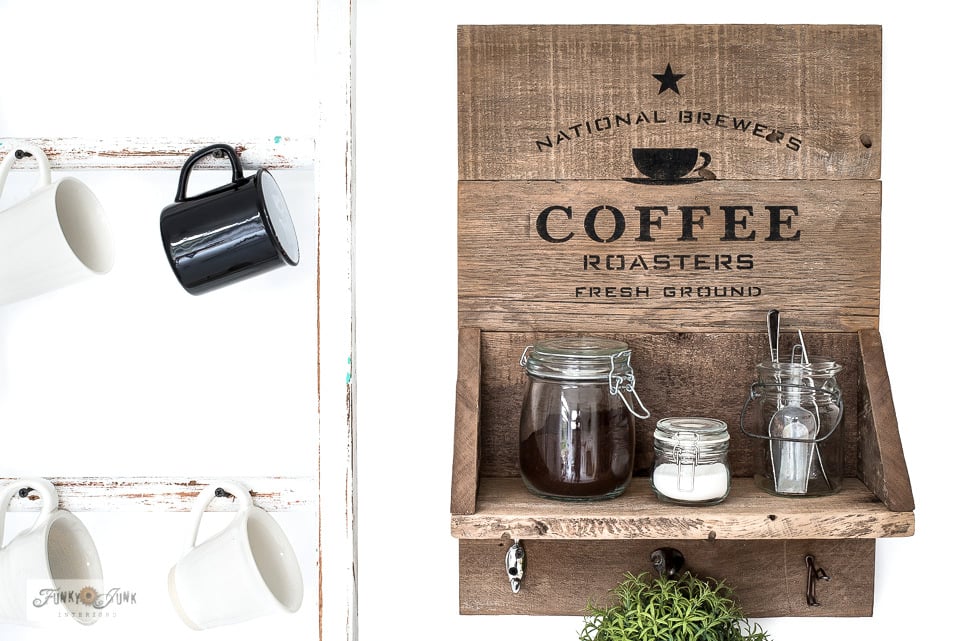
Then add some rustic hooks like THESE along the bottom plank to hang your black and white coffee mugs, and your adorable coffee station sign shelf is complete!
I attached the shelf to the wall using screws from the front of the sign.
Get some coffee making essentials:
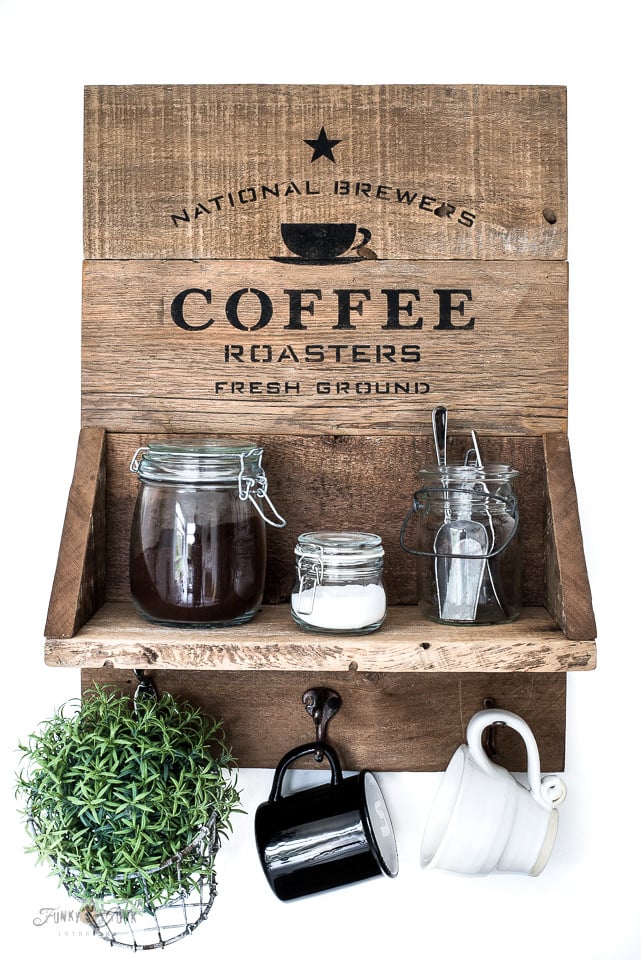
Isn’t the wooden wall shelf adorable? If you too have a kitchen on the smaller side, this shelf size is perfection for compact spaces!
I also love how the shelf contents don’t block the coffee sign graphics! That extra plank made all the difference! I just LOVE this shelf design!
Colour options:
.
You could also paint the plank behind the coffee contents black. Or just the shelf! So many options.
Don’t need a wood coffee station sign shelf?
How about teaming up another 10″ x 10″ stencil design from HERE and you can theme it any way you wish for something else?
Other ways to use this wooden wall shelf:
.
- Paint shelf – hang brushes or rags
- Mini tool shelf for a drill and jar of screws
- Bathroom toilet paper shelf (without the hooks)
- Towel hooks
- Hang kitchen pots and pans or tea towels
- Coats
- Clothing in a bedroom
- Helpful in an RV trailer
- Potting shed / garden supplies
- Living room accent shelf
- Hallway to hang coats or keys
… and so much more!
HERE is another small reclaimed wood shelf with a branch that was styled 3 ways!
However for me, coffee won this round. But then again, it always does…
Cute, huh? How would you use this little wooden wall shelf?
Visit many other unique coffee-themed projects HERE
View all coffee stencils HERE
Other wood shelf projects to make:

Make this reclaimed wood with branch shelf

Make this pallet styled workshelf

Give this easy block shelving unit a whirl!
View many other unique shelving ideas HERE
I LOVE this shelf!
One can’t go wrong with rustic wood building and coffee. Love it Donna!
Such a cute project and so well designed! Love it!
I love this! Pinned.